QRCode - 二维码识别与生成
Posted 小敏的博客
tags:
篇首语:本文由小常识网(cha138.com)小编为大家整理,主要介绍了QRCode - 二维码识别与生成相关的知识,希望对你有一定的参考价值。
来源:Yi\'mouleng(@丶伊眸冷)
链接:http://t.cn/R40WxcM
前言
有关二维码的介绍,我这里不做过多说明, 可以直接去基维百科查看,附上链接QR code(https://en.wikipedia.org/wiki/QR_code).
ios7之前,开发者进行扫码编程时,一般会借助第三方库。常用的是ZBarSDKa和ZXingObjC,IOS7之后,系统的AVMetadataObject类中,为我们提供了解析二维码的接口。经过测试,使用原生API扫描和处理的效率非常高,远远高于第三方库。
扫描
官方提供的接口非常简单,直接看代码,主要使用的是AVFoundation。
@interface ViewController ()AVCaptureMetadataOutputObjectsDelegate>//用于处理采集信息的代理
{
AVCaptureSession * session;//输入输出的中间桥梁
}
@end
@implementation ViewController
- (void)viewDidLoad {
[super viewDidLoad];
// Do any additional setup after loading the view, typically from a nib.
//获取摄像设备
AVCaptureDevice * device = [AVCaptureDevice defaultDeviceWithMediaType:AVMediaTypeVideo];
//创建输入流
AVCaptureDeviceInput * input = [AVCaptureDeviceInput deviceInputWithDevice:device error:nil];
if (!input) return;
//创建输出流
AVCaptureMetadataOutput * output = [[AVCaptureMetadataOutput alloc]init];
//设置代理 在主线程里刷新
[output setMetadataObjectsDelegate:self queue:dispatch_get_main_queue()];
//设置有效扫描区域
CGRect scanCrop=[self getScanCrop:_scanWindow.bounds readerViewBounds:self.view.frame];
output.rectOfInterest = scanCrop;
//初始化链接对象
_session = [[AVCaptureSession alloc]init];
//高质量采集率
[_session setSessionPreset:AVCaptureSessionPresetHigh];
[_session addInput:input];
[_session addOutput:output];
//设置扫码支持的编码格式(如下设置条形码和二维码兼容)
output.metadataObjectTypes=@[AVMetadataObjectTypeQRCode,AVMetadataObjectTypeEAN13Code, AVMetadataObjectTypeEAN8Code, AVMetadataObjectTypeCode128Code];
AVCaptureVideoPreviewLayer * layer = [AVCaptureVideoPreviewLayer layerWithSession:_session];
layer.videoGravity=AVLayerVideoGravityResizeAspectFill;
layer.frame=self.view.layer.bounds;
[self.view.layer insertSublayer:layer atIndex:0];
//开始捕获
[_session startRunning];
}
-(void)captureOutput:(AVCaptureOutput *)captureOutput didOutputMetadataObjects:(NSArray *)metadataObjects fromConnection:(AVCaptureConnection *)connection{
if (metadataObjects.count>0) {
//[session stopRunning];
AVMetadataMachineReadableCodeObject * metadataObject = [metadataObjects objectAtIndex : 0 ];
//输出扫描字符串
NSLog(@"%@",metadataObject.stringValue);
}
}
一些初始化的代码加上实现代理方法便完成了二维码扫描的工作,这里我们需要注意的是, 在二维码扫描的时候, 我们一般都会在屏幕中间放一个方框,用来显示二维码扫描的大小区间,这里我们在个AVCaptureMetadataOutput类中有一个rectOfInterest属性,它的作用就是设置扫描范围。
这个CGRect参数和普通的Rect范围不太一样,它的四个值的范围都是0-1,表示比例。
rectOfInterest都是按照横屏来计算的 所以当竖屏的情况下 x轴和y轴要交换一下。
宽度和高度设置的情况也是类似。
我们在上面设置有效扫描区域的方法如下
#pragma mark-> 获取扫描区域的比例关系
-(CGRect)getScanCrop:(CGRect)rect readerViewBounds:(CGRect)readerViewBounds
{
CGFloat x,y,width,height;
x = (CGRectGetHeight(readerViewBounds)-CGRectGetHeight(rect))/2/CGRectGetHeight(readerViewBounds);
y = (CGRectGetWidth(readerViewBounds)-CGRectGetWidth(rect))/2/CGRectGetWidth(readerViewBounds);
width = CGRectGetHeight(rect)/CGRectGetHeight(readerViewBounds);
height = CGRectGetWidth(rect)/CGRectGetWidth(readerViewBounds);
return CGRectMake(x, y, width, height);
}
读取
读取主要用到CoreImage 不过要强调的是读取二维码的功能只有在iOS8之后才支持,我们需要在相册中调用一个二维码,将其读取,代码如下
#pragma mark-> 我的相册
-(void)myAlbum{
NSLog(@"我的相册");
if([UIImagePickerController isSourceTypeAvailable:UIImagePickerControllerSourceTypePhotoLibrary]){
//1.初始化相册拾取器
UIImagePickerController *controller = [[UIImagePickerController alloc] init];
//2.设置代理
controller.delegate = self;
//3.设置资源:
/**
UIImagePickerControllerSourceTypePhotoLibrary,相册
UIImagePickerControllerSourceTypeCamera,相机
UIImagePickerControllerSourceTypeSavedPhotosAlbum,照片库
*/
controller.sourceType = UIImagePickerControllerSourceTypeSavedPhotosAlbum;
//4.随便给他一个转场动画
controller.modalTransitionStyle=UIModalTransitionStyleFlipHorizontal;
[self presentViewController:controller animated:YES completion:NULL];
}else{
UIAlertView * alert = [[UIAlertView alloc]initWithTitle:@"提示" message:@"设备不支持访问相册,请在设置->隐私->照片中进行设置!" delegate:nil cancelButtonTitle:@"确定" otherButtonTitles:nil, nil];
[alert show];
}
}
完成相册代理, 我们在代理中添加读取二维码方法
#pragma mark-> imagePickerController delegate
- (void)imagePickerController:(UIImagePickerController *)picker didFinishPickingMediaWithInfo:(NSDictionary *)info
{
//1.获取选择的图片
UIImage *image = info[UIImagePickerControllerOriginalImage];
//2.初始化一个监测器
CIDetector*detector = [CIDetector detectorOfType:CIDetectorTypeQRCode context:nil options:@{ CIDetectorAccuracy : CIDetectorAccuracyHigh }];
[picker dismissViewControllerAnimated:YES completion:^{
//监测到的结果数组
NSArray *features = [detector featuresInImage:[CIImage imageWithCGImage:image.CGImage]];
if (features.count >=1) {
/**结果对象 */
CIQRCodeFeature *feature = [features objectAtIndex:0];
NSString *scannedResult = feature.messageString;
UIAlertView * alertView = [[UIAlertView alloc]initWithTitle:@"扫描结果" message:scannedResult delegate:nil cancelButtonTitle:@"确定" otherButtonTitles:nil, nil];
[alertView show];
}
else{
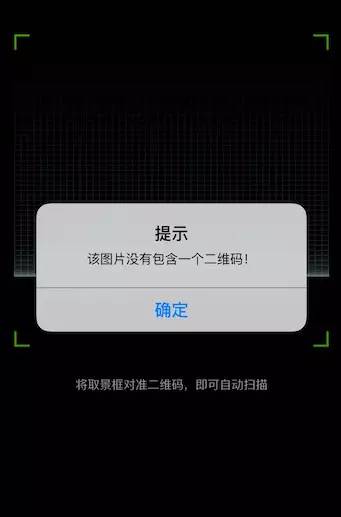
UIAlertView * alertView = [[UIAlertView alloc]initWithTitle:@"提示" message:@"该图片没有包含一个二维码!" delegate:nil cancelButtonTitle:@"确定" otherButtonTitles:nil, nil];
[alertView show];
}
}];
}
因为没用真机,所以这里没有给出太多的截图, 用模拟器读取自带图片,结果如下

生成
生成二维码,其实也是用到CoreImage,但是步骤繁琐一些,代码如下
#pragma mark-> 二维码生成
-(void)create{
UIImage *image=[UIImage imageNamed:@"6824500_006_thumb.jpg"];
NSString*tempStr;
if(self.textField.text.length==0){
tempStr=@"ddddddddd";
}else{
tempStr=self.textField.text;
}
UIImage*tempImage=[QRCodeGenerator qrImageForString:tempStr imageSize:360 Topimg:image withColor:RandomColor];
_outImageView.image=tempImage;
}
+(UIImage*)qrImageForString:(NSString *)string imageSize:(CGFloat)size Topimg:(UIImage *)topimg withColor:(UIColor*)color{
if (![string length]) {
return nil;
}
QRcode *code = QRcode_encodeString([string UTF8String], 0, QR_ECLEVEL_L, QR_MODE_8, 1);
if (!code) {
return nil;
}
// create context
CGColorSpaceRef colorSpace = CGColorSpaceCreateDeviceRGB();
CGContextRef ctx = CGBitmapContextCreate(0, size, size, 8, size * 4, colorSpace, kCGImageAlphaPremultipliedLast);
CGAffineTransform translateTransform = CGAffineTransformMakeTranslation(0, -size);
CGAffineTransform scaleTransform = CGAffineTransformMakeScale(1, -1);
CGContextConcatCTM(ctx, CGAffineTransformConcat(translateTransform, scaleTransform));
// draw QR on this context
[QRCodeGenerator drawQRCode:code context:ctx size:size withPointType:0 withPositionType:0 withColor:color];
// get image
CGImageRef qrCGImage = CGBitmapContextCreateImage(ctx);
UIImage * qrImage = [UIImage imageWithCGImage:qrCGImage];
if(topimg)
{
UIGraphicsBeginImageContext(qrImage.size);
//Draw image2
[qrImage drawInRect:CGRectMake(0, 0, qrImage.size.width, qrImage.size.height)];
//Draw image1
float r=qrImage.size.width*35/240;
[topimg drawInRect:CGRectMake((qrImage.size.width-r)/2, (qrImage.size.height-r)/2 ,r, r)];
qrImage=UIGraphicsGetImageFromCurrentImageContext();
UIGraphicsEndImageContext();
}
// some releases
CGContextRelease(ctx);
CGImageRelease(qrCGImage);
CGColorSpaceRelease(colorSpace);
QRcode_free(code);
return qrImage;
}
+ (void)drawQRCode:(QRcode *)code context:(CGContextRef)ctx size:(CGFloat)size withPointType:(QRPointType)pointType withPositionType:(QRPositionType)positionType withColor:(UIColor *)color {
unsigned char *data = 0;
int width;
data = code->data;
width = code->width;
float zoom = (double)size / (code->width + 2.0 * qr_margin);
CGRect rectDraw = CGRectMake(0, 0, zoom, zoom);
// draw
const CGFloat *components;
if (color) {
components = CGColorGetComponents(color.CGColor);
}else {
components = CGColorGetComponents([UIColor blackColor].CGColor);
}
CGContextSetRGBFillColor(ctx, components[0], components[1], components[2], 1.0);
NSLog(@"aad :%f bbd :%f ccd:%f",components[0],components[1],components[2]);
for(int i = 0; i
for(int j = 0; j
if(*data & 1) {
rectDraw.origin = CGPointMake((j + qr_margin) * zoom,(i + qr_margin) * zoom);
if (positionType == QRPositionNormal) {
switch (pointType) {
case QRPointRect:
CGContextAddRect(ctx, rectDraw);
break;
case QRPointRound:
CGContextAddEllipseInRect(ctx, rectDraw);
break;
default:
break;
}
}else if(positionType == QRPositionRound) {
switch (pointType) {
case QRPointRect:
CGContextAddRect(ctx, rectDraw);
break;
case QRPointRound:
if ((i>=0 && i6 && j>=0 && j6) || (i>=0 && i6 && j>=width-7-1 && j-1) || (i>=width-7-1 && i-1 && j>=0 && j6)) {
CGContextAddRect(ctx, rectDraw);
}else {
CGContextAddEllipseInRect(ctx, rectDraw);
}
break;
default:
break;
}
}
}
++data;
}
}
CGContextFillPath(ctx);
}
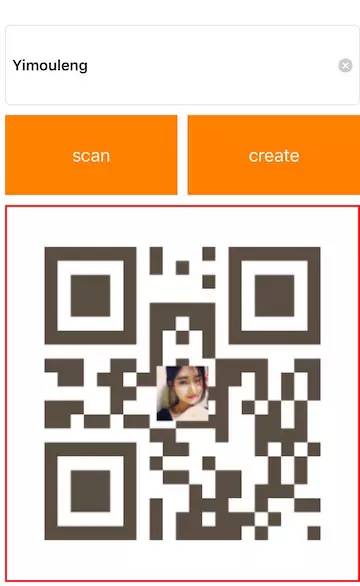
在textField输入,生成下图

长按二维码识别
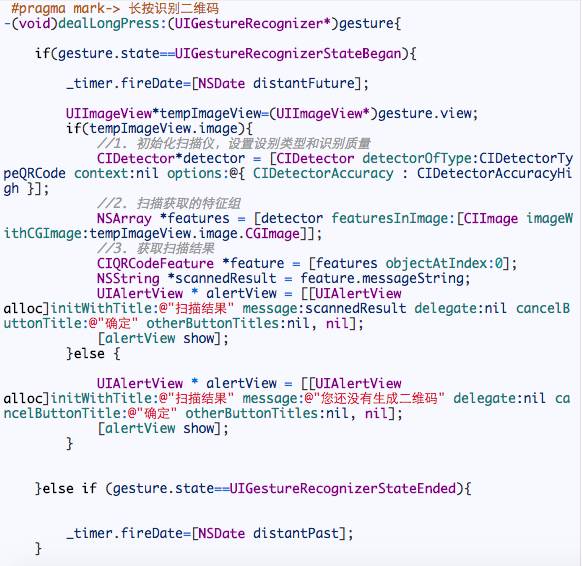
这个功能有很多的地方在用, 最让人熟知的我想便是微信了,其实实现方法还是很简单的。

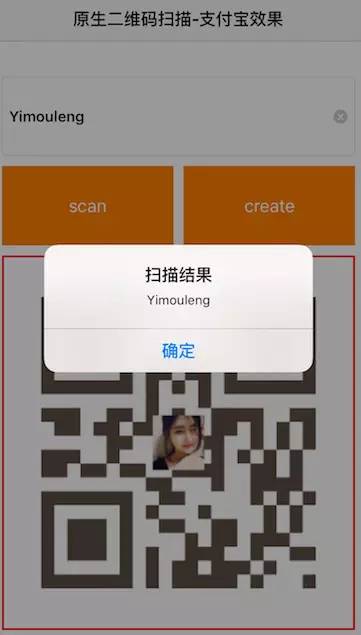
我们用刚才生成的二维码进行长按识别,效果如下

结语
本文demo:https://github.com/yimouleng/GBAliScan
转自mokey1422所写的仿支付宝二维码。
系统原生的二维码扫描扫描识别速度,要比第三方好用得多,在没有特殊原因的情况下,比如7.0系统以下,我希望大家都能用系统原生的方法。
iOS-原生二维码
http://www.jianshu.com/p/e15ca2799796
以上是关于QRCode - 二维码识别与生成的主要内容,如果未能解决你的问题,请参考以下文章
二维码识别基于matlab GUI 灰度+二值化+校正二维码生成与识别含Matlab源码 635期