Gazebo機器人仿真學習探索筆記機器人模型
Posted zhangrelay
tags:
篇首语:本文由小常识网(cha138.com)小编为大家整理,主要介绍了Gazebo機器人仿真學習探索筆記機器人模型相关的知识,希望对你有一定的参考价值。
gazebo_models:https://bitbucket.org/osrf/gazebo_models

模型庫下載,可以參考如下命令:
~/Rob_Soft/Gazebo7$ hg clone https://bitbucket.org/osrf/gazebo_models

模型庫的結構 目錄 配置等可以參考官方文檔,注意model.sdf。
當然也可以將自己制作的模型上傳到庫中,文檔中也有具體說明。
code$ hg clone https://yourname@bitbucket.org/yourname/gazebo_models
gazebo_models$ hg add mymodel
gazebo_models$ hg add mymodel/model.config
gazebo_models$ hg add mymodel/model.sdf
gazebo_models$ hg commit
gazebo_models$ hg push
~/Rob_Soft/Gazebo7$ gedit box.sdf
<?xml version='1.0'?>
<sdf version="1.4">
<model name="my_model">
  <pose>0 0 0.5 0 0 0</pose>
  <static>true</static>
    <link name="link">
      <inertial>
        <mass>1.0</mass>
        <inertia> <!-- interias are tricky to compute -->
          <!-- http://answers.gazebosim.org/question/4372/the-inertia-matrix-explained/ -->
          <ixx>0.083</ixx>       <!-- for a box: ixx = 0.083 * mass * (y*y + z*z) -->
          <ixy>0.0</ixy>         <!-- for a box: ixy = 0 -->
          <ixz>0.0</ixz>         <!-- for a box: ixz = 0 -->
          <iyy>0.083</iyy>       <!-- for a box: iyy = 0.083 * mass * (x*x + z*z) -->
          <iyz>0.0</iyz>         <!-- for a box: iyz = 0 -->
          <izz>0.083</izz>       <!-- for a box: izz = 0.083 * mass * (x*x + y*y) -->
        </inertia>
      </inertial>
      <collision name="collision">
        <geometry>
          <box>
            <size>1 1 1</size>
          </box>
        </geometry>
      </collision>
      <visual name="visual">
        <geometry>
          <box>
            <size>1 1 1</size>
          </box>
        </geometry>
      </visual>
    </link>
  </model>
</sdf>
機器人模型
1 設置模型目錄
~/.gazebo/models$ mkdir -p ~/.gazebo/models/my_robot
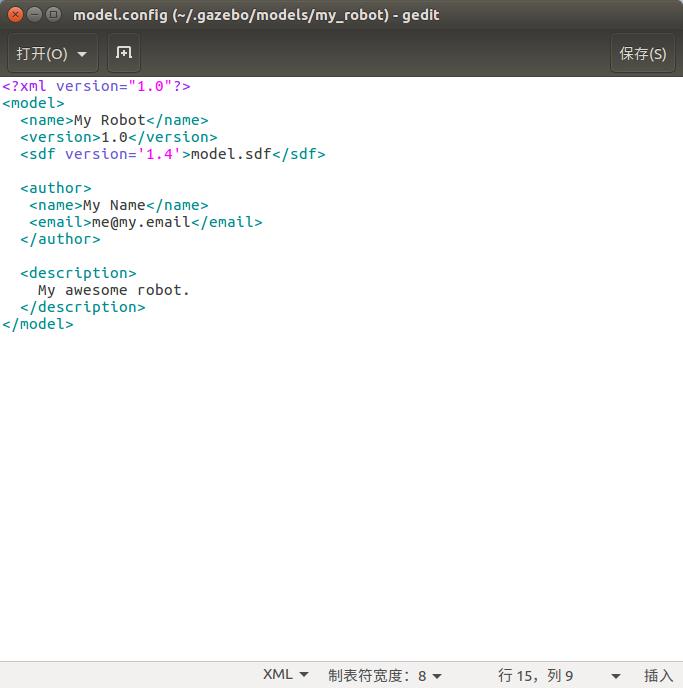
~/.gazebo/models$ gedit ~/.gazebo/models/my_robot/model.config
<?xml version="1.0"?>
<model>
<name>My Robot</name>
<version>1.0</version>
<sdf version='1.4'>model.sdf</sdf>
<author>
<name>My Name</name>
<email>me@my.email</email>
</author>
<description>
My awesome robot.
</description>
</model>
機器人模型sdf:
~/.gazebo/models$ gedit ~/.gazebo/models/my_robot/model.sdf
<?xml version='1.0'?>
<sdf version='1.4'>
  <model name="my_robot">
  <static>false</static>
          <link name='chassis'>
            <pose>0 0 .1 0 0 0</pose>
            <collision name='collision'>
              <geometry>
                <box>
                  <size>.4 .2 .1</size>
                </box>
              </geometry>
            </collision>

            <visual name='visual'>
              <geometry>
                <box>
                  <size>.4 .2 .1</size>
                </box>
              </geometry>
            </visual>

          <collision name='caster_collision'>
            <pose>-0.15 0 -0.05 0 0 0</pose>
            <geometry>
                <sphere>
                <radius>.05</radius>
              </sphere>
            </geometry>

            <surface>
              <friction>
                <ode>
                  <mu>0</mu>
                  <mu2>0</mu2>
                  <slip1>1.0</slip1>
                  <slip2>1.0</slip2>
                </ode>
              </friction>
            </surface>
          </collision>

          <visual name='caster_visual'>
            <pose>-0.15 0 -0.05 0 0 0</pose>
            <geometry>
              <sphere>
                <radius>.05</radius>
              </sphere>
            </geometry>
          </visual>
          </link>

      <link name="left_wheel">
        <pose>0.1 0.13 0.1 0 1.5707 1.5707</pose>
        <collision name="collision">
          <geometry>
            <cylinder>
              <radius>.1</radius>
              <length>.05</length>
            </cylinder>
          </geometry>
        </collision>
        <visual name="visual">
          <geometry>
            <cylinder>
              <radius>.1</radius>
              <length>.05</length>
            </cylinder>
          </geometry>
        </visual>
      </link>

      <link name="right_wheel">
        <pose>0.1 -0.13 0.1 0 1.5707 1.5707</pose>
        <collision name="collision">
          <geometry>
            <cylinder>
              <radius>.1</radius>
              <length>.05</length>
            </cylinder>
          </geometry>
        </collision>
        <visual name="visual">
          <geometry>
            <cylinder>
              <radius>.1</radius>
              <length>.05</length>
            </cylinder>
          </geometry>
        </visual>
      </link>

      <joint type="revolute" name="left_wheel_hinge">
        <pose>0 0 -0.03 0 0 0</pose>
        <child>left_wheel</child>
        <parent>chassis</parent>
        <axis>
          <xyz>0 1 0</xyz>
        </axis>
      </joint>

      <joint type="revolute" name="right_wheel_hinge">
        <pose>0 0 0.03 0 0 0</pose>
        <child>right_wheel</child>
        <parent>chassis</parent>
        <axis>
          <xyz>0 1 0</xyz>
        </axis>
      </joint>

  </model>
</sdf>
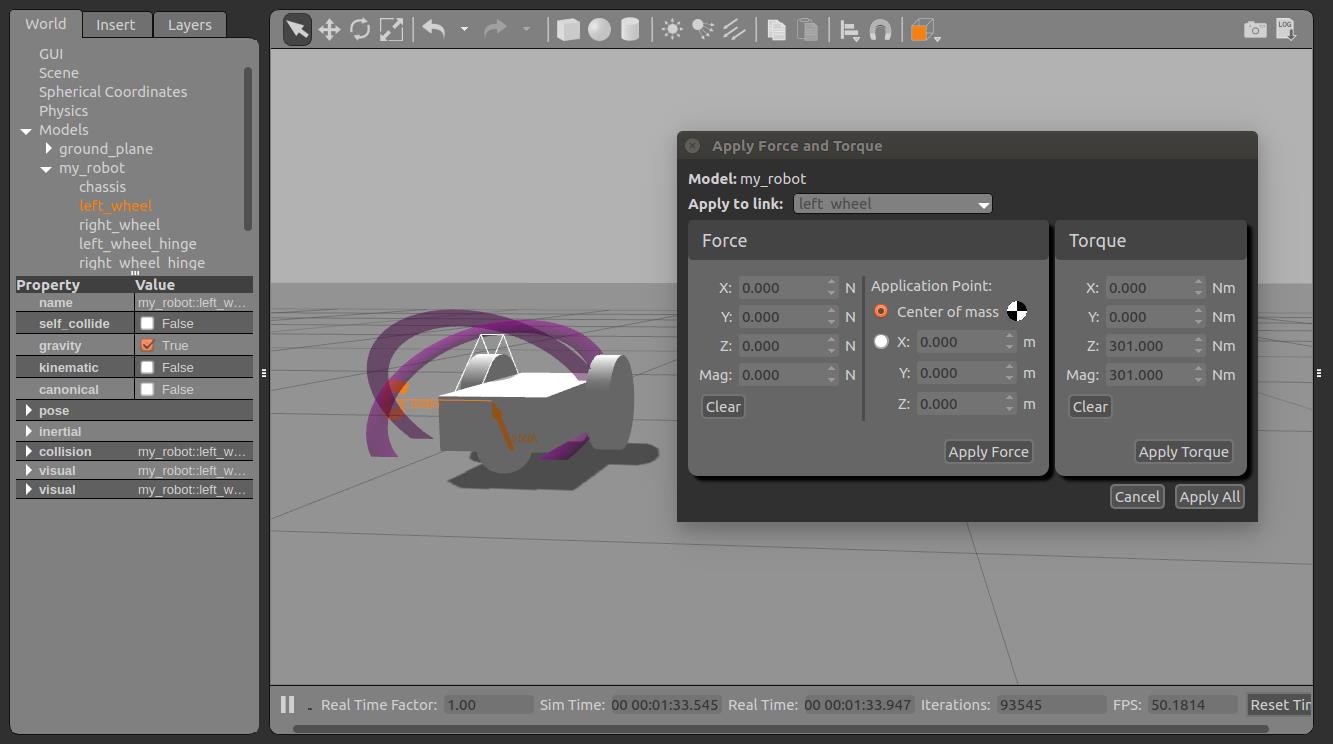
這樣就構建了一個簡單的兩輪差動的移動機器人模型。使用Force工具,可以使其在仿真中運動。

~/.gazebo/models$ gedit ~/.gazebo/models/my_robot/model.sdf
            <visual name='visual'>
              <geometry>
                <mesh>
                  <uri>model://pioneer2dx/meshes/chassis.dae</uri>
                  <scale>0.9 0.5 0.5</scale>
                </mesh>
              </geometry>
            </visual>
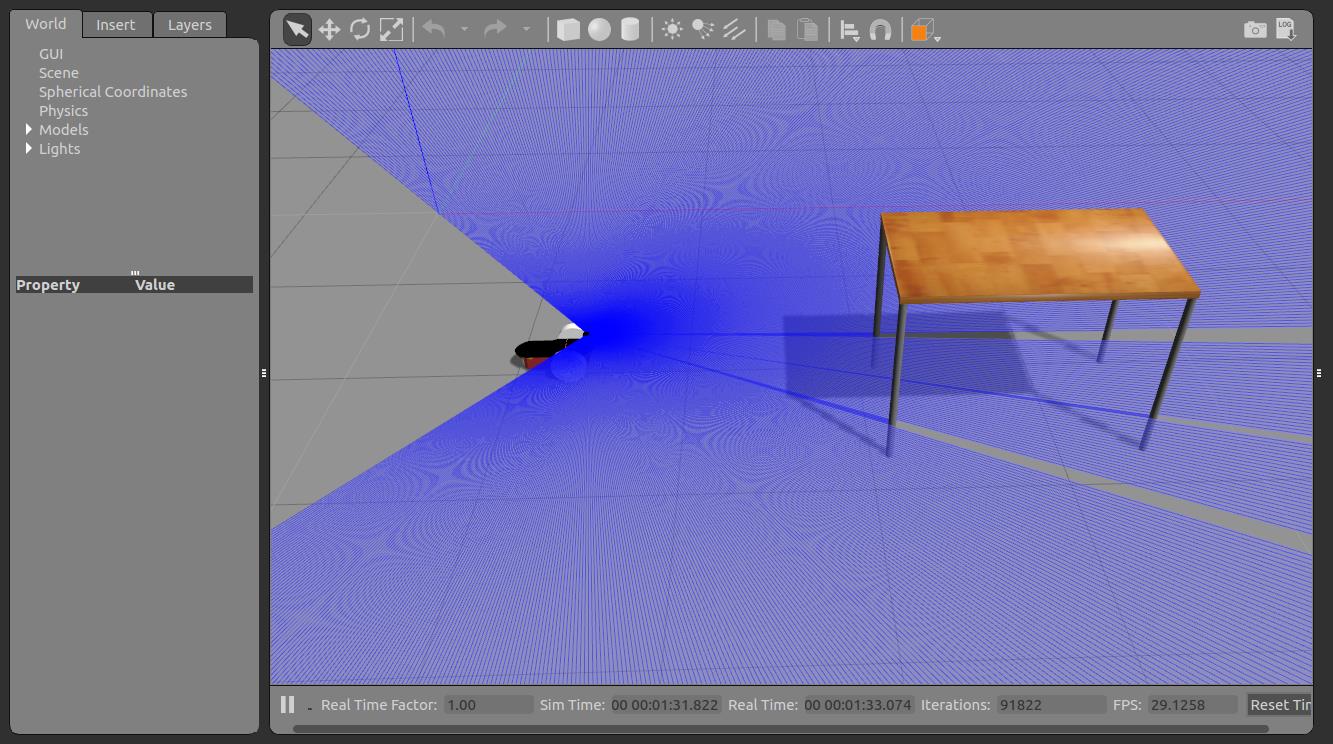
添加傳感器
    <include>
      <uri>model://hokuyo</uri>
      <pose>0.2 0 0.2 0 0 0</pose>
    </include>
    <joint name="hokuyo_joint" type="revolute">
      <child>hokuyo::link</child>
      <parent>chassis</parent>
      <axis>
        <xyz>0 0 1</xyz>
        <limit>
          <upper>0</upper>
          <lower>0</lower>
        </limit>
      </axis>
    </joint>
當然也可以參考官方教程在機器人上添加其他對象。具體參考附件。
附件-官网教程汇总-构建机器人模型-Build a Robot
Model structure and requirements
Overview
Gazebo is able to dynamically load models into simulation either programmatically or through the GUI. Models exist on your computer, after they have been downloaded or created by you. This tutorial describes Gazebo's model directory structure, and the necessary files within a model directory.
Models in Gazebo define a physical entity with dynamic, kinematic, andvisual properties. In addition, a model may have one or more plugins, whichaffect the model's behavior. A model can represent anything from a simpleshape to a complex robot; even the ground is a model.
Gazebo relies on a database to store and maintain models available for usewithin simulation. The model database is a community-supported resource, soplease upload and maintain models that you create and use.
The Model Database Repository
The model database is a bitbucket repository found here.
You can clone the repository using:
hg clone https://bitbucket.org/osrf/gazebo_models
Model Database Structure
A model database must abide by a specific directory and file structure. Theroot of a model database contains one directory for each model, and adatabase.config file with information about the model database. Each modeldirectory also has a model.config file that contains meta data about themodel. A model directory also contains the SDF for the model and any materials,meshes, and plugins.
The structure is as follows (in this example the database has only one model called model_1):
- Database
- database.config : Meta data about the database. This is now populated automatically from CMakeLists.txt
- model_1 : A directory for model_1
- model.config : Meta-data about model_1
- model.sdf : SDF description of the model
- model.sdf.erb : Ruby embedded SDF model description
- meshes : A directory for all COLLADA and STL files
- materials : A directory which should only contain the
texturesandscriptssubdirectories- textures : A directory for image files (jpg, png, etc).
- scripts : A directory for OGRE material scripts
- plugins: A directory for plugin source and header files
Plugins Directory
This is an optional directory that contains all of the plugins for the model.
Meshes Directory
This is an optional directory that contains all of the COLLADA and/or STL files for the model.
Material Directory
This is an optional directory that contains all of the textures, images, and OGRE scripts for the model. Texture images must be placed in the textures subdirectory, and OGRE script files in the scripts directory.
Database Config
This is the database.config file in the root of the model database. This file contains license information for the models, a name for the database, and a list of all the valid models.
Note: The database.config file is only required for online repositories. A directory full of models on your local computer does not need a database.config file.
The format of this database.config is:
<?xml version='1.0'?>
<database>
  <name>name_of_this_database</name>
  <license>Creative Commons Attribution 3.0 Unported</license>
  <models>
    <uri>file://model_directory</uri>
  </models>
</database>
- <name>
The name of the database. This is used by the GUI and other tools.
- <license>
The license for the models within the database. We highly recommend theCreative Commons Attribution 3.0 Unported license.
- <models>
A listing of all the model URIs within the database.
<uri>
The URI for a model, this should be
file://model_directory_name
Model Config
Each model must have a model.config file in the model's root directory that contains meta information about the model.
The format of this model.config is:
<?xml version="1.0"?>

<model>
  <name>My Model Name</name>
  <version>1.0</version>
  <sdf version='1.5'>model.sdf</sdf>

  <author>
    <name>My name</name>
    <email>name@email.address</email>
  </author>

  <description>
    A description of the model
  </description>
</model>
- <name> required
Name of the model.
- <version> required
Version of this model.
Note: This is not the version of sdf that the model uses. That informationis kept in the model.sdf file.
- <sdf> required
The name of a SDF or URDF file that describes this model. The version attribute indicates what SDF version the file uses, and is not required for URDFs. Multiple <sdf> elements may be used in order to support multiple SDF versions.
<author> required
- <name> required
Name of the model author.* <email> required
Email address of the author.
<description> required
Description of the model should include:
- What the model is (e.g., robot, table, cup)
- What the plugins do (functionality of the model)
- <depend> optional
All the dependencies for this model. This is typically other models.
<model> optional
<uri> required
URI of the model dependency.
<version> required
Version of the model.
Model SDF
Each model requires a model.sdf file that contains the Simulator Description Format of the model. You can find more information on the SDF website.
Model SDF.ERB
Standard SDF file which can contain ruby code embedded. This option is used toprogramatically generate SDF files using Embedded Ruby codetemplates. Please note that the ruby conversion should be done manually (erbmodel.sdf.erb > model.sdf) and the final model.sdf file must be uploadedtogether with the model.sdf.erb (this one only for reference).
Examples of sdf.erb files are available in thegazebo_models repository(some of them use the deprecated suffix .rsdf). An easy ERB file is theflocking.world.erbwhich uses a simple loop.
以上是关于Gazebo機器人仿真學習探索筆記機器人模型的主要内容,如果未能解决你的问题,请参考以下文章