CentOS7 Install Consul
Posted Ca0Gu0
tags:
篇首语:本文由小常识网(cha138.com)小编为大家整理,主要介绍了CentOS7 Install Consul相关的知识,希望对你有一定的参考价值。
Centos7 Install Consul
原文链接:http://www.cnblogs.com/caoguo/p/5959962.html
1) 环境
192.168.217.158 consul-1
192.168.217.159 consul-2
192.168.217.160 consul-3
192.168.217.161 agent-1
2) 安装
# yum install -y unzip
# wget https://releases.hashicorp.com/consul/0.7.0/consul_0.7.0_linux_amd64.zip

# unzip consul_0.7.0_linux_amd64.zip
# mv consul /usr/local/bin/
3)配置
# consul-1配置
# consul agent -server -bootstrap-expect 3 -data-dir /tmp/consul -node=n1 -bind=192.168.217.158 -dc=bj1

# consul-2配置
# consul agent -server -bootstrap-expect 3 -data-dir /tmp/consul -node=n2 -bind=192.168.217.159 -dc=bj1

# consul-3配置
# consul agent -server -bootstrap-expect 3 -data-dir /tmp/consul -node=n3 -bind=192.168.217.160 -dc=bj1

# 将consul-2 consul-3加入集群
[root@consul-1 ~]# consul join 192.168.217.159 192.168.217.160
Successfully joined cluster by contacting 2 nodes.


# 配置服务注册文件(也可以从consul api 接口添加服务注册,他会自动持久化)
[root@localhost ~]# vi /etc/consul.d/web3.json
{
"service": {
"name": "web3",
"tags": ["master"],
"address": "127.0.0.1",
"port": 10000,
"checks": [
{
"http": "http://localhost:10000/health",
"interval": "10s"
}
]
}

# wget https://releases.hashicorp.com/consul/0.7.0/consul_0.7.0_web_ui.zip

#启动客户端agent-1
# consul agent -data-dir /tmp/consul -node=n4 -bind=192.168.217.161 -join=192.168.217.158 -dc=bj1 -config-dir=/etc/consul.d -ui-dir /tmp/ui -client=192.168.217.161
4) 测试
# 开一个端口10000的服务
[root@localhost ~]# vi web3.go
package main

import (
"fmt"
"net/http"
)

func handler(w http.ResponseWriter, r *http.Request) {
fmt.Println("hello Web3! This is n3")
fmt.Fprintf(w, "Hello Web3! This is n3")
}

func healthHandler(w http.ResponseWriter, r *http.Request) {
fmt.Println("health check!")
}

func main() {
http.HandleFunc("/", handler)
http.HandleFunc("/health", healthHandler)
http.ListenAndServe(":10000", nil)
}
# 运行服务
# go run web3.go
[root@consul-1 ~]# consul members
Node Address Status Type Build Protocol DC
n1 192.168.217.158:8301 alive server 0.7.0 2 bj1
n2 192.168.217.159:8301 alive server 0.7.0 2 bj1
n3 192.168.217.160:8301 alive server 0.7.0 2 bj1
n4 192.168.217.161:8301 alive client 0.7.0 2 bj1

# consul members -detailed
# curl localhost:8500/v1/catalog/nodes
# curl localhost:8500/v1/status/leader
# curl localhost:8500/v1/status/peers
# 服务发现
# curl -s http://192.168.217.161:8500/v1/catalog/service/web3|python -m json.tool
[
    {
        "Address": "192.168.217.161",
        "CreateIndex": 2853,
        "ModifyIndex": 3821,
        "Node": "n4",
        "ServiceAddress": "127.0.0.1",
        "ServiceEnableTagOverride": false,
        "ServiceID": "web3",
        "ServiceName": "web3",
        "ServicePort": 10000,
        "ServiceTags": [
            "master"
        ],
        "TaggedAddresses": {
            "lan": "192.168.217.161",
            "wan": "192.168.217.161"
        }
    }
]


[root@localhost ~]# dig @127.0.0.1 -p 8600 web3.service.consul SRV

; <<>> DiG 9.9.4-RedHat-9.9.4-29.el7_2.4 <<>> @127.0.0.1 -p 8600 web3.service.consul SRV
; (1 server found)
;; global options: +cmd
;; Got answer:
;; ->>HEADER<<- opcode: QUERY, status: NOERROR, id: 57200
;; flags: qr aa rd; QUERY: 1, ANSWER: 1, AUTHORITY: 0, ADDITIONAL: 1
;; WARNING: recursion requested but not available

;; QUESTION SECTION:
;web3.service.consul.        IN    SRV

;; ANSWER SECTION:
web3.service.consul.    0    IN    SRV    1 1 10000 n4.node.bj1.consul.

;; ADDITIONAL SECTION:
n4.node.bj1.consul.    0    IN    A    127.0.0.1

;; Query time: 1 msec
;; SERVER: 127.0.0.1#8600(127.0.0.1)
;; WHEN: Thu Oct 13 15:35:46 EDT 2016
;; MSG SIZE  rcvd: 85


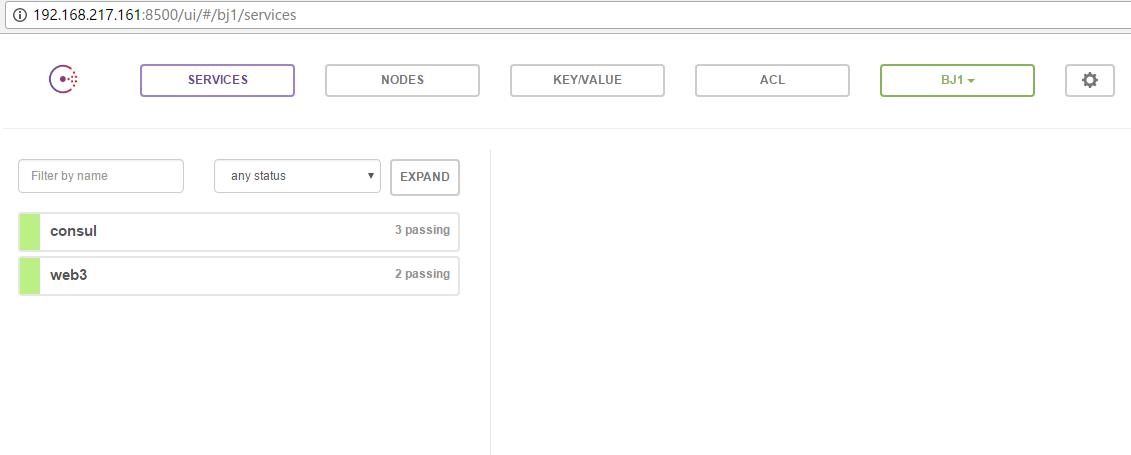
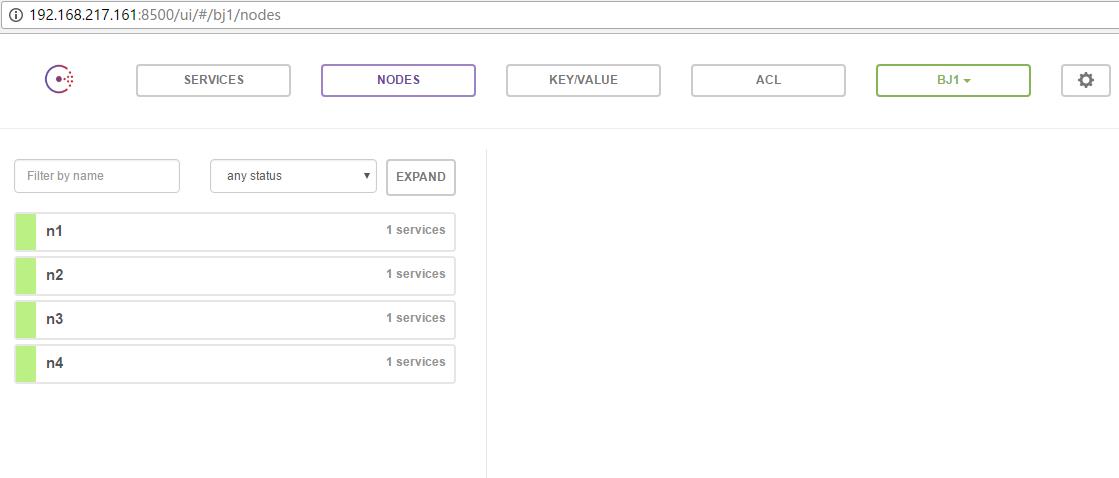
# 浏览器访问
http://192.168.217.161:8500/


以上是关于CentOS7 Install Consul的主要内容,如果未能解决你的问题,请参考以下文章
(dev mode) install CONSUL on ubuntu