HA高可用集群部署(ricci+luci+fence) 双机热备
Posted
tags:
篇首语:本文由小常识网(cha138.com)小编为大家整理,主要介绍了HA高可用集群部署(ricci+luci+fence) 双机热备相关的知识,希望对你有一定的参考价值。
主机环境 redhat6.5 6位
实验环境 服务端1 ip172.25.29.1 主机名:server1.example.com ricci
服务端2 ip172.25.29.2 主机名:server2.example.com ricci
管理端1 ip172.25.29.3 主机名:server3.example.com luci
管理端2 ip172.25.29.250 fence_virtd
防火墙状态:关闭
1. 安装ricci、luci及创建节点
1.安装、开启ricci(服务端1)
[[email protected]]# vim dvd.repo #安装之前,修改yum源
#repos on instructor for classroom use
#Main rhel6.5 server
[base]
name=InstructorServer Repository
baseurl=http://172.25.29.250/rhel6.5
gpgcheck=0
#HighAvailability rhel6.5
[HighAvailability]
name=InstructorHighAvailability Repository
baseurl=http://172.25.29.250/rhel6.5/HighAvailability
gpgcheck=0
#LoadBalancer packages
[LoadBalancer]
name=InstructorLoadBalancer Repository
baseurl=http://172.25.29.250/rhel6.5/LoadBalancer
gpgcheck=0
#ResilientStorage
[ResilientStorage]
name=InstructorResilientStorage Repository
baseurl=http://172.25.29.250/rhel6.5/ResilientStorage
gpgcheck=0
#ScalableFileSystem
[ScalableFileSystem]
name=InstructorScalableFileSystem Repository
baseurl=http://172.25.29.250/rhel6.5/ScalableFileSystem
gpgcheck=0
[[email protected]]# yum clean all #清除缓存
Loadedplugins: product-id, subscription-manager
Thissystem is not registered to Red Hat Subscription Management. You can usesubscription-manager to register.
Cleaningrepos: HighAvailability LoadBalancer ResilientStorage
: ScalableFileSystem base
Cleaningup Everything
[[email protected]]# yum install ricci -y #安装ricci
[[email protected]]# passwd ricci #修改ricci密码
Changingpassword for user ricci.
Newpassword:
BADPASSWORD: it is based on a dictionary word
BADPASSWORD: is too simple
Retypenew password:
passwd:all authentication tokens updated successfully.
[[email protected]]# /etc/init.d/ricci start #开启ricci
Startingsystem message bus: [ OK ]
Startingoddjobd: [ OK ]
generatingSSL certificates... done
GeneratingNSS database... done
Startingricci: [ OK ]
[[email protected]]# chkconfig ricci on #开机自动开启
服务端2和服务端1做相同的操作
2.安装、开启luci (管理端1)
安装之前,与服务端1一样修改yum源
[[email protected]]# yum install luci -y #安装luci
[[email protected]]# /etc/init.d/luci start #开启ruci
Startluci... [ OK ]
Pointyour web browser to https://server3.example.com:8084 (or equivalent) to accessluci
在登陆之前,必须有DNS解析,也就是在/etc/hosts添加
例如: 172.25.29.3 server3.example.com
3.创建节点
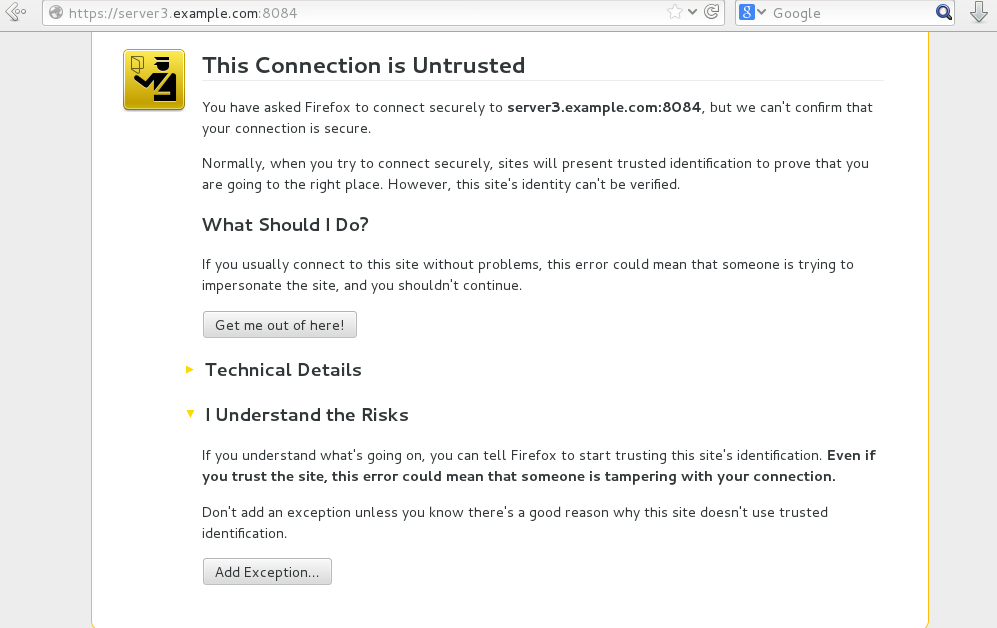
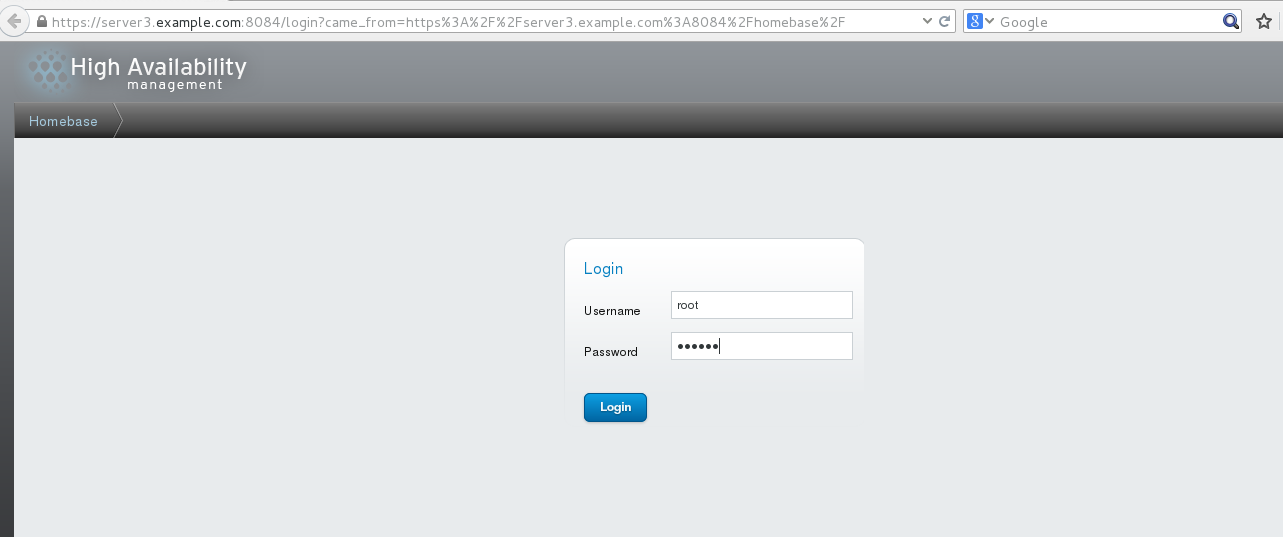
登陆 https://server3.example.com:8084 #luci开放的是8084端口
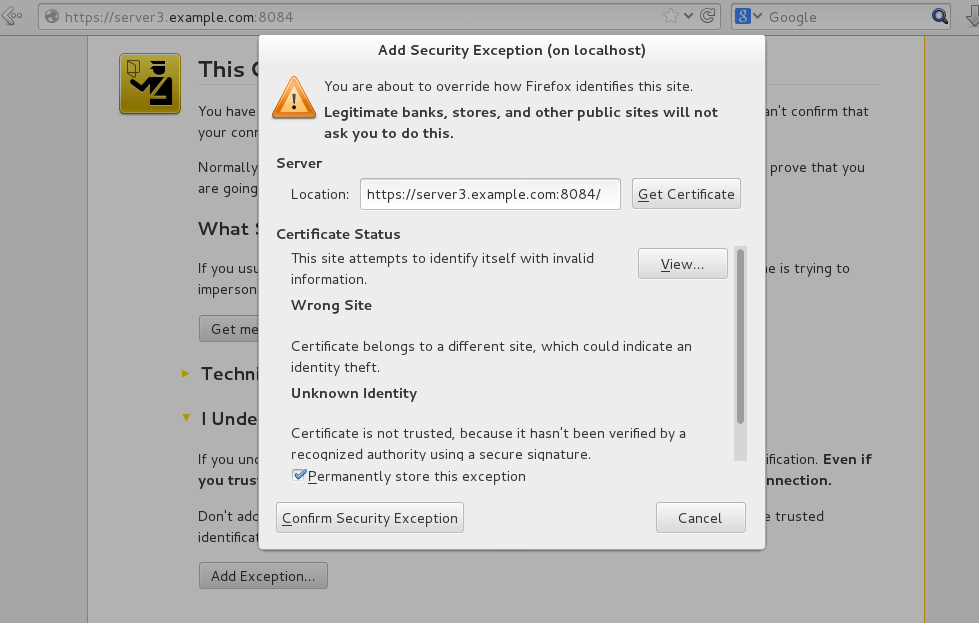
安全证书,选I Understand Risks
点击Confirm Security Excepton
进入到管理服务器的luci界面,登陆时的密码是安装luci虚拟机的root密码
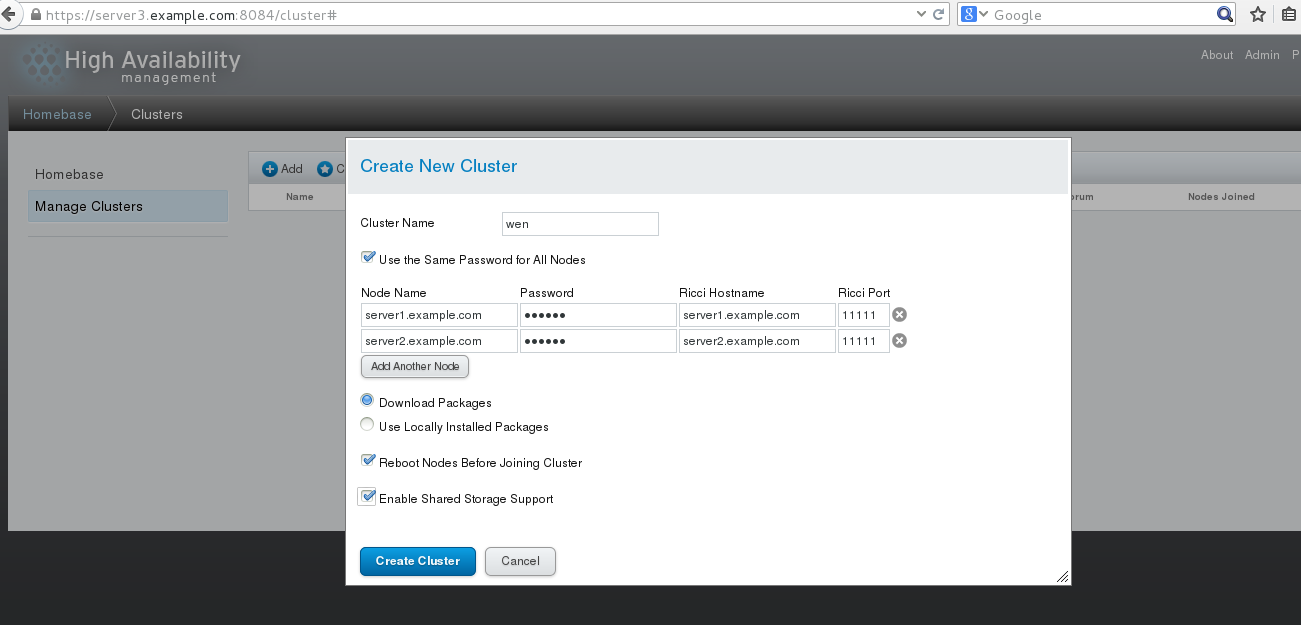
选择Manage Clusters,之后点击Create创建集群
如图,Cluster Name创建集群的名称,勾选Use the Same Passwordfor All Nodes,指的是所有结点所用的是相同的密码,填写要创建的结点名称和密码,名称是服务端的主机名,密码是上面提到的passwd ricci的修改的密码。勾选Download PackagesReboot和Enable,选择Create Cluster
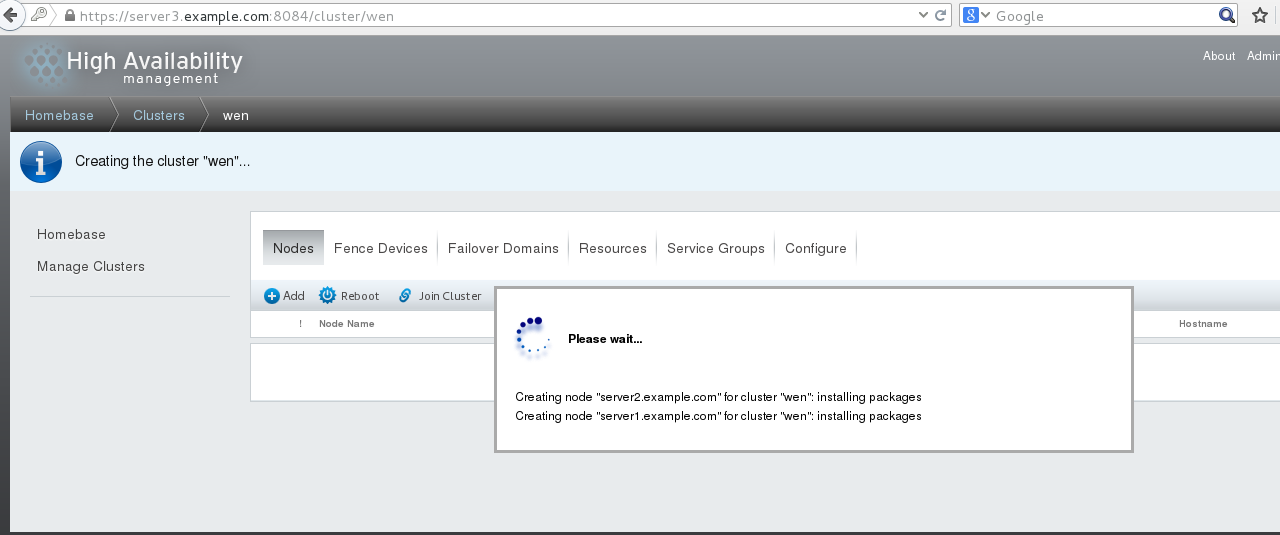
正在创建节点,如图
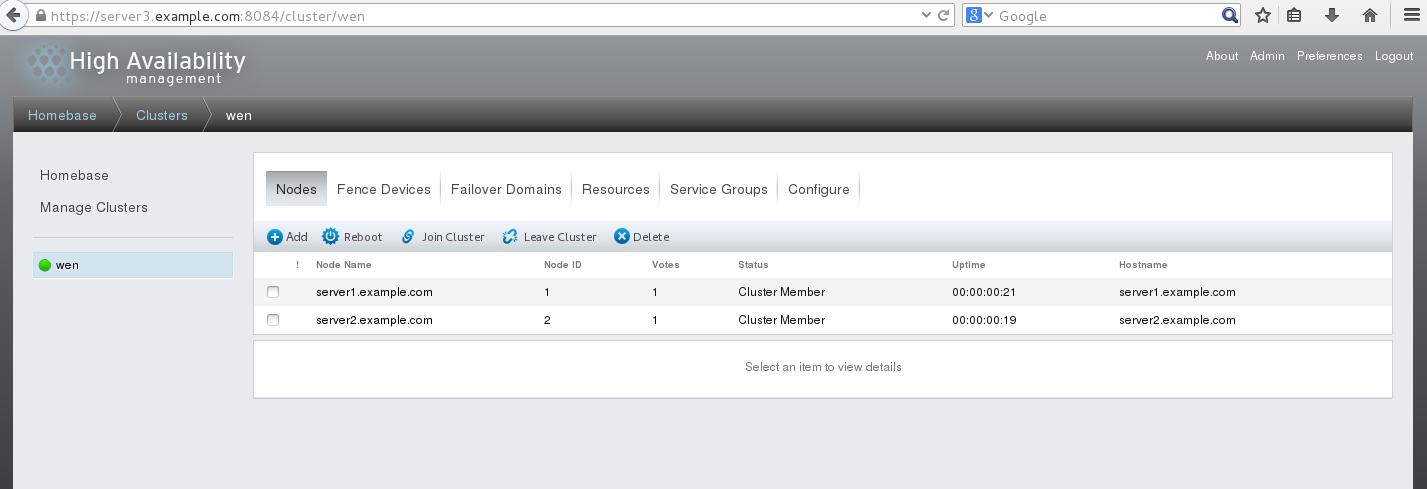
创建完成,如图
创建完成之后,在服务端1和服务端2的/etc/cluster/下会生成cluster.conf文件,查看如下
[[email protected]~]# cd /etc/cluster/
[[email protected]]# ls
cluster.conf cman-notify.d
[[email protected]]# cat cluster.conf #查看文件内容
<?xmlversion="1.0"?>
<clusterconfig_version="1" name="wen"> #集群名称
<clusternodes>
<clusternodename="server1.example.com" nodeid="1"/> #结点1
<clusternodename="server2.example.com" nodeid="2"/> #结点2
</clusternodes>
<cman expected_votes="1"two_node="1"/>
<fencedevices/>
<rm/>
</cluster>
2.安装fence_virtd、创建fence设备
1.安装、开启fence_virtd(管理端2)
[[email protected]]# yum install fence-virtd* -y
[[email protected]]# fence_virtd -c #设置
Modulesearch path [/usr/lib64/fence-virt]:
Availablebackends:
libvirt 0.1
Availablelisteners:
multicast 1.2
serial 0.4
Listenermodules are responsible for accepting requests
fromfencing clients.
Listenermodule [multicast]: #多播
Themulticast listener module is designed for use environments
wherethe guests and hosts may communicate over a network using
multicast.
Themulticast address is the address that a client will use to
sendfencing requests to fence_virtd.
MulticastIP Address [225.0.0.12]: #多播ip
Usingipv4 as family.
MulticastIP Port [1229]: #多播端口号
Settinga preferred interface causes fence_virtd to listen only
onthat interface. Normally, it listens onall interfaces.
Inenvironments where the virtual machines are using the host
machineas a gateway, this *must* be set (typically to virbr0).
Setto ‘none‘ for no interface.
Interface[br0]:
Thekey file is the shared key information which is used to
authenticatefencing requests. The contents of thisfile must
bedistributed to each physical host and virtual machine within
acluster.
KeyFile [/etc/cluster/fence_xvm.key]: #key文件的路径
Backendmodules are responsible for routing requests to
theappropriate hypervisor or management layer.
Backendmodule [libvirt]:
Configurationcomplete.
===Begin Configuration ===
backends{
libvirt {
uri = "qemu:///system";
}
}
listeners{
multicast {
port = "1229";
family = "ipv4";
interface = "br0";
address = "225.0.0.12";
key_file ="/etc/cluster/fence_xvm.key";
}
}
fence_virtd{
module_path ="/usr/lib64/fence-virt";
backend = "libvirt";
listener = "multicast";
}
===End Configuration ===
Replace/etc/fence_virt.conf with the above [y/N]? y
[[email protected]]# mkdir /etc/cluster #创建cluster目录
[[email protected]]# cd /etc/cluster/
[[email protected]]# dd if=/dev/urandom of=fence_xvm.key bs=128 count=1 #生成文件
1+0records in
1+0records out
128bytes (128 B) copied, 0.000167107 s, 766 kB/s
[[email protected]]# scp fence_xvm.key [email protected]:/etc/cluster/ #将文件传给服务端1
[email protected]‘spassword:
fence_xvm.key 100% 512 0.5KB/s 00:00
测试
[[email protected]]# ls #查看
cluster.conf cman-notify.d fence_xvm.key
以同样的方法传送给服务端2
[[email protected]]# systemctl start fence_fence_virtd.service #开启fence(由于管理端2是7.1的系统,开启时的命令不太一。如果是6.5系统,则用/etc/init.d/fence_virtd start即可)
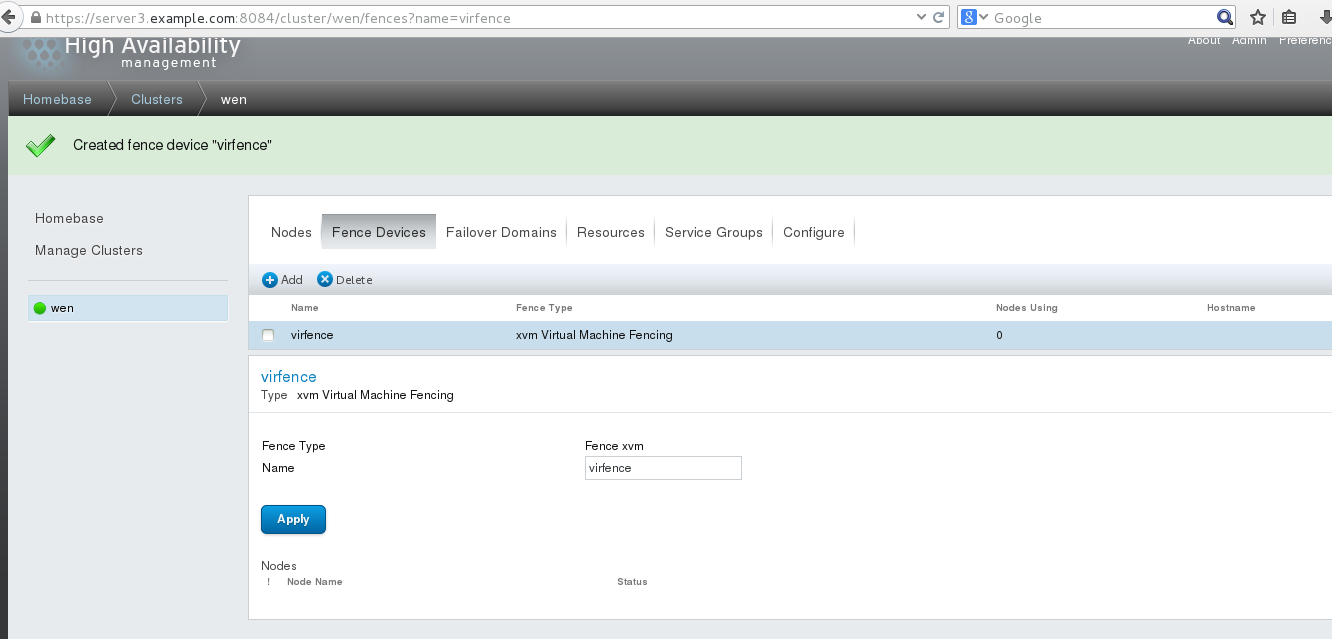
2.创建fence设备
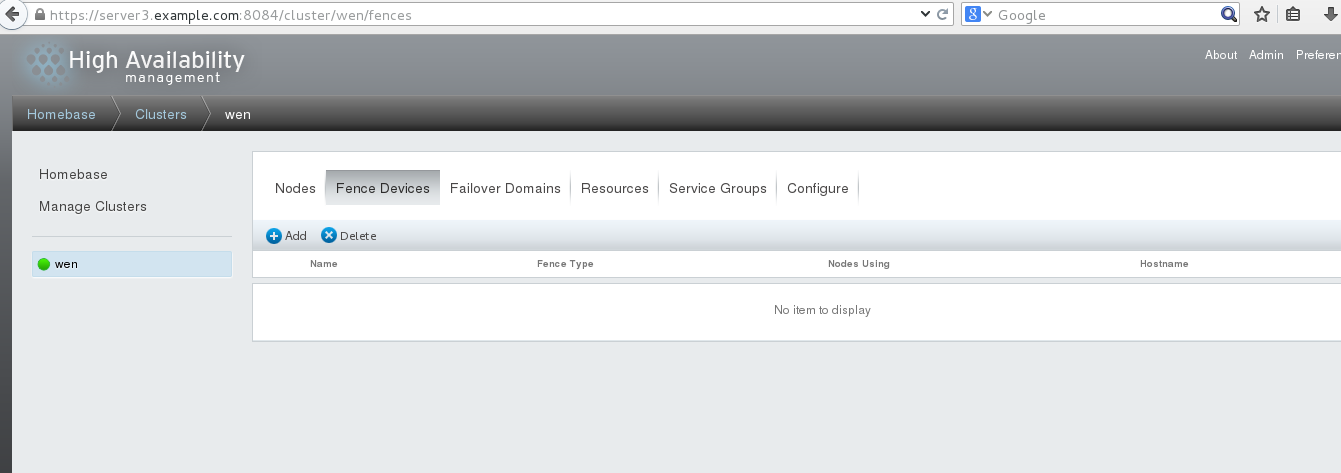
选择Fance Devices
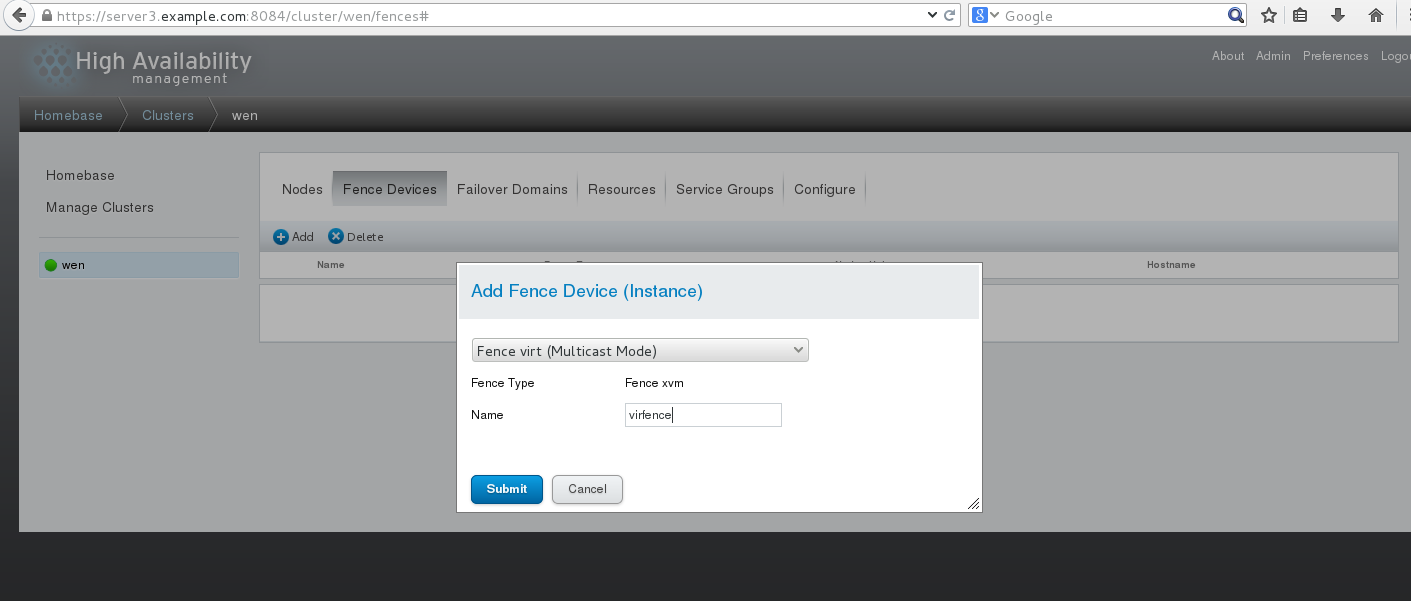
选择Add,如下图,Name指的是添加fence设备的名称,写完之后选择Submit
结果
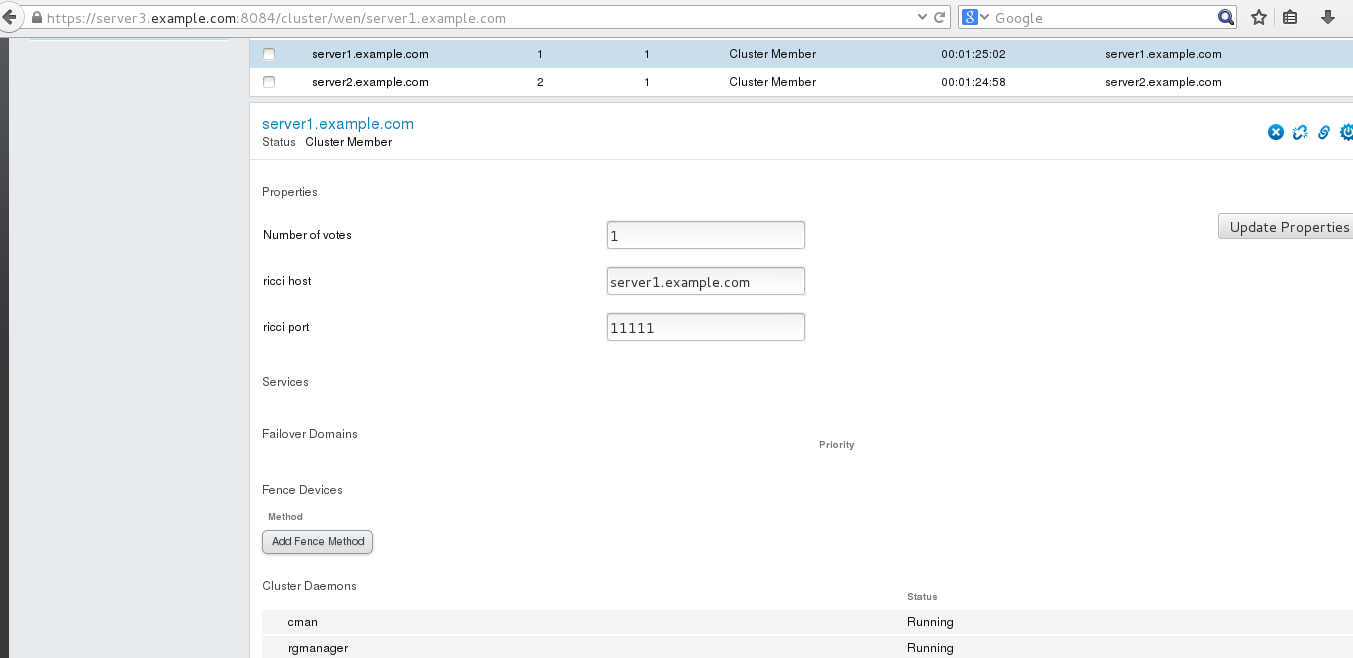
选择server1.example.com
点击Add Fence Method ,添加Method Name
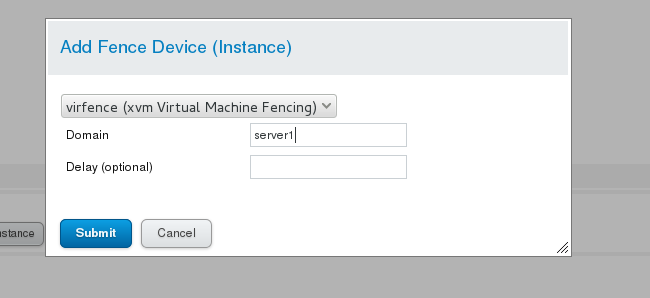
如图,选择Add Tence Instance
填写Domin,选择Submit
完成之后,服务端2和服务端1的配置相同
测试
[[email protected]]# fence_node server2.example.com #测试server2的结点
fenceserver2.example.com success
[[email protected]]# fence_node server1.example.com #测试server1的结点
fenceserver1.example.com success
3.在搭建好的集群上添加服务(双机热备),以apche为例
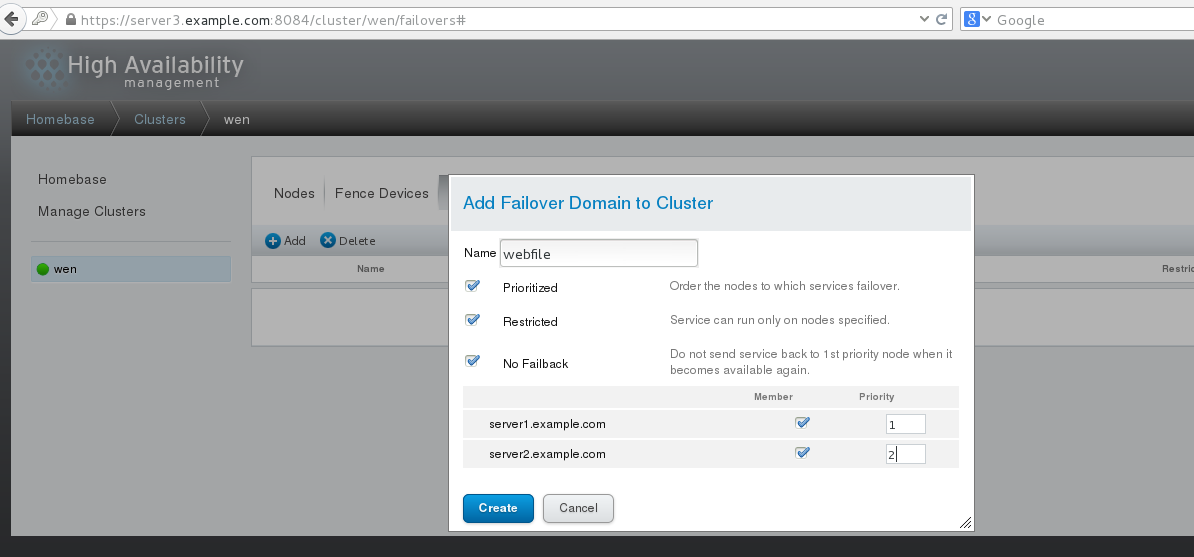
1.添加服务 这里采用的是双机热备
选择Failover Domains,如图,填写Name,如图选择,前面打勾的三个分别是结点失效之后可以跳到另一个结点、只服务运行指定的结点、当结点失效之跳到另一个结点之后,原先的结点恢复之后,不会跳回原先的结点。下面的Member打勾,是指服务运行server1.example.com和server2.exampe.com结点,后面的Priority值越小,优先级越高,选择Creale
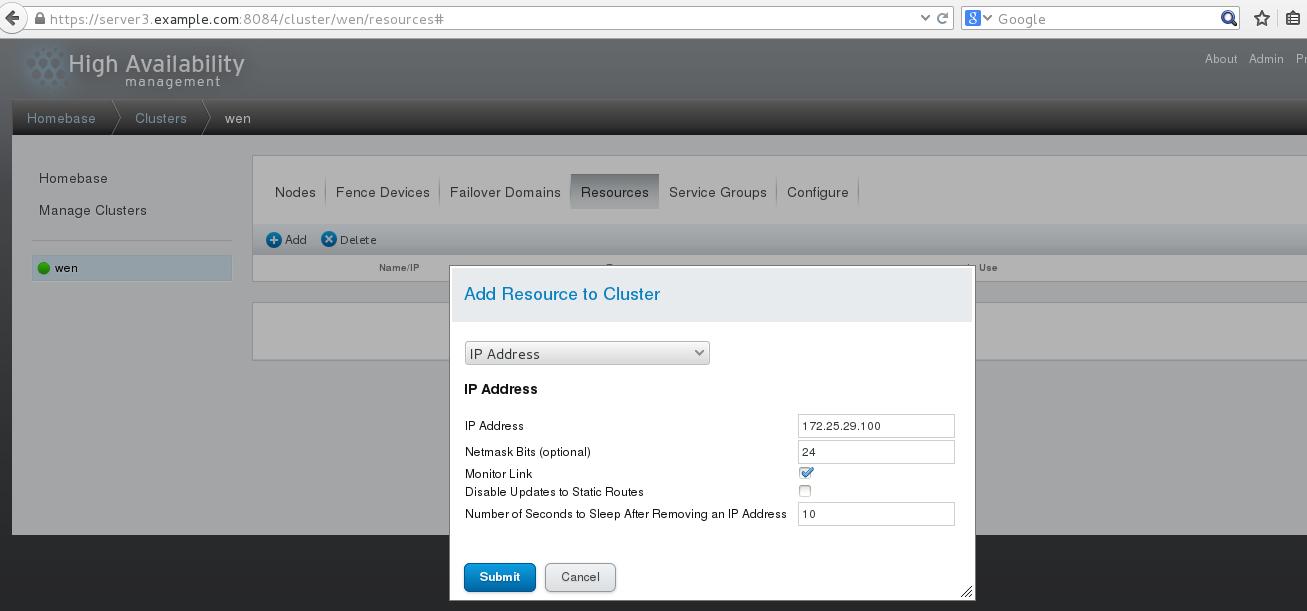
选择Resourcs,点击Add,选择添加IPAddress如图,添加的ip必须是未被占用的ip,24是子网掩码的位数,10指的是等待时间为10秒。选择Submit
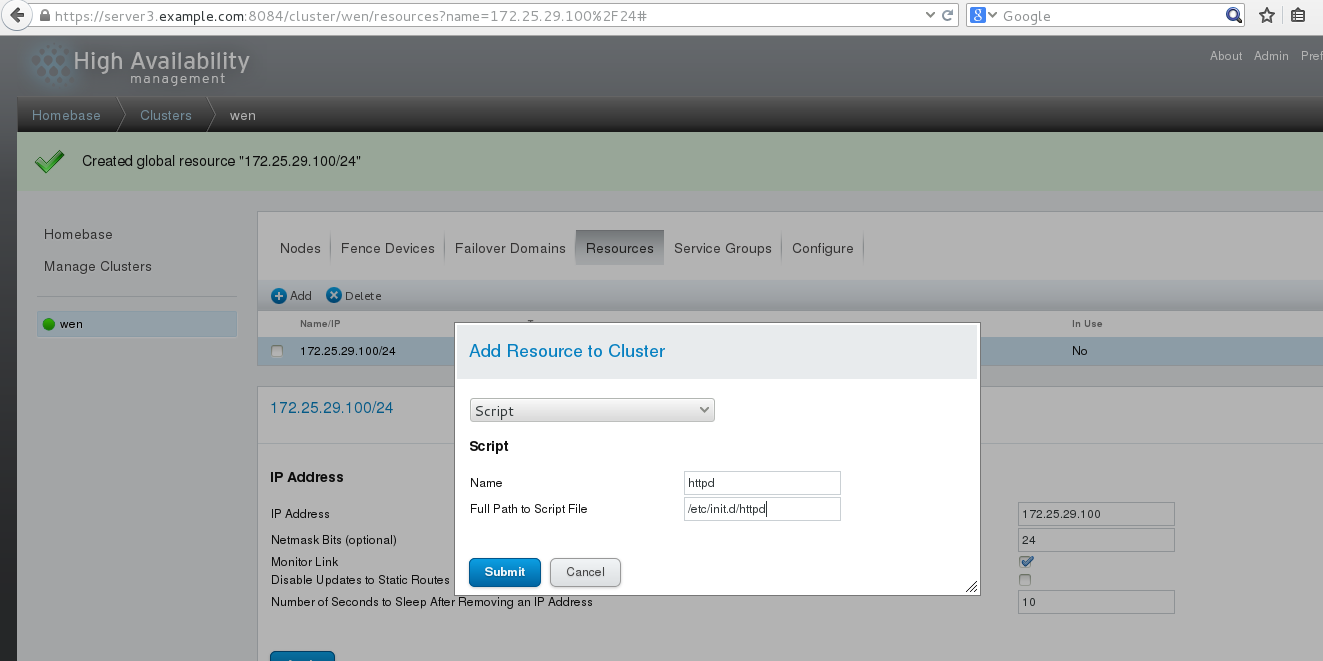
以相同的方法添加Script,httpd是服务的名字,/etc/init.d/httpd是服务启动脚本的路径,选择Submit
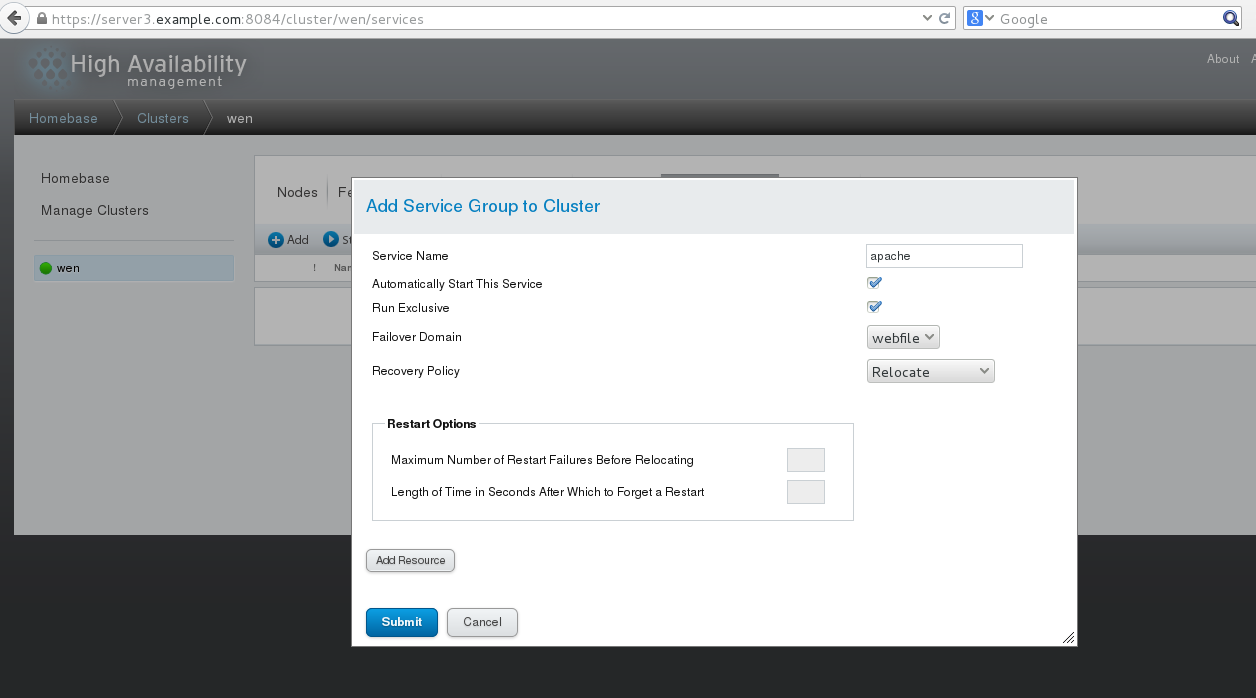
选择Service Groups,点击Add如图,apache是服务的名字,下面两个勾指分别的是
自动开启服务、运行 ,选择Add Resource
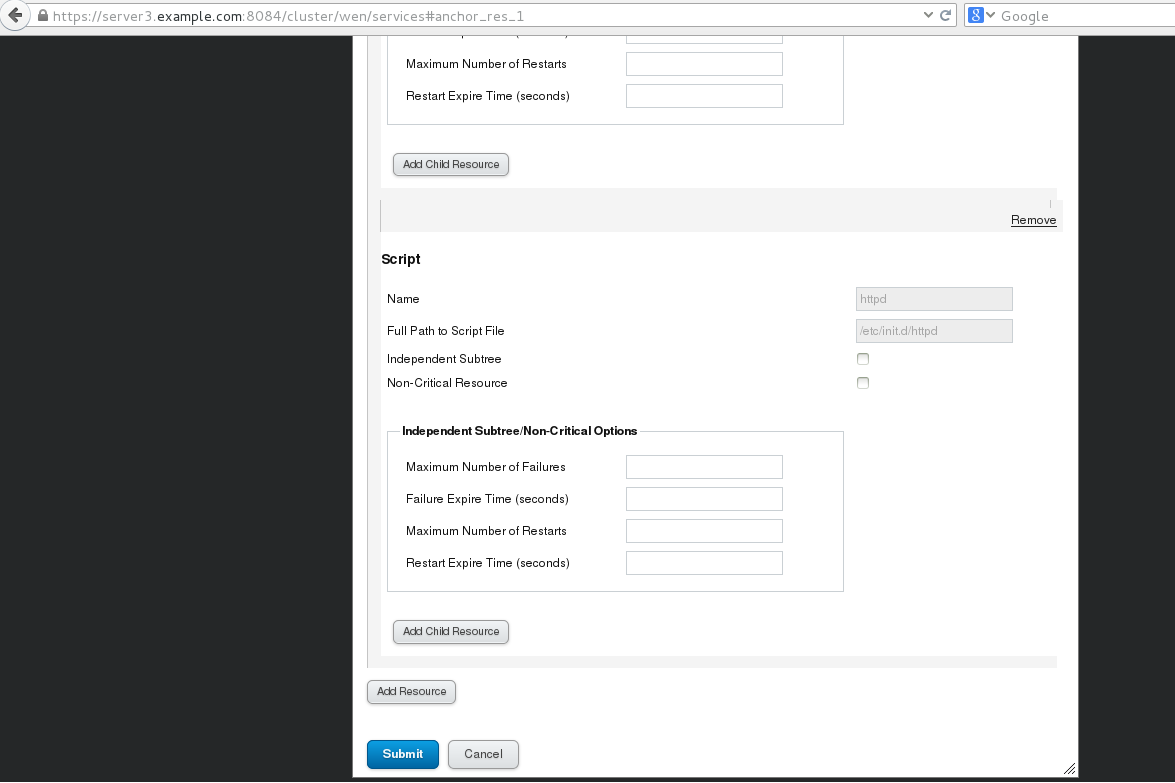
选择172.25.29.100/24之后,如图点击Add Child Resource
选择httpd之后,如图选择Submit,完成
2.测试
在测试之前 server1和server2必须安装httpd,并且有测试页。注意:不要开启httpd服务,在访问的时候,会自动开启(如果在访问之前开启了服务,访问的时候会报错)
测试 172.25.29.100
[[email protected]~]# ip addr show #查看
1:lo: <LOOPBACK,UP,LOWER_UP> mtu 16436 qdisc noqueue state UNKNOWN
link/loopback 00:00:00:00:00:00 brd00:00:00:00:00:00
inet 127.0.0.1/8 scope host lo
inet6 ::1/128 scope host
valid_lft forever preferred_lft forever
2:eth0: <BROADCAST,MULTICAST,UP,LOWER_UP> mtu 1500 qdisc pfifo_fast stateUP qlen 1000
link/ether 52:54:00:94:2f:4f brdff:ff:ff:ff:ff:ff
inet 172.25.29.1/24 brd 172.25.29.255 scopeglobal eth0
inet 172.25.29.100/24 scope globalsecondary eth0 #自动添加了ip 172.25.29.100
inet6 fe80::5054:ff:fe94:2f4f/64 scope link
valid_lft forever preferred_lft forever
[[email protected]~]# clustat #查看服务
ClusterStatus for wen @ Tue Sep 27 18:12:38 2016
MemberStatus: Quorate
Member Name ID Status
------ ---- ---- ------
server1.example.com 1 Online, Local,rgmanager
server2.example.com 2 Online, rgmanager
Service Name Owner (Last) State
------- ---- ----- ------ -----
service:apache server1.example.com started #serve1在服务
[[email protected]~]# /etc/init.d/network stop #当网络断开之后,fence控制server1自动断电,然后启动;服务转到server2
测试
[[email protected]~]# ip addr show #查看
1:lo: <LOOPBACK,UP,LOWER_UP> mtu 16436 qdisc noqueue state UNKNOWN
link/loopback 00:00:00:00:00:00 brd00:00:00:00:00:00
inet 127.0.0.1/8 scope host lo
inet6 ::1/128 scope host
valid_lft forever preferred_lft forever
2:eth0: <BROADCAST,MULTICAST,UP,LOWER_UP> mtu 1500 qdisc pfifo_fast stateUP qlen 1000
link/ether 52:54:00:23:81:98 brdff:ff:ff:ff:ff:ff
inet172.25.29.2/24 brd 172.25.29.255 scope global eth0
inet 172.25.29.100/24 scope globalsecondary eth0 #自动添加
inet6 fe80::5054:ff:fe23:8198/64 scope link
valid_lft forever preferred_lft forever
[[email protected]~]# clustat #查看服务
ClusterStatus for wen @ Tue Sep 27 18:22:20 2016
MemberStatus: Quorate
Member Name ID Status
------ ---- ---- ------
server1.example.com 1 Online, Local,rgmanager
server2.example.com 2 Online, rgmanager
Service Name Owner (Last) State
------- ---- ----- ------ ------
service:apache server2.example.com started #server2服务
本文出自 “不忘初心,方得始终” 博客,请务必保留此出处http://12087746.blog.51cto.com/12077746/1857811
以上是关于HA高可用集群部署(ricci+luci+fence) 双机热备的主要内容,如果未能解决你的问题,请参考以下文章
