9.平台总线驱动设计
Posted
tags:
篇首语:本文由小常识网(cha138.com)小编为大家整理,主要介绍了9.平台总线驱动设计相关的知识,希望对你有一定的参考价值。
平台总线驱动设计
平台总线(Platform bus)是linux2.6内核加入的一种虚拟总线,其优势在于采用了总线的模型对设备与驱动进行了管理,这样提高了程序的可移植性。虚拟总线和实际的总线优势相当。我们只要把驱动和设备挂载到虚拟总线就可以了。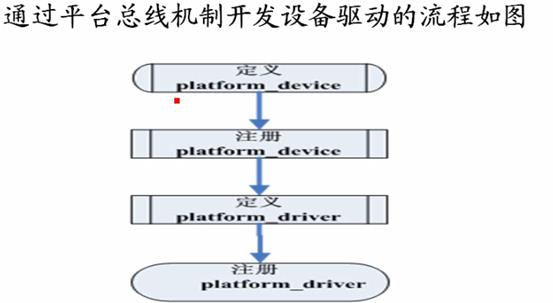
平台总线驱动与设备匹配机制
平台总线的结构:platform_bus_type:
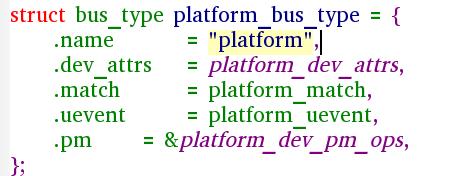
该结构中,最重要的是我们的匹配函数platform_match:
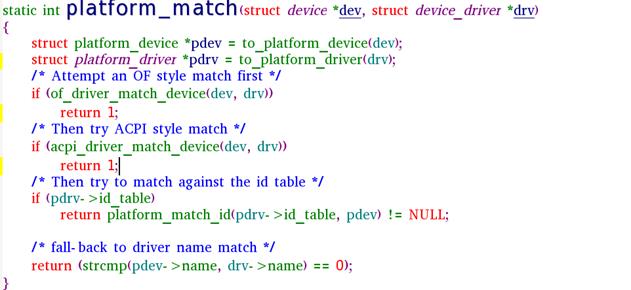
在匹配函数里,有我们熟悉的代码,最后一行:
Strcmp(pdev->name,drv->name)这是我们前面用到的,用驱动的名字和设备的名字来匹配的。如果名字一样的。我们就认为两者能匹配。
注册平台设备:
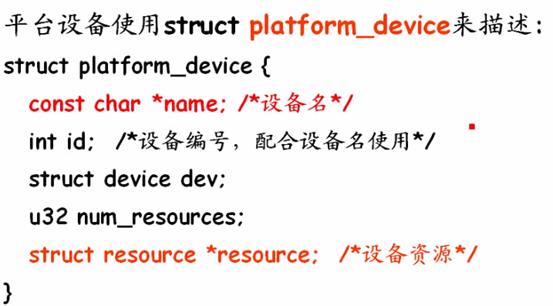
在这个结构中,重要的成员name,设备要和驱动的名字一样。另一个是resource。设备的资源,例如中断号,寄存器.....都是资源。这些就放到resource这个结构里:
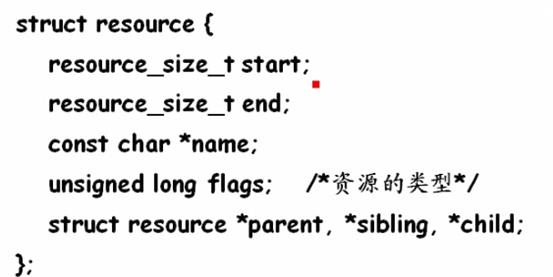
资源的类型:中断、内存等

注册完了之后,我们的平台设备就挂载到我们的总线上去了。
完成按键的注册
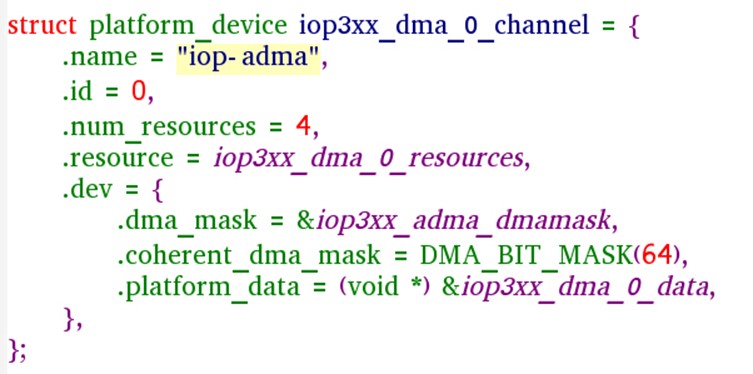
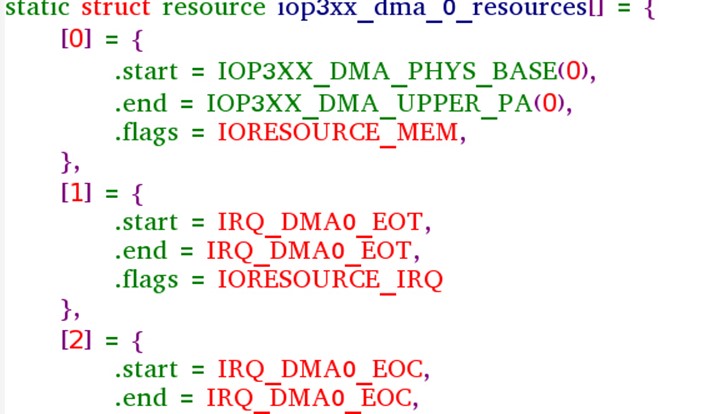
实现的代码:key_dev.c:
#include <linux/module.h>
#include <linux/init.h>
#include <linux/platform_device.h>
#include <linux/of_platform.h>
#include <linux/interrupt.h>
#define GPNCON 0x7F008830
MODULE_LICENSE("GPL");
//定义资源
struct resource key_resource[]=
{
//第一项资源
[0]={
.start=GPNCON,
.end = GPNCON+8,
.flags = IORESOURCE_MEM,
},
//第二项资源,中断号
[1]={
.start=IRQ_EINT(0),
.end = IRQ_EINT(1),
.flags= IORESOURCE_IRQ,
},
};
//定义平台设备结构
struct platform_device key_device=
{
.name = "my-key",
.id =0,
.num_resources = 2,
.resource = key_resource,
};
int keydev_init()
{
//平台设备的注册
platform_device_register(&key_device);
}
void keydev_exit()
{
platform_device_unregister(&key_device);
}
module_init(keydev_init);
module_exit(keydev_exit);
执行make,生成.ko设备文件,拷贝到开发板运行。
[[email protected]]# insmod key_dev.ko
[[email protected]]# cd /sys/bus/
[[email protected]]# ls
ac97 i2c platform serio usb-serial
event_source mdio_bus scsi spi
hid mmc sdio usb
[[email protected]]# cd platform/
[[email protected]]# ls
devices drivers_autoprobe uevent
drivers drivers_probe
[[email protected]]# cd devices/
[[email protected]]# ls
alarmtimer s3c-g2d s3c-ts s3c6410-nand
dm9000.0 s3c-g3d s3c-tvenc s3c64xx-rtc
dummy_hcd s3c-hsotg s3c-tvscaler s3c64xx-spi.0
dummy_udc s3c-jpeg s3c2410-ohci s3c64xx-spi.1
gpio-keys s3c-keypad s3c2410-wdt samsung-ac97
my-key.0 s3c-mfc s3c2440-i2c.0 samsung-audio
我们在平台总线的文件夹里看到了我们创建的my-key设备。平台总线实现成功。
平台总线驱动的实现
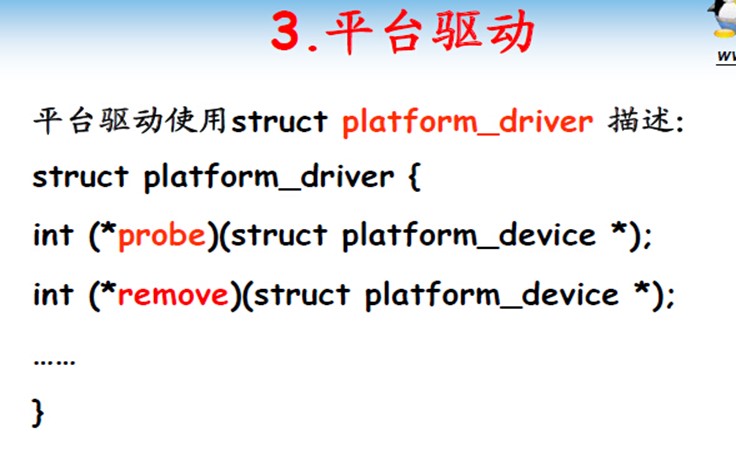

接下来是将前面的按键驱动修改为平台设备驱动模型:
平台总线驱动的结构:
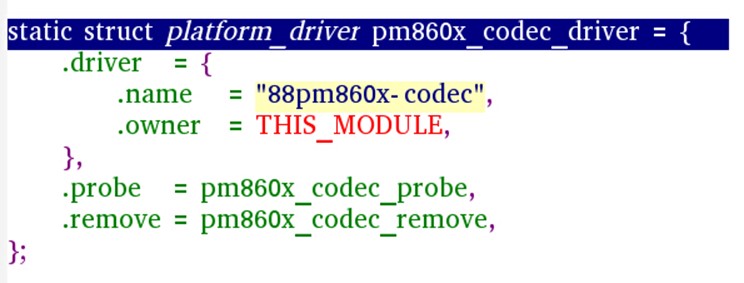
最后:key_drv.c的代码:
#include <linux/module.h> /* For module specific items */
#include <linux/fs.h> /* For file operations */
#include <linux/ioport.h> /* For io-port access */
#include <linux/io.h> /* For inb/outb/... */
#include <linux/init.h>
#include <linux/miscdevice.h>
#include <linux/interrupt.h>
#include <linux/slab.h>
#include <linux/uaccess.h>
#include <linux/sched.h>
#include <linux/platform_device.h>
#define TASK_UNINTERRUPTIBLE 2
#define TASK_INTERRUPTIBLE 1
#define TASK_NORMAL (TASK_INTERRUPTIBLE | TASK_UNINTERRUPTIBLE)
struct work_struct *work1;
struct timer_list key_timer;//定义定时器
//全局变量,初始化为0
unsigned int key_num =0 ;
//定义等待队列
wait_queue_head_t key_q;
struct resource *res_irq;
struct resource *res_mem;
unsigned int *key_data;
//read按键
ssize_t key_read(struct file *filp, char __user *buf, size_t size, loff_t *pos)
{
wait_event(key_q,key_num);
printk("<0> in kernel:key num is%d\n",key_num);
//返回内核的给用户
copy_to_user(buf,&key_num,4);
key_num=0;//清空按键
return 4;
}
void work1_func(struct work_struct *work)
{
//启动定时器 100毫秒超时=HZ/10,HZ=1秒。jiffies是系统当前时间
mod_timer(&key_timer,jiffies+HZ/10);
}
void key_timer_func(unsigned long data)
{ //定时器超时的函数需要修改,需要判断是哪个按键超时
unsigned int key_val;
//超时的时候,就要读取data
key_val=readw(key_data+1)&0x01;//读出一个按键EINT0的值。
//当他被按下,就是低电平的时候,就是被按下了。才是有效的按键
if(0==key_val)//真正按下
key_num=1;//读取按键编号
key_val=readw(key_data+1)&0x02;//读出一个按键EINT1的值。
//当他被按下,就是低电平的时候,就是被按下了。才是有效的按键
if(0==key_val)//真正按下
key_num=2;
//当有数据的时候,需要唤醒
wake_up(&key_q);
}
irqreturn_t key_int(int irq, void *dev_id)
{
//1.检测是否发生了按键中断
//2.清除已经发生的按键中断
//前面的都是硬件相关的工作,必须在中断里面执行
//下面是硬件无关的工作,我们把它提到中断以外的work1_func函数去处理。
//3.打印按键值
schedule_work(work1);
return 0;
}
void key_hw_init()
{
unsigned short data;
data = readw(key_data);
data &= ~0b1111;//增加一个按键
data |= 0b1010;
writew(data,key_data);
}
int key_open(struct inode *node, struct file *filp)
{
return 0;
}
struct file_operations key_fops =
{
.open = key_open,
.read = key_read,//增加了读取操作
};
struct miscdevice key_miscdevice =
{
.minor = 200,
.name = "6410key",
.fops = &key_fops,
};
static int __devinit key_probe(struct platform_device *pdev)
{
int ret;
int size;
ret=misc_register(&key_miscdevice);
if(0!=ret)
printk("<0>register fail!\n");
//注册中断处理程序
res_irq=platform_get_resource(pdev,IORESOURCE_IRQ,0);
request_irq(res_irq->start,key_int, IRQF_TRIGGER_FALLING,"6410key",0);
//增加一个按键的支持
request_irq(res_irq->end,key_int, IRQF_TRIGGER_FALLING,"6410key",0);
res_mem=platform_get_resource(pdev,IORESOURCE_IRQ,0);
size=res_mem->end-res_mem->start +1;
key_data=ioremap(res_mem->start,size);
//硬件初始化
key_hw_init();//相应的位进行设置
//2. 创建工作
work1 = kmalloc(sizeof(struct work_struct),GFP_KERNEL);
INIT_WORK(work1, work1_func);
//定时器初始化
init_timer(&key_timer);
key_timer.function=key_timer_func;
//注册定时器
add_timer(&key_timer);
//初始化等待队列
init_waitqueue_head(&key_q);
}
static int __devexit key_remove(struct platform_device *pdev)
{
return misc_deregister(&key_miscdevice);
}
//平台总线驱动结构
struct platform_driver key_driver=
{
.driver = {
.name = "my-kye",//与设备的名字一致
},
.probe = key_probe,
.remove = __devexit_p(key_remove),
};
static int button_init()
{
//注册平台驱动
return platform_driver_register(&key_driver);
}
static void button_exit()
{
platform_driver_unregister(&key_driver);
}
module_init(button_init);
module_exit(button_exit);
/*优化:多一个中断,gpio也进行多按键初始化,中断产生的时候要判断是哪个按键产生的中断。*/
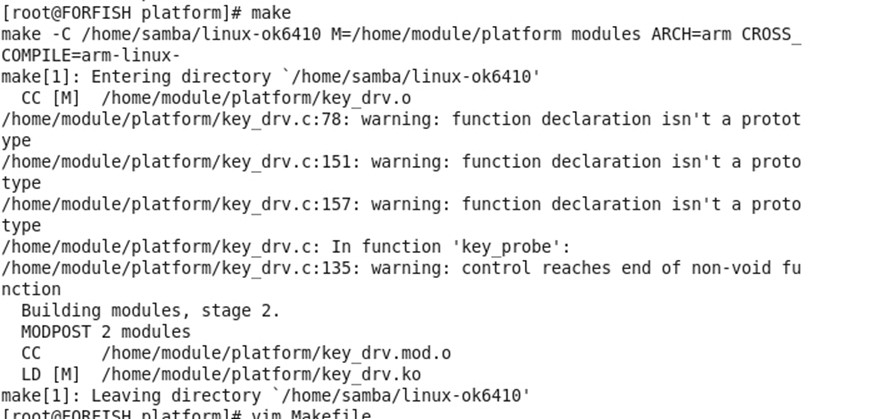
Make的结果:
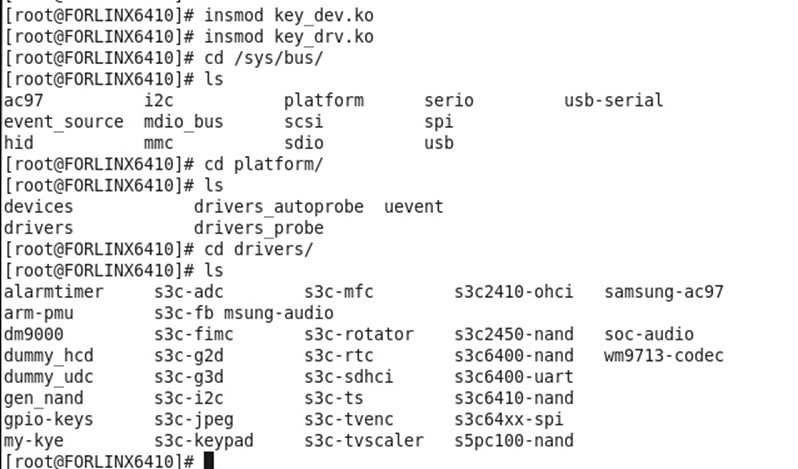
运行的结果如下,找到了总线驱动:
以上是关于9.平台总线驱动设计的主要内容,如果未能解决你的问题,请参考以下文章