tenginx+ImageMagick+Lua+FastDfs分布式自动缩略图
Posted
tags:
篇首语:本文由小常识网(cha138.com)小编为大家整理,主要介绍了tenginx+ImageMagick+Lua+FastDfs分布式自动缩略图相关的知识,希望对你有一定的参考价值。
1.安装ImageMagick图片处理软件
[[email protected] ~]# tar xvf ImageMagick-6.4.0-0.tar.gz
[[email protected] ~]# cd ImageMagick-6.4.0
[[email protected] ImageMagick-6.4.0]# ./configure --prefix=/usr/local/ImageMagick-6.4.0
[[email protected] ImageMagick-6.4.0]# make && make install
[[email protected] ImageMagick-6.4.0]#
2.安装lua脚本语言
[[email protected] ~]# yum install lua* -y
3.安装tenginx服务(必须先下载ngx_cache_purge和fastdfs-nginx-module模块)
[[email protected] ~]# tar xvf tengine-2.1.0.tar.gz
[[email protected] ~]# cd tengine-2.1.0
[[email protected] tengine-2.1.0]# --prefix=/usr/local/tenginx-2.1.0 --with-file-aio --with-poll_module --with-pcre=/usr/local/pcre-8.37 --without-http_autoindex_module --without-http_ssi_module --without-maingx_cache_purgel_pop3_module --without-mail_smtp_module --without-mail_imap_module --with-http_lua_module --with-ld-opt=-Wl,-rpath,/usr/local/lib --with-http_realip_module --with-http_concat_module --add-module=/root/ngx_cache_purge-1.6 --add-module=/root/fastdfs-nginx-module/src
[[email protected] tengine-2.1.0]# make -j4 && make install
[[email protected] tengine-2.1.0]# vim /usr/local/tenginx-2.1.0/conf/nginx.conf
server {
listen 800;
server_name localhost;
location / {
root html ;
index index.html index.htm;
}
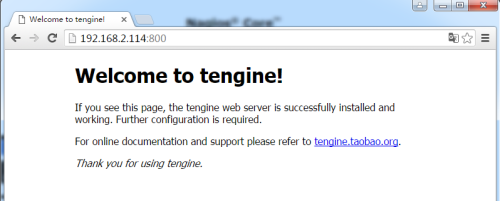
[[email protected] tengine-2.1.0]# /usr/local/tenginx-2.1.0/sbin/nginx
4.安装fastDFS分布式文件系统
fastDFS必须有三个节点,一个tracker节点,两个storage节点.tracker节点是管理,监控,维护两个数据节点,文件上传.storage数据节点是做文件存储,校验,容灾.tenginx必须装在storage节点上.
node1节点:(tracker节点)
[[email protected] ~]# tar xvf fastdfs-5.04.tar.gz
[[email protected] ~]# cd fastdfs-5.04
[[email protected] fastdfs-5.04]# ./make.sh
[[email protected] fastdfs-5.04]# ./make.sh install
[[email protected] ~]# vim /etc/fdfs/tracker.conf
[[email protected] ~]# egrep -v ‘^#|^$‘ /etc/fdfs/tracker.conf
disabled=false --不禁用服务
bind_addr=192.168.2.112 --本机的IP地址
port=22122 --服务端口
connect_timeout=30 --客户端会话连接超时
network_timeout=60 --网络连接超时
base_path=/home/fastdfs --存储目录
max_connections=256 --最大连接数
accept_threads=2 --访问线程
work_threads=4 --工作线程
store_group=group1 --组名
download_server=0 --下载方式(0 是轮循,1 是指定节点)
reserved_storage_space = 10% --预留存储空间
log_level=info --日志级别
run_by_group= --以哪个用户组运行
run_by_user=
allow_hosts=* --允许哪个IP访问
http.server_port=800 --web访问的端口
http.check_alive_interval=30
http.check_alive_type=tcp
http.check_alive_uri=/status.html
[[email protected] ~]# egrep -v ‘^#|^$‘ /etc/fdfs/client.conf
connect_timeout=30
network_timeout=60
base_path=/home/fastdfs --存储目录
tracker_server=192.168.2.112:22122 --tracker节点的IP和端口
log_level=info
use_connection_pool = false
connection_pool_max_idle_time = 3600
load_fdfs_parameters_from_tracker=false
use_storage_id = false
storage_ids_filename = storage_ids.conf
http.tracker_server_port=800
[[email protected] ~]#
node2和node3节点:(storage节点)
[[email protected] ~]# tar xvf fastdfs-5.04.tar.gz
[[email protected] ~]# cd fastdfs-5.04
[[email protected] fastdfs-5.04]# ./make.sh
[[email protected] fastdfs-5.04]# ./make.sh install
[[email protected] fastdfs-5.04]# egrep -v ‘^#|^$‘ /etc/fdfs/storage.conf
disabled=false
group_name=group1
bind_addr=192.168.2.114 --本机IP地址
client_bind=true
port=23000 --storage节点的端口
connect_timeout=30
network_timeout=60
heart_beat_interval=30
stat_report_interval=60
base_path=/home/fastdfs --存储目录
max_connections=256
buff_size = 256KB
accept_threads=1
work_threads=4
disk_rw_separated = true
disk_reader_threads = 1
disk_writer_threads = 1
sync_wait_msec=50
sync_interval=0
sync_start_time=00:00
sync_end_time=23:59
write_mark_file_freq=500
store_path_count=1
store_path0=/home/fastdfs
subdir_count_per_path=256
tracker_server=192.168.2.112:22122 --tracker节点的IP和端口
log_level=info
run_by_group=
run_by_user=
allow_hosts=*
file_distribute_path_mode=0
file_distribute_rotate_count=100
fsync_after_written_bytes=0
sync_log_buff_interval=10
sync_binlog_buff_interval=10
sync_stat_file_interval=300
thread_stack_size=512KB
upload_priority=10
if_alias_prefix=
check_file_duplicate=0
file_signature_method=hash
key_namespace=FastDFS
keep_alive=0
use_access_log = false
rotate_access_log = false
access_log_rotate_time=00:00
rotate_error_log = false
error_log_rotate_time=00:00
rotate_access_log_size = 0
rotate_error_log_size = 0
file_sync_skip_invalid_record=false
use_connection_pool = false
connection_pool_max_idle_time = 3600
http.domain_name=
http.server_port=800
[[email protected] fastdfs-5.04]# cd
[[email protected] ~]# tar xvf fastdfs-nginx-module_v1.16.tar.gz --加载fastdfs-nginx-module模块配置文件
[[email protected] ~]# cp -a fastdfs-nginx-module/src/mod_fastdfs.conf /etc/fdfs/
[[email protected] ~]# egrep -v ‘^$|^#‘ /etc/fdfs/mod_fastdfs.conf
connect_timeout=2
network_timeout=30
base_path=/home/fastdfs
load_fdfs_parameters_from_tracker=true
storage_sync_file_max_delay = 86400
use_storage_id = false
storage_ids_filename = storage_ids.conf
tracker_server=192.168.2.112:22122 --tracker节点的IP和端口
storage_server_port=23000
group_name=group1
url_have_group_name = true
store_path_count=1
store_path0=/home/fastdfs
log_level=info
log_filename=
response_mode=proxy
if_alias_prefix=
flv_support = true
flv_extension = flv
group_count = 0
[group1]
group_name=group1
storage_server_port=23000
store_path_count=1
store_path0=/home/fastdfs
[[email protected] ~]# cp fastdfs-5.04/init.d/fdfs_storaged /etc/init.d/
[[email protected] ~]# chkconfig --add fdfs_storaged
[[email protected] ~]# chkconfig fdfs_storaged on
node3同node2配置是一样的,只是绑定的IP不一样而已
5.在storage节点1上修改tenginx的配置文件
[[email protected] ~]# vim /usr/local/tenginx-2.1.0/conf/nginx.conf
server {
listen 800;
server_name localhost;
location /lua {
default_type ‘text/plain‘;
content_by_lua ‘ngx.say("hello,lua")‘;
}
location ~* /group1/M00/ {
ngx_fastdfs_module;
set $needCreateImg 0;
if ( !-f $request_filename) {
set $needCreateImg "${needCreateImg}1";
}
if ($uri ~* "/group1/M00/(\d+)/(\d+)/([A-Za-z0-9_-]+).(gif|jpg|jpeg|png).(\d+x\d+).(gif|jpg|jpeg|png)") {
set $needCreateImg "${needCreateImg}2";
set $conUri "/$1/$2/$3.$4.$5.$6";
}
if ($needCreateImg = "012") {
set $image_root "/home/fastdfs/data";
set $file "$image_root$conUri";
rewrite_by_lua ‘
local index = string.find(ngx.var.conUri, "([0-9]+)x([0-9]+)");
local originalUri = string.sub(ngx.var.conUri, 0, index-2);
local area = string.sub(ngx.var.conUri, index);
index = string.find(area, "([.])");
area = string.sub(area, 0, index-1);
function table.contains(table, element)
for _, value in pairs(table) do
if value == element then
return true
end
end
return false
end
local c = "/usr/local/GraphicsMagick-1.3.23/bin/gm convert " .. ngx.var.image_root .. originalUri .. " -thumbnail " .. area .. " - ";
local f = assert(io.popen(c, "r"))
local s = assert(f:read("*a"))
f:close()
ngx.say(s) ‘;
}
alias /home/fastdfs/data/;
}
[[email protected] ~]# /usr/local/tenginx-2.1.0/sbin/nginx -s reload
ngx_http_fastdfs_set pid=5233
[[email protected] ~]#
6.在tracker节点上传图片
[[email protected] ~]# fdfs_test /etc/fdfs/client.conf upload 26.jpg
This is FastDFS client test program v5.02
Copyright (C) 2008, Happy Fish / YuQing
FastDFS may be copied only under the terms of the GNU General
Public License V3, which may be found in the FastDFS source kit.
Please visit the FastDFS Home Page http://www.csource.org/
for more detail.
[2016-09-09 17:07:03] DEBUG - base_path=/home/fastdfs, connect_timeout=30, network_timeout=60, tracker_server_count=1, anti_steal_token=0, anti_steal_secret_key length=0, use_connection_pool=0, g_connection_pool_max_idle_time=3600s, use_storage_id=0, storage server id count: 0
tracker_query_storage_store_list_without_group:
server 2. group_name=, ip_addr=192.168.2.114, port=23000
server 3. group_name=, ip_addr=192.168.2.146, port=23000
group_name=group1, ip_addr=192.168.2.114, port=23000
storage_upload_by_filename
group_name=group1, remote_filename=M00/00/00/wKgCclfSe76AYHqXAAB9uxsIydU803.jpg
source ip address: 192.168.2.114
file timestamp=2016-09-09 17:07:10
file size=32187
file crc32=453560789
example file url: http://192.168.2.114:800/group1/M00/00/00/wKgCclfSe76AYHqXAAB9uxsIydU803.jpg
storage_upload_slave_by_filename
group_name=group1, remote_filename=M00/00/00/wKgCclfSe76AYHqXAAB9uxsIydU803_big.jpg
source ip address: 192.168.2.114
file timestamp=2016-09-09 17:07:10
file size=32187
file crc32=453560789
example file url: http://192.168.2.114:800/group1/M00/00/00/wKgCclfSe76AYHqXAAB9uxsIydU803_big.jpg
[[email protected] ~]#
7.访问图片并切图
http://192.168.2.114:800/group1/M00/00/00/wKgCclfSe76AYHqXAAB9uxsIydU803.jpg
http://192.168.2.114:800/group1/M00/00/00/wKgCclfSe76AYHqXAAB9uxsIydU803.jpg_200x200.jpg
http://192.168.2.114:800/group1/M00/00/00/wKgCclfSe76AYHqXAAB9uxsIydU803.jpg_400x400.jpg
本文出自 “一起走过的日子” 博客,请务必保留此出处http://tongcheng.blog.51cto.com/6214144/1851176
以上是关于tenginx+ImageMagick+Lua+FastDfs分布式自动缩略图的主要内容,如果未能解决你的问题,请参考以下文章
搭建带lua模块的nginx调用ImageMagick工具实现实时剪切缩放图片功能
使用ImageMagick调整索引的PNG图像大小,同时保留颜色贴图


