eclipse上传代码到gitbub
Posted MaxPanda0206
tags:
篇首语:本文由小常识网(cha138.com)小编为大家整理,主要介绍了eclipse上传代码到gitbub相关的知识,希望对你有一定的参考价值。
作为一名程序员,自己在学习时经常需要写代码,但是由于换电脑或其他原因这些代码可能丢失,不方便以后的查看和复习。如果有一个版本服务器,不仅能把上传代码,在需要是可以随时下载,而且能实现 版本控制,查看每个版本做了哪些修改。这时GitHub是个不错的选择。1. 要使用GitHub首先需要注册一个GitHub账号,并创建一个Repository。这已基本成为每个程序员的必备技能,在此就不赘述了。
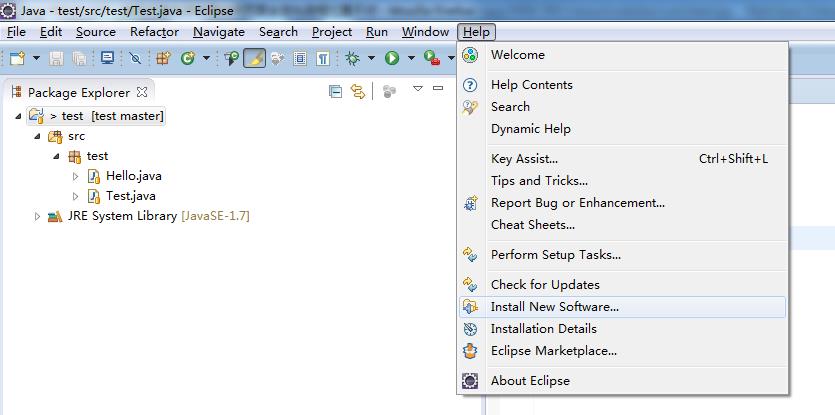
2. 在eclipse上安装 Git插件
首先选择Help -> Install New Software:
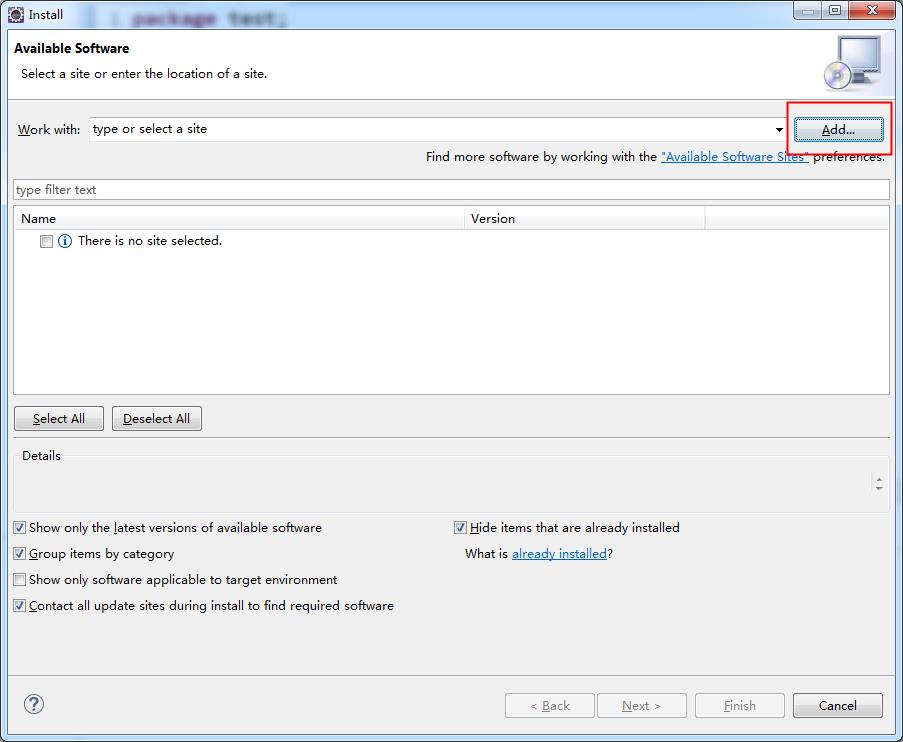
弹出如下窗口,点击Add按钮:
弹出如下窗口,输入相应内容:
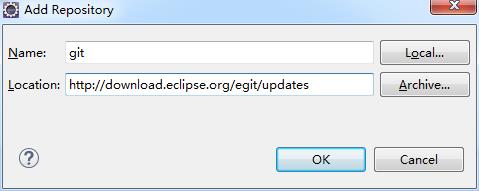
Name的值可以任意输入,建议见名知义;Location的值为
http://download.eclipse.org/egit/updates。
往下选择默认的就ok了。安装完成之后需要重启eclipse。
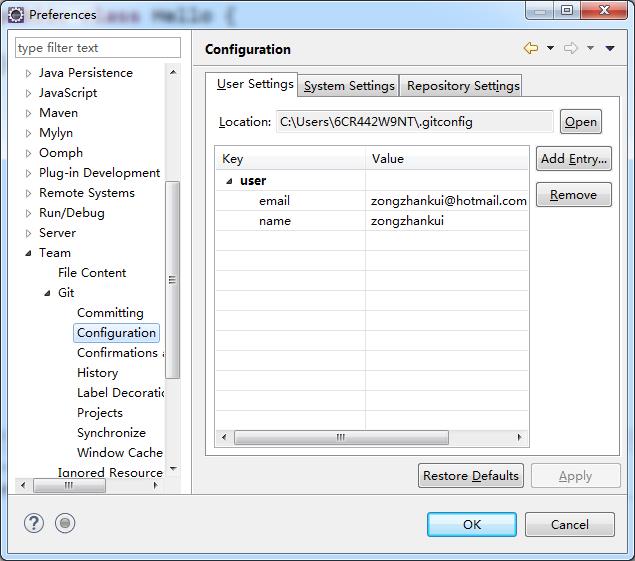
需要在Window -> Preferences -> Team -> Git -> Configuration中配置GitHub的用户信息。
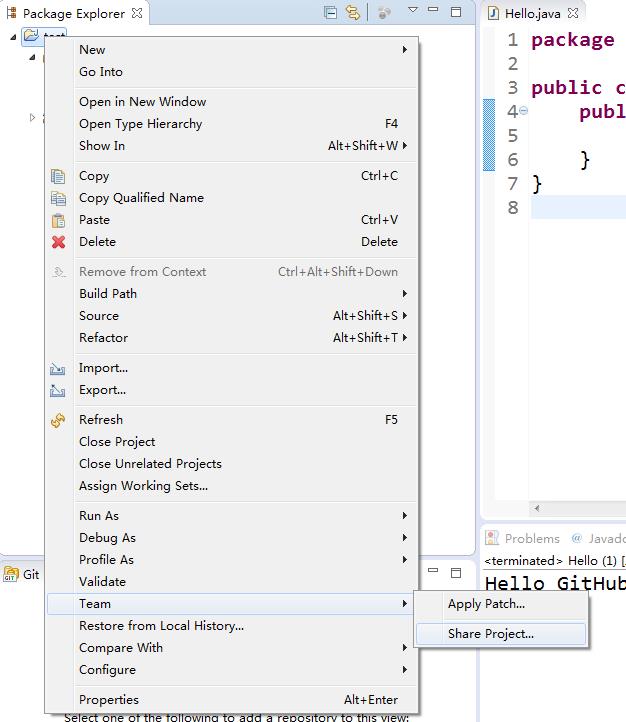
3. 在eclipse中创建 Java项目(本文以Java项目为例,其他项目与此类似)。在项目名字上右键选择Team -> Share Project:
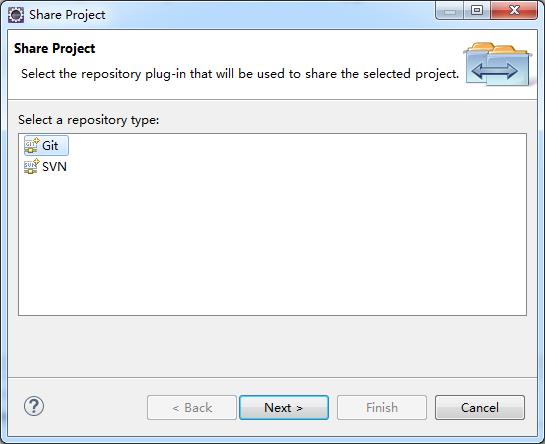
选择Git,点击下一步:
第一次时需要勾选
Use or create repository in parent folder of project
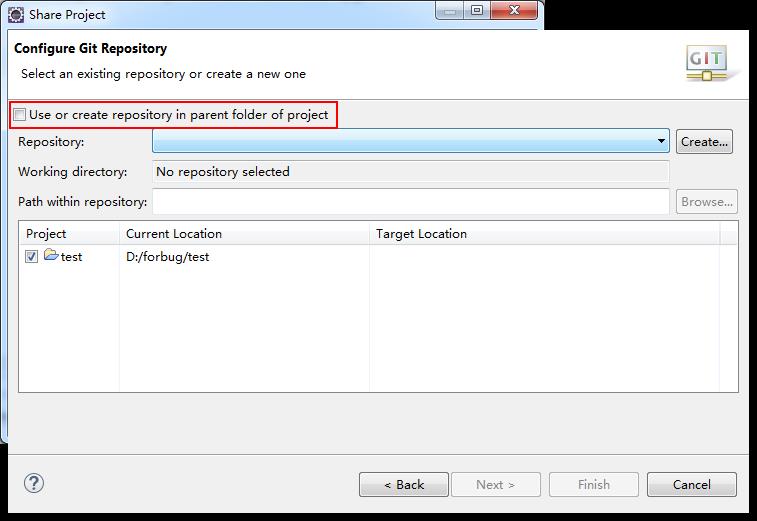
选中项目,点击
Create Repository
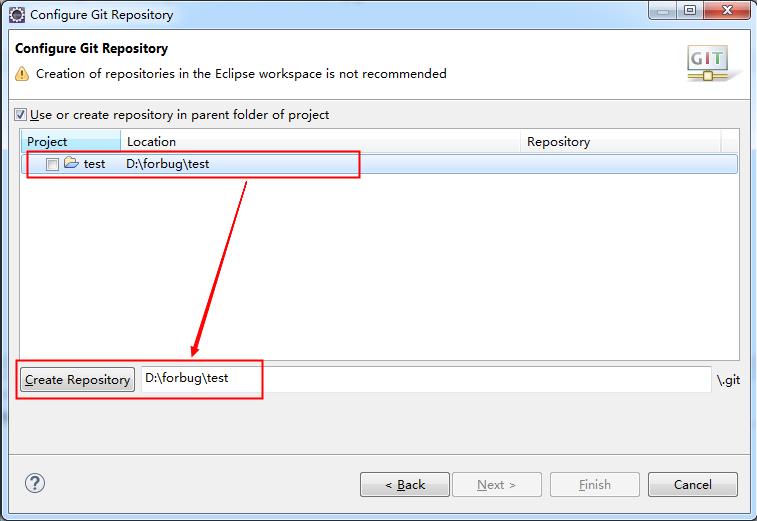
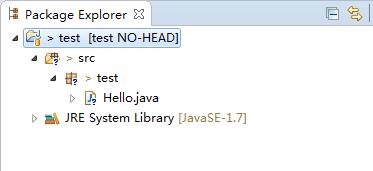
完成后就在本机上创建了一个Git仓库。此时项目中文件会显示问号小图标。
此时就可以把代码提交到本地仓库了,在项目上右键选择Team -> Commit
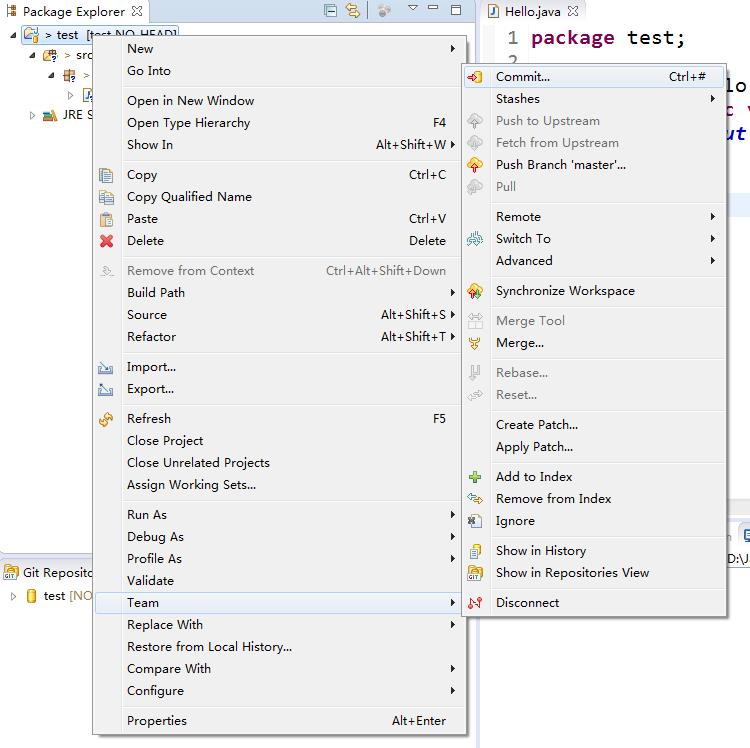
可以选择某个文件提交,也可以选择全部提交。
Commit message为必填项。
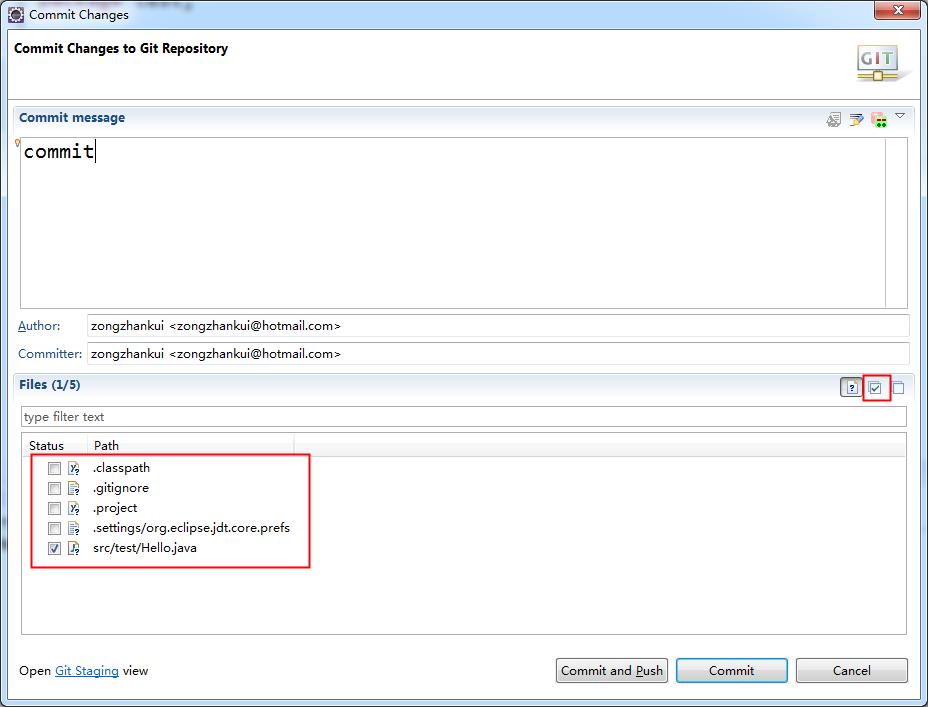
点击
Commit按钮就可以把代码提交到本地仓库。当然也可以点击
Commit and Push按钮提交代码到本地仓库并上传至GitHub。
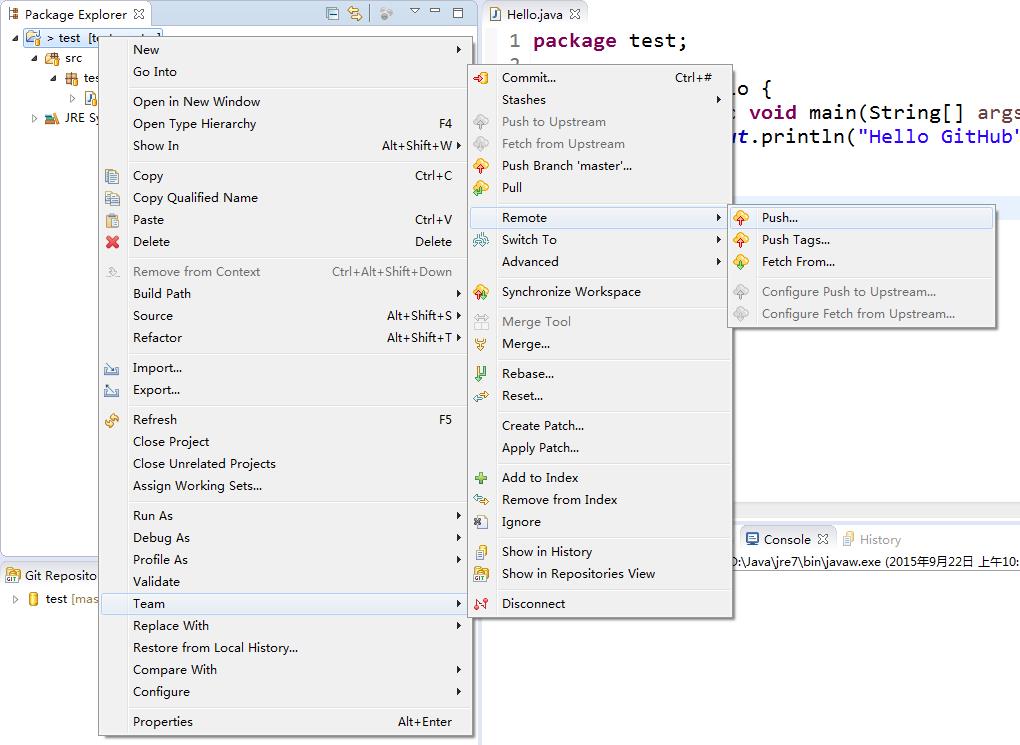
如果点击的是Commit按钮,接下来就要把代码Push到GitHub上。右键项目选择Team -> Remote -> Push
输入之前在GitHub上创建的Repository的URI
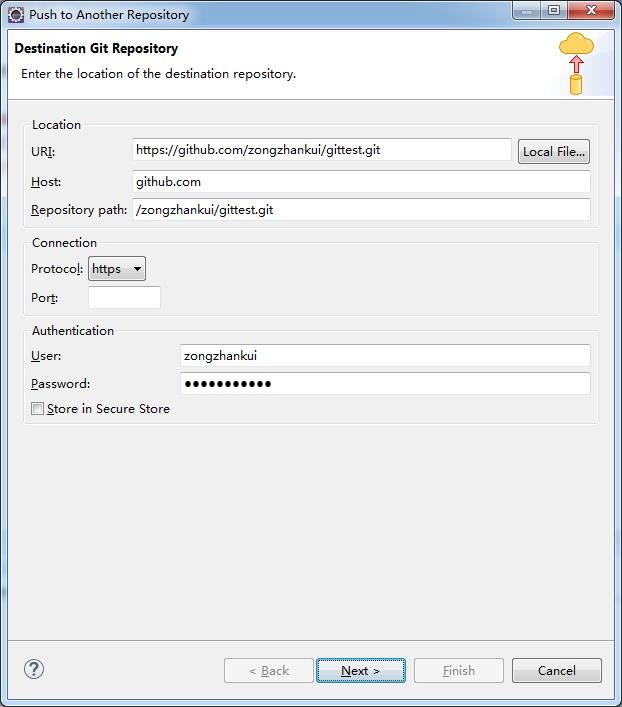
Host和Repository path会自动生成,不需要输入。User和Password需要输入。
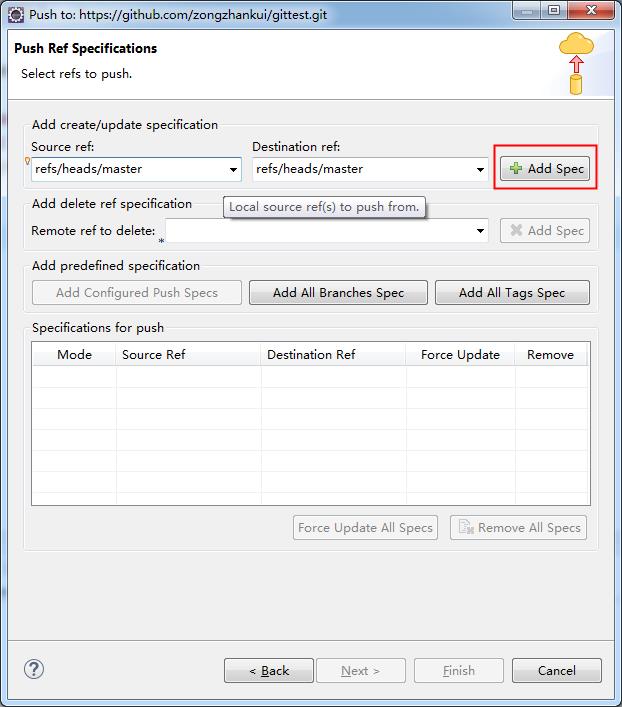
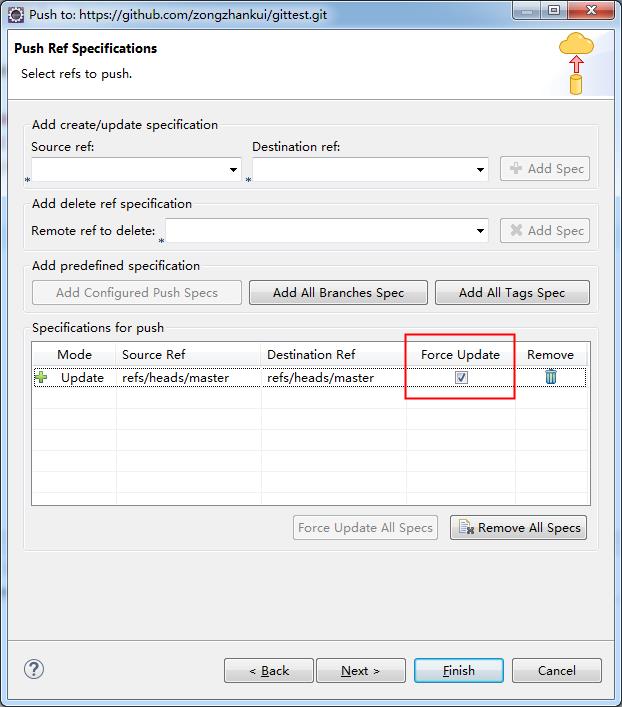
下一步选择分支,此处选择master而不是HEAD。
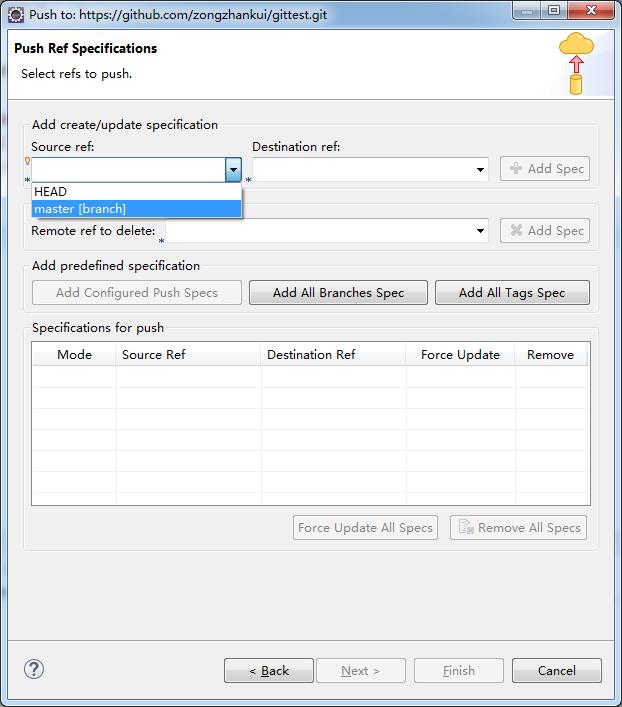
然后点击Add Spec
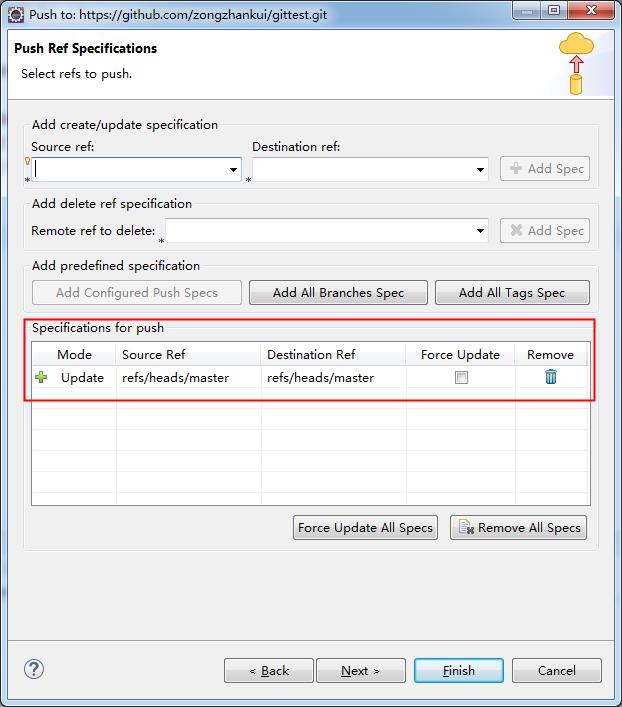
点击完成,上传成功。此时在GitHub上查看代码是否已经上传。
如果没有上传成功,可能是上一步没有勾选
Force Update。建议每次上传都勾选。
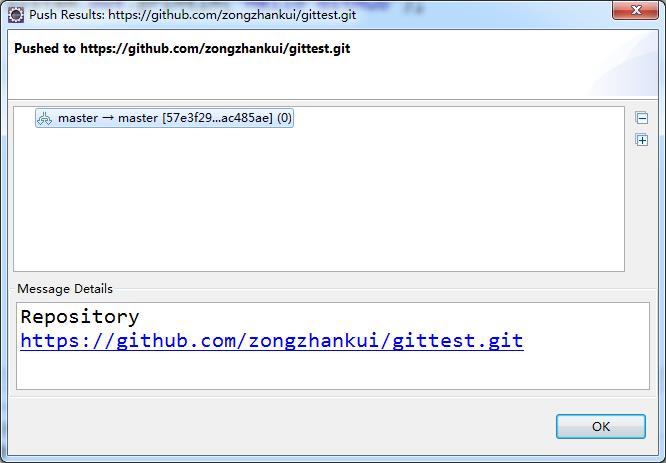
至此全部完成。
以上是关于eclipse上传代码到gitbub的主要内容,如果未能解决你的问题,请参考以下文章