安卓第一个小项目
Posted 萍2樱释
tags:
篇首语:本文由小常识网(cha138.com)小编为大家整理,主要介绍了安卓第一个小项目相关的知识,希望对你有一定的参考价值。
此博客链接:https://www.cnblogs.com/ping2yingshi/p/13112191.html
学习链接:https://blog.csdn.net/ficey/article/details/80281981
1新建一个工程,打开activity.main.xml,选择红框部分,删除hello。

2.新建两个按钮,直接拖拽就可以。
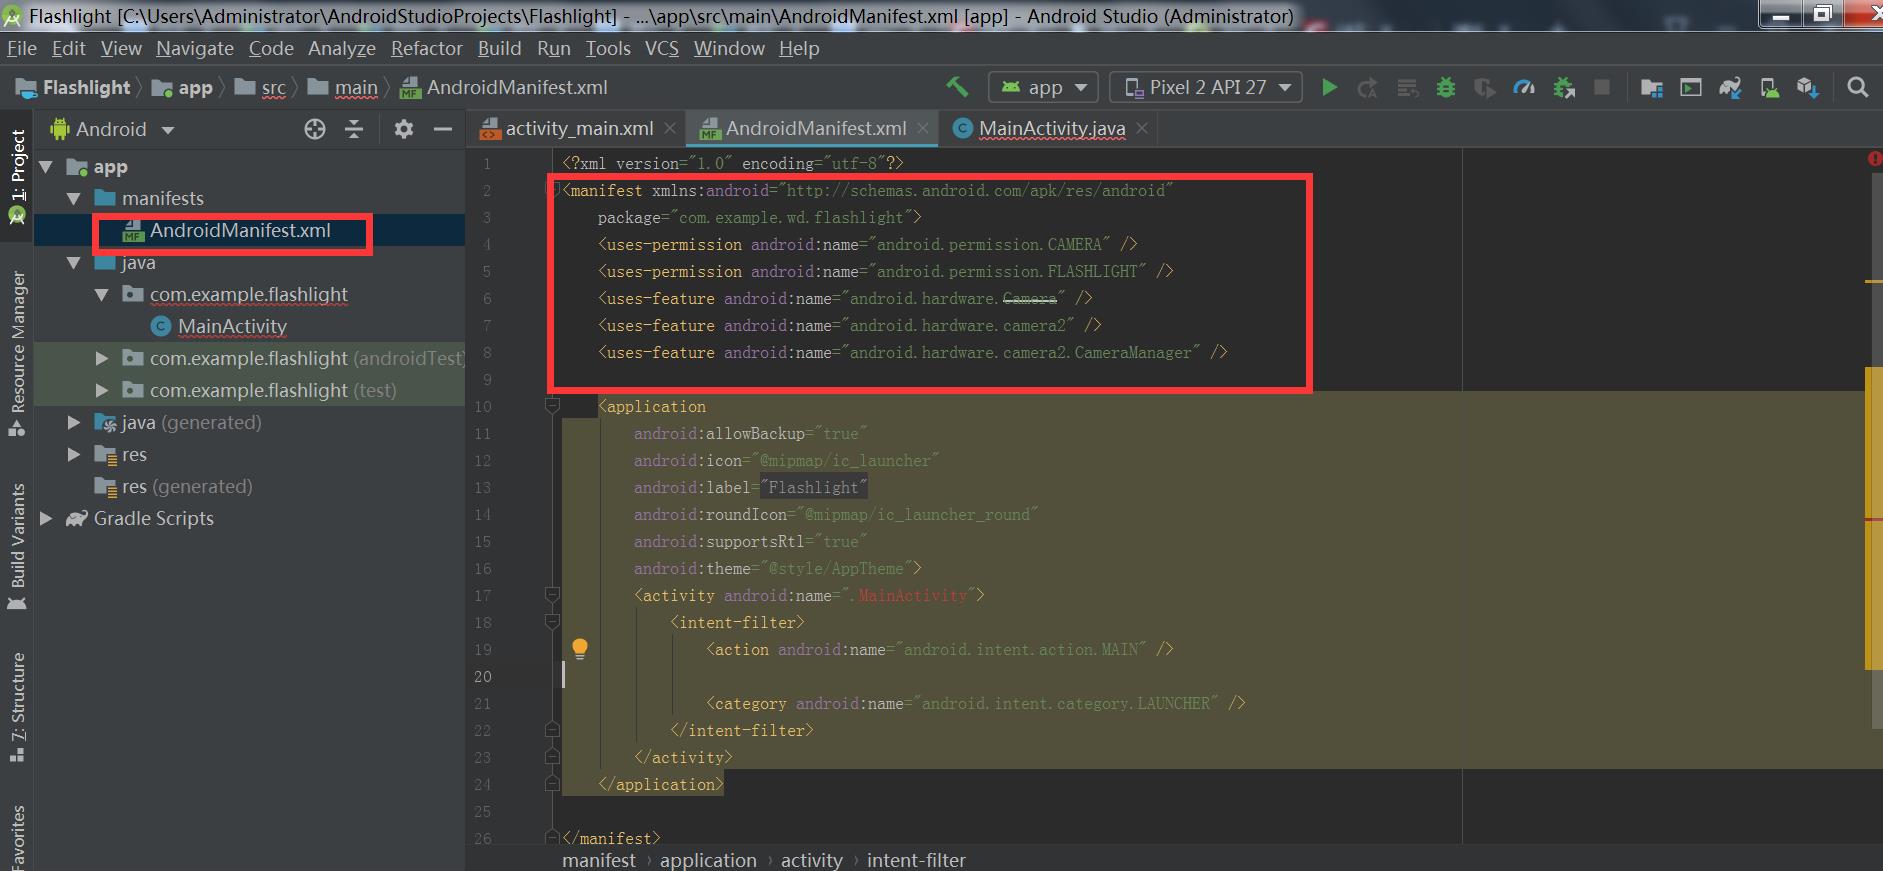
3.在androidManifest.xml中添加源码,注意只是添加代码。原有的东西不要动。
<?xml version="1.0" encoding="utf-8"?>
<manifest xmlns:android="http://schemas.android.com/apk/res/android"
    package="com.example.wd.flashlight">
    <uses-permission android:name="android.permission.CAMERA" />
    <uses-permission android:name="android.permission.FLASHLIGHT" />
    <uses-feature android:name="android.hardware.Camera" />
    <uses-feature android:name="android.hardware.camera2" />
    <uses-feature android:name="android.hardware.camera2.CameraManager" />
4.在activity_main.xml中复制如下代码。对,全删了,把你的代码全删了在复制。
<?xml version="1.0" encoding="utf-8"?>
<LinearLayout xmlns:android="http://schemas.android.com/apk/res/android"
    xmlns:app="http://schemas.android.com/apk/res-auto"
    xmlns:tools="http://schemas.android.com/tools"
    android:layout_width="match_parent"
    android:layout_height="match_parent"
    tools:context=".MainActivity">

    <Button
        android:id="@+id/button"
        android:layout_width="wrap_content"
        android:layout_height="wrap_content"
        android:layout_marginStart="128dp"
        android:layout_marginLeft="128dp"
        android:layout_marginTop="148dp"
        android:text="开"
        app:layout_constraintStart_toStartOf="parent"
        app:layout_constraintTop_toTopOf="parent" />

    <ToggleButton
        android:id="@+id/toggleButton"
        android:layout_width="wrap_content"
        android:layout_height="wrap_content"
        android:layout_marginTop="56dp"
        android:text="ToggleButton"
        app:layout_constraintStart_toStartOf="@+id/button"
        app:layout_constraintTop_toBottomOf="@+id/button" />
</LinearLayout>

如何打开activity_main.xml如下图。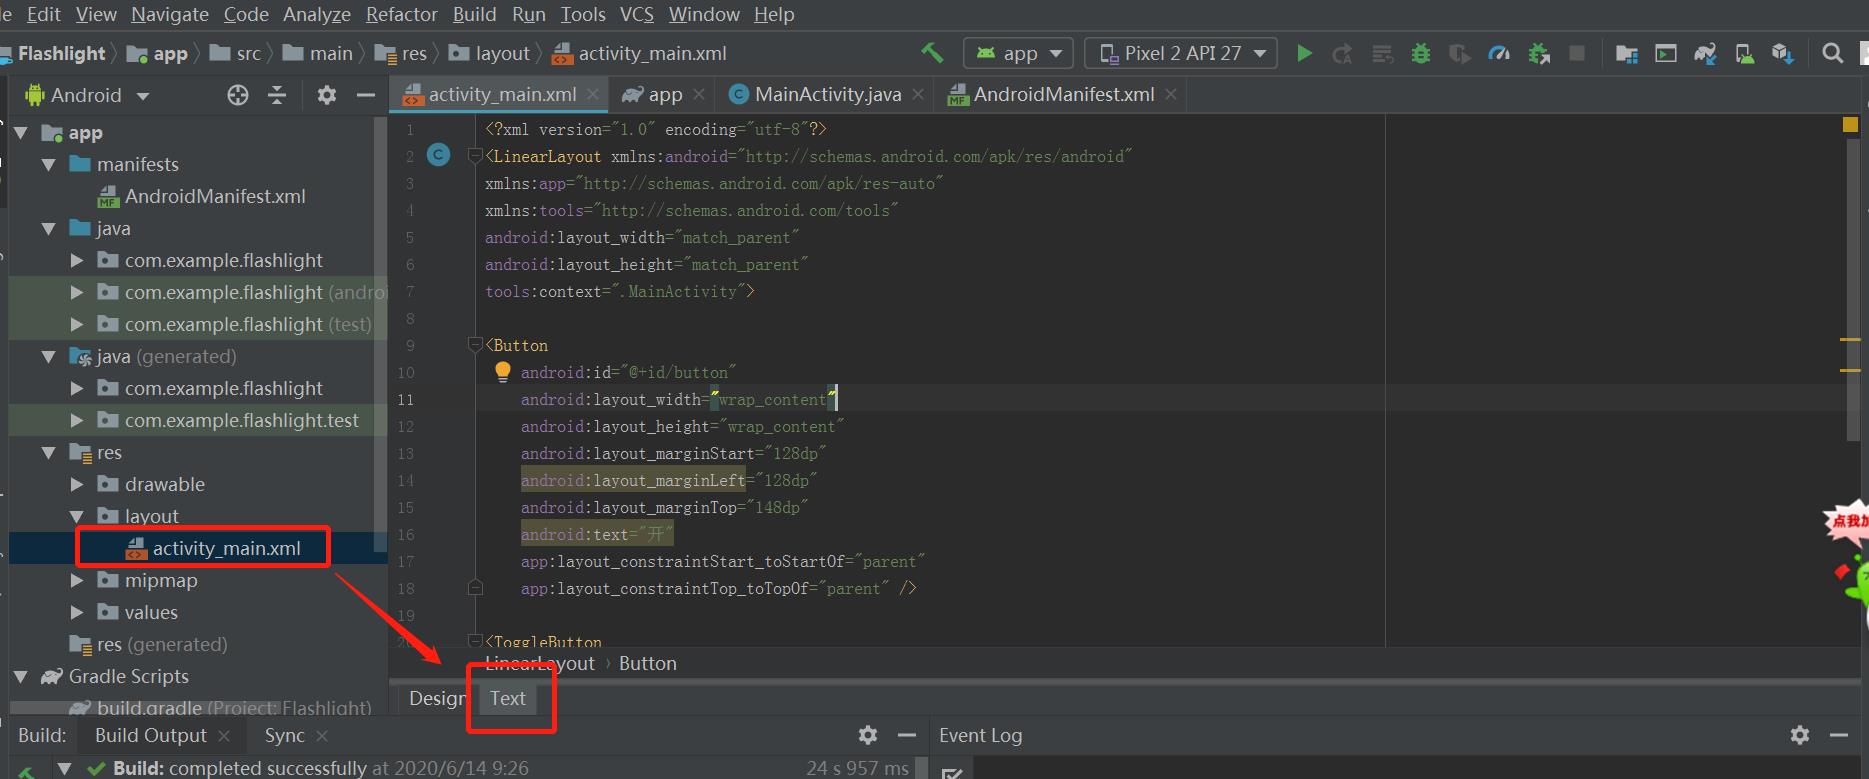
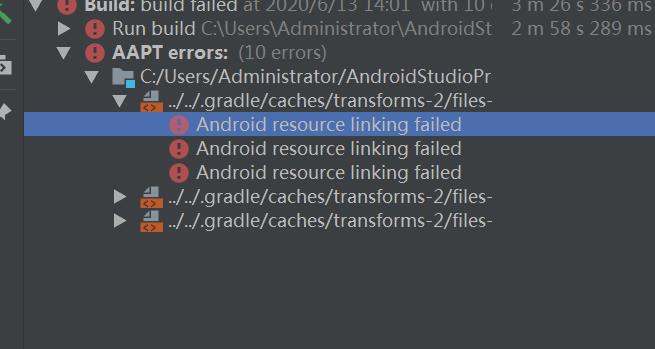
报错如下的错误,这里是因为你没有选择真机运行或者模拟机运行程序。
在下面的MainActivity.java中复制替换代码

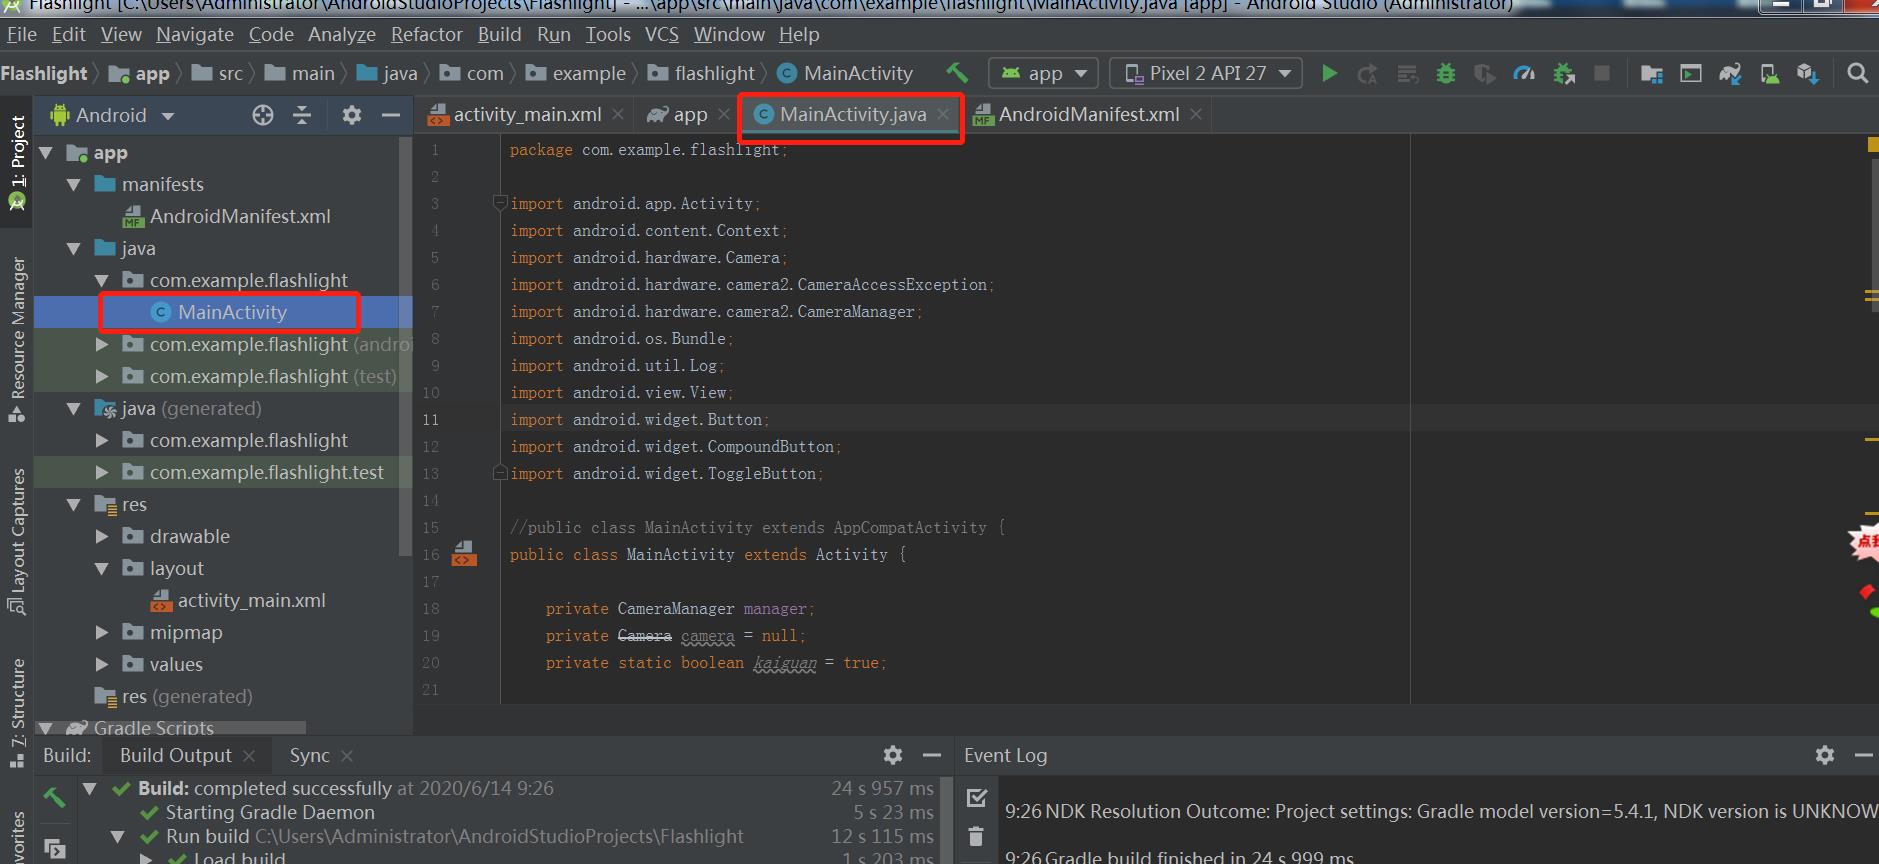
代码:
package com.example.flashlight;

import android.app.Activity;
import android.content.Context;
import android.hardware.Camera;
import android.hardware.camera2.CameraAccessException;
import android.hardware.camera2.CameraManager;
import android.os.Bundle;
import android.util.Log;
import android.view.View;
import android.widget.Button;
import android.widget.CompoundButton;
import android.widget.ToggleButton;

//public class MainActivity extends AppCompatActivity {
public class MainActivity extends Activity {

    private CameraManager manager;
    private Camera camera = null;
    private static boolean kaiguan = true;

    @Override
    protected void onCreate(Bundle savedInstanceState) {
        super.onCreate(savedInstanceState);
        setContentView(R.layout.activity_main);
        //super.onCreate(savedInstanceState);

        manager = (CameraManager)getSystemService(Context.CAMERA_SERVICE);

        try{
            String [] cameraList = manager.getCameraIdList();
            for (String str:cameraList
            ) {
                Log.d("List", str);
            }
        }catch (CameraAccessException e){
            Log.e("error",e.getMessage());
        }
        Button open_btn = (Button)findViewById(R.id.button);

        open_btn.setOnClickListener(new View.OnClickListener() {
            @Override
            public void onClick(View view) {
                try{
                    manager.setTorchMode("0",true);
                }catch(CameraAccessException e){
                    e.printStackTrace();
                }
            }
        });

        Button close_btn = (Button) findViewById(R.id.button);
        close_btn.setOnClickListener(closeOnClickListener);

        ToggleButton toggle_btn = (ToggleButton)findViewById(R.id.toggleButton);
        toggle_btn.setOnCheckedChangeListener(new CompoundButton.OnCheckedChangeListener(){
            //@Override
            public void onCheckedChanged(CompoundButton buttonView, boolean isChecked){
                try{
                    manager.setTorchMode("0",isChecked);
                }catch (CameraAccessException e){
                    e.printStackTrace();
                }
            }
        });
    }

    private View.OnClickListener closeOnClickListener = new View.OnClickListener() {
        @Override
        public void onClick(View v) {
            try{
                manager.setTorchMode("0",false);
            }catch (CameraAccessException e){
                e.printStackTrace();
            }
        }
    };
}
下面问题可以参考此博客:https://blog.csdn.net/ShiXinXin_Harbour/article/details/103923893
最后可能没有成功,那你看看你小象中的参数对吗、调不好就复制下面代码替换你的

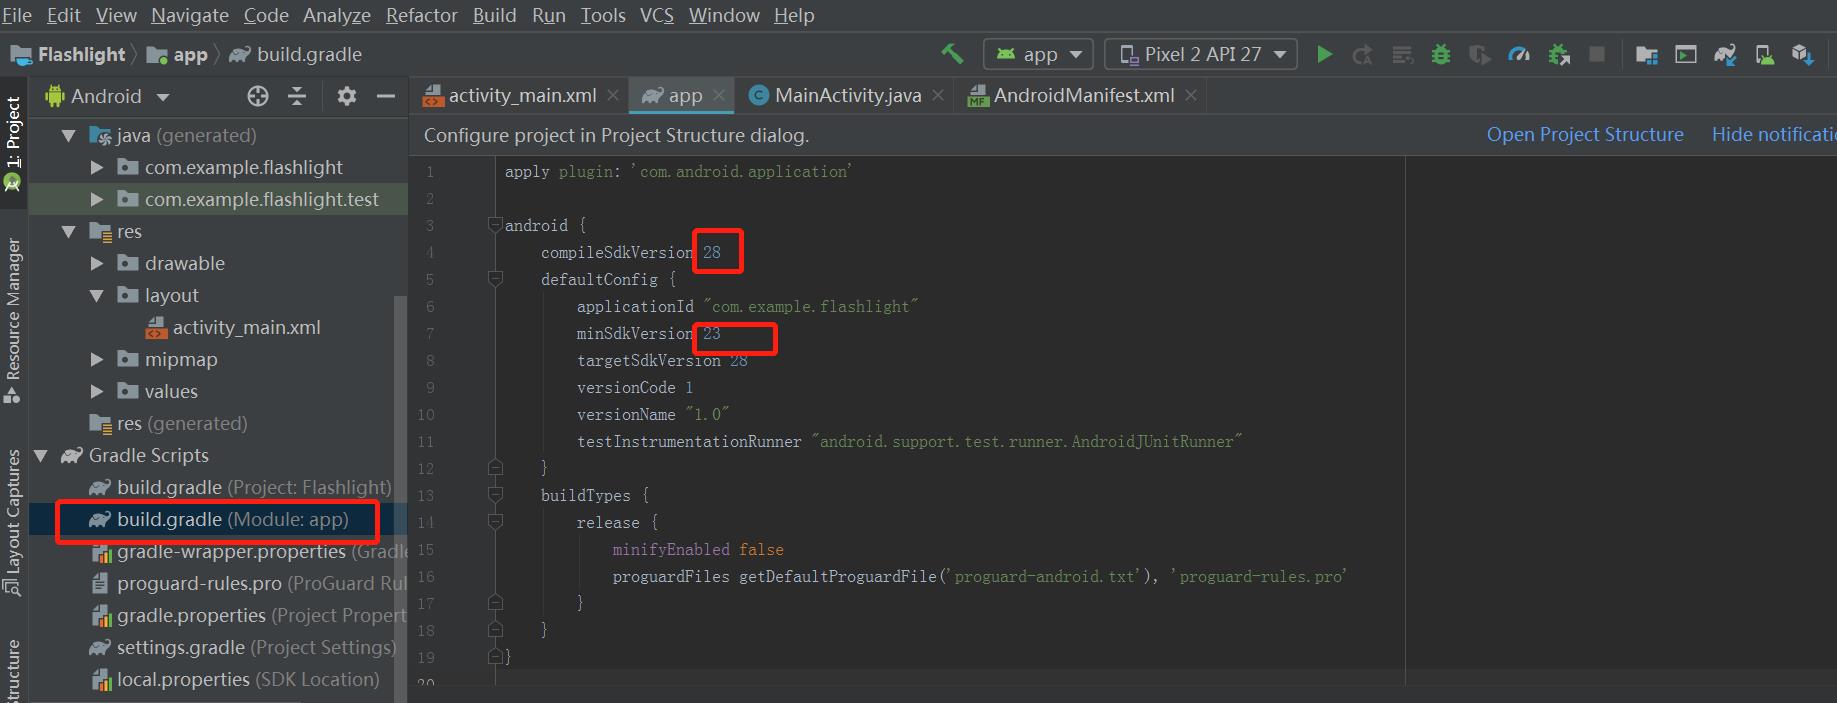
apply plugin: \'com.android.application\'

android {
    compileSdkVersion 28
    defaultConfig {
        applicationId "com.example.flashlight"
        minSdkVersion 23
        targetSdkVersion 28
        versionCode 1
        versionName "1.0"
        testInstrumentationRunner "android.support.test.runner.AndroidJUnitRunner"
    }
    buildTypes {
        release {
            minifyEnabled false
            proguardFiles getDefaultProguardFile(\'proguard-android.txt\'), \'proguard-rules.pro\'
        }
    }
}

dependencies {
    implementation fileTree(dir: \'libs\', include: [\'*.jar\'])

    implementation \'androidx.appcompat:appcompat:1.0.2\'
    implementation \'androidx.constraintlayout:constraintlayout:1.1.3\'
    testImplementation \'junit:junit:4.12\'
    androidTestImplementation \'androidx.test.ext:junit:1.1.0\'
    androidTestImplementation \'androidx.test.espresso:espresso-core:3.1.1\'
}
到此应该就差不多了。
以上是关于安卓第一个小项目的主要内容,如果未能解决你的问题,请参考以下文章