初步学习border-radius
Posted {-)大傻逼
tags:
篇首语:本文由小常识网(cha138.com)小编为大家整理,主要介绍了初步学习border-radius相关的知识,希望对你有一定的参考价值。
1.属性解析
border-radius是css3属性,他可以使div的角进行一定程度的弯曲。
比如说下面这个width和height的正方形div
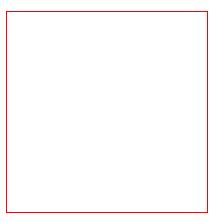
经过设置border-radius之后四个角会出现弯曲
border-radius:40px;
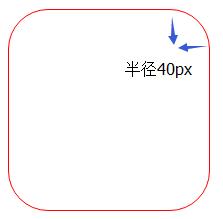
当然我们可以针对某个角进行单独的设置
border-top-left-radius:40px;
border-top-right-radius:40px;
border-bottom-right-radius:40px;
border-bottom-left-radius:40px;
2.使用场景
而在网页开发中,我们会遇到很多种需要使用圆形图案的情况,比如说做个圆形的头像图案

做个进度统计
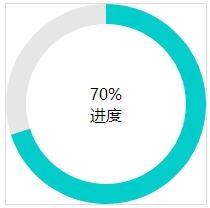
上面这些情况都需要用到border-radius这个属性去弯曲边框。
3.常见图案
那我们该如何生成一个原型呢,原理是把边角弯曲成一条圆弧,在这里我们只需把border-radius大小设置为div(正方形)高的一半就好了,所以我们一般设置
border-radius:50%;
就可以实现圆型的图案。
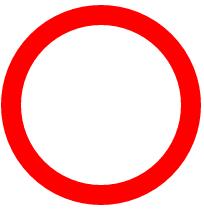
1.圆圈
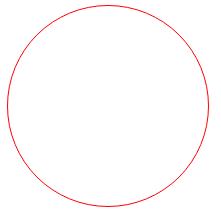
在刚刚div的基础上增加border-radius:50%;就可以实现如下图案
2.圆环
只要在1的基础上加大border的宽度即可
3.月牙天冲。
至于为什么会出现这种镰刀形状的图形,我认为是border-radius都是圆角,而角是由两个边组成,但是却只设置border-right,右上角和右下角只有右边作为他的其中一个边,所以导致了他边的宽度一直在衰减。

<style type="text/css">
        .circle{
            width:160px;
            height:160px;
            border-right:20px solid red;
            border-radius:50%;
            position: relative;
            display: table-cell;
            vertical-align: middle;
        }


    </style>
    <div class="circle">

    </div>
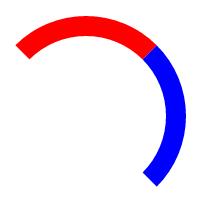
4.半圆。
在这里我用了两个颜色去标注他,首先先设置border都是20px且边框为透明,这样之后设置单个border颜色,图案就不会变成月牙天冲,至于为什么,这是因为我们之前设置的border-radius使得角会进行弯曲,如果只设置单一边框都会使得由于边的两端的角的弯曲,使得他宽度衰减。
既然这样我们其实只需设置全部边的都存在,且为透明,再去设置我们需要的边,就不会有衰减的月牙天冲了
<style type="text/css">
        .half-circle{
            width:160px;
            height:160px;
            border:20px solid red;
            border-radius:50%;
            border: 20px solid transparent;
            border-top:20px solid red;
            border-right:20px solid blue;
        }
    </style>
    <div class="half-circle">

    </div>
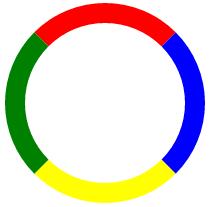
也有可能某些童鞋会说这个半圆的角度怎么会这样?可能只要我设置一下颜色,可能你就会看的很清楚了
    <style type="text/css">
        .circle{
            width:160px;
            height:160px;
            border-radius:50%;
            border-top:20px solid red;
            border-left: 20px solid green;
            border-right:20px solid blue;
            border-bottom:20px solid yellow;
        }
    </style>
    <div class="circle">

    </div>
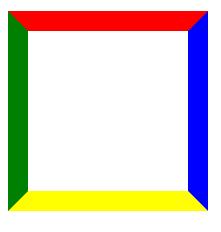
如果我们把border-radius:50%去掉,就会变成下面这样子,各位童鞋估计就懂了吧,其实我们只要脑海里面想着把一个正方形压一下,变成一个圆形,估计就会出现上面的图案了。
如果我们需要对半圆进行角度的修正,可以使用transform属性,但是要注意兼容性哦
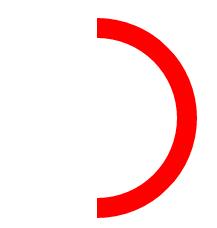
    <style type="text/css">
        .circle{
            width:160px;
            height:160px;
            border-radius:50%;
            border:20px solid transparent;
            border-top: 20px solid red;
            border-right: 20px solid red;
            transform: rotate(45deg);
        }
    </style>
    <div class="circle">

    </div>
4.眼睛
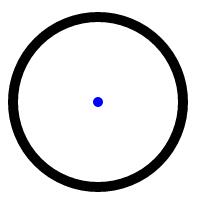
<style type="text/css">
        .circle{
            width:160px;
            height:160px;
            border:10px solid black;
            border-radius:50%;
            position: relative;
            display: table-cell;
            vertical-align: middle;
        }
        .point{
            margin: 0 auto;
            border-radius:50%;
            background: blue;
            width: 10px;
            height: 10px;
        }
    </style>
    <div class="circle">
        <div class="point"></div>
    </div>
5.车轮(真想自己做个小车来看看会有什么效果...可惜没啥时间,呜呜呜)
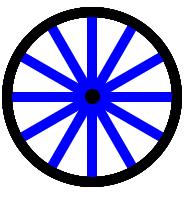
    <style type="text/css">
        .round{
            width:180px;
            height:180px;
            position: relative;
        }
        .circle{
            position: absolute;
            top: 0;
            width:160px;
            height:160px;
            border:10px solid black;
            border-radius:50%;
        }
        .point{
            margin: 0 auto;
            border-radius:50%;
            background: black;
            width: 15px;
            height: 15px;
        }
        .circle2{
            height: 160px;
            width: 160px;
            position: relative;
            display: table-cell;
            vertical-align: middle;
        }
        .line{
            width:160px;
            height: 10px;
            background: blue;
            margin: 0 auto;
        }
        .circle.line1{
            transform: rotate(0deg);
        }
        .circle.line2{
            transform: rotate(30deg);
        }
        .circle.line3{
            transform: rotate(60deg);
        }
        .circle.line4{
            transform: rotate(90deg);
        }
        .circle.line5{
            transform: rotate(120deg);
        }
        .circle.line6{
            transform: rotate(150deg);
        }
        .circle.line6{
            transform: rotate(150deg);
        }
    </style>
    <div class="round">
        <div class="circle line1">
            <div class="circle2">
                <div class="line"></div>
            </div>

        </div>
        <div class="circle line2">
            <div class="circle2">
                <div class="line "></div>
            </div>

        </div>
        <div class="circle line3">
            <div class="circle2">
                <div class="line "></div>
            </div>

        </div>
        <div class="circle line4">
            <div class="circle2">
                <div class="line "></div>
            </div>

        </div>
        <div class="circle line5">
            <div class="circle2">
                <div class="line "></div>
            </div>

        </div>
        <div class="circle line6">
            <div class="circle2">
                <div class="line "></div>
            </div>

        </div>
        <div class="circle">
            <div class="circle2">
                <div class="point"></div>
            </div>
        </div>

    </div>
以上是关于初步学习border-radius的主要内容,如果未能解决你的问题,请参考以下文章