寒冬袭来,带你使用Flask开发一款天气查询软件吧
Posted 华为云官方博客
tags:
篇首语:本文由小常识网(cha138.com)小编为大家整理,主要介绍了寒冬袭来,带你使用Flask开发一款天气查询软件吧相关的知识,希望对你有一定的参考价值。
天气预报
获取天气预报数据,离不开中国天气网 http://www.weather.com.cn
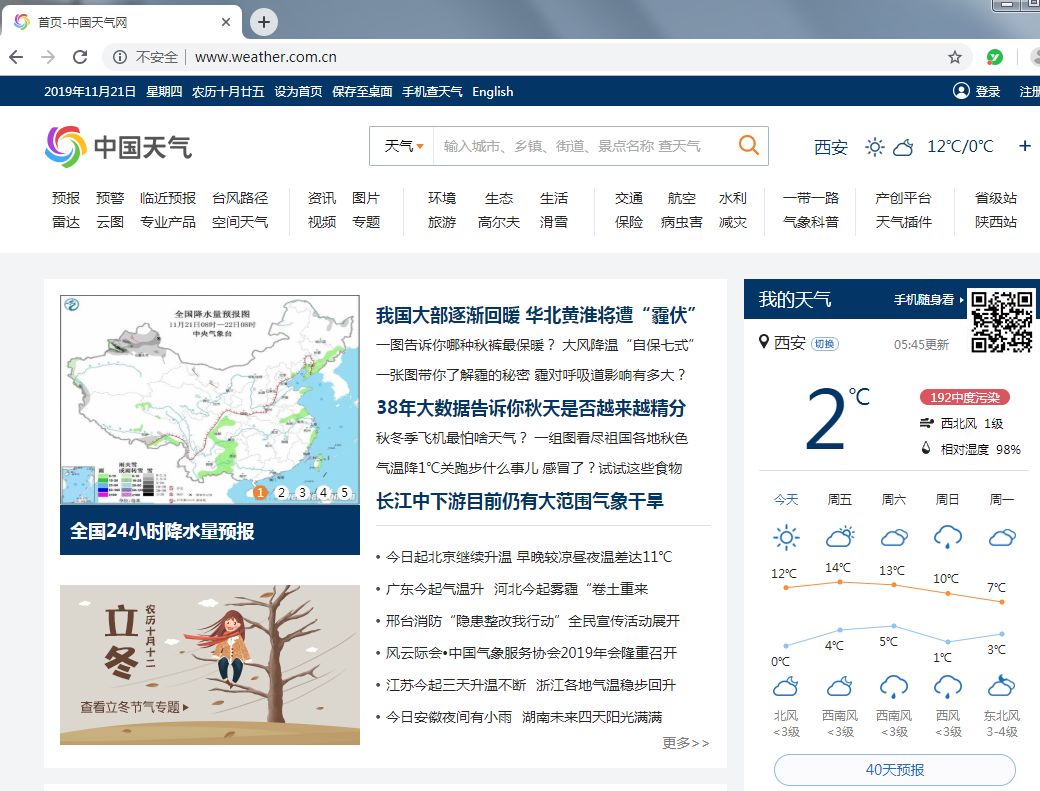
天气预报网
登陆网站,在搜索栏中输入城市名称点击搜索,即可获取该地区的天气预报。比如我搜索西安,完成后会跳转至下面的网址:
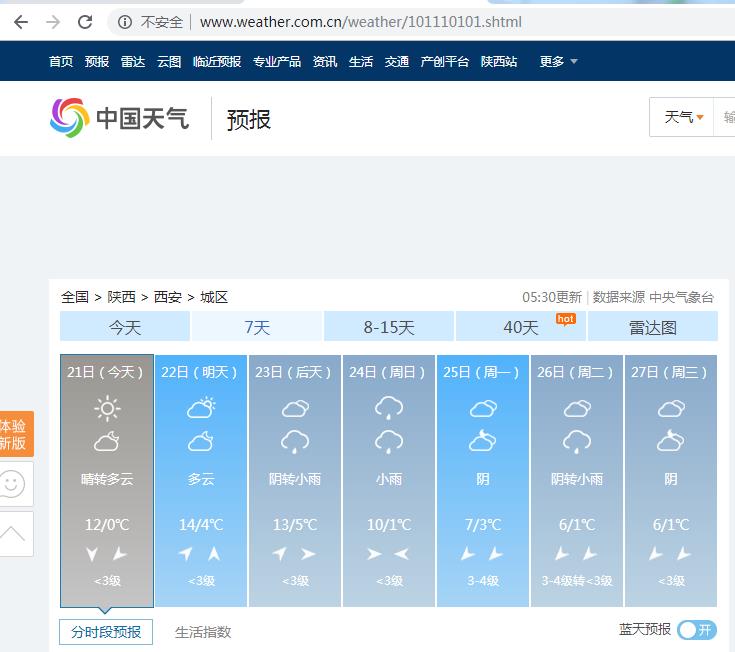
西安天气
其他的都好说,但是这个地区编码怎么搞?F12看看网络请求…
爬虫思路

网络请求
我们可以看到网站先通过get请求,访问urlhttp://toy1.weather.com.cn/search?cityname=%E8%A5%BF%E5%AE%89并传参cityname,获取到城市编码,再进行了相关跳转。有些young man 会问这个cityname怎么是这种格式…其实很简单:

知道了这些,我们就可以有针对性的获取每个城市最近7天的天气预报了,当然少不了一堆beautifulsoup的元素定位操作:
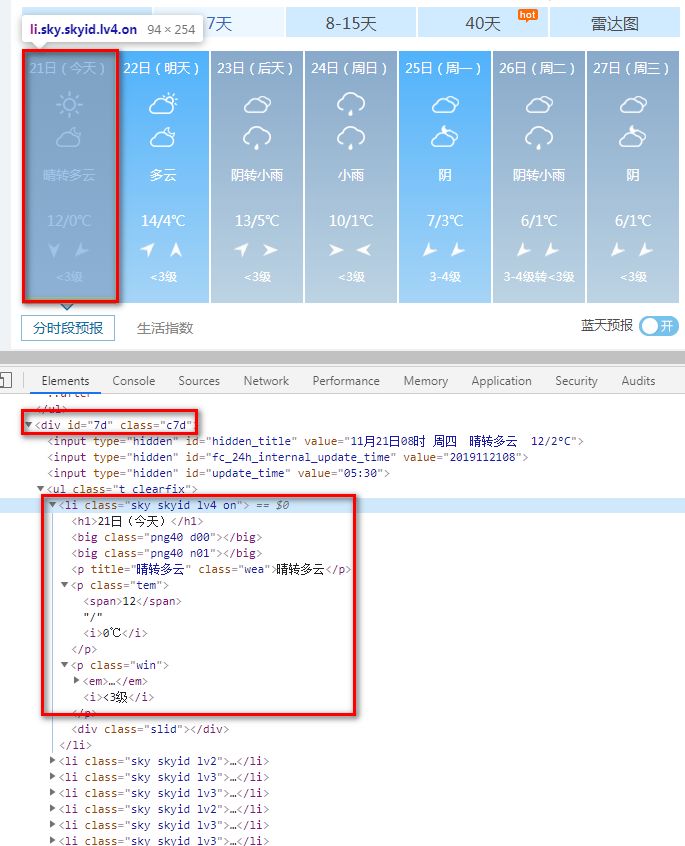

城市近期天气
1 1# 元素定位思路:
2 2id=7d --> class=\'clearfix\' -->ul --> findAll(li)
3 3# 参数获取
4 4h1标签为日期
5 5class=wea 为天气
6 6class=tem 为温度
7 7
爬虫代码
确定了这些内容,我们的爬虫代码基本就OK了,但这个不是今天的重点,所以简单看下吧:
 1  1# -*- coding: utf-8 -*-
 2  2# @Author   : 王翔
 3  3# @公众号    : 清风Python
 4  4# @Date     : 2019/11/21 05:56
 5  5# @Software : PyCharm
 6  6# @version  :Python 3.7.3
 7  7# @File     : weather.py
 8  8
 9  9
10 10import requests
11 11from urllib.parse import quote
12 12import re
13 13from bs4 import BeautifulSoup
14 14
15 15
16 16class WeatherReport:
17 17    def __init__(self, city):
18 18        self.quote_city = quote(city, encoding=\'utf-8\')
19 19        self.result_info = []
20 20
21 21    def get_city_code(self):
22 22        r = requests.get(\'http://toy1.weather.com.cn/search?cityname=%s\' % self.quote_city)
23 23        response = eval(r.text)[0].get(\'ref\')
24 24        try:
25 25            return re.search(\'[0-9]+\', response).group()
26 26        except AttributeError:
27 27            return None
28 28
29 29    def get_weather(self, code):
30 30        r = requests.get(\'http://www.weather.com.cn/weather/%s.shtml\' % code)
31 31        r.encoding = \'utf-8\'
32 32        bs4 = BeautifulSoup(r.text, \'lxml\')
33 33        days = bs4.find(\'div\', {\'id\': \'7d\'}).find(\'ul\', {"class": "clearfix"}).findAll(\'li\')
34 34        for day in days:
35 35            date = day.h1.text
36 36            weather = day.find(\'p\', {"class": "wea"}).text
37 37            tmp = day.find(\'p\', {"class": \'tem\'}).text.strip()
38 38            self.result_info.append("%s: %s %s" %(date,weather, tmp))
39 39        return self.result_info
Web界面
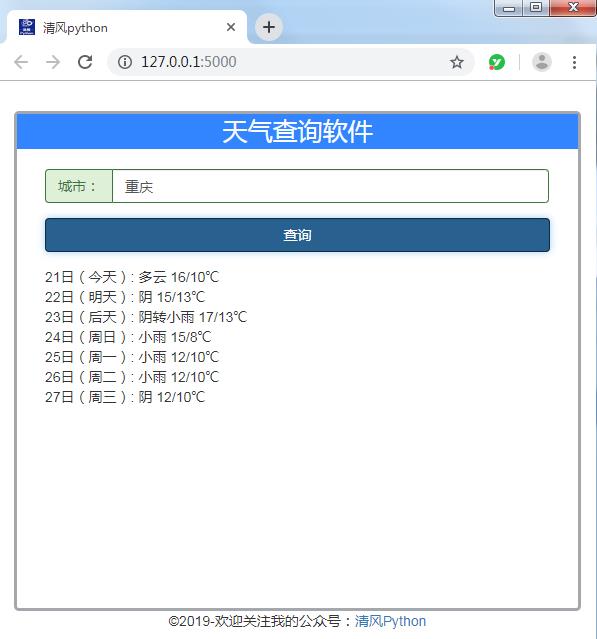
有了后台的数据,我们前台实现也就比较简单了,只需要提供一个城市的输入框和提交按钮,剩下就是城市天气的内容展示了。简单引入Bootstrap+jQuery即可完成,前台界面大概这样子,原谅屌丝的审美,哈哈…
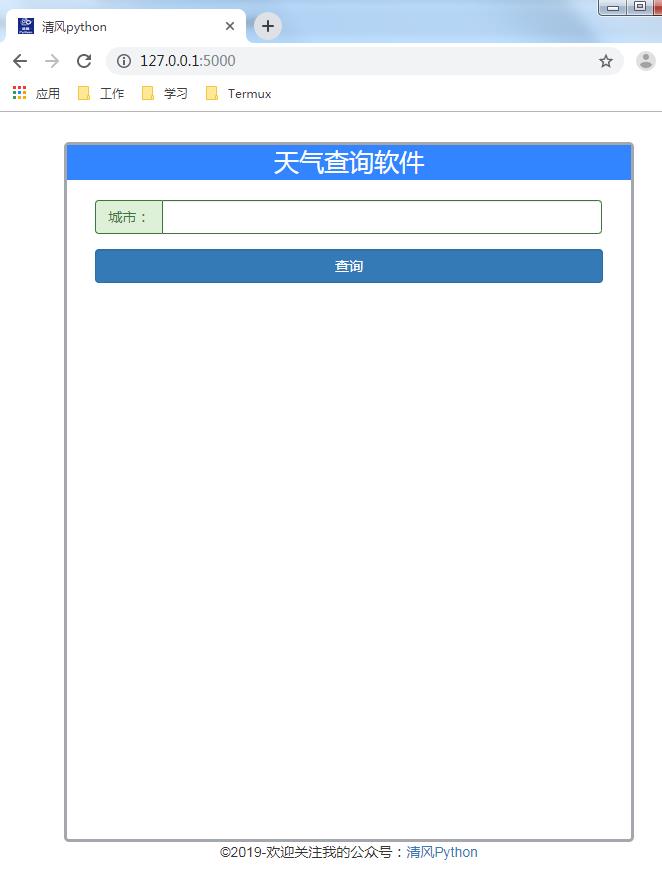
Web界面
 1 1<!DOCTYPE html>
 2  2<html lang="en">
 3  3<head>
 4  4    <meta charset="UTF-8">
 5  5    <meta http-equiv="X-UA-Compatible" content="IE=edge">
 6  6    <meta name="viewport" content="width=device-width, initial-scale=1 ,user-scalable=no">
 7  7    <title>清风python</title>
 8  8    <link rel="icon" href="{{ url_for(\'static\',filename=\'favicon.ico\') }}">
 9  9    <link rel="stylesheet" href="{{ url_for(\'static\',filename=\'css/bootstrap.min.css\') }}">
10 10    <link rel="stylesheet" href="{{ url_for(\'static\',filename=\'css/main.css\') }}">
11 11    <script src="{{ url_for(\'static\',filename=\'js/jquery.min.js\') }}"></script>
12 12</head>
13 13<body>
14 14
15 15<div class="container container-small">
16 16    <div class="content">
17 17        <div class="header">
18 18            天气查询软件
19 19        </div>
20 20        <div class="block-info">
21 21            <div class="form-group has-success">
22 22                <div class="input-group">
23 23                    <div class="input-group-addon">
24 24                        城市:
25 25                    </div>
26 26                    <input id=\'name\' class="form-control"/>
27 27
28 28                </div>
29 29
30 30            </div>
31 31            <div class="form-group ">
32 32                <button class="form-control btn-primary" id="load">查询</button>
33 33            </div>
34 34            <p class="result"></p>
35 35            <script type="text/javascript">
36 36                $(function () {
37 37                    $(\'#load\').click(function () {
38 38                        let city = $(\'#name\').val();
39 39                        if (city.length > 0) {
40 40                            $.ajax({
41 41                                url: \'/weather/\' + city,
42 42                                type: \'get\',
43 43                                success: function (data) {
44 44                                    $(\'.result\').html(data);
45 45                                }
46 46                            })
47 47                        } else {
48 48                            $(\'.result\').html("请填写正确的城市名称...");
49 49                        }
50 50                    })
51 51                })
52 52            </script>
53 53        </div>
54 54    </div>
55 55    <div class="footer">
56 56        ©2019-欢迎关注我的公众号:<a href="https://www.jianshu.com/u/d23fd5012bed">清风Python</a>
57 57    </div>
58 58</div>
59 59
60 60</body>
61 61</html>
Flask路由
Flask的路由比较简单,一个用来呈现首页,另外一个负责动态获取Ajax数据进行回传即可
 1 1from flask import Flask, render_template
 2  2from weather import WeatherReport as wr
 3  3
 4  4app = Flask(__name__)
 5  5
 6  6
 7  7@app.route(\'/\')
 8  8def index():
 9  9    return render_template(\'index.html\')
10 10
11 11
12 12@app.route(\'/weather/<city>\')
13 13def weather(city):
14 14    main_func = wr(city)
15 15    city_code = main_func.get_city_code()
16 16    if city_code:
17 17        info = main_func.get_weather(city_code)
18 18        return \'<br>\'.join(info)
19 19    else:
20 20        return "城市名称无效,请核查..."
pipenv部署
代码我们已经开发完了,那么如何让大家快速部署呢?让我们看看项目目录:
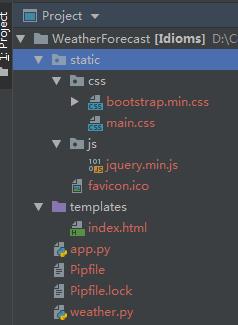
项目目录
首先我们将代码提交到github…
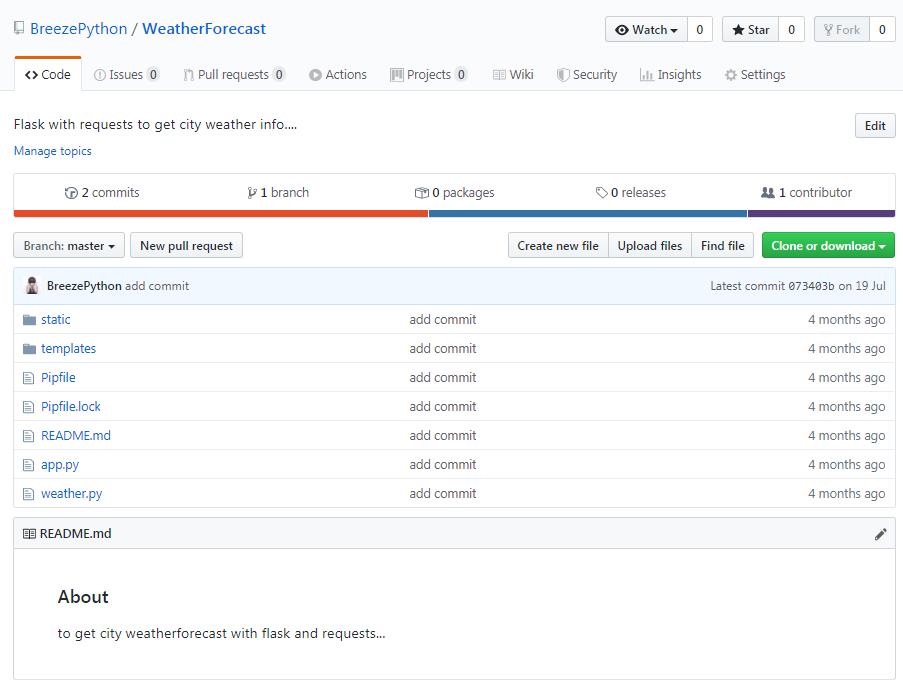
Github
由于采用pipenv虚拟环境开发,所以使用起来更为方便,只需如下操作:
 1  1# 如果为安装pipenv,需要先进行安装操作
 2  2pip install pipenv
 3  3# 克隆代码
 4  4git clone https://github.com/KingUranus/WeatherForecast.git
 5  5# 进入代码目录
 6  6cd WeatherForecast
 7  7# 安装虚拟机及依赖模块
 8  8pipenv install
 9  9# 进入虚拟机
10 10pipenv shell
11 11# 启动flask
12 12flask run
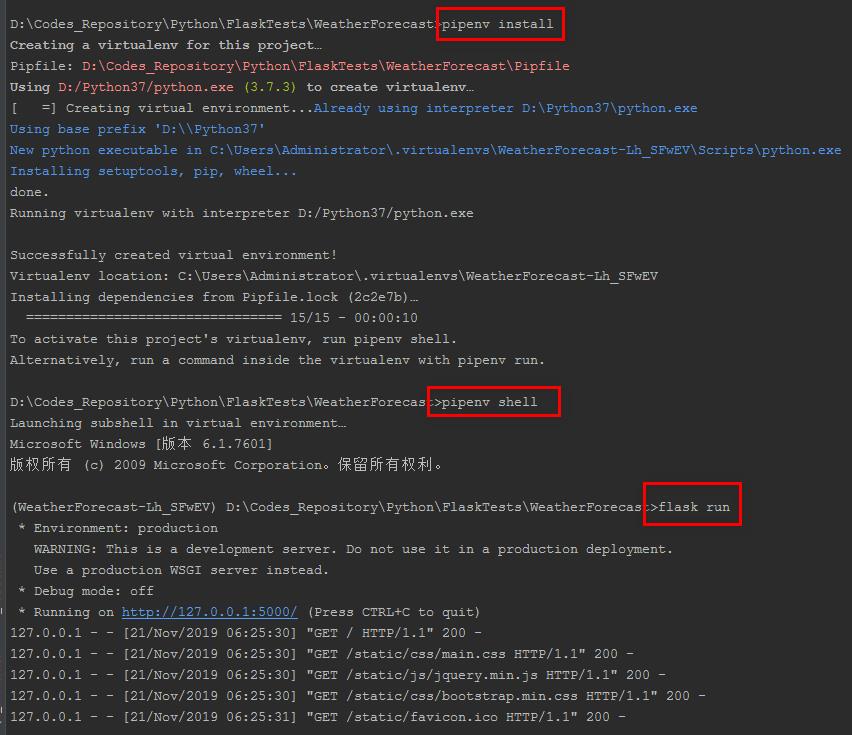

pipenv导入项目
最后来看看克隆部署后的软件实现吧:
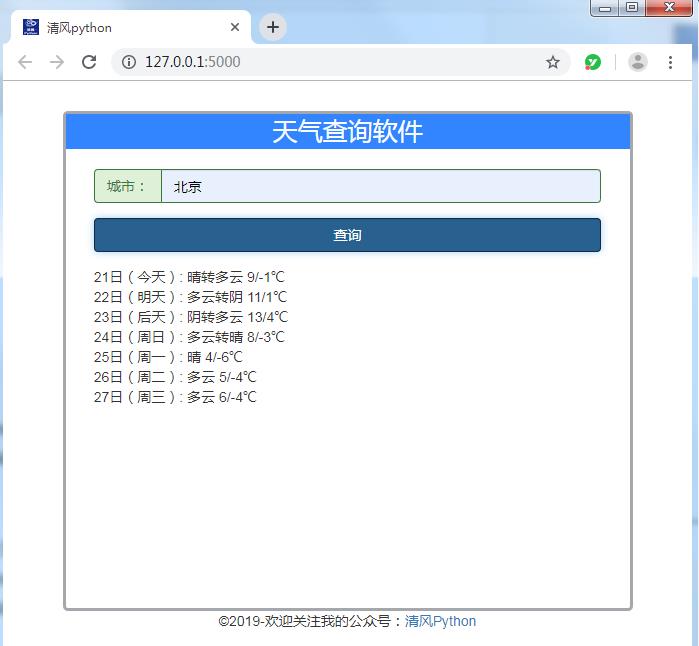
北京天气
HDC.Cloud 华为开发者大会2020 即将于2020年2月11日-12日在深圳举办,是一线开发者学习实践鲲鹏通用计算、昇腾AI计算、数据库、区块链、云原生、5G等ICT开放能力的最佳舞台。
欢迎报名参会(https://www.huaweicloud.com/HDC.Cloud.html?utm_source=&utm_medium=&utm_campaign=&utm_content=techcommunity)

以上是关于寒冬袭来,带你使用Flask开发一款天气查询软件吧的主要内容,如果未能解决你的问题,请参考以下文章