jmeterWebSerivice测试
Posted 菜比之路
tags:
篇首语:本文由小常识网(cha138.com)小编为大家整理,主要介绍了jmeterWebSerivice测试相关的知识,希望对你有一定的参考价值。
WebSerivice测试计划的取样器有两种方式:HTTP请求、SOAP/XML-RPC Request。
1. 测试计划
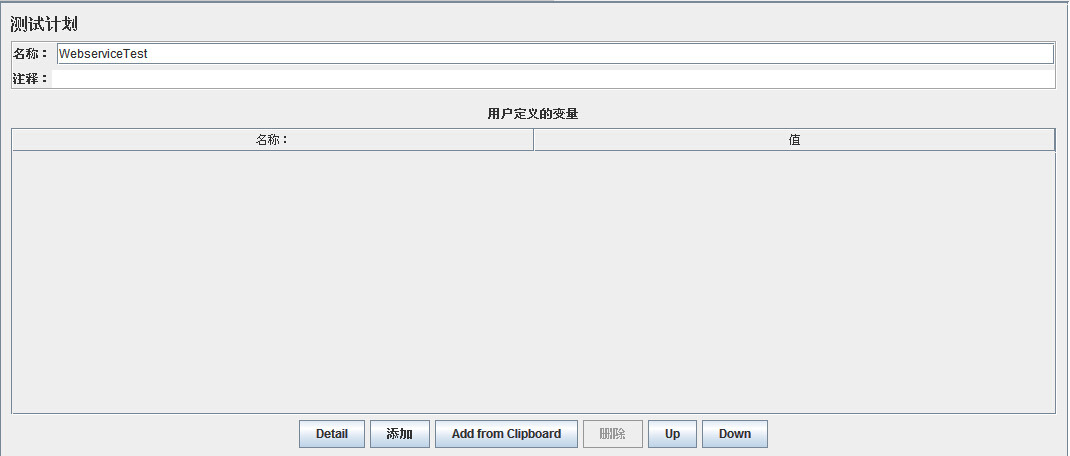
启动JMeter,点击测试计划节点上,重命名测试计划:WebserviceTest.如下图:
2. 添加线程组
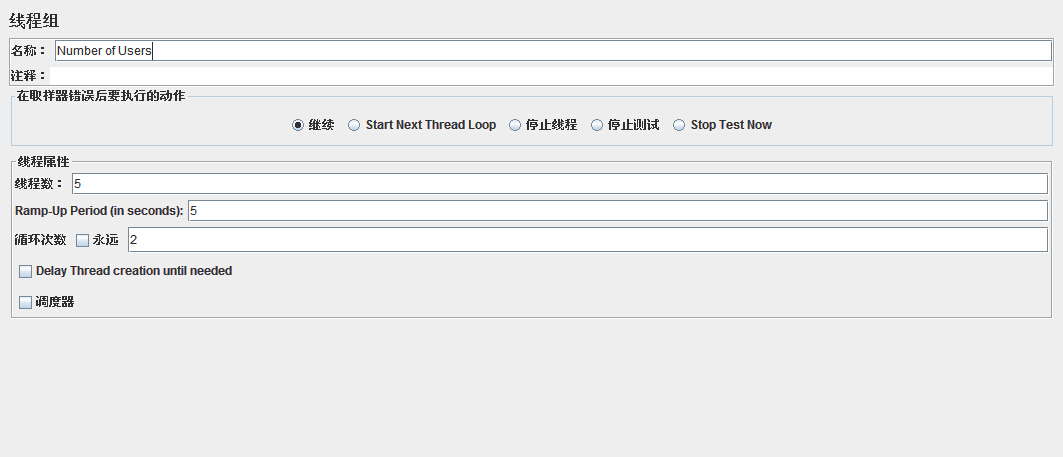
添加一个线程组,右键单击测试计划 WebserviceTest -添加 - Threads(Users) > 线程组。接下来,修改线程组的默认属性。修改以下属性:
   Name: Number of Users
   Number of Threads (Users): 5
   Ramp-Up Period: 5
   Loop Count:2
如下图:
3. 添加配置元件
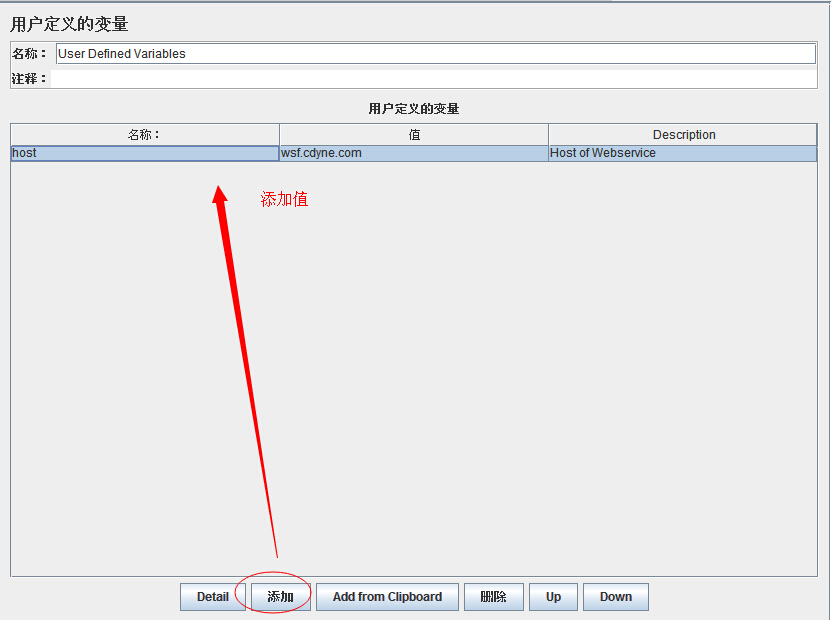
a.右键单击测试计划 WebserviceTest -添加 -配置元件 > 用户定义的变量
名称:User Defined Variables
点击添加,设置名称:host,
设置值:wsf.cdyne.com,
设置Description:Host of Webservice.
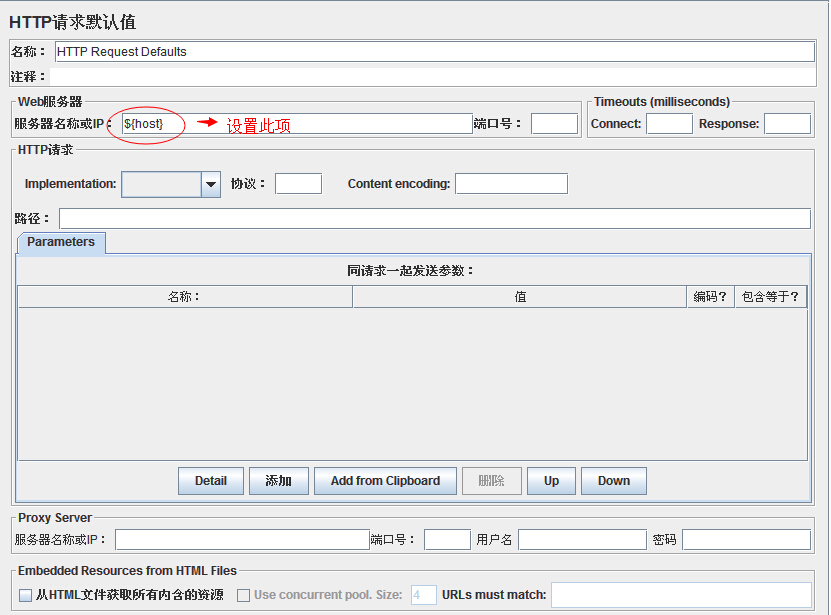
b. 右键单击测试计划 WebserviceTest -添加 -配置元件 > HTTP请求默认值,名称:HTTP Request Defaults
点击添加,设置服务器名称或IP:${host}
4. 添加取样器
注意:这里有两种取样器都可以,HTTP请求或者SOAP/XML-RPC Request
- 介绍HTTP请求的做法:右键单击线程组 Number of Users-添加 -Sampler > HTTP请求
设置如下参数:
名称:Soap Request
路径:/WeatherWS/Weather.asmx
BodyData:
<soap:Envelope xmlns:xsi="http://www.w3.org/2001/XMLSchema-instance" xmlns:xsd="http://www.w3.org/2001/XMLSchema" xmlns:soap="http://schemas.xmlsoap.org/soap/envelope/">
<soap:Body>
<GetCityForecastByZIP xmlns="http://ws.cdyne.com/WeatherWS/">
<ZIP>60601</ZIP>
</GetCityForecastByZIP>
</soap:Body>
</soap:Envelope>
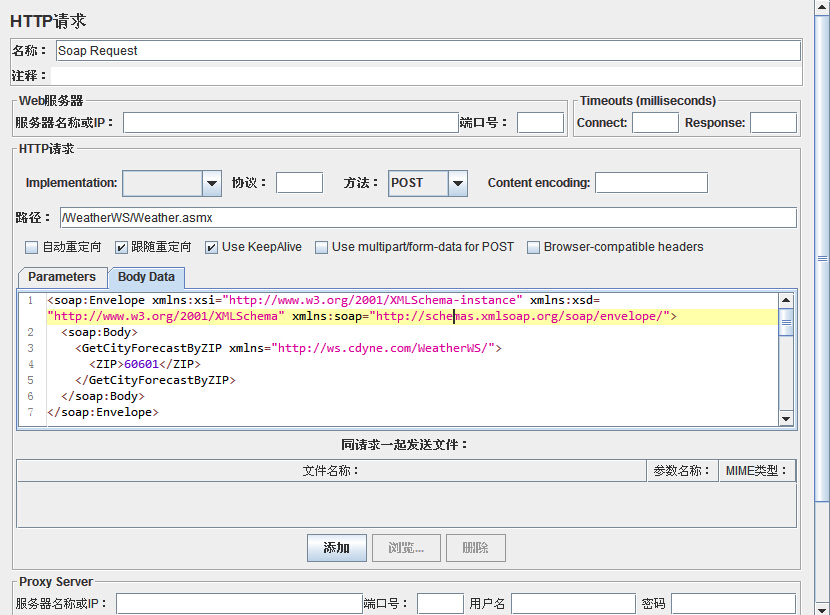
- 介绍SOAP/XML-RPC Request的做法:右键单击线程组 Number of Users-添加 -Sampler > SOAP/XML-RPC Request
设置如下参数:
名称:Soap Request
URL:http://${host}/WeatherWS/Weather.asmx
BodyData:
<soap:Envelope xmlns:xsi="http://www.w3.org/2001/XMLSchema-instance" xmlns:xsd="http://www.w3.org/2001/XMLSchema" xmlns:soap="http://schemas.xmlsoap.org/soap/envelope/">
<soap:Body>
<GetCityForecastByZIP xmlns="http://ws.cdyne.com/WeatherWS/">
<ZIP>60601</ZIP>
</GetCityForecastByZIP>
</soap:Body>
</soap:Envelope>
如下图所示:

简单讲解一下Soap/XML-RPC Data的编写:
GetCityForecastByZIP是WebService发布的方法;
http://ws.cdyne.com/WeatherWS/是GetCityForecastByZIP所在类的域名;
ZIP是GetCityForecastByZIP类的参数名,参数类型是int;
60601是输入的实参。
5. 添加监听器
右键单击线程组 Number of Users-添加 -监听器> 察看结果树
6. 运行此测试计划
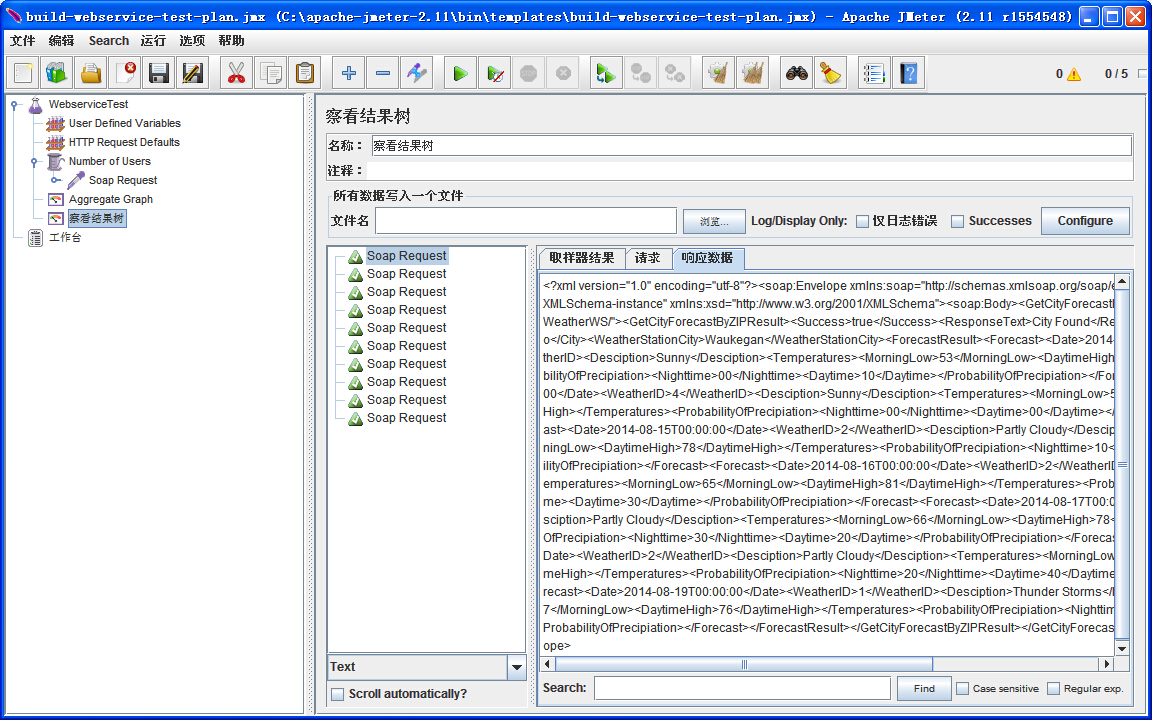
现在保存的以上测试计划 test_webservice.jmx。执行本测试计划使用 Run > Start 选项。

至此,整个测试计划就完成了。
以上是关于jmeterWebSerivice测试的主要内容,如果未能解决你的问题,请参考以下文章
