Element-ui上传图片按顺序展示
Posted mianbaodaxia
tags:
篇首语:本文由小常识网(cha138.com)小编为大家整理,主要介绍了Element-ui上传图片按顺序展示相关的知识,希望对你有一定的参考价值。
背景
不知道你上传图片的时候有没有过这样的情况,批量上传多张图片,可能因为图片大小或者网络问题,导致图片返回的顺序和上传时的顺序不一样。因为我们公司是做电商的,即使我们的支持拖动排序,运营还是希望图片能够严格的按照他们上传的顺序展示。
解决问题
在上传组件的on-success的方法中,有3个参数 response, file, fileList 其中fileList就是之前上传成功图片的集合,且upload组件提供了clearFiles方法,用来清空fileList,每次上传成功,我们调用clearFiles方法就行了
上代码
<template>
  <!-- 上传单张图片 -->
  <div v-if="!multiple" class="image-item">
    <div class="image-wrap" v-if="imgUrl">
      <img :src="imgUrl" :style="imgStyle" />
      <div class="icon-wrap" @click.stop="removeFile">
        <i class="el-icon-delete"></i>
      </div>
    </div>
    <el-upload
      v-else
      ref="imageUpload"
      action="//up.qbox.me"
      :before-upload="beforeUpload"
      :on-success="handleSuccess"
      class="image-uploader"
      :on-error="onError"
      :data="form"
      :show-file-list="false"
      :disabled="loading"
      accept="image/*">
      <i :class="loading ? ‘el-icon-loading‘ : ‘el-icon-plus‘" :style="imgStyle"></i>
    </el-upload>
  </div>
  <!-- 上传多张图片 -->
  <div class="image-list" v-else>
    <draggable v-model="showImgList" :options="group:‘image‘" @change="dragChange">
      <div v-for="(image, index) in showImgList" :key="index" class="image-wrap">
        <img :src="imgUrl" :style="imgStyle" />
        <div class="icon-wrap" @click.stop="removeFile(index)">
          <i class="el-icon-delete"></i>
        </div>
      </div>
      <el-upload
        ref="imageListUpload"
        action="//up.qbox.me"
        :before-upload="beforeUpload"
        :on-success="handleSuccess"
        class="image-uploader"
        :on-error="onError"
        :data="form"
        multiple
        :disabled="loading"
        :show-file-list="false"
        accept="image/*">
        <i :class="loading ? ‘el-icon-loading‘ : ‘el-icon-plus‘" :style="imgStyle"></i>
      </el-upload>
    </draggable>
  </div>
</template>
<script type="text/babel">
/**
 * 上传图片或文件
 */
import md5 from ‘blueimp-md5‘
import draggable from ‘vuedraggable‘

export default
  props:
    // 接收和返回的数据
    data:
      type: [Array, String, Object],
      default: () =>
        return ‘‘

    ,
    // 上传多个文件时,文件限制的个数
    limit:
      type: Number,
      default: () =>
        return 100

    ,
    // 一次上传多个
    multiple:
      type: Boolean,
      default: false,
    ,
    //图片展示的宽度
    imgWidth:
      type: Number,
      default: 150,
    ,
    imgHeight:
      type: Number,
      default: 150,
    ,
    //期望上传图片的宽度
    rule: [ Object, Function ]
  ,
  data()
    return
      imgUrl: ‘‘,
      imageCdn: ‘‘, //图片的cdn
      form:
        token: ‘‘, //七牛上传的token
      ,
      showImgList: [],
      fileList: [],
      clipboard: false,
      isDrag: false,
      handleSuccess: null,
      loading: false,

  ,
  components:  draggable ,
  watch:
    data:
      handler(value)
        if (!this.multiple)
          this.imgUrl = value
         else if (this.multiple)
          this.showImgList = value

      ,
      immediate: true

  ,
  computed:
    imgStyle()
      return
        width: this.imgWidth + ‘px‘,
        height: this.imgHeight + ‘px‘,
        lineHeight: this.imgHeight + ‘px‘,


  ,
  mounted()
    //防抖
    this.handleSuccess = _.debounce(this.uploadSuccess, 500)
  ,
  methods:
    beforeUpload(file)
      if (file.type.split(‘/‘)[0] === ‘image‘)
        let tempSize = file.size / 5242880
        if (tempSize > 1)
          this.$message.error(‘图片尺寸不得大于5M!‘)
          return false


      this.loading = true
      let tempNames = file.name.split(‘.‘)
      let fileType = tempNames[tempNames.length - 1]
      let curr = (+new Date()).toString()
      let random = Math.random() * 10000
      let md5Str = md5(`$curr$random$file.name`)
      this.form.key = `ai-admin/$md5Str.$fileType`
    ,
    async uploadSuccess(response, file, fileList)
      try
        for (let fileInfo of fileList)
          let imageInfo = await this.getImageInfo(fileInfo.response.key)
          if (this.rule)
            this.rule(imageInfo, (error) =>
              if (error)
                throw(error)

            )

          if (imageInfo.width > 2048 || imageInfo.height > 2048)
            throw(new Error(‘图片长或者宽不能超过2048‘))
           else
            if (this.type === ‘image‘)
              this.imgUrl = response.key
              this.$emit(‘update:data‘, response.key)
             else
              if (this.showImgList.length >= this.limit)  // 限制图片张数
                this.showImgList.length = this.limit
                throw(new Error(`最多上传 $this.limit 张图片`))

              this.showImgList.push(imageInfo)
              this.$emit(‘update:data‘, this.showImgList)


       catch (error)
        this.$message.error(error.message)
       finally
        this.loading = false
        this.$refs.imageListUpload && this.$refs.imageListUpload.clearFiles()
        this.$refs.imageUpload && this.$refs.imageUpload.clearFiles()

    ,
    removeFile(index)
      this.$confirm(‘确定删除该图片吗?‘, ‘提示‘,
        confirmButtonText: ‘确定‘,
        cancelButtonText: ‘取消‘,
        type: ‘warning‘
      ).then(() =>
        if (this.type === ‘image‘)
          this.$emit(‘update:data‘, typeof this.data === ‘object‘ ?  : ‘‘)
         else
          this.showImgList.splice(index, 1)
          this.$emit(‘update:data‘, this.showImgList)

      )
    ,
    onError()
      this.$message.error(‘上传文件失败‘)
    ,
    getImageInfo(url)
      return new Promise((resolve, reject)=>
        let image = new Image()
        image.src = `$this.imageCdn$url`
        image.onload = () =>
          resolve(
            image: url,
            width: image.width,
            height: image.height
          )

        image.onerror = () =>
          reject(new Error(‘Could not load image at ‘ + url));
        ;
      )
    ,
    dragChange()
      this.$emit(‘update:data‘, this.showImgList)
    ,
    handleRemove(file, fileList)
      let imgList = fileList.map(item =>
        return item.response.key
      )
      this.$emit(‘update:data‘, imgList)
    ,
    handlerClipboard(event)
      if (this.clipboard)
        const rawFile = getImageFromClipboard(event)
        if (rawFile)
          this.$refs.elUpload.handleStart(rawFile)
          this.$refs.elUpload.$refs[‘upload-inner‘].upload(rawFile)


    ,


</script>
<style lang="less" scoped>
.image-list, .image-item
  display: flex;
  .image-wrap
    position: relative;
    display: inline-block;
    box-sizing: content-box;
    margin: 0 8px 8px 0;
    vertical-align: top;
    &:hover
      .icon-wrap
        opacity: 1;


    .icon-wrap
      position: absolute;
      left: 0;
      bottom: 0;
      width: 100%;
      height: 30px;
      cursor: default;
      text-align: center;
      color: #fff;
      opacity: 0;
      font-size: 20px;
      background-color: rgba(0, 0, 0, .7);
      transition: opacity .3s;
      .el-icon-zoom-in
        cursor: pointer;
        margin-right: 8px;

      .el-icon-delete
        cursor: pointer;


.image-item
  display: inline-flex;

/deep/.image-uploader
  display: inline-block;
  .el-upload
    border: 1px dashed #d9d9d9;
    border-radius: 6px;
    cursor: pointer;
    position: relative;
    overflow: hidden;
    [class^="el-icon"]
      font-size: 28px;
      color: #8c939d;
      text-align: center;

    &:hover
      border-color: #409EFF;


</style>
注意
这是我封装的上传图片的组件,支持 类v-model的传参方式,上传多张图时支持拖动,写图片规则(例如宽高是多少),删除图片
特别注意:因为我们还封装了图片组件,在这里被我替换了,所以图片展示有上面的代码可能有点问题,稍微改下就行
用法(只允许上传正方形的图)
<template>
  <image-upload :data.sync="image" :rule="rule"></image-upload>
</template>
<script>
export default
  data()
    let validate = ( width, height , callback) =>
      if (width === height)
        callback()
       else
        callback(new Error(‘请上传正方形的图‘))


    return
      rule: validate,
      image: ‘‘

  ,

</script>
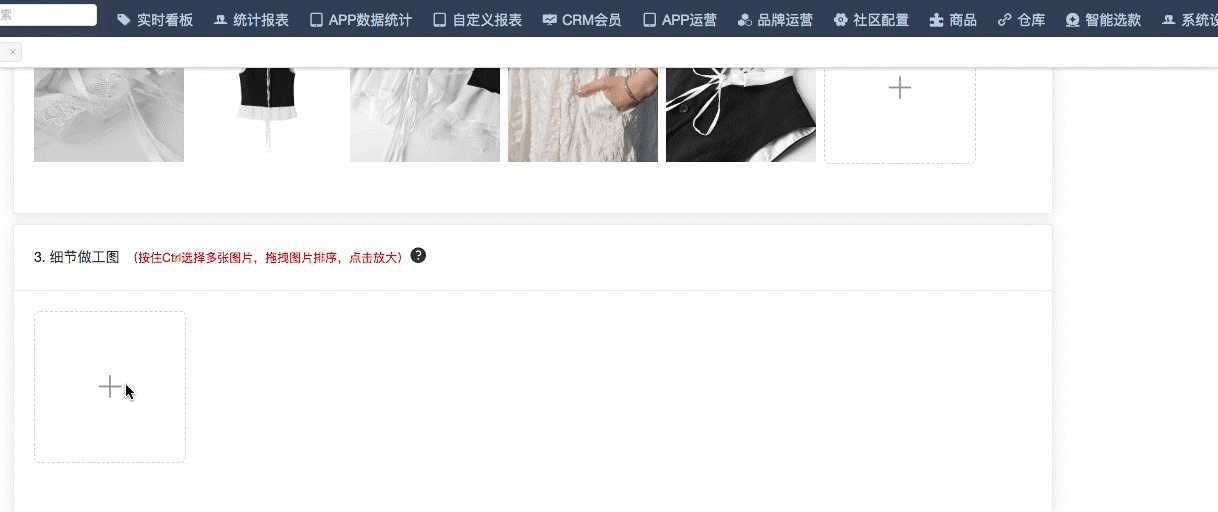
效果

以上是关于Element-ui上传图片按顺序展示的主要内容,如果未能解决你的问题,请参考以下文章