基于PXE+Kickstart无人值守安装
Posted
tags:
篇首语:本文由小常识网(cha138.com)小编为大家整理,主要介绍了基于PXE+Kickstart无人值守安装相关的知识,希望对你有一定的参考价值。
准备工作- 一台服务器(用来提供DHCP,TFTP,HTTP服务)
- 一台客户端(用来测试,注:网卡要支持PXE功能)
- 服务器关闭防火墙和selinux,如果是在虚拟机上还需要关闭虚拟机的DHCP服务,服务器要设置静态IP地址。
- 客户机和服务器一定要在一个网卡模式里
整体架构图
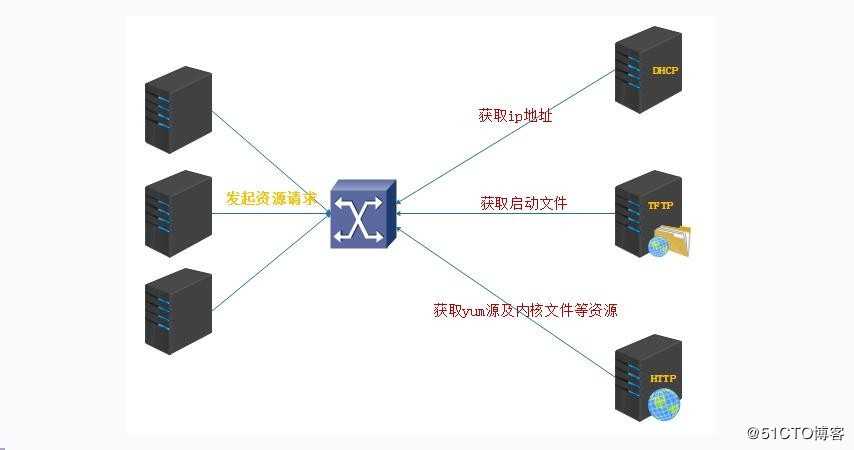
注:由于我们是做实验,用一台服务器提供所需要的服务。
安装步骤
一. 在服务器上安装DHCP ,TFTP,HTTP 服务。
- 安装TFTP服务
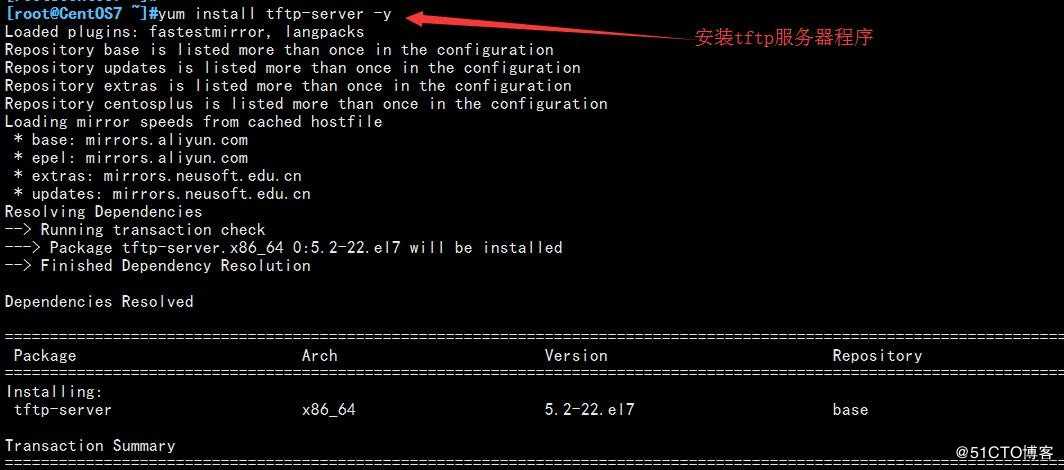
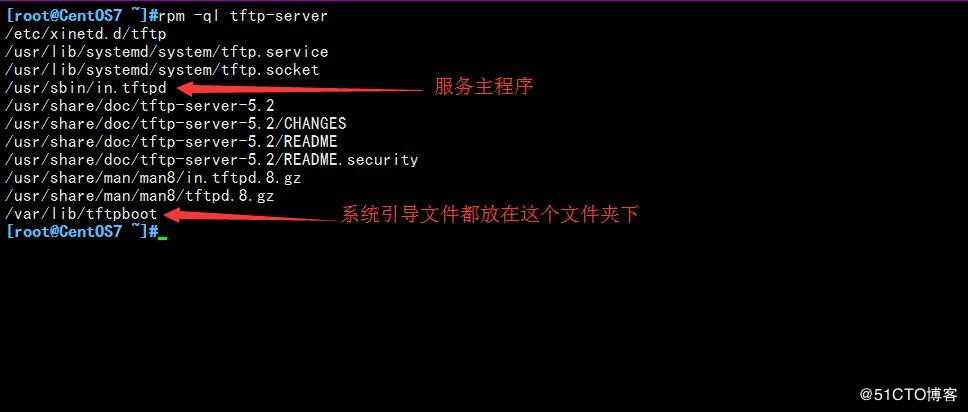
- 安装DHCP服务

2.1 修改DHCP的配置文件 /etc/dhcp/dhcpd.conf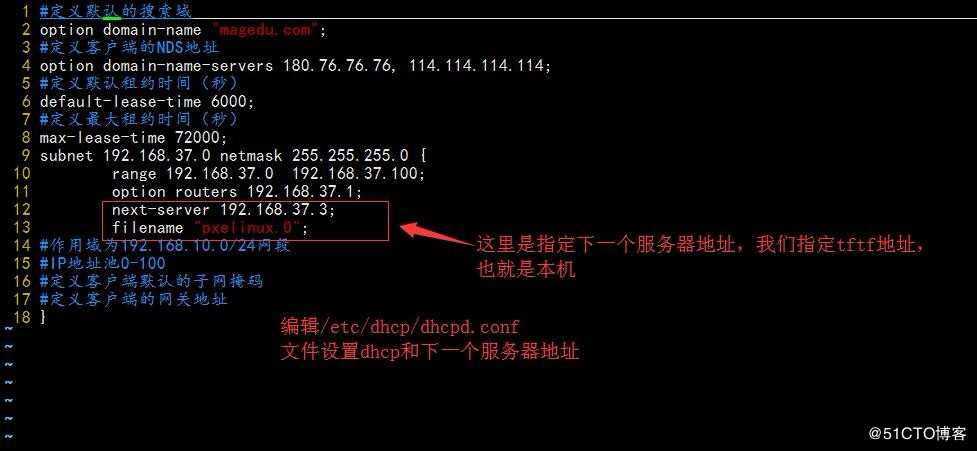
- 安装http服务
http的安装就不在这里叙述了可以用yum安装或编译源码安装,我这里使用的是源码编译安装的2.4版本 - 因为tftpboot引导目录下还需要一些必要的文件,我们还要安装一个syslinux包,里面提供了丰富的与系统安装的文件。
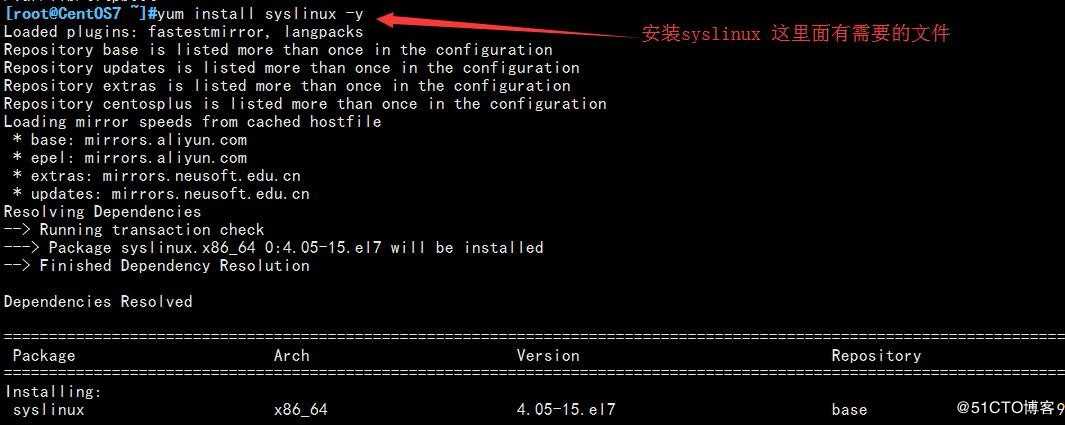
4.1 把syslinux里的两个文件复制到 /var/lib/tftpboot/下
二. 先把centos7或6的安装光盘挂载到http的一个目录下,我这里挂载的目录是/apps/httpd24/htdocs/centos/7/os/x86_64/,当然centos6也挂载到相应的目录下。
查看完整的tftpboot下文件
然后再编辑tftpboot/pxelinux.cfg/default文件,可以去光盘下拷贝isolinux.cfg覆盖改改。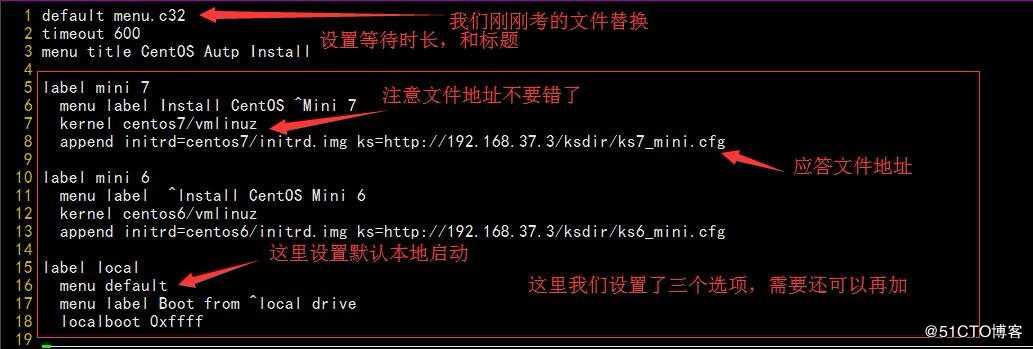
三. 准备好kickstart应答文件。
方法一:安装带图形的制作工具 yum -y install system-config-kickstart
方法二:找一台都得安装成功的机器,在他的家目录里有一个anaconda-ks.cfg文件,拿过来改改就可以了。
把应答文件放到http服务的文件夹下 地址要和 tftpboot/pxelinux.cfg/default里的设置匹配
这里提供一个我自己的基于centos7最小化的ks文件供参考。
#platform=x86, AMD64, or Intel EM64T
#version=DEVEL
# Install OS instead of upgrade
install
# Keyboard layouts
keyboard ‘us‘
# Root password
rootpw --plaintext centos
# Use network installation
url --url="http://192.168.37.3/centos/7/os/x86_64"   #这里要写上安装盘的http地址
# System language
lang en_US
# System authorization information
auth  --useshadow  --passalgo=sha512
# Use text mode install
text
firstboot --disable
# SELinux configuration
selinux --disabled

# Firewall configuration
firewall --disabled
# Network information
network  --bootproto=dhcp --device=eth0
# Reboot after installation
reboot
# System timezone
timezone Asia/Shanghai
# System bootloader configuration
bootloader --append="net.ifnames=0" --location=mbr
# Clear the Master Boot Record
zerombr
# Partition clearing information
clearpart --all
# Disk partitioning information
part / --fstype="xfs" --size=100000
part /boot --fstype="xfs" --size=1000
part swap --fstype="swap" --size=2000

%packages
@^minimal
autofs
%end

%post
mkdir /root/.ssh
chmod 700 /root/.ssh
#cat > /root/.ssh/authorized_keys <<EOF
#ssh-rsa AAAAB3NzaC1yc2EAAAADAQABAAABAQDSi4WucaraQXLsyyrluMBuKjClLscLulnLLzTshTX/L3t7c6Lw+Ap0zMbPuGer0NRuvnkESfsRNtnBXmuTDcuOYeOosMe59zGGmv04BZFipyDi7Acw94IeNF2HaU3pk6WIqkpqYlOnUAvAJg0fN+hEkVBy0S1pghVK7SWA0KFAUKuSrvd8ZNj3NK1Vj+ZPLXGDrnF8JyvfBz8oq+M+70dZRNhSsXCegHUfLY2tRvXOkjYb6tLQlQAgSifzI+FqB0Ix/VmsIspdAep/jwsKNjTf93fngoQ1ovdSu5ybzo95VF+UxAou1+9kNhr9/qJhSGp3StQHAVbERJdgjguhoA7h [email protected]
#EOF
#chmod 600 /root/.ssh/authorized_keys
mkdir /etc/yum.repos.d/bak
mv /etc/yum.repos.d/*.repo /etc/yum.repos.d/bak
cat > /etc/yum.repos.d/test.repo <<EOF
[base]
baseurl=http://192.168.37.3/centos/7/os/x86_64
gpgcheck=0
EOF

%end
四. 测试效果
- 先测试centos7的最小化安装
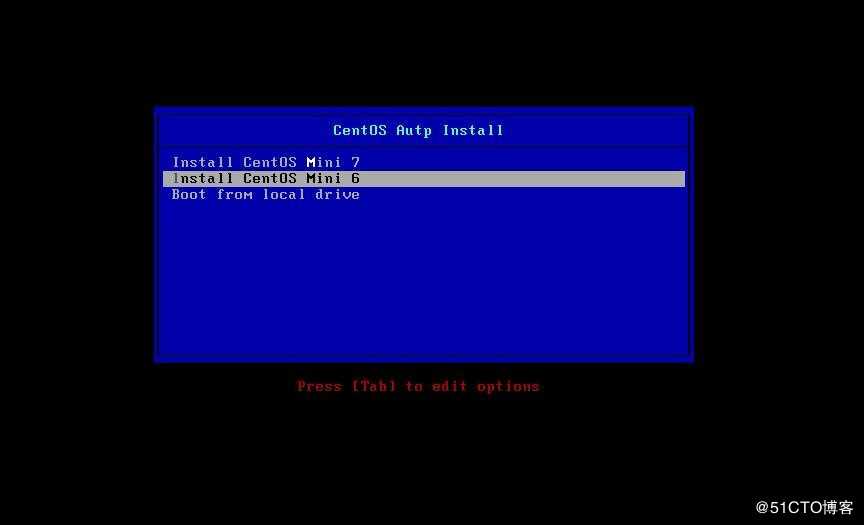
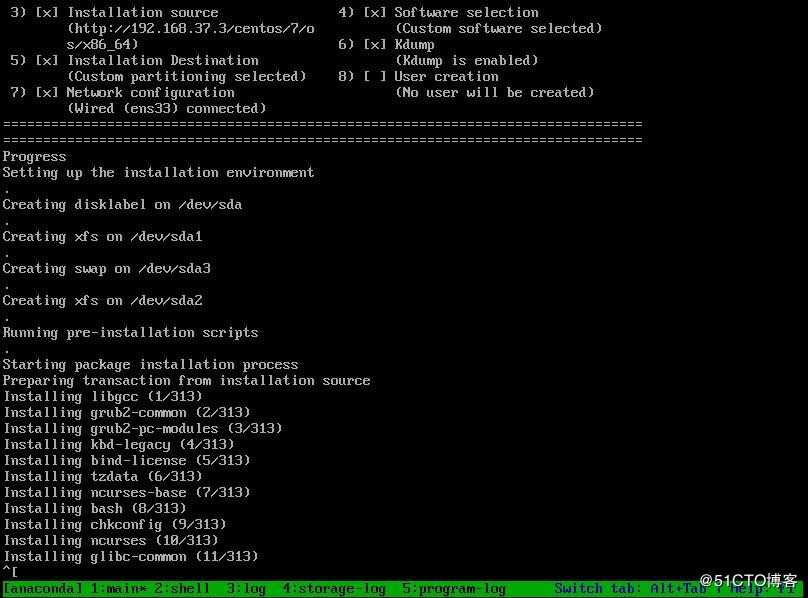
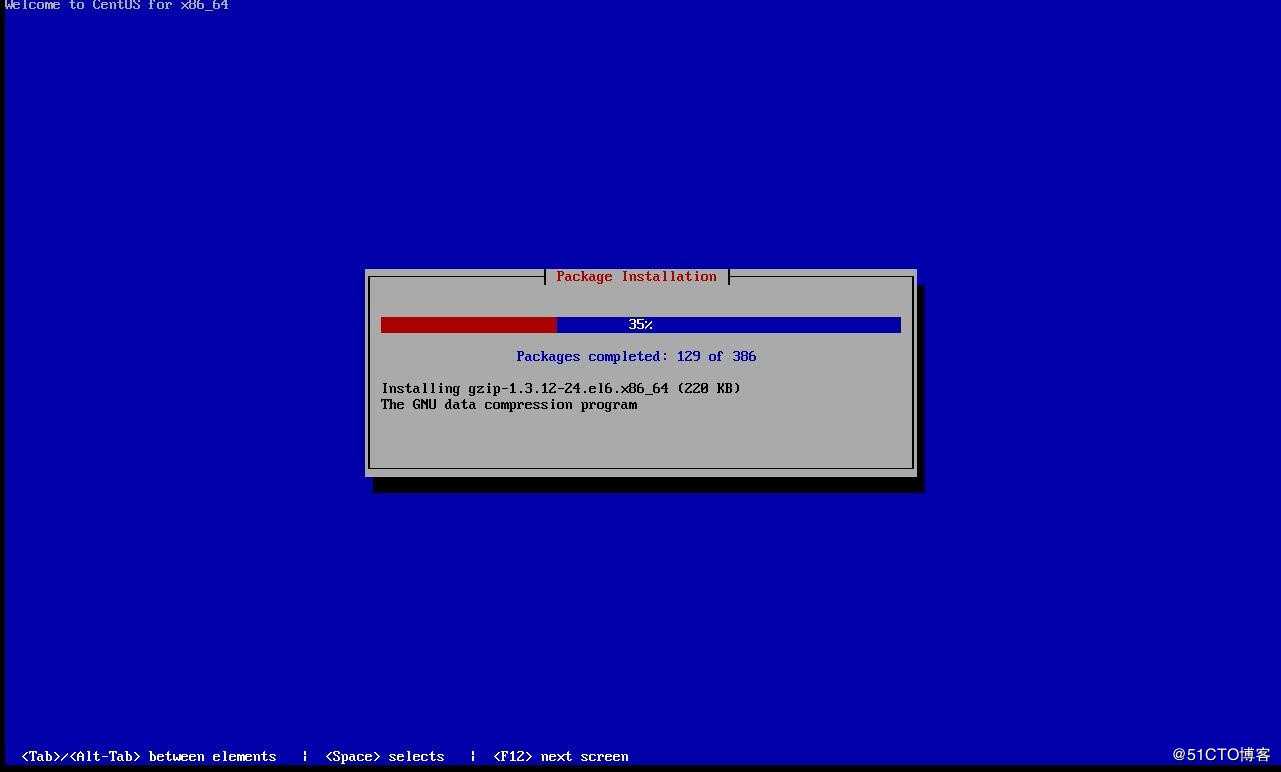
- 测试centos6的最小化安装
以上是关于基于PXE+Kickstart无人值守安装的主要内容,如果未能解决你的问题,请参考以下文章