mysql数据库主从同步(交互式)
Posted mynale
tags:
篇首语:本文由小常识网(cha138.com)小编为大家整理,主要介绍了mysql数据库主从同步(交互式)相关的知识,希望对你有一定的参考价值。
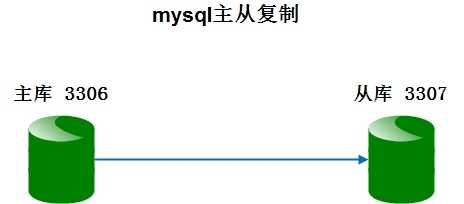
mysql数据库主从同步交互式配置步骤,本文以一台mysql数据库多实例3306和3307为例进行配置,3306为主库,3307为从库(多台单实例与一台多实例配置是一样的)

一.my.cnf文件配置
1.修改my.cnf配置文件,主数据库3306要打开log-bin,server-id不能一样
[[email protected] ~]# egrep"log-bin|server-id" /data/3306,3307/my.cnf
/data/3306/my.cnf:log-bin=/data/3306/mysql-bin
/data/3306/my.cnf:server-id=1
/data/3307/my.cnf:#log-bin=/data/3307/mysql-bin
/data/3307/my.cnf:server-id=3
2.重启数据库3306和3307
[[email protected] ~]#/data/3306/mysql stop
[[email protected] ~]#/data/3306/mysql start
[[email protected] ~]#/data/3307/mysql stop
[[email protected] ~]#/data/3307/mysql start
3.进入主数据库3306,查询log_bin是否打开,server_id是多少
[[email protected] ~]# mysql -uroot-p123456 -S /data/3306/mysql.sock
mysql> show variables like"log_bin";
+---------------+-------+
| Variable_name | Value |
+---------------+-------+
| log_bin | ON |
+---------------+-------+
1 row in set (0.01 sec)
mysql> show variables like"server_id";
+---------------+-------+
| Variable_name | Value |
+---------------+-------+
| server_id | 1 |
+---------------+-------+
1 row in set (0.00 sec)
4.创建一个专门用来同步数据库的用户
mysql> grant replicationslave on *.* to [email protected]‘10.0.0.%‘ identified by ‘123456‘;
###*.*代表所有库和所有表
mysql> flush privileges;
mysql> select user,hostmysql.user;
mysql> show grants [email protected]‘10.0.0.%‘;
二.主库3306备份
mysql> flush table with readlock; //锁表,这时为只读,不能写,此时mysql窗口不能退出,退出则锁表会失败,超出默认的锁表时间会自动解锁
mysql> show variables like‘timeout%‘; //查看默认的锁表时间
mysql> show master status; //查看binlog位置
+------------------+----------+--------------+------------------+-----------------------------------+
| File | Position | Binlog_Do_DB | Binlog_Ignore_DB |
+------------------+----------+--------------+------------------+-----------------------------------+
| mysql-bin.000004 | 328| | |
+------------------+----------+--------------+------------------+-----------------------------------+
1 row in set (0.00 sec)
[[email protected] ~]# mysqldump-uroot -p123456 -S /data/3306/mysql.sock -A -B|gzip >/opt/bak_$(date+%F).sql.gz //从新打开一个CRT窗口,进行备份
[[email protected] ~]# ls /opt
bak_2017-06-28.sql.gz
mysql> show master status; //备份数据后,再次查看binlog位置,确认这期间没有新数据写入
mysql> unlock tables; //解锁
三.把主库3306备份出来的数据还原到从库3307
1.登陆3307,确认logbin是关闭状态,server id与3306不冲突
[[email protected] ~]# mysql -uroot-p123456 -S /data/3307/mysql.sock
mysql> show variables like"log_bin";
+---------------+-------+
| Variable_name | Value |
+---------------+-------+
| log_bin | OFF |
+---------------+-------+
1 row in set (0.01 sec)
mysql> show variables like"server_id";
+---------------+-------+
| Variable_name | Value |
+---------------+-------+
| server_id | 3 |
+---------------+-------+
1 row in set (0.00 sec)
2.将3306备份的数据还原到3307上
[[email protected] ~]# cd /opt
[[email protected] opt]# ls
bak_2017-06-28.sql.gz
[[email protected] opt]# gzip -dbak_2017-06-28.sql.gz
[[email protected] opt]# ls
bak_2017-06-28.sql
[[email protected] opt]# mysql -uroot-p123456 -S /data/3307/mysql.sock <bak_2017-06-28.sql
3.登陆3307,执行以下命令,连接主库3306
[[email protected] opt]# mysql -uroot-p123456 -S /data/3307/mysql.sock
mysql> CHANGE MASTER TO
-> MASTER_HOST=‘10.0.0.20‘,
-> MASTER_PORT=3306,
-> MASTER_USER=‘rep‘,
-> MASTER_PASSWORD=‘123456‘,
-> MASTER_LOG_FILE=‘mysql-bin.000004‘,
-> MASTER_LOG_POS=328;
mysql> start slave; //从库3307开启主从复制开关
mysql> show slave status\\G //检查同步状态
*************************** 1.row ***************************
Slave_IO_State: Waiting formaster to send event
Master_Host: 10.0.0.20
Master_User: rep
Master_Port: 3306
Connect_Retry: 60
Master_Log_File: mysql-bin.000004
Read_Master_Log_Pos: 328
Relay_Log_File: relay-bin.000002
Relay_Log_Pos: 253
Relay_Master_Log_File: mysql-bin.000004
Slave_IO_Running:Yes //确认这两条是yes状态
Slave_SQL_Running: Yes
Replicate_Do_DB:
Replicate_Ignore_DB: mysql
Replicate_Do_Table:
Replicate_Ignore_Table:
Replicate_Wild_Do_Table:
Replicate_Wild_Ignore_Table:
Last_Errno: 0
Last_Error:
Skip_Counter: 0
Exec_Master_Log_Pos: 328
Relay_Log_Space: 403
Until_Condition: None
Until_Log_File:
Until_Log_Pos: 0
Master_SSL_Allowed: No
Master_SSL_CA_File:
Master_SSL_CA_Path:
Master_SSL_Cert:
Master_SSL_Cipher:
Master_SSL_Key:
Seconds_Behind_Master: 0 //复制过程中从库比主库延迟的秒数
Master_SSL_Verify_Server_Cert:No
Last_IO_Errno: 0
Last_IO_Error:
Last_SQL_Errno: 0
Last_SQL_Error:
Replicate_Ignore_Server_Ids:
Master_Server_Id: 1
1 row in set (0.00 sec)
或者这样检查同步状态
[[email protected] ~]# mysql -uroot-p123456 -S /data/3307/mysql.sock -e"show slave status\\G"|egrep -i "running|_behind" //-e的作用是不需要登陆mysql交互敲入命令
Slave_IO_Running: Yes
Slave_SQL_Running: Yes
Seconds_Behind_Master: 0
查看线程状态
[[email protected] ~]# mysql -uroot -p123456 -S/data/3307/mysql.sock -e "show processlist\\G"
[[email protected] ~]# mysql -uroot -p123456 -S/data/3306/mysql.sock -e "show processl
四.测试
在主库3306上创建数据库,然后再登陆3307查看是否正常同步,经测试已正常同步^_^
以上是关于mysql数据库主从同步(交互式)的主要内容,如果未能解决你的问题,请参考以下文章