canva绘制圆角矩形
Posted pengfei25
tags:
篇首语:本文由小常识网(cha138.com)小编为大家整理,主要介绍了canva绘制圆角矩形相关的知识,希望对你有一定的参考价值。
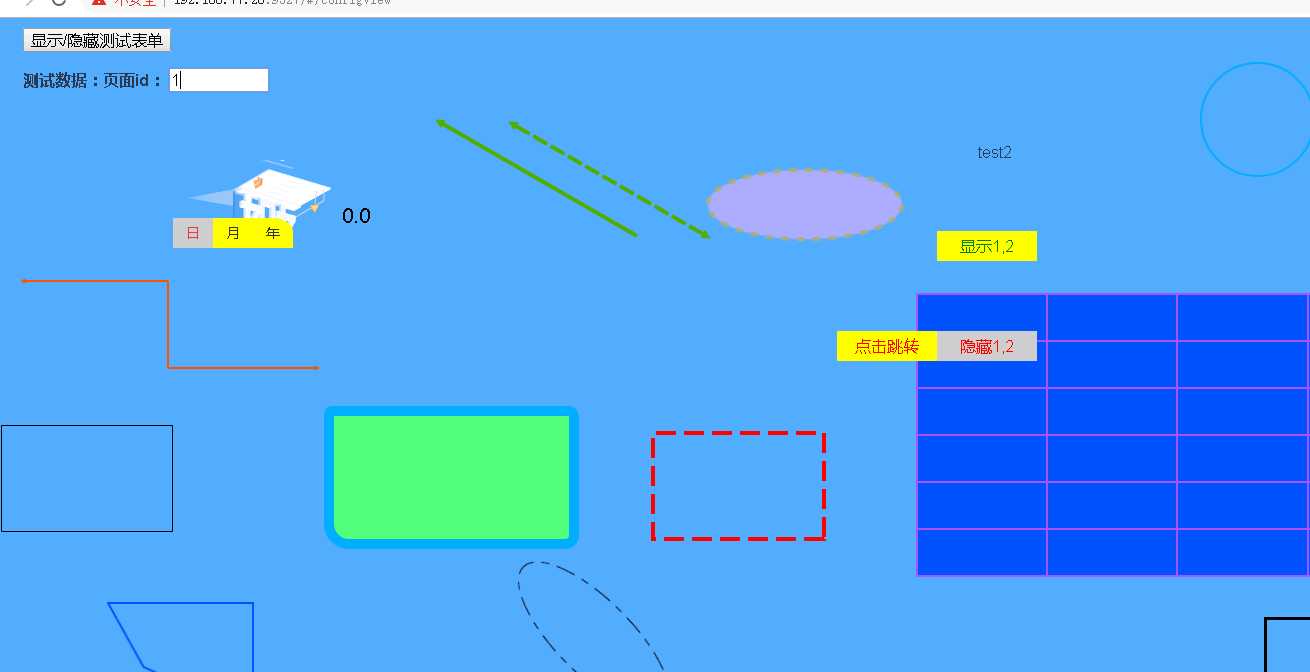
在做组态的时候,需要支持矩形圆角格式,但是因为canvas本身不带有圆角矩形,需要自行算出坐标进行绘制
方案一、统一圆角
<!DOCTYPE html>
<html>

<head>
    <meta charset="utf-8">
    <title>canvas制作圆角矩形(包括填充矩形的功能)</title>
</head>

<body>
    <canvas id="myCanvas" style="border:1px solid #d3d3d3;">
        您的浏览器不支持 HTML5 canvas 标签。</canvas>
    <script>
    window.onload = function()
        var myCanvas = document.getElementById("myCanvas"); //获取canvas对象
        if (myCanvas.getContext("2d"))  //判断浏览器是否支持canvas标签
            //设置canvas的宽度和高度
            myCanvas.width = 400;
            myCanvas.height = 200;

            var context = myCanvas.getContext("2d"); //获取画布context的上下文环境
            //绘制一个圆角矩形
            strokeRoundRect(context, 10, 10, 100, 50, 10);

            //绘制并填充一个圆角矩形
            fillRoundRect(context, 200, 10, 100, 50, 10, ‘rgba(0,0,0,0.7)‘);
         else
            alert("您的浏览器不支持canvas,请换个浏览器试试");

    ;


    /**该方法用来绘制一个有填充色的圆角矩形
     *@param cxt:canvas的上下文环境
     *@param x:左上角x轴坐标
     *@param y:左上角y轴坐标
     *@param width:矩形的宽度
     *@param height:矩形的高度
     *@param radius:圆的半径
     *@param fillColor:填充颜色
     **/
    function fillRoundRect(cxt, x, y, width, height, radius, /*optional*/ fillColor)
        //圆的直径必然要小于矩形的宽高
        if (2 * radius > width || 2 * radius > height)  return false;

        cxt.save();
        cxt.translate(x, y);
        //绘制圆角矩形的各个边
        drawRoundRectPath(cxt, width, height, radius);
        cxt.fillStyle = fillColor || "#000"; //若是给定了值就用给定的值否则给予默认值
        cxt.fill();
        cxt.restore();


    /**该方法用来绘制圆角矩形
     *@param cxt:canvas的上下文环境
     *@param x:左上角x轴坐标
     *@param y:左上角y轴坐标
     *@param width:矩形的宽度
     *@param height:矩形的高度
     *@param radius:圆的半径
     *@param lineWidth:线条粗细
     *@param strokeColor:线条颜色
     **/
    function strokeRoundRect(cxt, x, y, width, height, radius, /*optional*/ lineWidth, /*optional*/ strokeColor)
        //圆的直径必然要小于矩形的宽高
        if (2 * radius > width || 2 * radius > height)  return false;

        cxt.save();
        cxt.translate(x, y);
        //绘制圆角矩形的各个边
        drawRoundRectPath(cxt, width, height, radius);
        cxt.lineWidth = lineWidth || 2; //若是给定了值就用给定的值否则给予默认值2
        cxt.strokeStyle = strokeColor || "#000";
        cxt.stroke();
        cxt.restore();


    function drawRoundRectPath(cxt, width, height, radius)
        cxt.beginPath(0);
        //从右下角顺时针绘制,弧度从0到1/2PI
        cxt.arc(width - radius, height - radius, radius, 0, Math.PI / 2);

        //矩形下边线
        cxt.lineTo(radius, height);

        //左下角圆弧,弧度从1/2PI到PI
        cxt.arc(radius, height - radius, radius, Math.PI / 2, Math.PI);

        //矩形左边线
        cxt.lineTo(0, radius);

        //左上角圆弧,弧度从PI到3/2PI
        cxt.arc(radius, radius, radius, Math.PI, Math.PI * 3 / 2);

        //上边线
        cxt.lineTo(width - radius, 0);

        //右上角圆弧
        cxt.arc(width - radius, radius, radius, Math.PI * 3 / 2, Math.PI * 2);

        //右边线
        cxt.lineTo(width, height - radius);
        cxt.closePath();

    </script>
</body>

</html>
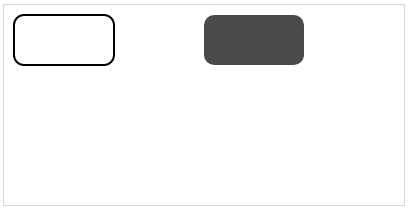
效果图

方案二、支持多种圆角格式【右下、左下、左上、右上】
申明一个变量,以数组的形式,然后将 drawRoundRectPath函数重新改写一下即可
    drawRoundRectPath(cxt, width, height)
      var radius = this.radius;//vue data里面的数据
      var  r0 = radius[0],r1 = radius[1],r2 = radius[2],r3 = radius[3];
      cxt.beginPath(0);
      //从右下角顺时针绘制,弧度从0到1/2PI
      cxt.arc(width - r0, height - r0, r0, 0, Math.PI / 2);

      //矩形下边线
      cxt.lineTo(r1, height);

      //左下角圆弧,弧度从1/2PI到PI
      cxt.arc(r1, height - r1, r1, Math.PI / 2, Math.PI);

      //矩形左边线
      cxt.lineTo(0, r2);

      //左上角圆弧,弧度从PI到3/2PI
      cxt.arc(r2, r2, r2, Math.PI, Math.PI * 3 / 2);

      //上边线
      cxt.lineTo(width - r3, 0);

      //右上角圆弧
      cxt.arc(width - r3, r3, r3, Math.PI * 3 / 2, Math.PI * 2);

      //右边线
      cxt.lineTo(width, height - r3);
      cxt.closePath();
实例
vue进行绘制矩形

<template>
  <canvas
    :id="options.id"
    ref="canvas"
    class="elem-container"
    :width="canvasWidth"
    :height="canvasHeight"
    :style="assignStyle"
  />
</template>
<script>
import mixins from ‘./canvasMixins.js‘

export default
  name: ‘RectElem‘,
  mixins: [mixins],
  data()
    return
      myOptions:
        penStyle: 0
      ,
      assignStyle:  // 合并样式

  ,
  computed:
    ‘canvasWidth‘: function()
      return (parseFloat(this.myOptions.width) + parseFloat(this.myOptions.borderWidth))
    ,
    ‘canvasHeight‘: function()
      return (parseFloat(this.myOptions.height) + parseFloat(this.myOptions.borderWidth))
    ,
    ‘radius‘ : function()
      debugger;
      if(this.myOptions.radius == "none") return [0,0,0,0]
      return !!this.myOptions.radius ? JSON.parse(this.myOptions.radius) : [0,0,0,0]

  ,
  mounted()
    this.initialStyleOfRec()
  ,
  methods:
    initialStyleOfRec()
      const options = this.myOptions // 父组件传入的参数
      const bWidth = options.borderWidth
      let baseStyle = options.style // 未转为对象前的基础样式(字符串)
      const width = options.width ? `width:$options.borderWidth ? (options.width * 1 + options.borderWidth) : options.widthpx;` : ‘‘
      const height = options.height ? `height:$options.borderWidth ? (options.height * 1 + options.borderWidth) : options.heightpx;` : ‘‘
      const len = baseStyle.length
      baseStyle = baseStyle.charAt(len - 1) === ‘;‘ ? (baseStyle + width + height) : (baseStyle + ‘;‘ + width + height)
      this.baseStyle = this.style2Object(baseStyle)
      if (bWidth && bWidth !== ‘‘)
        this.baseStyle.top = `$-0.5 * (this.options.borderWidth || 0)px`
        this.baseStyle.left = `$-0.5 * (this.options.borderWidth || 0)px`

      this.assignStyle = this.baseStyle
    ,
    // // 把字符串样式转化为
    // styleToObject(style)
    //   let styleObject =

    //   if (style && style !== ‘‘ && style !== ‘null‘)
    //     const len = style.length
    //     styleObject = style.charAt(len - 1) === ‘;‘ ? ‘‘ + style + ‘‘ : ‘‘ + style + ‘;‘ // 统一样式后面以";"结束

    //     // 将字符串转化为json标准字符串
    //     styleObject = styleObject.replace(//g, ‘\\"‘)
    //     styleObject = styleObject.replace(/:/g, ‘\\":\\"‘)
    //     styleObject = styleObject.replace(/;/g, ‘\\",\\"‘)
    //     styleObject = styleObject.replace(/,"/g, ‘‘)

    //     // 将json标准字符串转化为对象
    //     styleObject = JSON.parse(styleObject)
    //
    //   return styleObject
    // ,
    render(options)
      const ctx = this.getCleanCtx()// 获取canvas画布
      const penStyle = options.penStyle// 线型
      // 判断
      const halfBW = 0.5 * (options.borderWidth || 0) // 线宽的一半
      const fillColor = options.fillColor

      if (penStyle === 0)
        ctx.lineWidth === 0
       else if (penStyle !== 1)
        ctx.setLineDash(this.getLineDashArr(penStyle))

      let param =
          x:0 + halfBW,
          y:0 + halfBW,
          w:options.width,
          h:options.height,
          radius:options.radius || [0,0,0,0]

      if (fillColor !== ‘none‘)
        // 绘制填充矩形
        ctx.fillStyle = fillColor
       // ctx.fillRect(0 + halfBW, 0 + halfBW, options.width, options.height);

        //绘制填充圆角矩形
        this.fillRoundRect(ctx,param);
        //ctx.fill()

      ctx.lineWidth = options.borderWidth
      ctx.strokeStyle = options.borderColor
      //ctx.strokeRect(0 + halfBW, 0 + halfBW, options.width, options.height)
      //绘制描边圆角矩形
      this.strokeRoundRect(ctx,param);
    ,
    /**该方法用来绘制一个有填充色的圆角矩形
     *@param cxt:canvas的上下文环境
     *@param param.x:左上角x轴坐标
     *@param param.y:左上角y轴坐标
     *@param param.w:矩形的宽度
     *@param param.h:矩形的高度
     *@param param.radius:圆的半径
     **/
    fillRoundRect(cxt, param)
        let x = param.x,
        ctx = ctx,
        y = param.y,
        width = param.w,
        height = param.h,
        radius = param.radius;
        //圆的直径必然要小于矩形的宽高
        if (2 * radius > width || 2 * radius > height)  return false;
        cxt.save();
        cxt.translate(x, y);
        //绘制圆角矩形的各个边
        this.drawRoundRectPath(cxt, width, height, radius);
        //cxt.fillStyle = fillColor || "#000"; //若是给定了值就用给定的值否则给予默认值
        cxt.fill();
        cxt.restore();
    ,

    drawRoundRectPath(cxt, width, height)
      var radius = this.radius;
      var  r0 = radius[0],r1 = radius[1],r2 = radius[2],r3 = radius[3];
      cxt.beginPath(0);
      //从右下角顺时针绘制,弧度从0到1/2PI
      cxt.arc(width - r0, height - r0, r0, 0, Math.PI / 2);

      //矩形下边线
      cxt.lineTo(r1, height);

      //左下角圆弧,弧度从1/2PI到PI
      cxt.arc(r1, height - r1, r1, Math.PI / 2, Math.PI);

      //矩形左边线
      cxt.lineTo(0, r2);

      //左上角圆弧,弧度从PI到3/2PI
      cxt.arc(r2, r2, r2, Math.PI, Math.PI * 3 / 2);

      //上边线
      cxt.lineTo(width - r3, 0);

      //右上角圆弧
      cxt.arc(width - r3, r3, r3, Math.PI * 3 / 2, Math.PI * 2);

      //右边线
      cxt.lineTo(width, height - r3);
      cxt.closePath();
    ,
    /**该方法用来绘制描边圆角矩形
     *@param cxt:canvas的上下文环境
     *@param x:左上角x轴坐标
     *@param y:左上角y轴坐标
     *@param width:矩形的宽度
     *@param height:矩形的高度
     *@param radius:圆的半径
     *@param lineWidth:线条粗细
     *@param strokeColor:线条颜色
     **/
    strokeRoundRect(cxt,param)
      let x = param.x,
      y = param.y,
      width = param.w,
      height = param.h,
      radius = param.radius;
      //圆的直径必然要小于矩形的宽高
      if (2 * radius > width || 2 * radius > height)  return false;

      cxt.save();
      cxt.translate(x, y);
      //绘制圆角矩形的各个边
      this.drawRoundRectPath(cxt, width, height, radius);
     // cxt.lineWidth = lineWidth || 2; //若是给定了值就用给定的值否则给予默认值2
      //cxt.strokeStyle = strokeColor || "#000";
      cxt.stroke();
      cxt.restore();


</script>

以上是关于canva绘制圆角矩形的主要内容,如果未能解决你的问题,请参考以下文章
