搭建zabbix监控系统
Posted
tags:
篇首语:本文由小常识网(cha138.com)小编为大家整理,主要介绍了搭建zabbix监控系统相关的知识,希望对你有一定的参考价值。
搭建自动化服务平台---zabbix监控平台准备环境
- 准备一台Linux主机(CentOS 7举例)
- 已经安装好LAMP平台
- 关闭防火墙及SELinux
- 设置IP地址
- 设置好yum源
- linux指令中的个别符号会与博客的文本编辑语言产生冲突,我会用空格隔开方便阅读 具体的以实际语法为准
实验开始
准备zabbix平台环境
服务器地址设置
更改主机名
[[email protected] ~] hostnamectl set-hostname zabbix-server //设置主机名配置IP地址
[[email protected] zabbix-server ~] nmcli connection modify ens33 ipv4.addresses 192.168.139.132  //设置IP地址
[[email protected] zabbix-server ~] nmcli connection up ens33  //激活网卡
添加主机映射
[[email protected] zabbix-server ~] vim /etc/hosts

192.168.139.132 zabbix zabbix-server.com   //在vim中写入该指令 另起一行
检查是否能够ping通设置的网站
[[email protected] zabbix-server ~] ping zabbix-server.com  //ping刚才在vim写入的网址
PING zabbix (192.168.139.132) 56(84) bytes of data.
64 bytes from zabbix (192.168.139.132): icmp_seq=1 ttl=64 time=0.032 ms
64 bytes from zabbix (192.168.139.132): icmp_seq=2 ttl=64 time=0.034 ms
安装并启用LAMP平台
安装LAMP组件
[[email protected] zabbix-server ~] yum -y install httpd mariadb mariadb-server php php-mysql   //安装软件包
已安装:
  httpd.x86_64 0:2.4.6-89.el7.centos         mariadb.x86_64 1:5.5.60-1.el7_5
  mariadb-server.x86_64 1:5.5.60-1.el7_5     php.x86_64 0:5.4.16-46.el7
  php-mysql.x86_64 0:5.4.16-46.el7
检查是否安装成功
[[email protected] ~]# yum list httpd mariadb mariadb-server php php-mysql
已加载插件:fastestmirror, langpacks
Loading mirror speeds from cached hostfile
 * base: mirrors.aliyun.com
 * extras: ap.stykers.moe
 * updates: mirrors.aliyun.com
已安装的软件包
httpd.x86_64                                                       2.4.6-89.el7.centos                                              @updates
mariadb.x86_64                                                     1:5.5.60-1.el7_5                                                 @base
mariadb-server.x86_64                                              1:5.5.60-1.el7_5                                                 @base
php.x86_64                                                         5.4.16-46.el7                                                    @base
php-mysql.x86_64                                                   5.4.16-46.el7
启用LAMP服务
[[email protected] ~] systemctl restart httpd mariadb  //重启服务
[[email protected] ~] systemctl enable httpd mariadb  //设置开机自启
Created symlink from /etc/systemd/system/multi-user.target.wants/httpd.service to /usr/lib/systemd/system/httpd.service.
Created symlink from /etc/systemd/system/multi-user.target.wants/mariadb.service to /usr/lib/systemd/system/mariadb.s
设置防火墙和SELinux
关闭防火墙
[[email protected] ~] systemctl stop firewalld.service  //关闭防火墙
[[email protected] ~] systemctl disable firewalld.service  //进制开机自启
Removed symlink /etc/systemd/system/multi-user.target.wants/firewalld.service.
Removed symlink /etc/systemd/system/dbus-org.fedoraproject.FirewallD1.service.
关闭SELinux机制
[[email protected] ~] setenforce 0  //使SELinux失效
[[email protected] ~] vim /etc/selinux/config  //开机时禁止
// 进入到vim编辑模式 更改第一个SELinux的值
# This file controls the state of SELinux on the system.
# SELINUX= can take one of these three values:
#     enforcing - SELinux security policy is enforced.
#     permissive - SELinux prints warnings instead of enforcing.
#     disabled - No SELinux policy is loaded.
**SELINUX=disabled**
# SELINUXTYPE= can take one of three values:
#     targeted - Targeted processes are protected,
#     minimum - Modification of targeted policy. Only selected processes are protected.
#     mls - Multi Level Security protection.
SELINUXTYPE=targeted
zabbix安装及初始化
安装zabbix相关软件包
确认软件包
可以使用XFTP连上CentOS 7 将准备好的zabbix-server文件传到/root 目录下
安装zabbix服务器依赖包
[[email protected] zabbix-server ~] ls  /root/zabbix-server/
[[email protected] zabbix-server ~] yum  -y  install  zabbix-server/ *.rpm
[[email protected] ~] yum list "zabbix*"
已安装的软件包
zabbix-agent.x86_64                                                      3.4.15-1.el7                                              @zabbix
zabbix-release.noarch                                                    3.4-2.el7                                                 installed
zabbix-server-mysql.x86_64                                               3.4.15-1.el7                                              @zabbix
zabbix-server-pgsql.x86_64                                               3.4.15-1.el7                                              @zabbix
zabbix-web.noarch                                                        3.4.15-1.el7                                              @zabbix
zabbix-web-mysql.noarch                                                  3.4.15-1.el7
配置解析环境 更改时区
修改zabbix的web服务器配置
[[email protected] ~] vim  /etc/httpd/conf.d/zabbix.conf
...
php_value date.timezone Asia/Shanghai   //删掉#号 将时区改为上海
...
[[email protected] ~] systemctl  restart  httpd  //重启web服务
初始化数据库连接
新建zabbix库 授权用户zabbix访问 密码为[email protected]
[[email protected] ~] mysql  -uroot
MariaDB [(none)]> create  database  zabbix  character  set  utf8  collate   utf8_bin;
MariaDB [(none)]> grant  all  on zabbix.*  to  [email protected]   identified  by   ‘[email protected]‘;
MariaDB [(none)]> quit;
导入zabbix服务提供的初始库
[[email protected] ~] zcat /usr/share/doc/zabbix-server-mysql*/create.sql.gz | mysql -uzabbix [email protected] zabbix设置数据库连接
[[email protected] ~] vim  /etc/zabbix/zabbix_server.conf
...
DBName=zabbix    //数据库名
DBUser=zabbix     //数据库用户
[email protected]     //连接密码
zabbix监控界面
开启zabbix相关服务
启动zabbix-serer、zabbix-agent
[[email protected] ~] systemctl restart zabbix-server zabbix-agent
[[email protected] ~] systemctl enable zabbix-server zabbix-agent
确认httpd网站服务已开启
[[email protected] ~] systemctl restart httpd访问web界面 初始化设置
访问部署好的zabbix监控系统页面
在浏览器中访问 http://192.168.139.132/zabbix/
点击 Next Step 按钮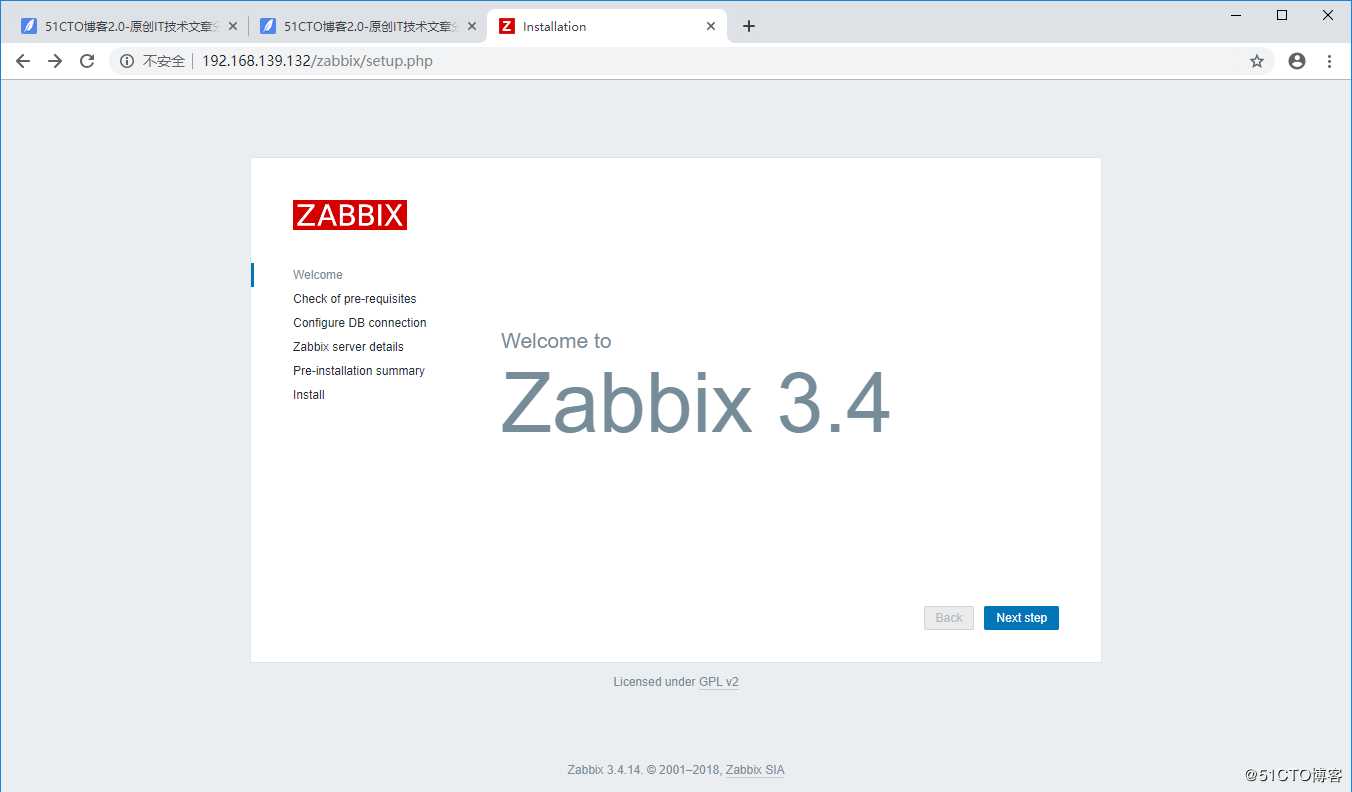
确认各项状态无误后点击 Next Step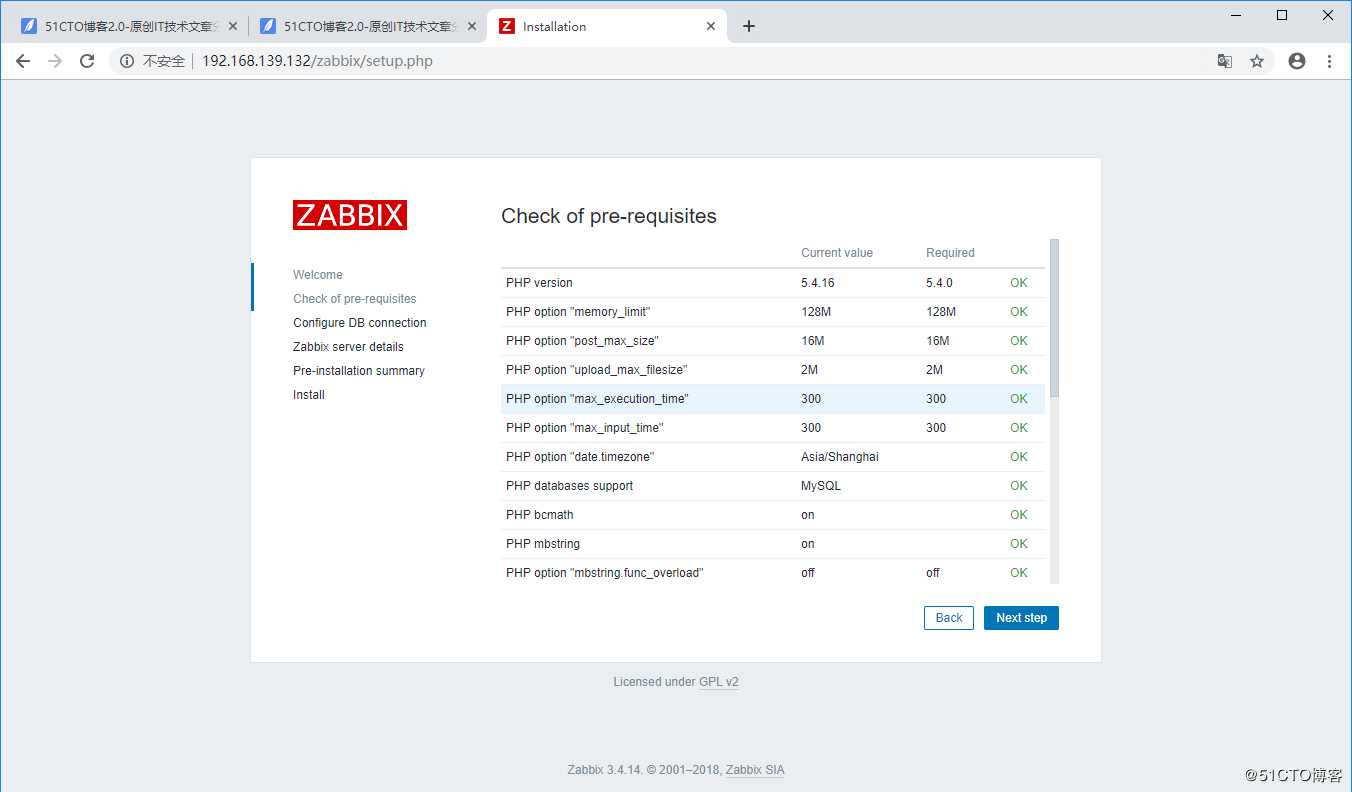
设置库名zabbix、用户名zabbix、密码[email protected] 点击Next Step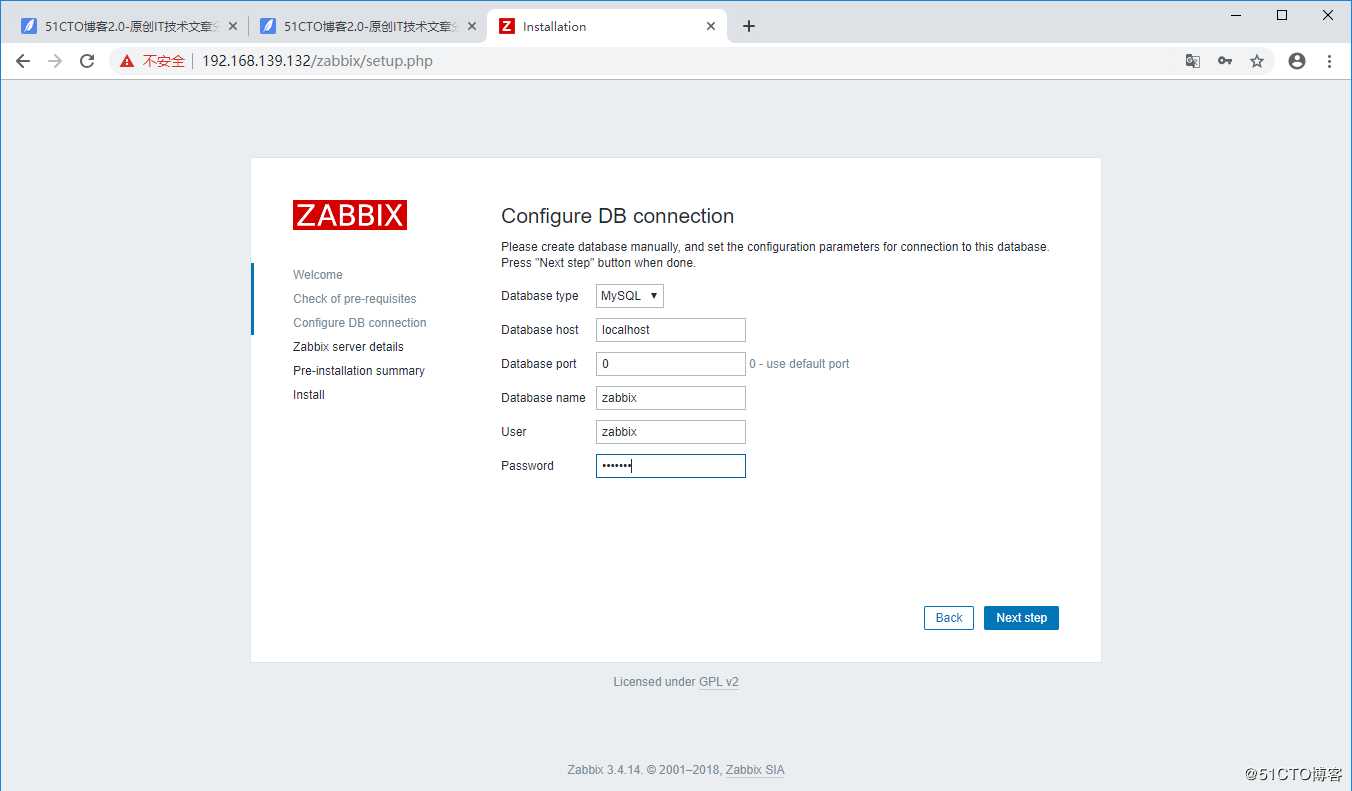
name这里起个名字 再次点击Next Step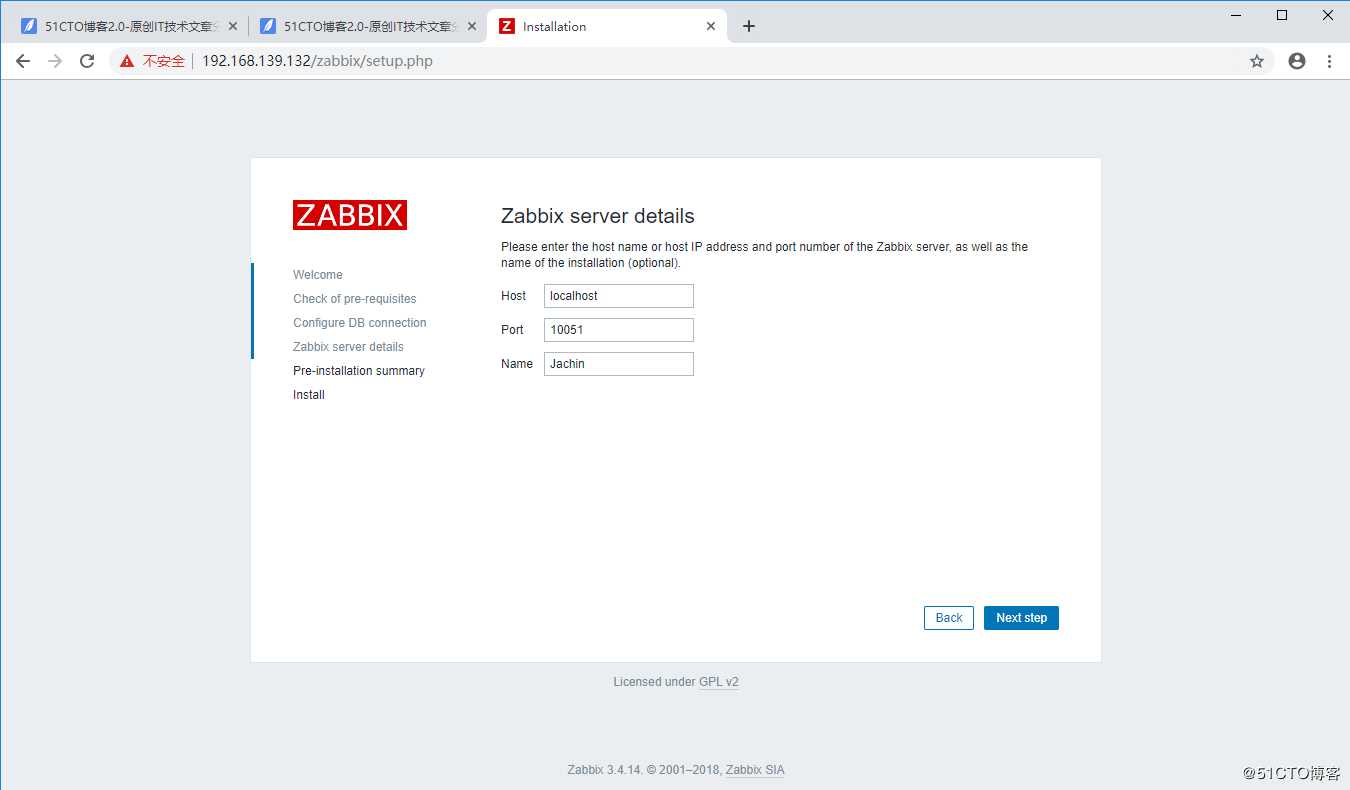
再点一次Next Step 点Finish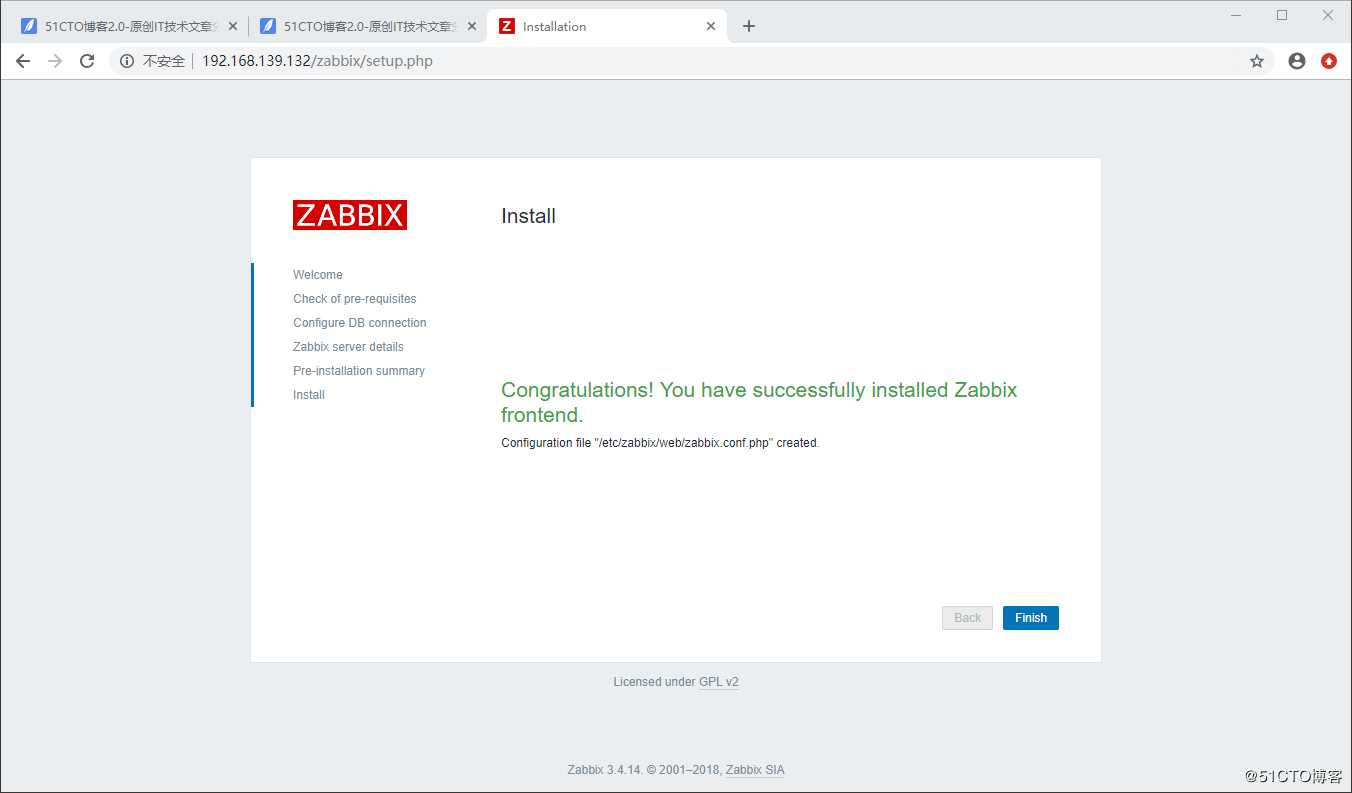
zabbix基础设置
回到登录界面 开始登陆
使用默认管理员的账号登陆
Username:Admin
Password:zabbix
登录成功后 显示zabbix监控的网页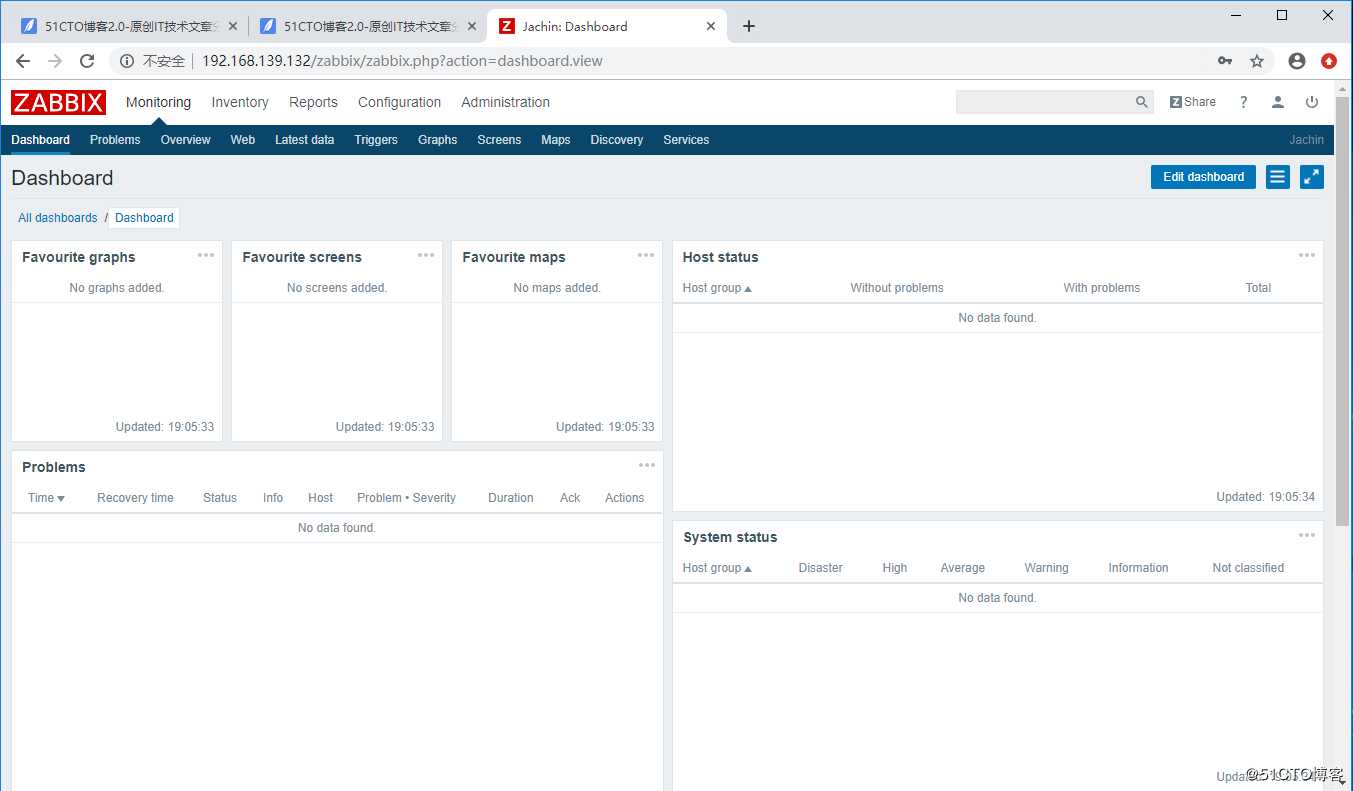
更改语言设置 点击zabbix监控平台右上方的头像标识
在language选项中选择Chinese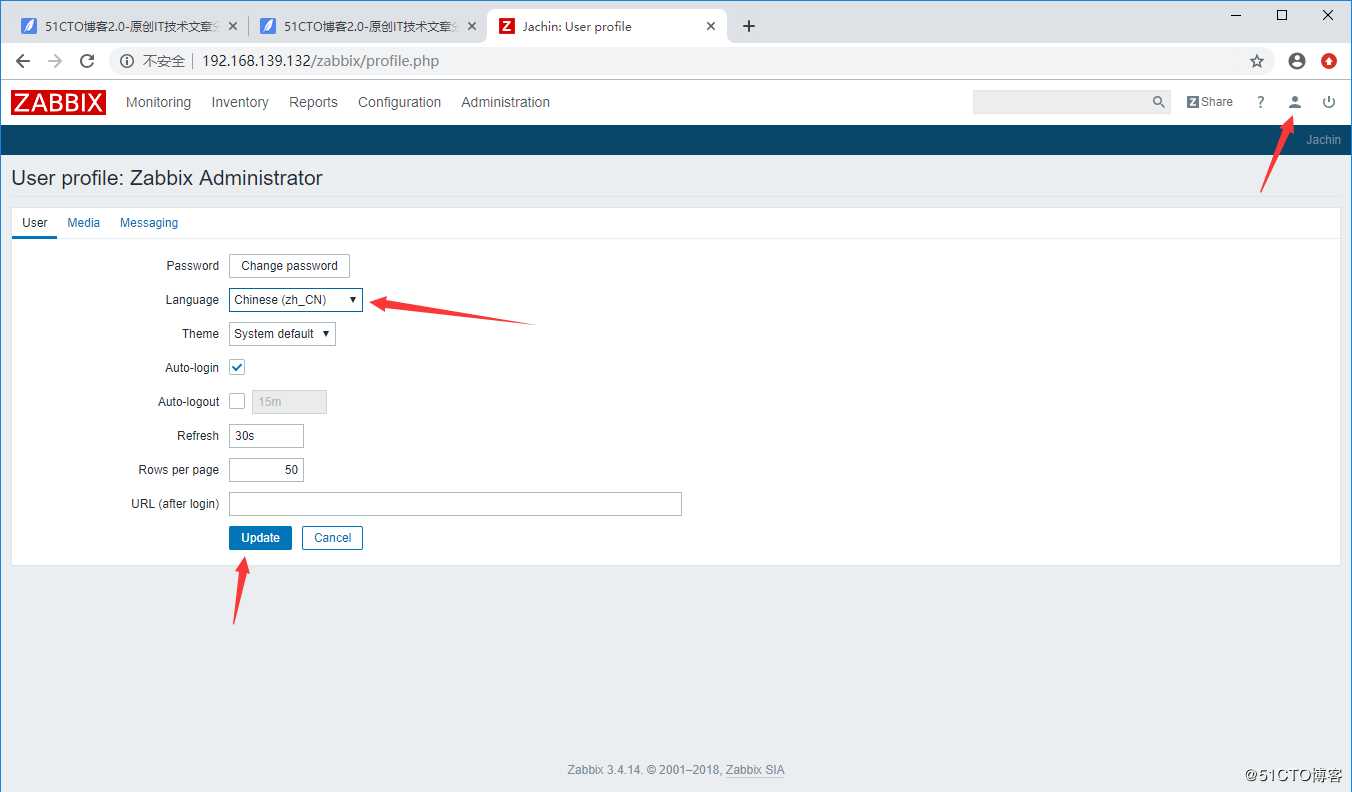
可以更换一个炫酷一点的主题 在刚才设置中文下面的选项中选择dark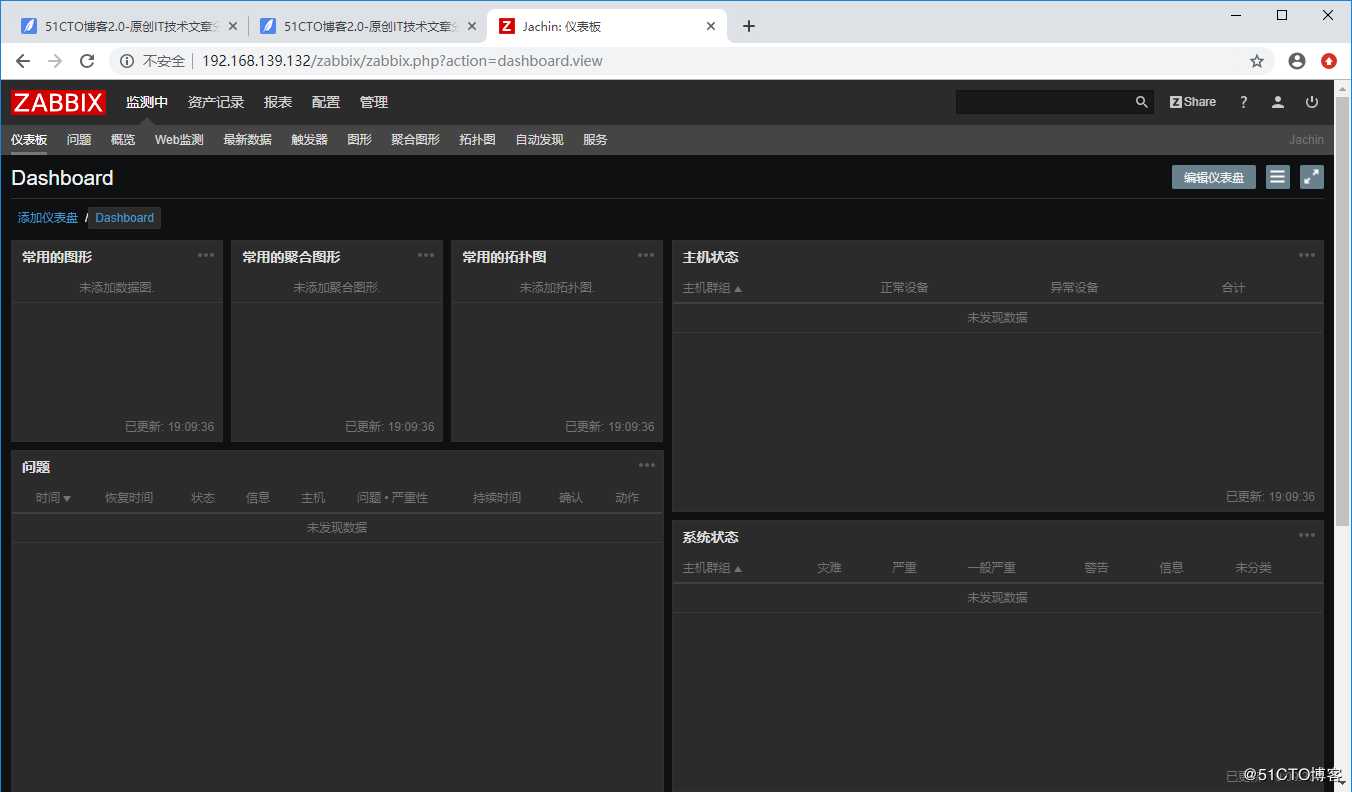
常见问题
下面这些问题是我个人这几天遇到的 希望能让你们少走弯路
提示安装php服务出错
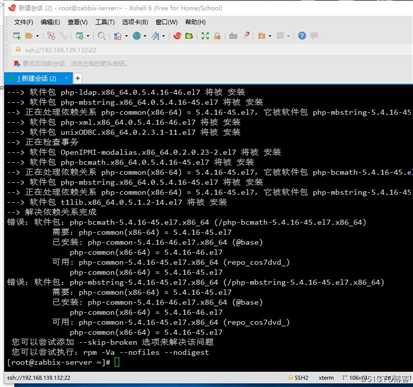
这个问题可能是yum仓库设置的时候有问题
两种解决方法
- 检查设置yum仓库的命令是否正确
设置完yum源一定要repolist检查一下看看数据正不正常
理论上说 --add后面不加-repo也行 但是我就是不行 还是加上吧
[[email protected] ~] yum-config-manager --add-repo file:///repo/cos7dvd/- 可能是软件依赖关系的问题
[[email protected] ~] yum -y remove httpd-tools php-common mariadb-libs
[[email protected] ~] yum -y install httpd mariadb mariadb-server php php-mysql
[[email protected] ~] yum -y install postfix
安装zabbix-server包时出错
可能是linux的版本跟zabbix-server的版本不一致导致的
CentOS 7-1804版本的是9个包 16版本的包更多一点 需要下载对应的包
mysql -uroot登录数据库时报错ERROR2002
这个错误指令应该是数据库没启动
如果启动了还是这样的话 可能跟上面的问题原因一样
16版本的话安装不是mariadb包 应该是:mysql-community-server.x86_64
解决方法:
[[email protected] ~] wget http://dev.mysql.com/get/mysql57-community-release-el7-8.noarch.rpm
[[email protected] ~] yum localinstall mysql57-community-release-el7-8.noarch.rpm
[[email protected] ~] yum repolist enabled |grep "mysql.*-community.*"
[[email protected] ~] yum -y install mysql-community-server.x86_64
[[email protected] ~] systemctl start mysqld
[[email protected] ~] systemctl status mysqld
[[email protected] ~] systemctl enable mysqld
进入数据库设置密码时报错ERROR3009
由于曾经升级过数据库,升级完成后没有使用mysql_upgrade升级数据结构造成
解决方法:
[[email protected] ~] mysql_upgrade -uroot总结
被上面这几个问题卡了好几天,慢慢琢磨,百度才解决这些问题,希望能够帮助到你们
搭建zabbix还是很有必要的,很多公司都在用zabbix,也是运维必备技能
一般容易出错的地方就是在yum源 版本这块 往往也是不起眼的小问题往往容易被忽略
有任何问题和文中错误的地方可以评论或私信告诉我
以上是关于搭建zabbix监控系统的主要内容,如果未能解决你的问题,请参考以下文章