python爬虫---从零开始Urllib库
Posted cxiaocai
tags:
篇首语:本文由小常识网(cha138.com)小编为大家整理,主要介绍了python爬虫---从零开始Urllib库相关的知识,希望对你有一定的参考价值。
接上文再继续我们的爬虫,这次我们来述说Urllib库
1,什么是Urllib库
Urllib库是python内置的HTTP请求库
urllib.request 请求模块
urllib.error 异常处理模块
urllib.parse url解析模块
urllib.robotparse robots.txt解析模块
不需要额外安装,python自带的库。
注意:
python2
import urllib2
response = urllib2.urlopen(‘http://baidu.com‘)
python3
import urllib.request
response = urilib.request.urlopen(‘http://www.baidu.com‘)
python2和python3使用urllib库还是有一定区别的。
2,方法以及模块:
1)request
基本运行:(get方式的请求)
import urllib.request
response = urilib.request.urlopen(‘http://www.baidu.com‘)
print(response.read().decode(‘utf-8‘))
运行结果如下:
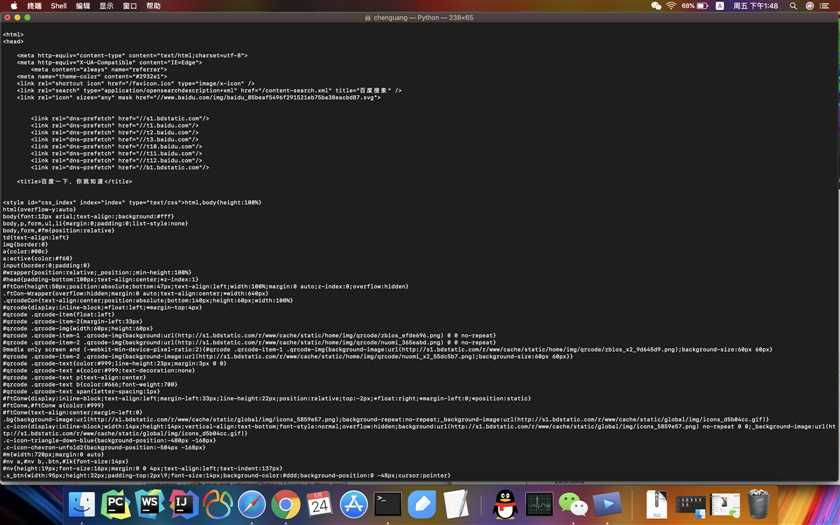
在这里我们看到,当我们输入urllib.request.urlopen(‘http://baidu.com‘)时,我们会得到一大长串的文本,也就是我们将要从这个得到的文本里得到我们所需要的数据。
带有请求参数:(post方式的请求)
import urllib.request
import urllib.parse
data = bytes(urllib.parse.urlencode({‘username‘:‘cainiao‘}),encoding=‘utf8‘)
response = urllib.request.urlopen(‘http://httpbin.org/post‘,data = data)
print(response.read())
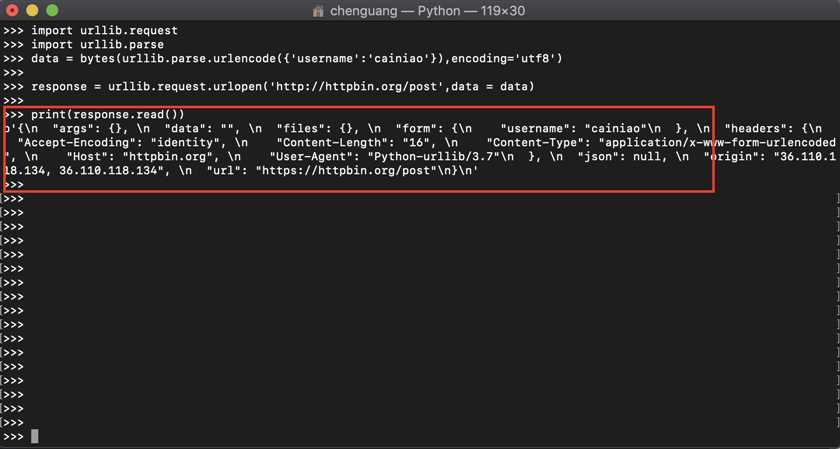
在这里我们不难看出,我们给予的data username参数已经传递过去了。
注意data必须为bytes类型
设置请求超时时间:
import urllib.request
response = urllib.request.urlopen(‘http://httpbin.org/get‘, timeout = 1)
print(response.read())
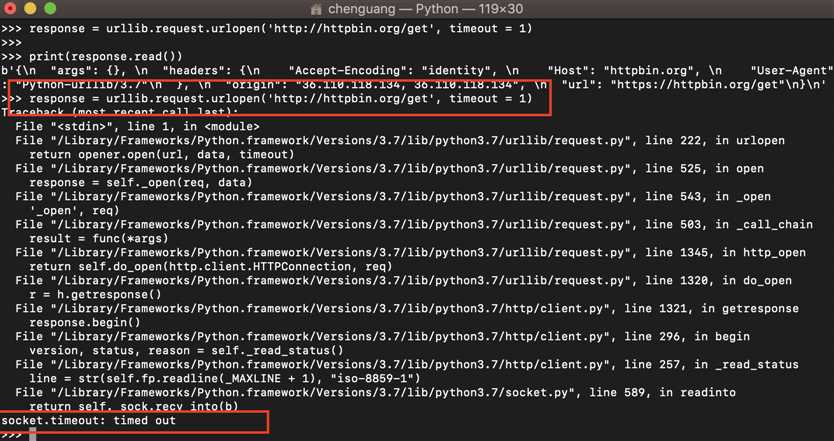
这时我们看到,执行代码时报出timed out错误。我们这时可以使用urllib.error模块,代码如下
import urllib.request
ipmort urllib.error
try:
response = urllib.request.urlopen(‘http://httpbin.org/get‘, timeout = 0.1)
print(response.read())
except urllib.error.URLError as e:
print(‘链接超时啦~!‘) # 这里我们没有判断错误类型,可以自行加入错误类型判断,然后在进行输出。
说到这,我们就把最简单,最基础的urlopen的基础全都说完了,有能力的小伙伴,可以进行详细阅读其源码,更深入的了解该方法。
2)响应 response
import urllib.request
response = urllib.request.urlopen(‘http://www.baidu.com‘)
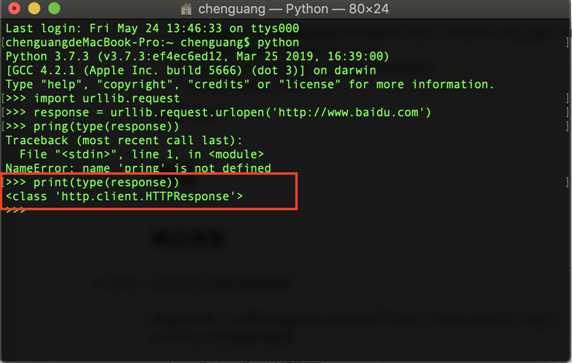
print(type(response))
# 得到一个类型为<class ‘http.client.HTTPResponse‘>
import urllib.request
response = urllib.request.urlopen(‘http://www.baidu.com‘)
print(type(response)) # 响应类型
print(response.status) #上篇文章提到的状态码
print(response.getheaders) # 请求头
print(response.getheader(‘Server‘)) # 取得请求头参数

import urllib.request
response = urllib.request.urlopen(‘http://www.baidu.com‘)
print(response.read().decode(‘utf-8‘)) # 响应体,响应内容
响应体为字节流形式的内容,我们需要调用decode(decode(‘utf-8‘))进行转码。
常用的post请求基本写法
from urllib import request,parse
url = ‘http://httpbin.org/post‘
headers = {
‘User-Agent‘:‘Mozilla/4.0(compatible;MSIE 5.5;Windows NT)‘,
‘Host‘:‘httpbin.org‘
}
dict = {
‘name‘:‘cxiaocai‘
}
data = bytes(parse.urlencode(dict),encoding=‘utf8‘)
req = request.Request(url =url , data = data , headers = headers , method = ‘POST‘)
response = request.urlopen(req)
print(response.read().decode(‘utf-8‘))
也可以写成这样的
from urllib import request,parse
url = ‘http://httpbin.org/post‘
dict = {
‘name‘:‘cxiaocai‘
}
data = bytes(parse.urlencode(dict),encoding=‘utf8‘)
req = request.Request(url =url , data = data , headers = headers , method = ‘POST‘)
req.add_header(‘User-Agent‘:‘Mozilla/4.0(compatible;MSIE 5.5;Windows NT)‘)
response = request.urlopen(req)
print(response.read().decode(‘utf-8‘))
说到这里,我们最基本的urllib请求就可以基本完成了,很大一部分网站也可以进行爬取了。
3,代理设置
代理设置我们这里简单的说一下,后面的博客我们会用实际爬虫来说明这个。
Hander代理
import urllib.request
proxy_hander = urllib.request.ProxyHeader({
‘http‘:‘http://127.0.0.1:1111‘,
‘https‘:‘https://127.0.0.1:2222‘
})
opener = urllib.request.build_opener(proxy_hander)
response = opener.open(‘http://www.baidu.com‘)
print(response.read()) # 我这没有代理,没有测试该方法。
Cookie设置
import http.cookiejar, urllib.request
cookie = http.cookiejar.CookieJar()
hander = urllib.request.HTTPCookieProcessor(cookie)
opener = urllib.request.build_opener(hander)
response = opener.open("http://www.baidu.com")
for item in cookie:
print(item.name + "=" + item.value)
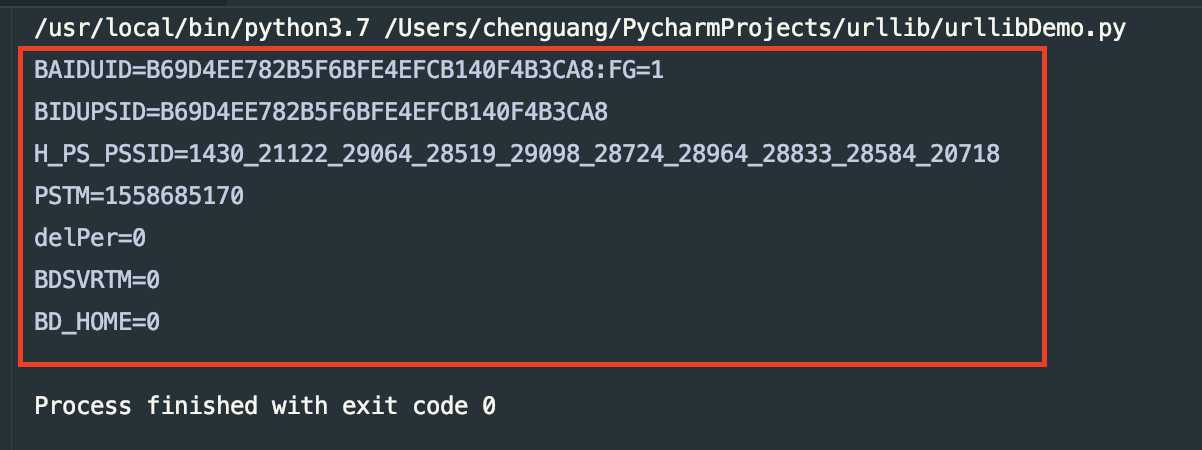
例如某些网站是需要登陆的,所有我们在这里需要设置Cookie
我们也可以将Cookie保存为文本文件,便于多次进行读取。
import http.cookiejar, urllib.request
filename = ‘cookie.txt‘
cookie = http.cookiejar.MozillaCookieJar(filename)
hander = urllib.request.HTTPCookieProcessor(cookie)
opener = urllib.request.build_opener(hander)
response = opener.open("http://www.baidu.com")
cookie.save(ignore_discard=True, ignore_expires=True)
代码运行以后会在项目目录下生成一个cookie.txt
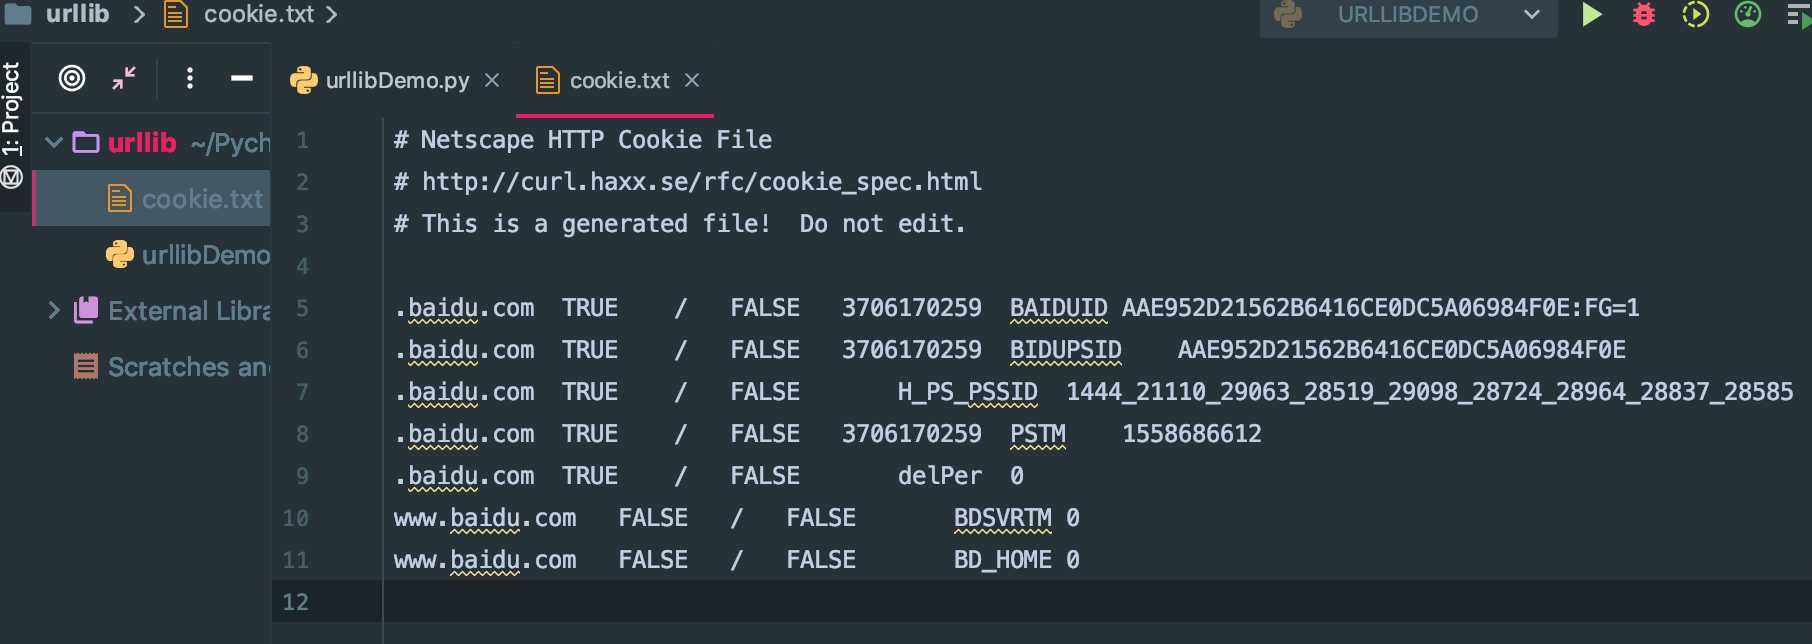
另外一种Cookie的保存格式
import http.cookiejar, urllib.request
filename = ‘cookie.txt‘
cookie = http.cookiejar.LWPCookieJar(filename)
hander = urllib.request.HTTPCookieProcessor(cookie)
opener = urllib.request.build_opener(hander)
response = opener.open("http://www.baidu.com")
cookie.save(ignore_discard=True, ignore_expires=True)
运行代码以后也会生成一个txt文件,格式如下

下面我们来读取我们过程保存的Cookie文件
import http.cookiejar, urllib.request
cookie = http.cookiejar.LWPCookieJar()
cookie.load(‘cookie.txt‘,ignore_expires=True,ignore_discard=True)
hander = urllib.request.HTTPCookieProcessor(cookie)
opener = urllib.request.build_opener(hander)
response = opener.open(‘http://www.baidu.com‘)
print(response.read().decode(‘utf-8‘))
4,异常处理
  简单事例,在这里我们来访问一个不存在的网站
from urllib import request,error
try:
response = request.urlopen(‘https://www.cnblogs.com/cxiaocai/articles/index123.html‘)
except error.URLError as e:
print(e.reason)
 这里我们知道这个网站根本不存在的,会报错,我们捕捉该异常可以保证程序继续运行,我们可以执行重试操作
 我们也可以查看官网 https://docs.python.org/3/library/urllib.error.html#module-urllib.error

5,URL解析
  urlparse模块
  主要用户解析URL的模块,下面我们先来一个简单的示例
from urllib.parse import urlparse
result = urlparse(‘https://www.baidu.com/s?ie=utf-8&f=8&rsv_bp=1&rsv_idx=1‘)
print(type(result),result)
这里我们看下输出结果:

  该方法可以进行url的拆分
  也可以制定请求方式http,或者https方式请求
from urllib.parse import urlparse
result = urlparse(‘www.baidu.com/s?ie=utf-8&f=8&rsv_bp=1&rsv_idx=1‘,scheme=‘https‘)
print(result)
 输出结果如下所示:

  在这里我们看到了,请求被制定了https请求
  我们会看到输出结果里包含一个fragents,我们想将framents拼接到query后面,我们可以这样来做
from urllib.parse import urlparse
result = urlparse(‘http://www.baidu.com/index.html;user?id=5#commont‘,allow_fragments=False)
print(result)
输出结果为

如果没有frament,则拼接到path内
示例:

我们现在知道了URl怎么进行拆分,如果我们得到了URl的集合,例如这样dada = [‘http‘,‘www.baidu.com‘,‘index.html‘,‘user‘,‘a=6‘,‘comment‘]
我们可以使用urlunparse
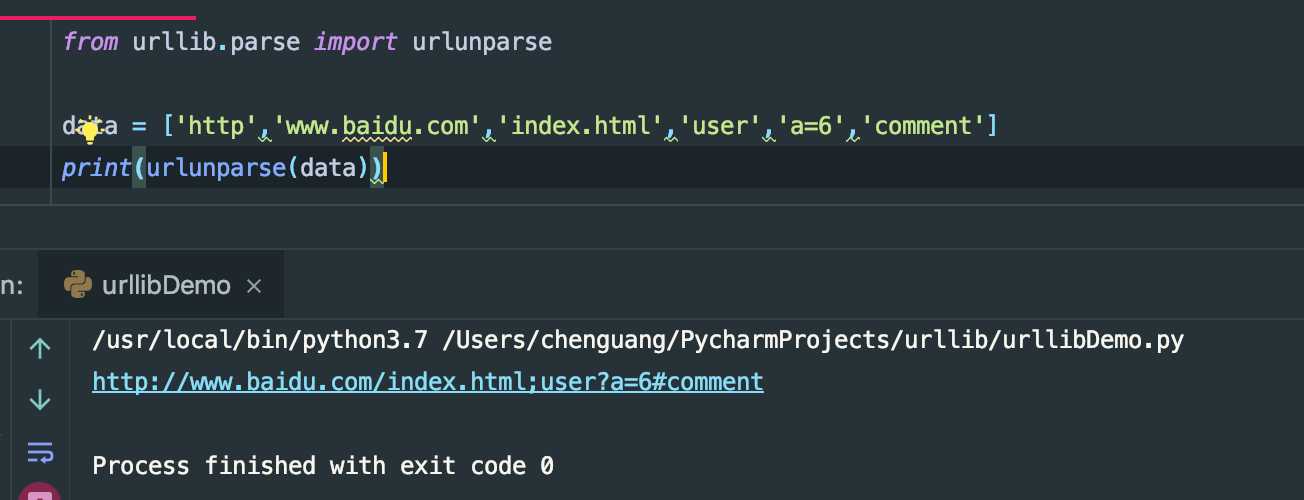
还有urljoin,主要是来进行url的拼接的,接下来我们来看下我们的示例:
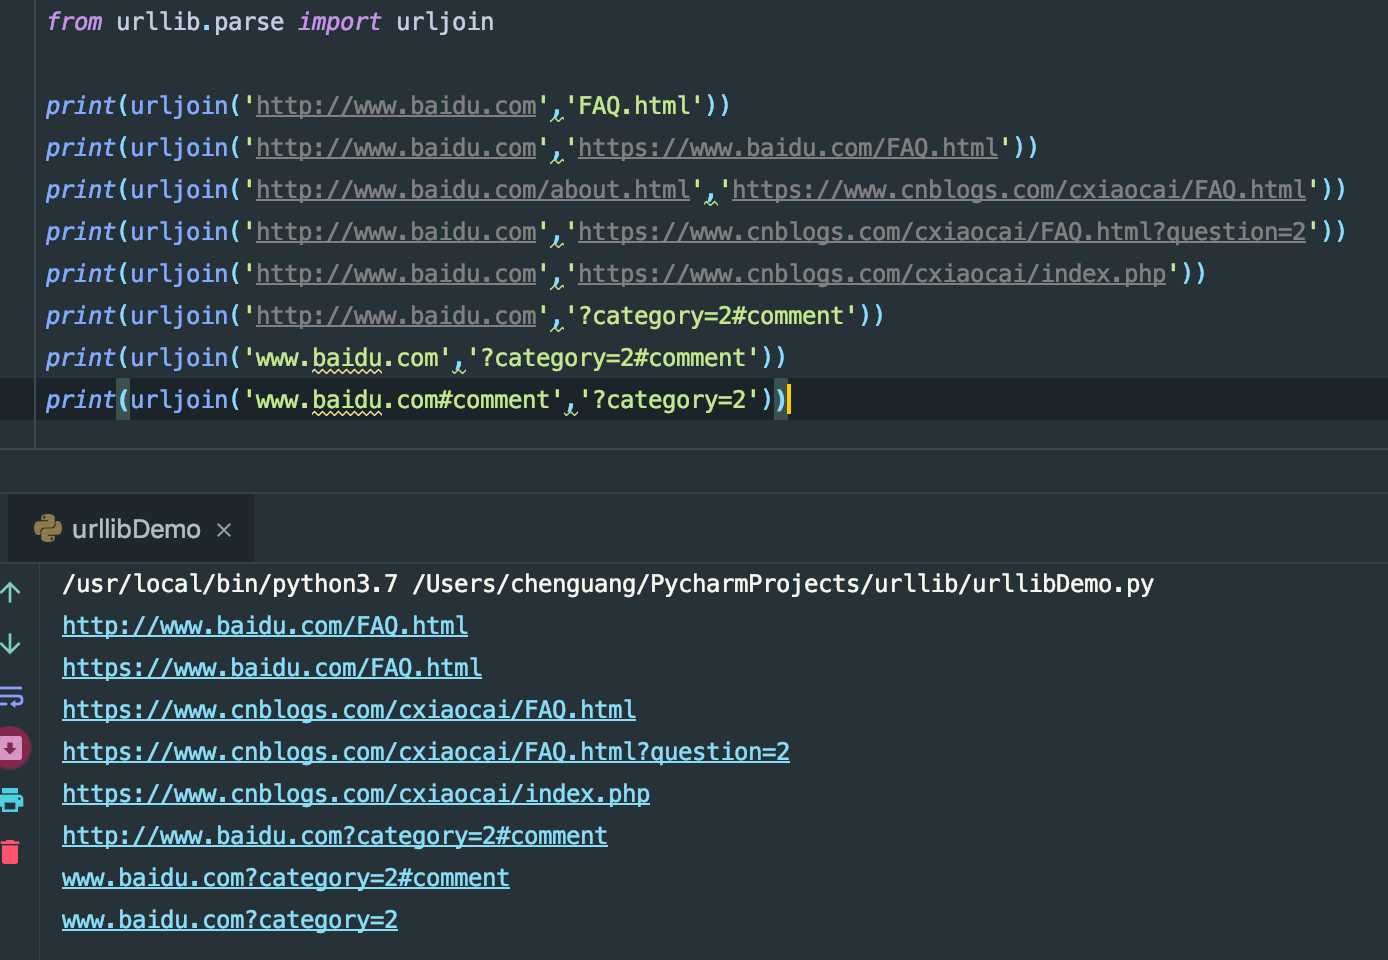
以后面的为基准,如果有就留下,如果没有就从前面取。
如果我们的有了一个字典类型的参数,和一个url,我们想发起get请求(上一期说过get请求传参),我们可以这样来做,
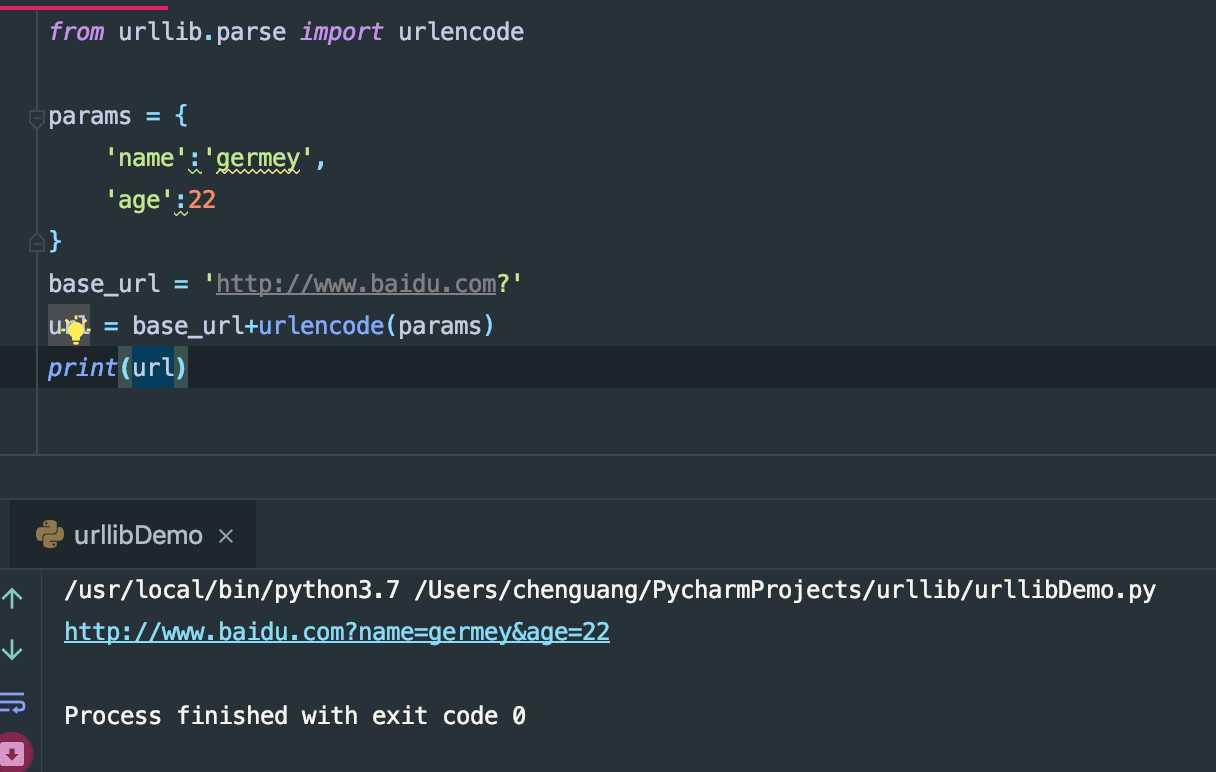
在这里我们需要注意的是,url地址后面需要自行加一个‘?’。
最后还有一个urllib.robotparser,主要用robot.txt文件的官网有一些示例,由于这个不常用,在这里我做过多解释。
官网地址:https://docs.python.org/3/library/urllib.robotparser.html#module-urllib.robotparser 感兴趣的小伙伴可以自行阅读官方文档。
到这里我们就把urllib的基本用法全部说了一遍,可以自己尝试写一些爬虫程序了(先用正则解析,后期我们有更简单的方法)。
想更深入的研读urllib库,可以直接登陆官方网站直接阅读其源码。官网地址: https://docs.python.org/3/library/urllib.html
注意:很多小伙伴看到我的代码直接复制过去,但发现直接粘贴会报错,还需要自己删除多余的空行,在这里我并不建议你们复制粘贴,后期我们整理一个github供大家直接使用。
下一篇文章我会弄一篇关于Requests包的使用,个人感觉比urllib更好用,敬请期待。
感谢大家的阅读,不正确的地方,还希望大家来斧正,鞠躬,谢谢??。
以上是关于python爬虫---从零开始Urllib库的主要内容,如果未能解决你的问题,请参考以下文章