串口配置
Posted 醉清风--
tags:
篇首语:本文由小常识网(cha138.com)小编为大家整理,主要介绍了串口配置相关的知识,希望对你有一定的参考价值。
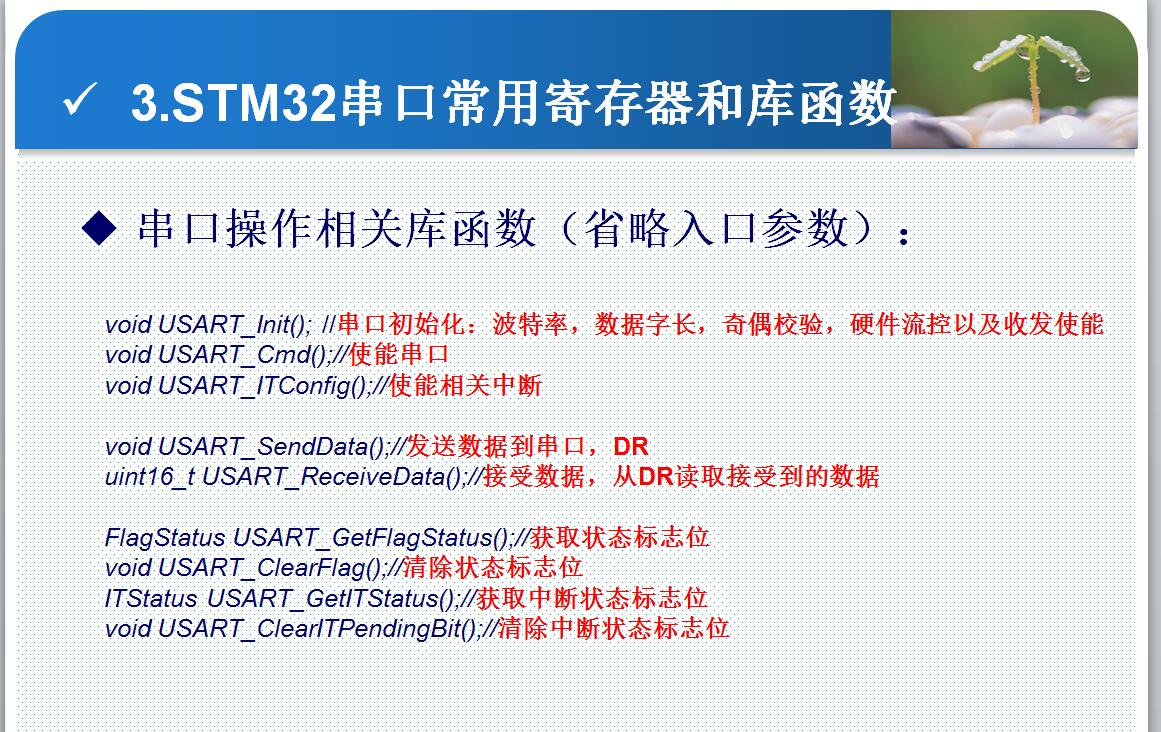
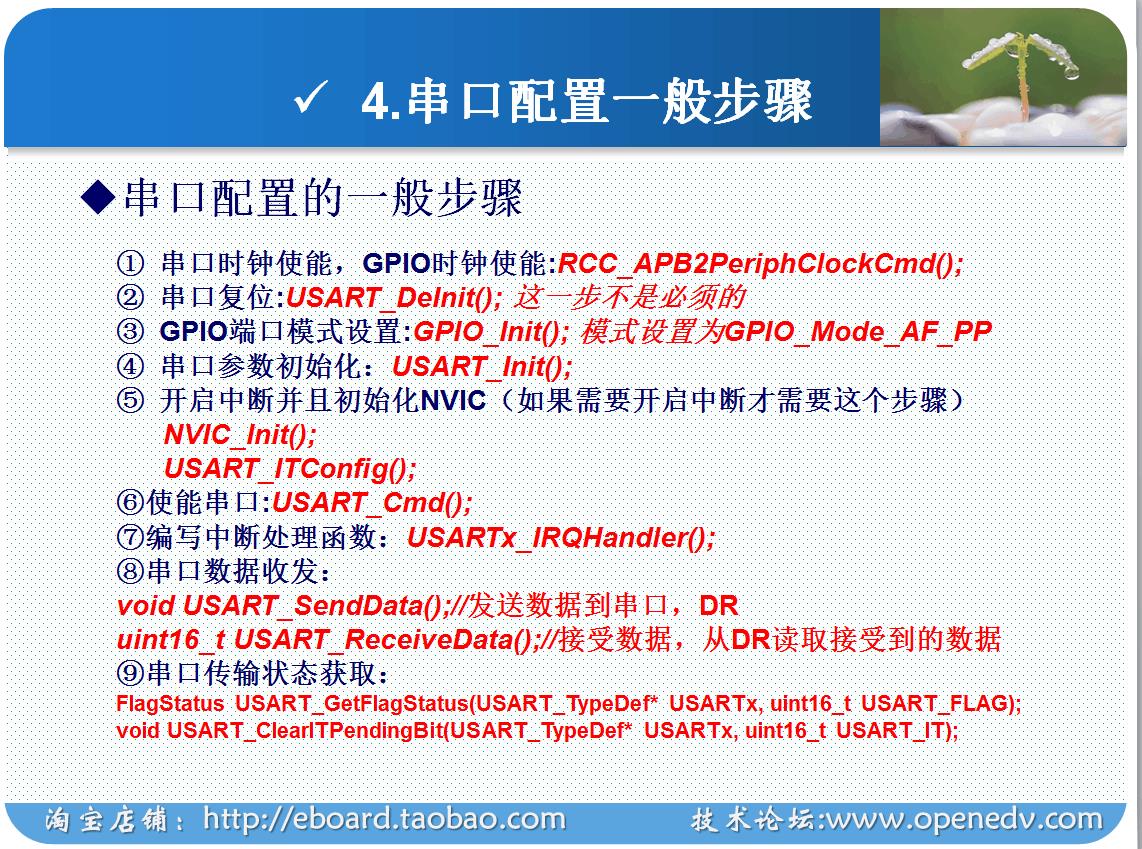
void My USART1_Init(void)
{
NVIC_InitTypeDef NVIC_InitStruct;
GPIO_InitTypeDef GPIO_InitStrue;
USART_InitTypeDef USART_InitStruct;
RCC_APB2PeriphClockCmd(RCC_APB2Periph_GPIOA,ENABLE);
RCC_APB2PeriphClockCmd(RCC_APB2Periph_USART1,ENABLE);
GPIO_InitStrue.GPIO_Pin=GPIO_Pin_9;
GPIO_InitStrue.GPIO_Mode=GPIO_Mode_AF_PP;
GPIO_InitStrue.GPIO_Speed=GPIO_Speed_10MHz;
GPIO_Init(GPIOA,&GPIO_InitStrue);
GPIO_InitTypeDef GPIO_InitStrue;
RCC_APB2PeriphClockCmd(RCC_APB2Periph_GPIOA,ENABLE);
RCC_APB2PeriphClockCmd(RCC_APB2Periph_USART1,ENABLE);
GPIO_InitStrue.GPIO_Pin=GPIO_Pin_10;
GPIO_InitStrue.GPIO_Mode=GPIO_Mode_IN_FLOATING;
GPIO_InitStrue.GPIO_Speed=GPIO_Speed_10MHz;
GPIO_Init(GPIOA,&GPIO_InitStrue);
USART_InitStruct.USART_BaudRate=115200;
USART_InitS0truct.USART_WordLength=USART_WordLength_8b;
USART_InitStruct.USART_Parity=USART_Parity_No;
USART_InitStruct.USART_StopBits=USART_StopBits_1;
USART_InitStruct.USART_Mode=USART_Mode_Rx|USART_Mode_Tx;
USART_Init(USART1,&USART_InitStruct)
USART_Cmd(USART1,ENABLE);
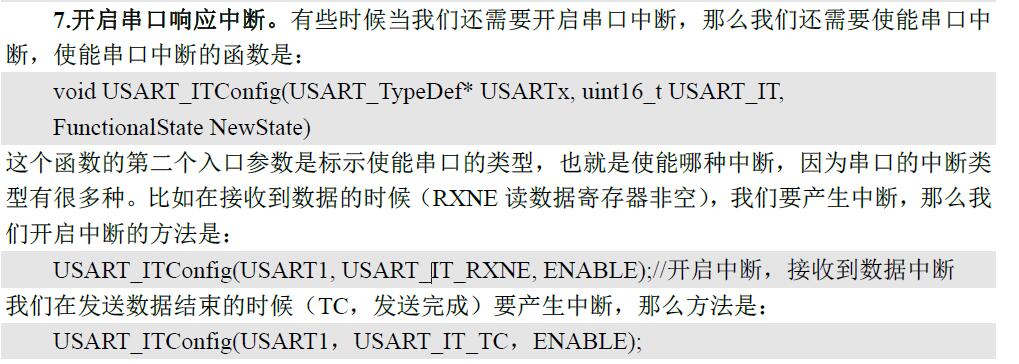
USART_ITConfig(USART1,USART_IT_RXNE,ENABLE);
USART_InitStruct.NVIC_IRQChannel=USART1_IRQn;
USART_InitStruct.NVIC_IRQChannelPreemptionPriority=1;
USART_InitStruct.NVIC_IRQChannelSubPriority=1;
USART_InitStruct.NVIC_IRQChannelCmd=ENABLE;
NVIC_Init(&NVIC_InitStruct);
}
void USART1_IRQHandler(void)
{
int res;
if(USART_GetITStatus(USART1,USART_IT_RXNE))
{
res=USART_ReceiveData(USART1);
USART_SendData(USART1,res);
}
}
以上是关于串口配置的主要内容,如果未能解决你的问题,请参考以下文章