Python+Weditor
Posted xmmc
tags:
篇首语:本文由小常识网(cha138.com)小编为大家整理,主要介绍了Python+Weditor相关的知识,希望对你有一定的参考价值。
1)下载、安装python
1、进入python官网https://www.python.org/downloads/
2、点击Download Python 3.7.3,即可下载python-3.7.3-amd64.exe
3、下载完成后,点击即可安装python
2)安装uiautomator2
由于Python 3.7已经内置了pip,所以我们直接使用命令pip install --pre uiautomator2 即可安装uiautomator2:
安装完成后,默认安装目录为:C:\\Users\\Administrator\\AppData\\Local\\Programs\\Python\\Python37\\Lib\\site-packages\\uiautomator2
3)使用USB连接设备,连接OK后运行命令python -m uiautomator2 init,该命令会自动安装本库所需要的设备端程序,也会在你的手机里安装两个软件一个可见一个不可见
(有图标和没图标)
4)安装可视化UI查看器 pip install --pre -U weditor
5)打开CMD命令框,运行python -m weditor ,该命令会在PC上打开浏览器,之后输入设备的ip或者序列号,点击Connect即可,映射测试机屏幕
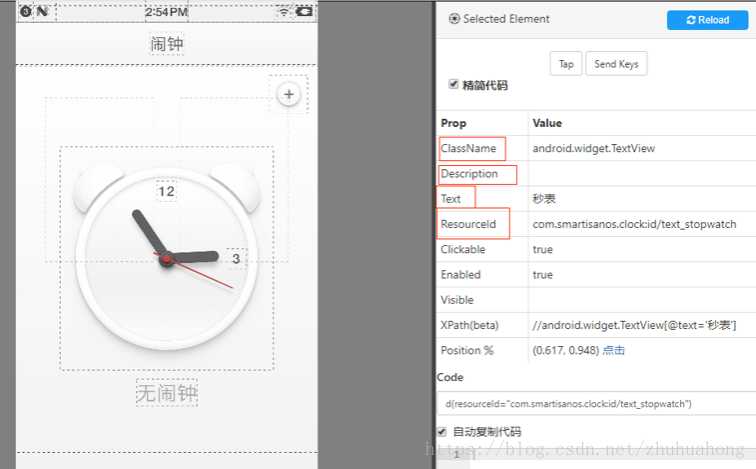
6)实例
import uiautomator2 as u2
import os
import time

#d = u2.connect(‘172.16.0.7‘)
d = u2.connect_usb(‘12345678‘)

#进入应用列表
d(resourceId="com.android.launcher3:id/all_apps_handle").click()
time.sleep(5)

# 启动AppWWW
d(resourceId="com.android.launcher3:id/icon", text=u"骁龙相机").click()
time.sleep(5)

# 拍照
d(resourceId="org.codeaurora.snapcam:id/shutter_button").click()
time.sleep(5)

# 切换摄像图
d(resourceId="org.codeaurora.snapcam:id/front_back_switcher").click()
time.sleep(5)

#拍照
d(resourceId="org.codeaurora.snapcam:id/shutter_button").click()
time.sleep(5)


#点击预览按钮
d(resourceId="org.codeaurora.snapcam:id/preview_thumb").click()

time.sleep(5)

#按返回键
for i in range(2):
    os.system("adb shell input keyevent 4")
    time.sleep(3)
以上是关于Python+Weditor的主要内容,如果未能解决你的问题,请参考以下文章