分析工厂采购系统,画出顺序图
Posted lilith404
tags:
篇首语:本文由小常识网(cha138.com)小编为大家整理,主要介绍了分析工厂采购系统,画出顺序图相关的知识,希望对你有一定的参考价值。
第一部分:顺序图语法
(1)简单示例:你可以用->来绘制参与者之间传递的消息, 而不必显式地声明参与者。你也可以使用 --> 绘制一个虚线箭头。另外,你还能用 <- 和 <--,这不影响绘图,但可以提高可读性。 注意:仅适用于时序图,对于其它示意图,规则是不同的。
1 @startuml
2 Alice -> Bob: Authentication Request
3 Bob --> Alice: Authentication Response
4
5 Alice -> Bob: Another authentication Request
6 Alice <-- Bob: another authentication Response
7 @enduml
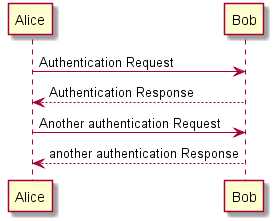
(2)声明参与者:关键字 participant 用于改变参与者的先后顺序。
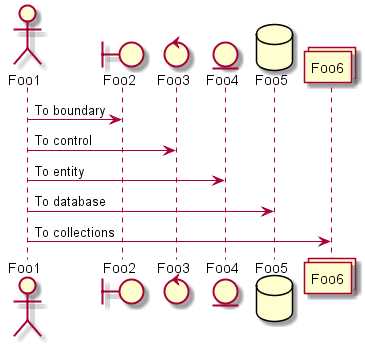
你也可以使用其它关键字来声明参与者:
actorboundarycontrolentitydatabase
 1 @startuml
 2 actor Foo1
 3 boundary Foo2
 4 control Foo3
 5 entity Foo4
 6 database Foo5
 7 collections Foo6
 8 Foo1 -> Foo2 : To boundary
 9 Foo1 -> Foo3 : To control
10 Foo1 -> Foo4 : To entity
11 Foo1 -> Foo5 : To database
12 Foo1 -> Foo6 : To collections
13
14 @enduml
 1 @startuml
 2 actor Bob #red
 3 ‘ The only difference between actor
 4 ‘and participant is the drawing
 5 participant Alice
 6 participant "I have a really\\nlong name" as L #99FF99
 7 /‘ You can also declare:
 8    participant L as "I have a really\\nlong name"  #99FF99
 9   ‘/
10
11 Alice->Bob: Authentication Request
12 Bob->Alice: Authentication Response
13 Bob->L: Log transaction
14 @enduml
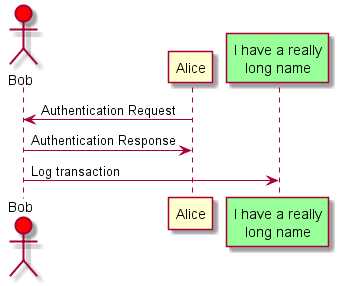
您可以使用关键字 order自定义顺序来打印参与者。
1 @startuml
2 participant Last order 30
3 participant Middle order 20
4 participant First order 10
5 @enduml
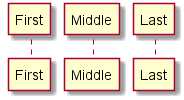
(3)在参与者中使用非字母符号:你可以使用引号定义参与者,还可以用关键字 as 给参与者定义别名。
1 @startuml
2 Alice -> "Bob()" : Hello
3 "Bob()" -> "This is very\\nlong" as Long
4 ‘ You can also declare:
5 ‘ "Bob()" -> Long as "This is very\\nlong"
6 Long --> "Bob()" : ok
7 @enduml
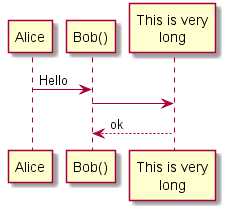
(4)给自己发消息:参与者可以给自己发信息,消息文字可以用\\n来换行。
1 @startuml
2 Alice->Alice: This is a signal to self.\\nIt also demonstrates\\nmultiline \\ntext
3 @enduml
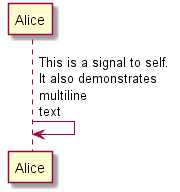
(5)修改箭头样式:修改箭头样式的方式有以下几种:
- 表示一条丢失的消息:末尾加
x - 让箭头只有上半部分或者下半部分:将
<和>替换成\\或者/ - 细箭头:将箭头标记写两次 (如
>>或//) - 虚线箭头:用
--替代- - 箭头末尾加圈:
->o - 双向箭头:
<->
 1 @startuml
 2 Bob ->x Alice
 3 Bob -> Alice
 4 Bob ->> Alice
 5 Bob -\\ Alice
 6 Bob \\\\- Alice
 7 Bob //-- Alice
 8
 9 Bob ->o Alice
10 Bob o\\\\-- Alice
11
12 Bob <-> Alice
13 Bob <->o Alice
14 @enduml
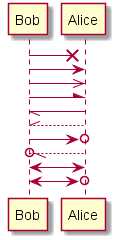
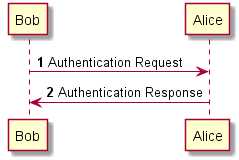
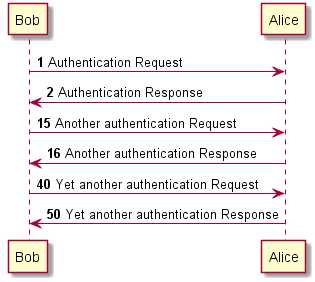
(6)对消息序列编号:关键字 autonumber 用于自动对消息编号。语句 autonumber start 用于指定编号的初始值,而 autonumber startincrement 可以同时指定编号的初始值和每次增加的值。
1 @startuml
2 autonumber
3 Bob -> Alice : Authentication Request
4 Bob <- Alice : Authentication Response
5 @enduml
 1 @startuml
 2 autonumber
 3 Bob -> Alice : Authentication Request
 4 Bob <- Alice : Authentication Response
 5
 6 autonumber 15
 7 Bob -> Alice : Another authentication Request
 8 Bob <- Alice : Another authentication Response
 9
10 autonumber 40 10
11 Bob -> Alice : Yet another authentication Request
12 Bob <- Alice : Yet another authentication Response
13
14 @enduml
 1 @startuml
 2 autonumber "<b>[000]"
 3 Bob -> Alice : Authentication Request
 4 Bob <- Alice : Authentication Response
 5
 6 autonumber 15 "<b>(<u>##</u>)"
 7 Bob -> Alice : Another authentication Request
 8 Bob <- Alice : Another authentication Response
 9
10 autonumber 40 10 "<font color=red><b>Message 0  "
11 Bob -> Alice : Yet another authentication Request
12 Bob <- Alice : Yet another authentication Response
13
14 @enduml
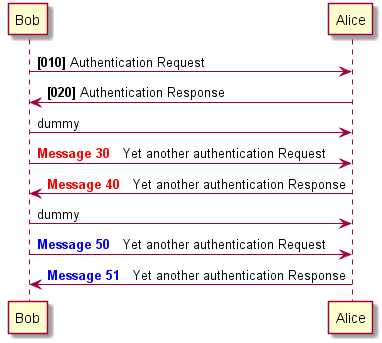
 1 @startuml
 2 autonumber 10 10 "<b>[000]"
 3 Bob -> Alice : Authentication Request
 4 Bob <- Alice : Authentication Response
 5
 6 autonumber stop
 7 Bob -> Alice : dummy
 8
 9 autonumber resume "<font color=red><b>Message 0  "
10 Bob -> Alice : Yet another authentication Request
11 Bob <- Alice : Yet another authentication Response
12
13 autonumber stop
14 Bob -> Alice : dummy
15
16 autonumber resume 1 "<font color=blue><b>Message 0  "
17 Bob -> Alice : Yet another authentication Request
18 Bob <- Alice : Yet another authentication Response
19 @enduml
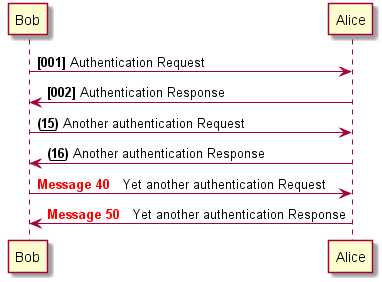
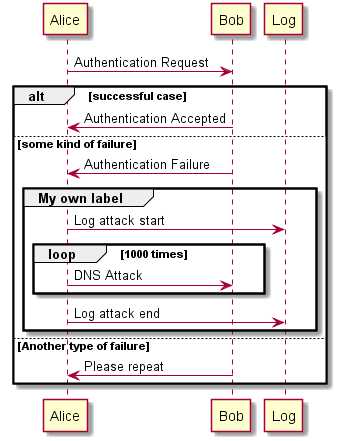
(7)组合消息:我们可以通过以下关键词将组合消息:
alt/elseoptloopparbreakcriticalgroup, 后面紧跟着消息内容
可以在标头(header)添加需要显示的文字(group除外)。关键词 end 用来结束分组。注意,分组可以嵌套使用。
 1 @startuml
 2 Alice -> Bob: Authentication Request
 3
 4 alt successful case
 5
 6     Bob -> Alice: Authentication Accepted
 7
 8 else some kind of failure
 9
10     Bob -> Alice: Authentication Failure
11     group My own label
12         Alice -> Log : Log attack start
13         loop 1000 times
14             Alice -> Bob: DNS Attack
15         end
16         Alice -> Log : Log attack end
17     end
18
19 else Another type of failure
20
21    Bob -> Alice: Please repeat
22
23 end
24 @enduml
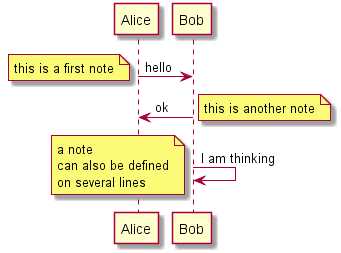
(8)给消息添加注释:我们可以通过在消息后面添加 note left 或者 note right 关键词来给消息添加注释。你也可以通过使用 end note 来添加多行注释。
 1 @startuml
 2 Alice->Bob : hello
 3 note left: this is a first note
 4
 5 Bob->Alice : ok
 6 note right: this is another note
 7
 8 Bob->Bob : I am thinking
 9 note left
10     a note
11     can also be defined
12     on several lines
13 end note
14 @enduml
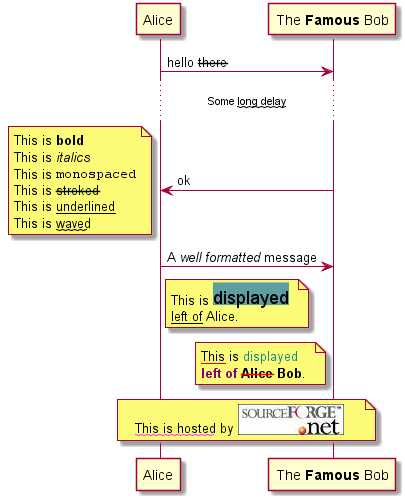
(9)Creole和html:
 1 @startuml
 2 participant Alice
 3 participant "The **Famous** Bob" as Bob
 4
 5 Alice -> Bob : hello --there--
 6 ... Some ~~long delay~~ ...
 7 Bob -> Alice : ok
 8 note left
 9   This is **bold**
10   This is //italics//
11   This is ""monospaced""
12   This is --stroked--
13   This is __underlined__
14   This is ~~waved~~
15 end note
16
17 Alice -> Bob : A //well formatted// message
18 note right of Alice
19  This is <back:cadetblue><size:18>displayed</size></back>
20  __left of__ Alice.
21 end note
22 note left of Bob
23  <u:red>This</u> is <color #118888>displayed</color>
24  **<color purple>left of</color> <s:red>Alice</strike> Bob**.
25 end note
26 note over Alice, Bob
27  <w:#FF33FF>This is hosted</w> by <img sourceforge.jpg>
28 end note
29 @enduml
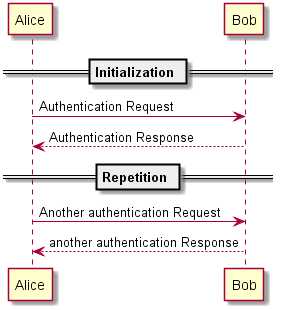
(10)分隔符:你可以通过使用 == 关键词来将你的图表分割多个步骤。
 1 @startuml
 2
 3 == Initialization ==
 4
 5 Alice -> Bob: Authentication Request
 6 Bob --> Alice: Authentication Response
 7
 8 == Repetition ==
 9
10 Alice -> Bob: Another authentication Request
11 Alice <-- Bob: another authentication Response
12
13 @enduml
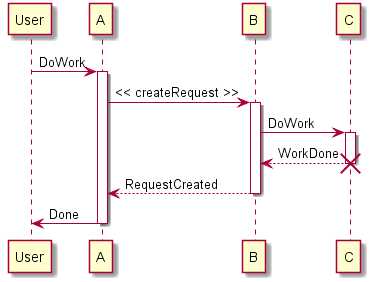
(11)生命线的激活与撤销:关键字activate和deactivate用来表示参与者的生命活动。一旦参与者被激活,它的生命线就会显示出来。activate和deactivate适用于以上情形。destroy表示一个参与者的生命线的终结。
 1 @startuml
 2 participant User
 3
 4 User -> A: DoWork
 5 activate A
 6
 7 A -> B: << createRequest >>
 8 activate B
 9
10 B -> C: DoWork
11 activate C
12 C --> B: WorkDone
13 destroy C
14
15 B --> A: RequestCreated
16 deactivate B
17
18 A -> User: Done
19 deactivate A
20
21 @enduml
 1 @startuml
 2 participant User
 3
 4 User -> A: DoWork
 5 activate A #FFBBBB
 6
 7 A -> A: Internal call
 8 activate A #DarkSalmon
 9
10 A -> B: << createRequest >>
11 activate B
12
13 B --> A: RequestCreated
14 deactivate B
15 deactivate A
16 A -> User: Done
17 deactivate A
18
19 @enduml
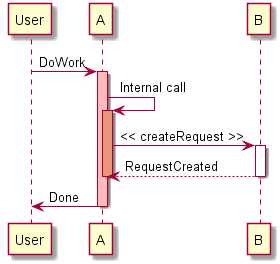
(12)进入和发出消息:如果只想关注部分图示,你可以使用进入和发出箭头。使用方括号[和]表示图示的左、右两侧。
 1 @startuml
 2 [-> A: DoWork
 3
 4 activate A
 5
 6 A -> A: Internal call
 7 activate A
 8
 9 A ->] : << createRequest >>
10
11 A<--] : RequestCreated
12 deactivate A
13 [<- A: Done
14 deactivate A
15 @enduml
 1 @startuml
 2 [-> Bob
 3 [o-> Bob
 4 [o->o Bob
 5 [x-> Bob
 6
 7 [<- Bob
 8 [x<- Bob
 9
10 Bob ->]
11 Bob ->o]
12 Bob o->o]
13 Bob ->x]
14
15 Bob <-]
16 Bob x<-]
17 @enduml
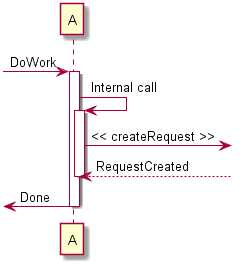

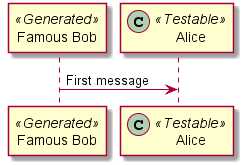
(13)构造类型和圈点:可以使用<<和>>给参与者添加构造类型。在构造类型中,你可以使用(X,color)格式的语法添加一个圆圈圈起来的字符。
1 @startuml
2
3 participant "Famous Bob" as Bob << Generated >>
4 participant Alice << (C,#ADD1B2) Testable >>
5
6 Bob->Alice: First message
7
8 @enduml
1 @startuml
2
3 skinparam guillemet false
4 participant "Famous Bob" as Bob << Generated >>
5 participant Alice << (C,#ADD1B2) Testable >>
6
7 Bob->Alice: First message
8
9 @enduml
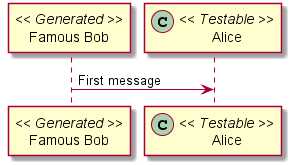
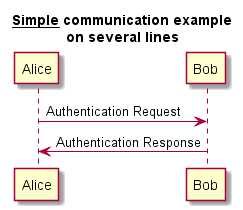
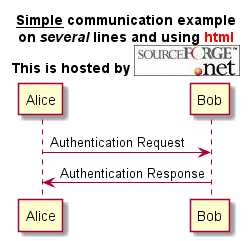
(14)更多标题信息:在标题描述中使用\\n表示换行。还可以使用关键字title和end title定义多行标题。
1 @startuml
2
3 title __Simple__ communication example\\non several lines
4
5 Alice -> Bob: Authentication Request
6 Bob -> Alice: Authentication Response
7
8 @enduml
 1 @startuml
 2
 3 title
 4  <u>Simple</u> communication example
 5  on <i>several</i> lines and using <font color=red>html</font>
 6  This is hosted by <img:sourceforge.jpg>
 7 end title
 8
 9 Alice -> Bob: Authentication Request
10 Bob -> Alice: Authentication Response
11
12 @enduml
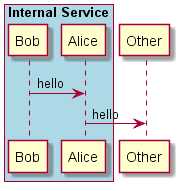
(15)包裹参与者:可以使用box和end box画一个盒子将参与者包裹起来。还可以在box关键字之后添加标题或者背景颜色。
 1 @startuml
 2
 3 box "Internal Service" #LightBlue
 4     participant Bob
 5     participant Alice
 6 end box
 7 participant Other
 8
 9 Bob -> Alice : hello
10 Alice -> Other : hello
11
12 @enduml
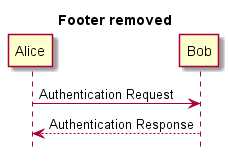
(16)移除脚注:使用hide footbox关键字移除脚注。
1 @startuml
2
3 hide footbox
4 title Footer removed
5
6 Alice -> Bob: Authentication Request
7 Bob --> Alice: Authentication Response
8
9 @enduml
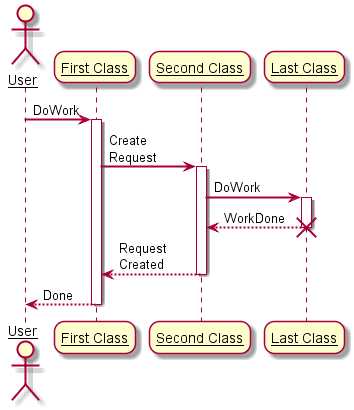
(17)外观参数(skinparam):
 1 @startuml
 2 skinparam sequenceArrowThickness 2
 3 skinparam roundcorner 20
 4 skinparam maxmessagesize 60
 5 skinparam sequenceParticipant underline
 6
 7 actor User
 8 participant "First Class" as A
 9 participant "Second Class" as B
10 participant "Last Class" as C
11
12 User -> A: DoWork
13 activate A
14
15 A -> B: Create Request
16 activate B
17
18 B -> C: DoWork
19 activate C
20 C --> B: WorkDone
21 destroy C
22
23 B --> A: Request Created
24 deactivate B
25
26 A --> User: Done
27 deactivate A
28
29 @enduml
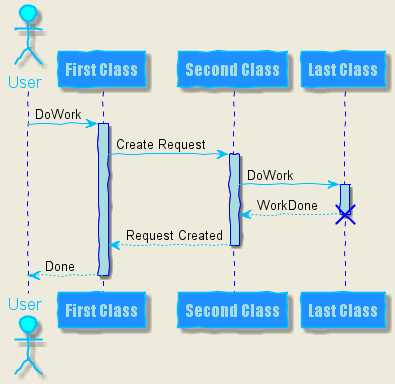
 1 @startuml
 2 skinparam backgroundColor #EEEBDC
 3 skinparam handwritten true
 4
 5 skinparam sequence {
 6     ArrowColor DeepSkyBlue
 7     ActorBorderColor DeepSkyBlue
 8     LifeLineBorderColor blue
 9     LifeLineBackgroundColor #A9DCDF
10
11     ParticipantBorderColor DeepSkyBlue
12     ParticipantBackgroundColor DodgerBlue
13     ParticipantFontName Impact
14     ParticipantFontSize 17
15     ParticipantFontColor #A9DCDF
16
17     ActorBackgroundColor aqua
18     ActorFontColor DeepSkyBlue
19     ActorFontSize 17
20     ActorFontName Aapex
21 }
22
23 actor User
24 participant "First Class" as A
25 participant "Second Class" as B
26 participant "Last Class" as C
27
28 User -> A: DoWork
29 activate A
30
31 A -> B: Create Request
32 activate B
33
34 B -> C: DoWork
35 activate C
36 C --> B: WorkDone
37 destroy C
38
39 B --> A: Request Created
40 deactivate B
41
42 A --> User: Done
43 deactivate A
44
45 @enduml
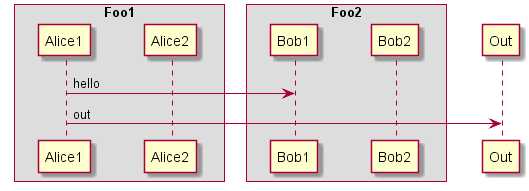
(18)填充区设置:可以设定填充区的参数配置。
 1 @startuml
 2 skinparam ParticipantPadding 20
 3 skinparam BoxPadding 10
 4
 5 box "Foo1"
 6 participant Alice1
 7 participant Alice2
 8 end box
 9 box "Foo2"
10 participant Bob1
11 participant Bob2
12 end box
13 Alice1 -> Bob1 : hello
14 Alice1 -> Out : out
15 @enduml
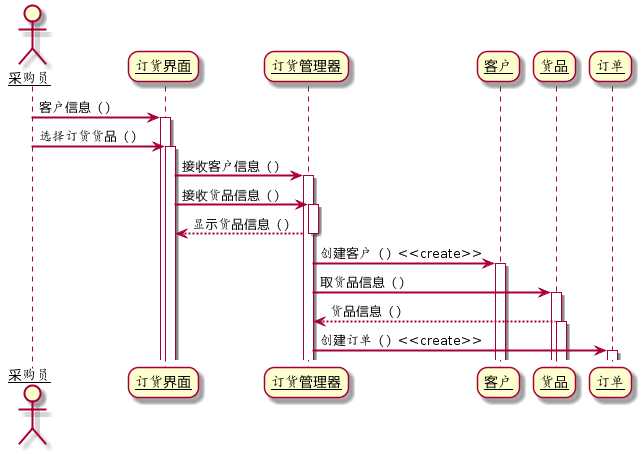
第二部分:《工厂采购》系统对象交互顺序
- 采购员选择订货货品。
- 到达订货界面,开始接收客户信息,接收货品信息,显示货品信息。
- 到达订货管理器,创建客户,取货品信息,创建订单。
- 创建客户到达客户区。
- 取货品信息到达货品区。
- 创建订单到订单区。
第三部分:《工厂采购》系统顺序图
 1 @startuml
 2 skinparam sequenceArrowThickness 2
 3 skinparam roundcorner 20
 4 skinparam maxmessagesize 60
 5 skinparam sequenceParticipant underline
 6
 7 actor 采购员
 8 participant "订货界面" as A
 9 participant "订货管理器" as B
10 participant "客户" as C
11 participant "货品" as D
12 participant "订单" as E
13
14 采购员 -> A: 客户信息()
15 activate A
16 采购员 -> A: 选择订货货品()
17 activate A
18
19 A -> B:接收客户信息()
20 activate B
21 A -> B:接收货品信息()
22 activate B
23 B --> A: 显示货品信息()
24 deactivate B
25
26 B -> C: 创建客户()<<create>>
27 activate C
28 B -> D: 取货品信息()
29 activate D
30 D --> B: 货品信息()
31 activate D
32 B -> E: 创建订单()<<create>>
33 activate E
34 @enduml
以上是关于分析工厂采购系统,画出顺序图的主要内容,如果未能解决你的问题,请参考以下文章