LaTeX排版设置图表的位置 Positioning images and tables
Posted
tags:
篇首语:本文由小常识网(cha138.com)小编为大家整理,主要介绍了LaTeX排版设置图表的位置 Positioning images and tables相关的知识,希望对你有一定的参考价值。
Positioning images and tables
LATEX is an editing tool that takes care of the format so you only have to worry about the contents of your document. Nevertheless, sometimes a better control of floating elements is necessary. This article explains how to position images and tables in a LATEX document.
Contents |
Introduction
The default alignment for images and tables is set to left
Lorem ipsum dolor sit amet, consectetuer adipiscing elit.
Etiam lobortis facilisis sem. Nullam nec mi et neque pharetra
sollicitudin.

\includegraphics[width=0.5\textwidth]{lion-logo}

Praesent imperdiet mi nec
ante. Donec ullamcorper, felis non sodales commodo, lectus velit
ultrices augue, a dignissim nibh lectus placerat pede.
 Vivamus nunc nunc, molestie ut, ultricies
vel, semper in, velit. Ut porttitor.
This is a simple example, for a description of this and other ways to include images in your LATEX file see the article Inserting Images.
Positioning images
Basic positioning
To change the default alignment of a image from left or right an easy manner is to add
\usepackage[export]{adjustbox}
to the preamble of your file and then use an additional option in your image importing statement
Lorem ipsum dolor sit amet, consectetuer adipiscing elit.
Etiam lobortis facilisis sem. Nullam nec mi et neque
pharetra sollicitudin.

\includegraphics[width=0.5\textwidth, right]{lion-logo}

Praesent imperdiet mi necante. Donec ullamcorper, felis
non sodales commodo, lectus velit ultrices augue,
a dignissim nibh lectus placerat pede. Vivamus nunc nunc,
molestie ut, ultriciesvel, semper in, velit. Ut porttitor.
The package adjustbox enables an additional option in the \includegraphics command, in the example the picture is aligned to right. The available values are: left, right, center, outer and inner, the last two are intended for two-sided documents.
The figure environment
The figure environment (see Inserting Images) is intended to provide automatic positioning.
Praesent in sapien. Lorem ipsum dolor sit amet, consectetuer adipiscing
elit. Duis fringilla tristique neque. Sed interdum libero ut metus.
Pellentesque placerat. Nam rutrum augue a leo. Morbi sed elit sit amet
ante lobortis sollicitudin.

\begin{figure}[h]
\includegraphics[width=0.5\textwidth, inner]{lion-logo}
\caption{Caption}
\label{fig:figure2}
\end{figure}
This environment uses a positioning parameter passed inside brackets, it can take the next values:
| Parameter | Position |
|---|---|
| h | Place the float here, i.e., approximately at the same point it occurs in the source text (however, not exactly at the spot) |
| t | Position at the top of the page. |
| b | Position at the bottom of the page. |
| p | Put on a special page for floats only. |
| ! | Override internal parameters LaTeX uses for determining "good" float positions. |
| H | Places the float at precisely the location in the LATEX code. Requires the float package. This is somewhat equivalent to h!. |
You can put more than one value in the parameter, for instance, if you write [ht] LATEX will try to position the figure here, but if it‘s not possible (the space may be insufficient) then the figure will appear at the topof the page. It is recommended to use more than one positioning parameter to prevent unexpected results.
Multiple images in one figure
It is possible to insert several images in one figure, each one with its own reference and label
Praesent in sapien. Lorem ipsum dolor sit amet, consectetuer
adipiscing elit. Duis fringilla tristique neque...

\begin{figure}[h]

\begin{subfigure}{0.5\textwidth}
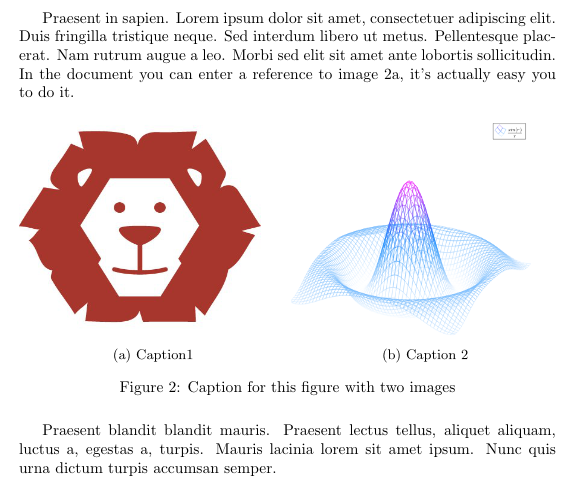
\includegraphics[width=0.9\linewidth, height=5cm]{lion-logo}
\caption{Caption1}
\label{fig:subim1}
\end{subfigure}
\begin{subfigure}{0.5\textwidth}
\includegraphics[width=0.9\linewidth, height=5cm]{mesh}
\caption{Caption 2}
\label{fig:subim2}
\end{subfigure}

\caption{Caption for this figure with two images}
\label{fig:image2}
\end{figure}

Praesent blandit blandit mauris. Praesent
lectus tellus, aliquet aliquam, luctus a, egestas a, turpis. Mauris
lacinia loremsit amet ipsum. Nunc quis urna dictum turpis accumsan
semper.
First, you must import the package subcaption by adding to the preamble
\usepackage{subcaption}
then you can use the environment \subfigure that takes one parameter, the width of the figure. This environment must be used inside a figure environment, captions and labels can be set to each subfigure.
Note:The \subfigure</cont> command doesn‘t work with Beamer nor Beamerposter
Wrapping text around a figure
The package wrapfig provides a useful feature, text can be floated around the images.
Praesent in sapien. Lorem ipsum dolor sit amet, consectetuer
adipiscing elit. Duis fringilla tristique neque. Sed interdum
libero ut metus. Pellentesque placerat.

\begin{wrapfigure}{l}{0.25\textwidth}
\includegraphics[width=0.9\linewidth]{lion-logo}
\caption{Caption1}
\label{fig:subim1}
\end{wrapfigure}

Praesent in sapien. Lorem ipsum dolor sit amet, consectetuer
adipiscing elit. Duis fringilla tristique neque. Sed interdum
First import the package wrapfig by adding
\usepackage{wrapfig}
to the preamble.
After that you can use the environment <code>wrapfig, it takes two parameters that are passed inside braces: the alignement that can be l, r, c, i or o; this letters stand for left, right, centre, inner and outer (the last two intended for two-sided documents). The second parameter is the width of the figure, in the example is 0.25 the width of the text. See the reference guide for a list of possible length units.
Positioning tables
Options for table positioning are similar to those available for figures
Basic positioning
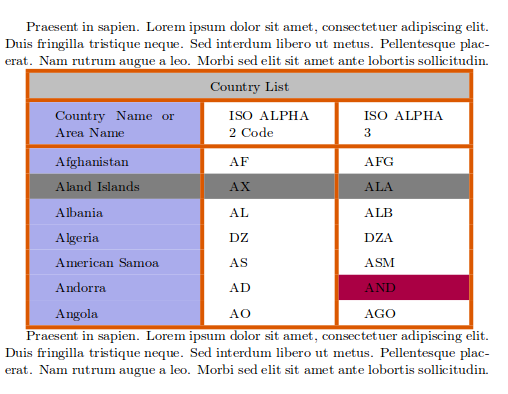
Default position of the tabular environment is centre.
Praesent in sapien. Lorem ipsum dolor sit amet, consectetuer adipiscing elit. Duis fringilla tristique neque. Sed interdum libero ut metus. Pellentesque placerat. Nam rutrum augue a leo. Morbi sed elit sit amet ante lobortis sollicitudin.

\arrayrulecolor[html]{DB5800}
\begin{tabular}{ |s|p{2cm}|p{2cm}|  }
\hline
\rowcolor{lightgray} \multicolumn{3}{|c|}{Country List} \\hline
Country Name     or Area Name& ISO ALPHA 2 Code &ISO ALPHA 3 \\hline
Afghanistan & AF &AFG \\rowcolor{gray}
Aland Islands & AX  & ALA \Albania    &AL & ALB \Algeria   &DZ & DZA \American Samoa & AS & ASM \Andorra & AD & \cellcolor[HTML]{AA0044} AND \Angola & AO & AGO \\hline
\end{tabular}

Praesent in sapien. Lorem ipsum dolor sit amet, consectetuer adipiscing
elit. Duis fringilla tristique neque. Sed interdum libero ut metus.
Pellentesque placerat. Nam rutrum augue a leo. Morbi sed elit sit
amet ante lobortis sollicitudin.
To learn about how to create tables see the Tables article.
The table environment
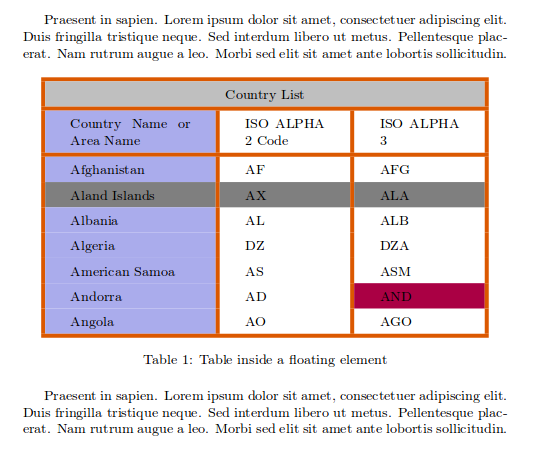
The table environment is intended to automatically position tables so they fit nicely in the flow of your document.
Praesent in sapien. Lorem ipsum dolor sit amet, consectetuer
adipiscing elit. Duis fringilla tristique neque. Sed interdum
libero ut metus. Pellentesque placerat. Nam rutrum augue a leo.
Morbi sed elit sit amet ante lobortis sollicitudin.

\begin{table}[ht]
\arrayrulecolor[HTML]{DB5800}
\centering
\begin{tabular}{ |s|p{2cm}|p{2cm}|  }
\hline
\rowcolor{lightgray} \multicolumn{3}{|c|}{Country List} \\hline
Country Name     or Area Name& ISO ALPHA 2 Code &ISO ALPHA 3 \\hline
Afghanistan & AF &AFG \\rowcolor{gray}
Aland Islands & AX  & ALA \Albania    &AL & ALB \Algeria   &DZ & DZA \American Samoa & AS & ASM \Andorra & AD & \cellcolor[HTML]{AA0044} AND \Angola & AO & AGO \\hline
\end{tabular}
\caption{Table inside a floating element}
\label{table:ta}
\end{table}

Praesent in sapien. Lorem ipsum dolor sit amet, consectetuer
adipiscing elit. Duis fringilla tristique neque. Sed interdum
libero ut metus. Pellentesque placerat. Nam rutrum augue a leo.
Morbi sed elit sit amet ante lobortis sollicitudin.
A position parameter, inside brackets, can be passed to the table environment. This parameter can take the next values:
| Parameter | Position |
|---|---|
| h | Place the float here, i.e., approximately at the same point it occurs in the source text (however, not exactly at the spot) |
| t | Position at the top of the page. |
| b | Position at the bottom of the page. |
| p | Put on a special page for floats only. |
| ! | Override internal parameters LaTeX uses for determining "good" float positions. |
| H | Places the float at precisely the location in the LATEX code. Requires the float package. This is somewhat equivalent to h!. |
You can set more than one value in the parameter, for instance, if you write [ht] LATEX will try to position the table here, but if it‘s not possible (the space may be insufficient) then the table will appear at the top of the page. It is recommended to use more than one positioning parameter to prevent unexpected results.
Notice also the command \centering. This changes the alignment of the table within its container to centreinstead of the default left.
Wrapping text around a table
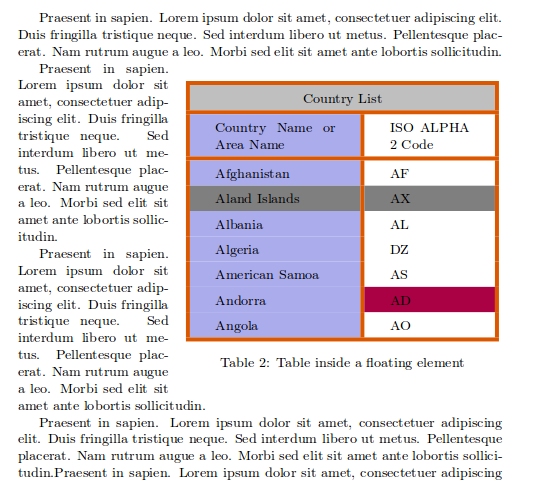
If your table don‘t take all available space and you want to put text next or before it, is possible with the package wraptable.
Praesent in sapien. Lorem ipsum dolor sit amet, consectetuer
adipiscing elit. Duis fringilla tristique neque. Sed interdum
libero ut metus. Pellentesque placerat. Nam rutrum augue a leo.
Morbi sed elit sit amet ante lobortis sollicitudin.

\begin{wraptable}{r}{8cm}
\arrayrulecolor[HTML]{DB5800}
\centering
\begin{tabular}{ |s|p{2cm}|  }
\hline
\rowcolor{lightgray} \multicolumn{2}{|c|}{Country List} \\hline
Country Name     or Area Name& ISO ALPHA 2 Code \\hline
Afghanistan & AF \\rowcolor{gray}
Aland Islands & AX \Albania    &AL  \Algeria   &DZ \American Samoa & AS \Andorra & \cellcolor[HTML]{AA0044} AD   \Angola & AO \\hline
\end{tabular}
\caption{Table inside a floating element}
\label{table:ta}
\end{wraptable}

Praesent in sapien. Lorem ipsum dolor sit amet, consectetuer
adipiscing elit. Duis fringilla tristique neque. Sed interdum
libero ut metus. Pellentesque placerat. Nam rutrum augue a leo.
Morbi sed elit sit amet ante lobortis sollicitudin...
First, import the package
\usepackage{wraptable}
then you can use the environment wraptable which takes two parameters: The first one is the alignment that can be l, r, c, i or o for left, right, centre, inner and outer respectively. The second one is the width of the table container, keep in mind that this latter parameter must be the same as the width of the table, otherwise things may not be properly aligned.
Reference guide
LATEX units and lengths
| Abbreviation | Definition |
|---|---|
| pt | A point, is the default length unit. About 0.3515mm |
| mm | a millimetre |
| cm | a centimetre |
| in | an inch |
| ex | the height of an x in the current font |
| em | the width of an m in the current font |
| \columnsep | distance between columns |
| \columnwidth | width of the column |
| \linewidth | width of the line in the current environment |
| \paperwidth | width of the page |
| \paperheight | height of the page |
| \textwidth | width of the text |
| \textheight | height of the text |
| \unitleght | units of length in the picture environment. |
from: https://www.sharelatex.com/learn/Positioning_images_and_tables
以上是关于LaTeX排版设置图表的位置 Positioning images and tables的主要内容,如果未能解决你的问题,请参考以下文章
