原生Javascript实现图片轮播效果
Posted ZinCode
tags:
篇首语:本文由小常识网(cha138.com)小编为大家整理,主要介绍了原生Javascript实现图片轮播效果相关的知识,希望对你有一定的参考价值。
首先引入js运动框架
 1 function getStyle(obj,name){
 2         if(obj.currentStyle){
 3             return obj.currentStyle[name];
 4         } else{
 5             return getComputedStyle(obj,false)[name];
 6         }
 7     }
 8
 9 function startMove(obj, json, fnEnd) {
10     clearInterval(obj.timer);
11     obj.timer = setInterval(function() {
12         var bStop = true;
13         for (var attr in json) {
14             var cur = 0;
15             if (attr == "opacity") {
16                 cur = Math.round(parseFloat(getStyle(obj, attr)) * 100);
17             } else {
18                 cur = parseInt(getStyle(obj, attr))
19             }
20             var speed = (json[attr] - cur) / 10;
21             speed = speed > 0 ? Math.ceil(speed) : Math.floor(speed);
22             if (cur !== json[attr]) {
23                 bStop = false;
24             };
25             if (attr == "opacity") {
26                 obj.style.opacity = (speed + cur) / 100;
27                 obj.style.filter = \'alpha(opacity:\' + (speed + cur) + \')\';
28             } else {
29                 obj.style[attr] = cur + speed + \'px\';
30             }
31         }
32         if (bStop) {
33             clearInterval(obj.timer);
34             if (fnEnd) fnEnd();
35         }
36     }, 30)
37 }
然后写轮播小案例
  1 <!DOCTYPE html>
  2 <html lang="en">
  3
  4 <head>
  5     <meta charset="UTF-8">
  6     <title>淘宝轮播</title>
  7     <style>
  8     ul,
  9     li {
 10         list-style: none;
 11         margin: 0;
 12         padding: 0;
 13     }
 14
 15     #wrap {
 16         width: 400px;
 17         height: 225px;
 18         margin: 0 auto;
 19         position: relative;
 20         overflow: hidden;
 21     }
 22
 23     li {
 24         float: left;
 25     }
 26
 27     #tips li {
 28         margin: 5px;
 29         border: 1px solid #f60;
 30         width: 20px;
 31         height: 20px;
 32         line-height: 20px;
 33         text-align: center;
 34         color: white;
 35         cursor: pointer;
 36     }
 37
 38     .active {
 39         background: #f60;
 40     }
 41
 42     img {
 43         vertical-align: top;
 44         width: 400px;
 45     }
 46
 47     #content {
 48         width: 2400px;
 49         position: absolute;
 50         left: -1200px;
 51     }
 52
 53     #content li {
 54         float: left;
 55     }
 56
 57     #tips {
 58         position: absolute;
 59         right: 20px;
 60         bottom: 5px;
 61     }
 62     </style>
 63 </head>
 64
 65 <body>
 66     <div id="wrap">
 67         <ul id="content">
 68             <li><img src="img3/1.jpg" alt=""></li>
 69             <li><img src="img3/2.jpg" alt=""></li>
 70             <li><img src="img3/3.jpg" alt=""></li>
 71             <li><img src="img3/4.jpg" alt=""></li>
 72             <li><img src="img3/5.jpg" alt=""></li>
 73             <li><img src="img3/6.jpg" alt=""></li>
 74         </ul>
 75         <ul id="tips">
 76             <li>1</li>
 77             <li>2</li>
 78             <li>3</li>
 79             <li>4</li>
 80             <li>5</li>
 81         </ul>
 82     </div>
 83     <script src="move.js"></script>
 84     <script>
 85     var wrap = document.getElementById(\'wrap\');
 86     var content = document.getElementById(\'content\');
 87     var tips = document.getElementById(\'tips\');
 88     var aLi = tips.getElementsByTagName(\'li\');
 89     var now = 0;
 90     //var
 91     for (var i = 0; i < aLi.length; i++) {
 92         aLi[0].className = \'active\';                //把初始状态定义好
 93         content.style.left = 0 +\'px\';
 94         aLi[i].index = i; //自定义属性
 95         aLi[i].onclick = function() {
 96             now = this.index;
 97             play();
 98         }
 99     }
100
101     function play() {
102         for (var j = 0; j < aLi.length; j++) {
103             aLi[j].className = \'\';
104         }
105         aLi[now].className = \'active\';
106
107         //this.index = now;                         //反过来写就不对了大兄弟
108         //content.style.left = -400 * this.index + \'px\';
109         startMove(content, {
110             left: -400 * now, //你还真别说,json格式就是这么写的
111         });
112     }
113
114     function autoPlay() {
115         now++;
116         if (now == aLi.length) {
117             now = 0;
118         }
119         play();
120     }
121
122     var timer = setInterval(autoPlay, 2000);
123     wrap.onmouseover = function(){                  //这里如果把事件绑定到ul上的话,那么鼠标移入,下面对饮的li会不起作用,
124         clearInterval(timer);                       //因为li的层级比较高,所以应该把事件绑定到大的div上
125     }
126     wrap.onmouseout = function(){
127         timer = setInterval(autoPlay,2000);
128         //setInterval(autoPlay,2000);   不能这么写,凡是开的定时器,必须得赋值,要不然总会多开一个定时器,导致速度加快
129     }
130     </script>
131 </body>
132
133 </html>
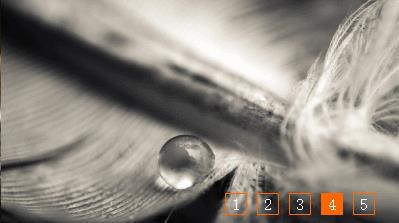
最终效果如下图,可实现鼠标翻页,鼠标悬停后停止轮播,

以上是关于原生Javascript实现图片轮播效果的主要内容,如果未能解决你的问题,请参考以下文章