Node.js 切近实战 之图书管理系统
Posted
tags:
篇首语:本文由小常识网(cha138.com)小编为大家整理,主要介绍了Node.js 切近实战 之图书管理系统相关的知识,希望对你有一定的参考价值。
上一篇Node.Js切近实战讲述了如何在VS上搭建Node.Js开发环境,相信看过那篇博客的同学,你已经对Node.Js有了好感,多了解些技术还是很有必要的。所谓实战见真功,还是要实战才行。我看博客园上一些专家荣誉的人写的博客,全是理论,没有实战,没有实战就没有发言权。熟能生巧,实战出理论。
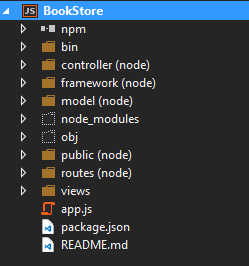
我们看一下项目结构
典型的NodeJs三层架构,controller,model,view,这里每个部分什么职能,我就不多说了。
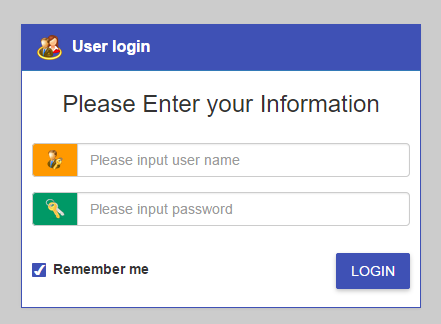
首先我们看一下登录界面,先上图,我看博客的时候,会首先看博客中有没有图,比如一篇博客讲的是实时通讯或者自己包装了一个html5播放器,结果整篇博客全是代码和汉字,没有图片,这样的博客也没有什么吸引力。废话不多说,看看界面。
还是BootStrap布局,只是我将BootStrap的primary样式改了下,变成Telerik Kendo UI中的primary样式,因为后面的话我们是要使用Kendo UI去做前端UI的。Telerik Kendo UI for Html5是很不错的,样式美观大方,支持Jquey和Angualr JS。地址:http://www.telerik.com/kendo-ui
其实这个登录界面很简单,还是使用jade模板,代码如下
doctype html
html
  head
    base(href=‘/‘)
    title #{title}
    link(rel=‘stylesheet‘, href=‘/stylesheets/style.css‘)
    link(rel=‘stylesheet‘,href=‘/stylesheets/bootstrap/css/bootstrap.min.css‘)
    link(rel=‘stylesheet‘,href=‘/stylesheets/bootstrap/css/bootstrap-theme.min.css‘)
    link(rel=‘stylesheet‘,href=‘/stylesheets/kendo/kendo.common-material.min.css‘)
    link(rel=‘stylesheet‘,href=‘/stylesheets/kendo/kendo.material.min.css‘)
    script(src=‘/javascripts/thirdpart/angular.min.js‘,type="text/javascript")
  body(style=‘background-color:#CCCCCC;‘)
    #main_layout(ng-app=‘loginModule‘ ng-controller=‘loginController‘)
     .panel.panel-primary
       .panel-heading
         h3.panel-title
          img(src=‘/images/userlogin.png‘ style=‘width:25px;height:25px‘)
          label.left-margin-10 User login
       form(ng-submit=‘loginIn()‘ role=‘form‘)
        div.panel-content
          .center-align-text
            h3 Please Enter your Information
          .row
            .col-md-12.row-margin
              .input-group.row-margin
                span.input-group-addon(style=‘background-color:#FF9900‘)
                  img.input-group-img(src=‘/images/userno.png‘)
                input.form-control(ng-model=‘Login.UserName‘ type=‘text‘ autofocus=‘autofocus‘ placeholder=‘Please input user name‘ maxlength=15 required title=‘User name can\‘t be empty!‘)
            .col-md-12.row-margin-large
              .input-group
                span.input-group-addon(style=‘background-color:#009966‘)
                  img.input-group-img(src=‘/images/password.jpg‘)
                input.form-control(ng-model=‘Login.Password‘ type=‘password‘ placeholder=‘Please input password‘ required maxlength=‘15‘ title=‘Password can\‘t be empty!‘)
            .col-md-12.row-margin-large(style=‘margin-bottom:10px‘)
            .col-md-6
              div.row-middle-height
               input#chk_remember.k-checkbox(type=‘checkbox‘ ng-model=‘IsRemember‘ ng-true-value=‘true‘ ng-false-value=‘false‘)
               label.k-checkbox-label(for=‘chk_remember‘) Remember me
            .col-md-6
              .right-align-text.row-middle-height
                button.k-button.k-primary(type=‘submit‘) Login
          .row.row-margin
            .center-align-text
              span(ng-show=‘IsLoading‘)
               img(src=‘/stylesheets/images/loading_2x.gif‘)
               span(style=‘color:#337ab7;font-weight:bold‘)  login,please wait......

script(type=‘text/javascript‘ src=‘/javascripts/local/login.js‘)
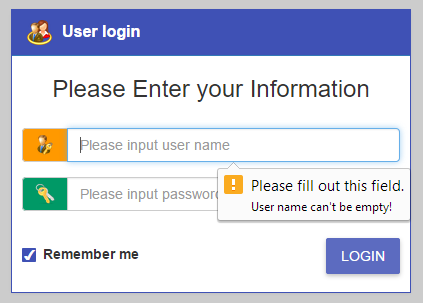
大家看到了,使用angularJs做前端数据绑定,有些人说这是MVC模式,我看是MVVM模式还差不多,做过Silverlight和WPF的同学肯定会认为这是MVVM模式。OK,在这里我们使用Html5的验证,效果
提交的时候自己去做验证,OK,我们看一下Js。
var appModule = angular.module(‘loginModule‘, []);

appModule.config(function ($locationProvider) {
    $locationProvider.html5Mode(true);
});

appModule.controller(‘loginController‘, function ($scope, $http, $location) {
    var config;
    $scope.IsLoading = false;
    $scope.Login = {
        UserName: ‘‘,
        Password: ‘‘
    };

    $scope.setRemeberUserInfo = function () {
        if (localStorage.UserInfo != null) {
            var userObj = angular.fromJson(localStorage.UserInfo);
            $scope.Login.UserName = userObj.UserName;
            $scope.Login.Password = userObj.Password;
        }
    }

    var sessionConfig = sessionStorage.getItem("config");
    if (sessionConfig != null) {
        config = angular.fromJson(sessionConfig);
    }
    else {
        $http.get(‘/config‘).success(function (data) {
            config = data;
            sessionStorage.setItem("config", JSON.stringify(data));
        });
    }

    $scope.setRemeberUserInfo();

    $scope.loginIn = function () {
        var postData = JSON.stringify($scope.Login);
        $scope.IsLoading = true;

        if (sessionStorage.getItem("LoginUser") != null) {
            $http({
                method: "post",
                url: "/user",
                headers: { ‘Content-Type‘: ‘application/json‘ },
                data: JSON.parse(sessionStorage.getItem("LoginUser"))
            }).success(function (data) {
                window.location.href = ‘/main‘
            });
        }
        else {
            $http.post(config.loginUrl, postData).success(function (data, status, headers) {
                sessionStorage.setItem("LoginUser", JSON.stringify(data.UserInfo));
                if ($scope.IsRemember) {
                    localStorage.UserInfo = postData;
                }

                $scope.IsLoading = false;
                $http({
                    method: "post",
                    url: "/user",
                    headers: { ‘Content-Type‘: ‘application/json‘ },
                    data: data.UserInfo
                }).success(function (data) {
                    window.location.href = ‘/main‘
                });
            }).error(function (data) {
                $scope.IsLoading = false;

                if (data.error) {
                    alert(‘Login failed,please check your account.‘)
                }
            });
        }
    }
});
在这里,用户名和密码是Login对象的两个属性,所以我们页面直接绑定Login.UserName和Login.Password即可。在登陆的时候判断如果用户在本地存在,则直接跳过登录,将用户信息存入数据库,否则调用登录api进行登录,登陆成功,如果需要记住密码,则将用户信息存到本地localStorage。
下一次当打开该页面时,系统会拿localStorage中的用户信息直接赋值到文本框( $scope.setRemeberUserInfo();)
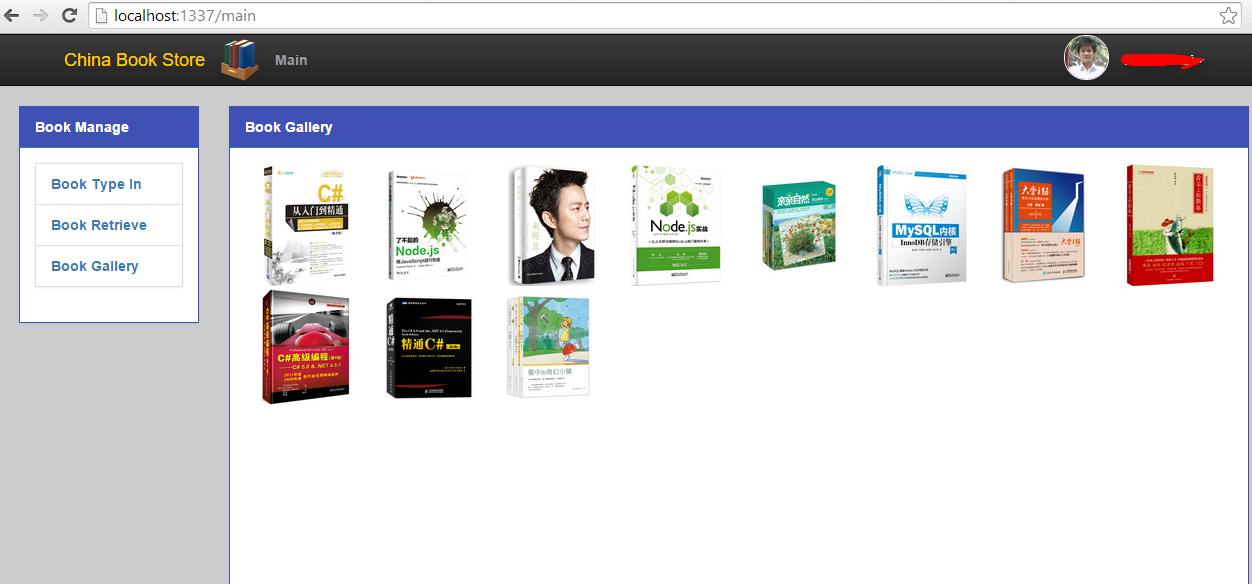
OK,登录就说这么多,登录其实和NodeJs服务端没有什么联系。我们看一下登陆后的界面。
OK,今天就到这里,更多精彩内容,请看下期。
本文出自 “技术创造价值” 博客,请务必保留此出处http://leelei.blog.51cto.com/856755/1789233
以上是关于Node.js 切近实战 之图书管理系统的主要内容,如果未能解决你的问题,请参考以下文章


