转 :手动配置三大框架整合:Spring+Struts2+mybatis
Posted
tags:
篇首语:本文由小常识网(cha138.com)小编为大家整理,主要介绍了转 :手动配置三大框架整合:Spring+Struts2+mybatis相关的知识,希望对你有一定的参考价值。
现在主流的项目框架中,数据库持久层有可能不是hibernate,而是mybatis或者ibatis,其实它们都是一样的,下面我来把环境搭建一下:
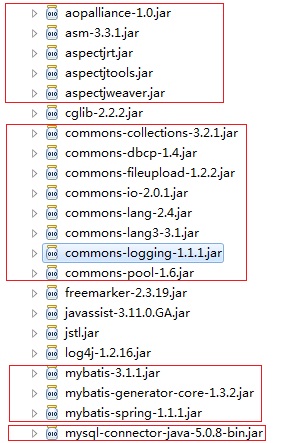
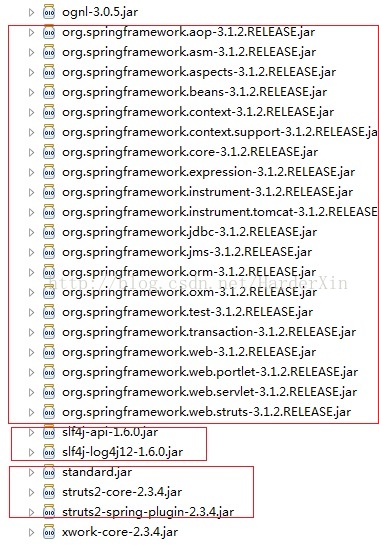
【导入相关jar包】新建web项目工程mss,Spring+Struts2+mybatis整合,除了Spring和Struts的jar包外(可以在我的资源中下载),我们还需导入mybatis的几个想jar包:
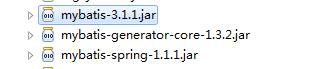
三大框架整合后jar包:
【配置web.xml】
|
1
2
3
4
5
6
7
8
9
10
11
12
13
14
15
16
17
18
19
20
21
22
23
24
25
26
27
28
29
30
31
32
33
34
35
36
37
38
39
40
41
|
<!--?xml version="1.0" encoding="UTF-8"?--><web-app version="2.5" xmlns="http://java.sun.com/xml/ns/javaee" xmlns:xsi="http://www.w3.org/2001/XMLSchema-instance" xsi:schemalocation="http://java.sun.com/xml/ns/javaee http://java.sun.com/xml/ns/javaee/web-app_2_5.xsd"> <welcome-file-list> <welcome-file>index.jsp</welcome-file> </welcome-file-list> <!-- struts启动配置 --> <filter> <filter-name>struts2</filter-name> <filter-class>org.apache.struts2.dispatcher.ng.filter.StrutsPrepareAndExecuteFilter</filter-class> </filter> <filter-mapping> <filter-name>struts2</filter-name> <url-pattern>/*</url-pattern> </filter-mapping> <!-- spring启动加载配置 --> <context-param> <param-name>contextConfigLocation</param-name> <param-value>classpath:springConfig/applicationContext-*.xml</param-value> </context-param> <listener> <listener-class> org.springframework.web.context.ContextLoaderListener </listener-class> </listener> <!-- log4j相关配置 --> <context-param> <param-name>log4jConfigLocation</param-name> <param-value>/WEB-INF/classes/log4j.properties</param-value> </context-param> <context-param> <param-name>log4jRefreshInterval</param-name> <param-value>60000</param-value> </context-param> <listener> <listener-class>org.springframework.web.util.Log4jConfigListener</listener-class> </listener></web-app> |
【Spring公共配置 applicationContext-common.xml】
|
1
2
3
4
5
6
7
8
9
10
11
12
13
14
15
16
17
18
19
20
21
22
23
24
25
26
27
28
29
30
31
32
33
34
35
36
37
38
39
40
41
42
43
44
45
46
47
48
|
<!--?xml version="1.0" encoding="UTF-8"?--><beans xmlns="http://www.springframework.org/schema/beans" xmlns:xsi="http://www.w3.org/2001/XMLSchema-instance" xmlns:aop="http://www.springframework.org/schema/aop" xmlns:tx="http://www.springframework.org/schema/tx" xsi:schemalocation=" http://www.springframework.org/schema/beans http://www.springframework.org/schema/beans/spring-beans-3.0.xsd http://www.springframework.org/schema/tx http://www.springframework.org/schema/tx/spring-tx-3.0.xsd http://www.springframework.org/schema/aop http://www.springframework.org/schema/aop/spring-aop-3.0.xsd"> <!-- 读取配置文件 --> <bean id="propertyConfigurer" class="org.springframework.beans.factory.config.PropertyPlaceholderConfigurer"> <property name="location" value="classpath:jdbc.properties"> </property></bean> <!-- 数据库连接池 --> <bean id="dataSource" class="org.apache.commons.dbcp.BasicDataSource" destroy-method="close"> <property name="driverClassName"> <value>${jdbc_driver}</value> </property> <property name="url"> <value>${jdbc_url}</value> </property> <property name="username"> <value>${jdbc_user}</value> </property> <property name="password"> <value>${jdbc_password}</value> </property> <property name="maxActive" value="100"></property> <property name="maxIdle" value="30"></property> <property name="maxWait" value="500"></property> <property name="defaultAutoCommit" value="true"></property> </bean> <!-- 事务配置 --> <bean id="transactionManager" class="org.springframework.jdbc.datasource.DataSourceTransactionManager"> <property name="dataSource" ref="dataSource"> </property></bean> <!-- 实体映射类--> <bean id="sqlSessionFactory" class="org.mybatis.spring.SqlSessionFactoryBean"> <property name="dataSource" ref="dataSource"> <property name="typeAliasesPackage" value="com.mss.common.pojo"> </property></property></bean></aop:aspectj-autoproxy></beans> |
数据库配置文件jdbc.properties:
【struts2公共配置】
|
1
2
3
4
5
6
7
8
9
10
11
12
13
14
15
16
|
<!--?xml version="1.0" encoding="UTF-8" ?--><struts> <!-- 将struts2交给spring管理--> <constant name="struts.configuration.xml.reload" value="true"> <constant name="struts.action.extension" value="action,do,webwork"> <constant name="struts.enable.DynamicMethodInvocation" value="true"> <constant name="struts.devMode" value="true"> <constant name="struts.multipart.maxSize" value="100971520"></constant> <constant name="struts.i18n.encoding" value="UTF-8"></constant> <constant name="struts.objectFactory.spring.autoWire" value="name"></constant> <constant name="struts.objectFactory" value="spring"></constant> <constant name="struts.custom.i18n.resources" value="messages"></constant> <include file="strutsConfig/struts-user.xml"></include></constant></constant></constant></constant></struts> |
【创建数据表结构】:项目中我们使用的是mysql数据库,在里面新建了一个user表:

【搭建项目结构】:这里我使用了三层架构:Action-->Service-->Dao(实体类)
编写user实体类:
|
1
2
3
4
5
6
7
8
9
10
11
12
13
14
15
16
17
18
19
20
21
22
23
24
25
26
27
28
29
30
31
32
33
34
35
36
37
38
39
40
41
42
43
44
45
46
47
48
49
|
package com.mss.common.pojo;import java.io.Serializable;public class User implements Serializable { /** * */ private static final long serialVersionUID = 1L; private String id; private String userName; private String password; private String email; public String getId() { return id; } public void setId(String id) { this.id = id; } public String getUserName() { return userName; } public void setUsername(String userName) { this.userName = userName; } public String getPassword() { return password; } public void setPassword(String password) { this.password = password; } public String getEmail() { return email; } public void setEmail(String email) { this.email = email; }} |
编写我们的dao层UserDao:
|
1
2
3
4
5
6
7
8
9
10
11
12
13
14
15
16
17
18
19
20
21
22
23
24
25
26
|
package com.mss.user.dao;import java.util.List;import com.mss.common.pojo.User;public interface UserDao { /** * 添加用户 * @param user */ public void addUser(User user); /** * 列出所有用户 * @return */ public List<user> queryUsers(); /** * 删除用户 * @param id */ public void delUser(String id);}</user> |
使用mybatis,我们得配置xml文件,将实体类User与表user映射,也将UserDao中的方法进行映射实现,这样我们不需要写UserDaoImpl,因为对数据库的操作也在这个xml中进行:UserDao.xml,这个很重要
|
1
2
3
4
5
6
7
8
9
10
11
12
13
14
15
16
17
18
19
20
21
22
23
24
25
26
27
28
29
30
31
32
33
34
35
36
37
38
39
40
|
<!--?xml version="1.0" encoding="UTF-8" ?--> <mapper namespace="com.mss.user.dao.UserDao"> <!-- User实体类、User表映射,注意实体类User和表名应该一致,字段下面可配置 --> <resultmap id="UserMap" type="com.mss.common.pojo.User"> <result property="id" column="ID"> <result property="userName" column="USERNAME"> <result property="password" column="PASSWORD"> <result property="email" column="EMAIL"> </result></result></result></result></resultmap> <!-- 将UserDao中的方法进行配置,id=方法名称,parameterType=参数类型,resultMap返回的结果, 当用户使用UserDao中的方法时,mybaties自己会找相应配置文件中的对数据库的操作 --> <insert id="addUser" parametertype="User"> INSERT INTO USER( ID, USERNAME, PASSWORD, EMAIL ) VALUES ( #{id}, #{userName}, #{password}, #{email} ) </insert> <!-- 返回一个上面的 resultMap实例,这里的resultMap要与上面的配置的resultMap中的id一致--> <select id="queryUsers" resultmap="UserMap"> SELECT * FROM USER </select> <!-- 删除信息 --> <delete id="delUser" parametertype="string"> DELETE FROM USER WHERE ID = #{id} </delete> </mapper> |
编写我们的Service和ServiceImpl类,操作Dao层:UserService、UserServiceImpl
|
1
2
3
4
5
6
7
8
9
10
11
12
13
14
15
16
17
18
19
20
|
public interface UserService { /** * 添加用户 * @param user */ public void addUser(User user); /** * 列出所有的用户 * @return */ public List<user> queryUsers(); /** * 删除用户 * @param id */ public void delUser(String id);}</user> |
|
1
2
3
4
5
6
7
8
9
10
11
12
13
14
15
16
17
18
19
20
21
22
23
24
25
26
27
28
29
30
31
32
33
34
35
36
37
38
39
40
41
42
43
44
45
|
package com.mss.user.serviceImpl;import java.util.List;import com.mss.common.pojo.User;import com.mss.user.dao.UserDao;import com.mss.user.service.UserService;public class UserServiceImpl implements UserService{ private UserDao userDao; |
以上是关于转 :手动配置三大框架整合:Spring+Struts2+mybatis的主要内容,如果未能解决你的问题,请参考以下文章