运维自动化工具Cobbler之——安装实践
Posted
tags:
篇首语:本文由小常识网(cha138.com)小编为大家整理,主要介绍了运维自动化工具Cobbler之——安装实践相关的知识,希望对你有一定的参考价值。
运维自动化工具——Cobbler实践
第1章 About Cobbler
1.1 Cobbler Introduction
Cobbler是一个Linux服务器安装的服务,可以通过网络启动(PXE)的方式来快速安装、重装物理服务器和虚拟机,同时还可以管理DHCP,DNS等。
Cobbler可以使用命令行方式管理,也提供了基于Web的界面管理工具(cobbler-web),还提供了API接口,可以方便二次开发使用。Cobbler是较早前的kickstart的升级版,优点是比较容易配置,还自带web界面比较易于管理。
Cobbler内置了一个轻量级配置管理系统,但它也支持和其它配置管理系统集成,如Puppet,暂时不支持SaltStack。
1.2 Cobbler related servies
PXE服务支持
DHCP服务管理
DNS服务管理(可选bind,dnsmasq)
电源管理
Kickstart服务支持
YUM仓库管理
TFTP(PXE启动时需要)
Apache(提供kickstart的安装源,并提供定制化的kickstart配
第2章 Prerequisites
2.1 Requries Packages
yum -y install cobbler cobbler-web dhcp tftp-server pykickstart httpd xinetd
#注:这里我是在Centos-7上做操作,有的安装包可能和官网会不同。
2.2 Installing From Packages
2.2.1 CentOS Release andEnvironment
[[email protected] ~]# cat/etc/redhat-release
CentOS Linux release 7.2.1511 (Core)
[[email protected] ~]# uname -r
3.10.0-327.18.2.el7.x86_64
[[email protected] ~]# uname -m
x86_64
[[email protected] ~]# hostname
linux-node1.example.com
[[email protected] ~]# ifconfig eth0|awk-F "[ :]+" ‘NR==2{print $3}‘
192.168.56.11
[[email protected] ~]# getenforce
Disabled
[[email protected] ~]# systemctl stop firewalld
2.2.2 epel源和yum源
wget -O /etc/yum.repos.d/epel.repo http://mirrors.aliyun.com/repo/epel-7.repo
wget -O /etc/yum.repos.d/CentOS-Base.repohttp://mirrors.aliyun.com/repo/Centos-7.repo
2.3 Cobbler Funcation Introduction
使用一个以前定义的模块来配置DHCP服务(如果启用了管理DHCP)
将一个存储库(yum和rsync)建立镜像或解压缩一个媒介,已注册一个新操作系统
在DHCP配置文件中为需要安装的机器创建一个条目,并使用您指定的参数(IP和MAC地址)
在TFTP服务目录下创建适当的PXE文件
重新启动DHCP服务以反映更改
重新启动机器以开始安装(如果电源管理已启用)
2.4 Configuration Cobbler
[[email protected] ~]# systemctl start xinetd
[[email protected] ~]# systemctl start rsyncd
[[email protected] ~]# systemctl start tftp
[[email protected] ~]# systemctl start dhcpd   ###由于还没有生成,无法启动(后续)
[[email protected] ~]# systemctl start httpd
[[email protected] ~]# systemctl start cobblerd
2.5 检查Cobbler安装配置
执行以下命令检查Cobbler的配置,如果看不到下面的结果,再次执行cobbler和httpd服务(cobbler check命令用于向用户提供检查信息,就安装可能出现的问题进行提示)
[[email protected] ~]# cobbler check
The following are potential configuration items that you may want to fix:
1 :The ‘server‘ field in /etc/cobbler/settingsmust be set to something other than
 localhost, or kickstarting features willnot work.  This should be a resolvablehostname or
 IP for the boot server as reachable by all machines that will use it.
2 :For PXE to be functional, the ‘next_server‘field in /etc/cobbler/settings must be set
 to something other than 127.0.0.1,and should match the IP of the boot server on the PXE
 network.
3 :enable and start rsyncd.service with systemctl
4 :debmirror package is not installed,it will be required to manage debian deployments
 and repositories
5 :The default password used by thesample templates for newly installed machines
 (default_password_crypted in/etc/cobbler/settings) is still set to ‘cobbler‘ and should
 be changed, try:"openssl passwd -1 -salt ‘random-phrase-here‘ ‘your-password-here‘"to
 generate new one
 Restart cobblerd and then run ‘cobbler sync‘ to apply changes.
根据上面的提示信息完成配置:
第1、2项:
[[email protected] ~]# vim /etc/cobbler/settings
next_server:192.168.56.11
server:192.168.56.11
这里是指提供Cobbler服务的服务主机。
第3项:
[[email protected] ~]# systemctl start rsyncd
注:这里可能启动了,检查还是会出现,但是不影响服务的正常运行。
第4项:
[[email protected] ~]# yum insall debmirror
注:在Debian操作系统平台,会需要安装这个包,在CentOS或Redhat不用。
第5项:
[[email protected] ~]# openssl passwd -1-salt ‘cobbler‘ ‘123456‘
$1$cobbler$sqDDOBeLKJVmxTCZr52/11
#设置新装系统的默认root密码123456。下面的命令来源于提示5,random-phrase-here为干扰码,
可以自行在配置文件/etc/cobbler/setting中设定:
default_password_crypted:"$1$root$/YPJHOfSs7b.KSSgk9sjT/"
2.5 Manager DHCP
You also need to enable such management,this is done in your setting:
[[email protected] ~]# vim/etc/cobbler/settings
manage_dhcp: 1    #将"0"改为"1"
下一步我们配置DHCP的模板文件:
[[email protected] ~]# vim /etc/cobbler/dhcp.template
#仅列出修改的字段
…….
subnet 192.168.56.0 netmask255.255.255.0 {             #网段和子网
    option routers        192.168.56.2;          #网关                            #网关
    option domain-name-servers   192.168.56.2;           #DNS服务器
    option subnet-mask       255.255.255.0;
    range dynamic-bootp      192.168.1.100 192.168.1.200;  #可分配地址段
………
执行cobbler sync同步应用更改,会自动生成dhcp的配置文件
[[email protected] ~]# cobbler sync
查看生成的DHCP配置文件:
[[email protected] ~]# cat/etc/dhcp/dhcpd.conf
#******************************************************************
# Cobbler managed dhcpd.conf file
# generated from cobbler dhcp.conftemplate (Fri May 27 01:11:00 2016)
# Do NOT make changes to/etc/dhcpd.conf. Instead, make your changes
# in /etc/cobbler/dhcp.template, as/etc/dhcpd.conf will be
# overwritten.
#******************************************************************
ddns-update-style interim;
allow booting;
allow bootp;
ignore client-updates;
set vendorclass = optionvendor-class-identifier;
option pxe-system-type code 93 =unsigned integer 16;
subnet 192.168.56.0 netmask255.255.255.0 {
    option routers            192.168.56.2;
    option domain-name-servers  192.168.56.2;
    option subnet-mask        255.255.255.0;
    range dynamic-bootp       192.168.56.100 192.168.56.210;
    default-lease-time          21600;
    max-lease-time             43200;
    next-server               192.168.56.11;
    class "pxeclients" {
         match if substring (option vendor-class-identifier, 0, 9) ="PXEClient";
         if option pxe-system-type = 00:02 {
                  filename"ia64/elilo.efi";
         } else if option pxe-system-type = 00:06 {
                  filename"grub/grub-x86.efi";
         } else if option pxe-system-type = 00:07 {
                  filename"grub/grub-x86_64.efi";
         } else {
                  filename"pxelinux.0";
         }
    }
}
# group for Cobbler DHCP tag: default
group {
}
第3章 Cobbler Import
导入一个ISO文件,作为网路安装操作系统的时候的镜像源,镜像文件需要我们导入到本地的Cobbler服务器。
3.1 实例
我们导入一个操作系统为CentOS-7-x86_64位镜像文件,因为我们用的是虚拟机,所以挂载本地镜像;
[[email protected] ~]# mount /dev/cdrom /mnt/
[[email protected] ~]# cobbler import --name=CentOS-7-x86_64 --path=/mnt/ --arch=x86_64
参数说明:
# --path 镜像路径
# --name 为安装源定义一个名字
# --arch 指定安装源是32位、64位、ia64, 目前支持的选项有: x86│x86_64│ia64
# 安装源的唯一标示就是根据name参数来定义,本例导入成功后,安装源的唯一标示
3.2 查看导入的镜像文
[[email protected] ~]# cobbler distro list   #查看镜像列表
CentOS-7-x86_64
默认Cobbler会将镜像中的所有安装文件拷贝到本地一份,放在/var/www/cobbler/ks_mirror下的
CentOS-7.1-x86_64目录下,因此/var/www/cobbler目录必须具有足够容纳安装文件的空间。
[[email protected] ~]# cd /var/www/cobbler/ks_mirror/
[[email protected] ks_mirror]# ls
CentOS-7-x86_64  config
[[email protected] ks_mirror]# ls CentOS-7-x86_64/
CentOS_BuildTag  GPL     LiveOS    RPM-GPG-KEY-CentOS-7
EFI        images    Packages    RPM-GPG-KEY-CentOS-Testing-7
EULA        isolinux    repodata    TRANS.TBL
3.3 获取更多的命令帮助
查看导入镜像命令的帮助信息
[[email protected] ~]# cobbler import --help
Usage: cobbler [options]
Options:
 -h, --help              show this help message and exit
 --arch=ARCH             OSarchitecture being imported
 --breed=BREED            the breedbeing imported
 --os-version=OS_VERSION       the version beingimported
 --path=PATH             local path or rsync location
 --name=NAME             name, example‘RHEL-5‘
 --available-as=AVAILABLE_AS      tree is here, don‘tmirror
 --kickstart=KICKSTART_FILassign    this kickstartfile        #分配这个启动文件
 --rsync-flags=RSYNC_FLAGS       pass additional flagsto rsync
第4章 定制ks.cfg文件及调整内核参数
我们在安装操作系统的过程中,需要大量的和服务器交互操作,为了减少这个交互过程,于是就有了
kickstart。使用这种kickstart,只需事先定义好一个Kickstart自动应答配置文件ks.c),并让安装程序
知道该配置文件的位置,在安装过程中安装程序就可以自 己从该文件中读取安装配置,这样就避免了在
安装过程中多次的人机交互,从而实现无人值守的自动化安装,可以参考
Redhat官方的介绍:
https://access.redhat.com/knowledge/docs/en-US/Red_Hat_Enterprise_Linux/6/html
/Installation_Guide/s1-kickstart2-options.html
ks.cfg文件组成大致分为3段
命令段
键盘类型,语言,安装方式等系统的配置,有必选项和可选项,如果缺少某项必选项,安装时会中断并提示用户选择此项的选项
软件包段
%packages
@groupname:指定安装的包组
package_name:指定安装的包
-package_name:指定不安装的包
在安装过程中默认安装的软件包,安装软件时会自动分析依赖关系。
脚本段(可选)
%pre:安装系统前执行的命令或脚本(由于只依赖于启动镜像,支持的命令很少)
%post:安装系统后执行的命令或脚本(基本支持所有命令)
提示:这里的脚本段非常有意思,我们在做自动化的时候,可以将各种服务安装脚本放到这里,系统会
自己执行,脚本的执行的方式有两种,一种是客户端安装系统的时候下载准备好的脚本,然后执行;另
一种则是不用下载脚本,但是脚本可以在客户端执行操作;这里大家可以了解一下"wget"命令的参数就
可以轻松搞定,我下面会给一个案例。这时候,你只需要点开机,然后服务会自己给你搭建完成,完全
不用管,相当方便。
4.1 Cobbler kickstart文件的默认存放位置
Cobbler默认会自带很多ks文件,默认使用"ample_end.ks"这个,一会我们要自己指定一个写好的ks文
件,如下:
[[email protected] ks_mirror]# cd/var/lib/cobbler/kickstarts/
[[email protected] kickstarts]# ls         #自带很多
default.ks   install_profiles  sample_autoyast.xml  sample_esxi4.ks  sample_old.seed
esxi4-ks.cfg  legacy.ks ample_end.ks(默认使用的ks文件)sample_esxi5.ks  sample.seed
esxi5-ks.cfg  pxerescue.ks    sample_esx4.ks   sample.ks
4.2 上传写好的ks.cfg文件到/var/lib/cobbler/kickstart下面
这是我提前准备的kickstart文件,名为:CentOS-7-x86_64(经供参考):
#Kickstart Configurator by Role‘s_Tan.
#platform=x86, AMD64, or Intel EM64T
#System language
lang en_US
#System keyboard
keyboard us
#Sytem timezone
timezone Asia/Shanghai
#Root password
rootpw --iscrypted $default_password_crypted
#rootpw --iscrypted $1$ops-node$7hqdpgEmIE7Z0RbtQkxW20
#Use text mode install
text
#Install OS instead of upgrade
install
#Use NFS installation Media
url --url=$tree
#url --url=http://192.168.56.11/CentOS-7.1-x86_64
#System bootloader configuration
bootloader --location=mbr
#Clear the Master Boot Record
zerombr
#Partition clearing information
clearpart --all --initlabel
#Disk partitioning information
part /boot --fstype xfs --size 1024 --ondisk sda
part swap --size 16384 --ondisk sda
part / --fstype xfs --size 1 --grow --ondisk sda
#System authorization infomation
auth  --useshadow  --enablemd5
#Network information
$SNIPPET(‘network_config‘)
#network --bootproto=dhcp --device=eth0 --onboot=on
# Reboot after installation
reboot
#Firewall configuration
firewall --disabled
#SELinux configuration
selinux --disabled
#Do not configure XWindows
skipx

%pre
$SNIPPET(‘log_ks_pre‘)
$SNIPPET(‘kickstart_start‘)
$SNIPPET(‘pre_install_network_config‘)
#Enable installation monitoring
$SNIPPET(‘pre_anamon‘)
%end

#Package install information
%packages
@ base
@ core
sysstat
rsyslog
ntp
lrzsz
ncurses-devel
openssl-devel
zlib-devel
OpenIPMI-tools
nmap
screen
telnet
tree
%end

%post                 ###脚本和命令段
systemctl disable postfix.service   #关闭一个postfix服务,可以加很多,根据实际环境来操作。
%end
上传写好的应答文件后,我们需要编辑系统默认的ks指向文件,操作如下:
[[email protected] ~]# cobbler profile edit --name=CentOS-7-x86_64 --kickstart=/var/lib/cobbler/kickstarts/CentOS-7-x86_64.cfg
但是我看了很多网友的资料,大家都需要改一下Centos7的网卡名,当然,我这里为了方便大家学习,
也需要改一下吧!(没办法) 我们直接通过Cobbler提供的命令行来进行修改,大可不必要再系统安装完
成后在进行操作,方法如下:
[[email protected] ~]# cobbler profile edit --name=CentOS-7-x86_64 --kopts=‘net.ifnames=0 biosdevname=0‘
[[email protected] ~]# cobbler sync
[[email protected] ~]# cobbler profile list
    CentOS-7-x86_64
这样,大概工作就完成了,下一步就可以启用客户端,安装操作系统了!
4.3 以上的步骤完成之后,我们就可以新建虚拟机,安装操作系统
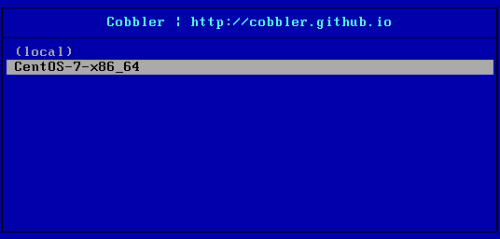
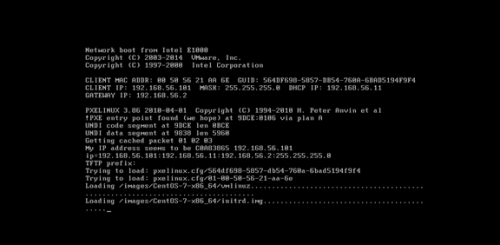
如下是客户机启动后的界面,我们选择:CentOS-7-x86_64,然后就会进行安装操作。
4.4 Kickstart文件扩展(仅供参考,下面的操作是笔者在Centos-6.7-x86_64上的操作)
上面我们说到ks文件的"%post"段,可以放一些脚本或命令端。这里我就来说一些简单的用法。
首先,我们要实现的功能就是:
自动安装操作系统
系统安装后简单优化系统
自动部署配置服务(需要提前写好脚本)
其次,具体的操作,这里给大家简单说一下Kickstart文件的写法就行了。
我们在脚本及命令段写(带“#”的为注释信息):
命令方式:
前提是系统有这个命令
%post
#精简开机自启动服务(注:如果你安装有别的服务,需要开机自启动,这里也需要加上,否则···你懂的)
chkconfig --list|grep "sshd|network|crond|rsyslog|sysstat"|awk ‘{print "chkconfig "$1" on"}‘|bash
chkconfig --list|egrep -v "sshd|network|crond|rsyslog|sysstat"|awk ‘{print "chkconfig "$1" off"}‘|bash

#启动/关闭一个服务
/etc/init.d/network start|stop|reload|restart

#设置开机自启动服务状态
chkconfig sshd on|off

#创建一个目录或文件
mkdir -p /server/scripts

#向文件中追加内容(向/etc/hosts文件追加主机名和IP地址)
echo "10.0.0.31 nfs01
10.0.0.41 backup" >> /etc/hosts
%end
脚本:(两种)
客户端的系统上有部署脚本
Cobbler服务端有部署脚本
可能大多数人第一想法就是第一个,安装系统后,就把部署脚本放到上面,然后执行,还是挺麻烦的。
这里我给各位说说第二种,我的部署脚本放到我的Cobbler端的HTTP服务的根目录下(之前安装的是
Apache,默认根目录是/var/www/html/),然后通过“wget”命令直接远端执行,不用下载到客户
端,就能完成给客户端部署安装务。
首先创建一个放部署脚本的目录:
[[email protected] ~]# mkdir -p /var/www/html/scripts
下面就是重点:
%post
wget -O- http://192.168.56.11/scripts/nginx.sh|bash       #提示大写的字母“O”
%end
说明:
优点:假如我们要部署一个Nginx的服务 ,将部署脚本放到Cobbler服务端的/var/www/html/scripts
下,然后再kickstart文件中添加上面这行命令,就可以在客户端上执行这个脚本,而不用下载到客户本
地然后再执行,怎么样!是不是很方便。
缺点:每台机器都会执行这个脚本。
解决办法:在实际工作场景,我们可以根据不同角色的服务器,根据主机名,或者IP地址来区分;在写
部署脚本的时候,在脚本中加上判断语句,如果是这台机器就执行,不是就“exit”,就是那么简单!
第5章 定制化安系统
5.1 定制化介绍
所谓定制化,就是根据服务器的角色、主机名、IP或功能等等,进行操作系统安装。
MAC地址(核心)
IP地址
主机名
子网
网关
DNS
提示:在定制化之前,需要提到拿到服务器的物理地址(MAC)
5.2 操作步骤
[[email protected] ~]# cobbler system add --name=test.example.com --mac=00:50:56:21:AA:6E --ip-address=192.168.56.110 --subnet=255.255.255.0 --gateway=192.168.56.2 --interface=eth0
--name-servers="192.168.56.28.8.8.8" --static=1 --hostname=test.example.com
--kickstart=/var/lib/cobbler/kickstarts/CentOS-7-x86_64.cfg --profile=CentOS-7-x86_64
参数说明:
# --name 自定义,但不能重复
#--mac 客户端的mac地址
#--profile 指定profile文件
#--ip-address 指定ip地址
#--subnet 指定子网
#--gateway 指定网关
#--interface 制定网卡名字
#--hostname 指定主机名
#--name-server指定DNS
#--kickstart 指定ks文件
查看自定义列表:
[[email protected] ~]# cobbler system list
  test.example.com
5.3 客户端操作
此时,客户端直接开机之后,会自动进行安装,而不用我们在选择Profiel文件(保证所有服务正常)
第6章 Cobbler Web管理
Cobbler服务之所以简单,是因为它有一个图形化界面的操作平台,那就是它的Web界面,这大大简易
了它的入门难度;可以在web管理界面完成命令行同样完成的任务。
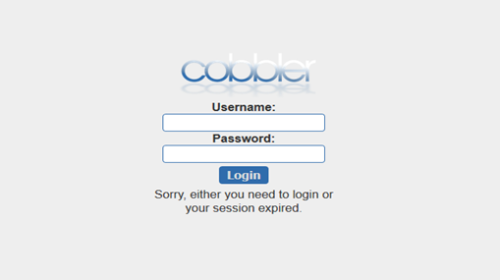
6.1 登录方式
https://Cobbler_sever-ip/cobbler_web
Web界面:
用户名:cobbler
密 码:cobbler
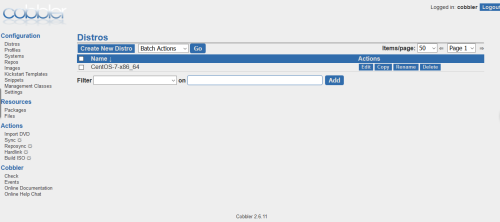
登录后的界面:
6.2 Web授权配置文件
如下:
[[email protected] ~]# cd /etc/cobbler/
[[email protected] cobbler]# vim users.conf
[admins]
admin = ""
cobbler = ""
添加一个Web端登陆用户:
查看原有的:
[[email protected] ~]# cd /etc/cobbler/
[[email protected] cobbler]# cat users.digest
cobbler:Cobbler:a2d6bae81669d707b72c0bd9806e01f3
 用户名    组      加密密码
添加:用户名为“role”,属于“Cobbler”组
[[email protected] cobbler]# htdigest /etc/cobbler/users.digest "Cobbler" "role"
[[email protected] cobbler]# cat users.digest
cobbler:Cobbler:a2d6bae81669d707b72c0bd9806e01f3
tanjianxin:Cobbler:a1ca1422226e9e45e9b7e10da626cdb3    ###多了一个用户的信息
到这里Web端的一些基本介绍完成了!
第7章 客户端重装系统工具
7.1 Koan介绍
Koan是Cobbler的一个辅助程序,可以安装在远程系统上(客户端),通过配置引导装载程序重新安装
系统;这也可以用于操作系统升级而启动,指定一个干净的安装。
更多用法请参考官网信息:http://cobbler.github.io/manuals/2.6.0/
7.2 用法如下:
yum安装(需要epel源支持)
[[email protected] ~]# yum install koan -y
列出Cobbler服务端可用的profile文件
[[email protected] ~]# koan --server=192.168.56.11 --list=profiles
- looking for Cobbler athttp://192.168.56.11:80/cobbler_api
CentOS-7-x86_64
CentOS-6-x86_64
参数说明:
#--server 指定Cobbler服务器IP地址
#--list 列出一些你需要的信息,可以自己指定(--help)
指定要重装系统的Cobbler端机profile文件
[[email protected] ~]# koan --replace-self --server=192.168.56.11 --profile=CentOS-7-x86_64
后记:
学习贵在坚持,要培养出自己的学习能力;这样学习新的技术知识,才不会感到吃力!
技术的提升仅是量的积累,思想的提升才是质的飞跃!(出自:老男孩老师语录)
后期期望给大家带来更多的文章!
本文出自 “Sunset” 博客,请务必保留此出处http://roles.blog.51cto.com/9623242/1787774
以上是关于运维自动化工具Cobbler之——安装实践的主要内容,如果未能解决你的问题,请参考以下文章


