部署Rabbitmq
Posted
tags:
篇首语:本文由小常识网(cha138.com)小编为大家整理,主要介绍了部署Rabbitmq相关的知识,希望对你有一定的参考价值。
一、Rabbitmq概念
RabbitMQ是一个开源的靠AMQP协议实现的服务,服务器端用Erlang语言编写,支持多种客户端,如:Python、Ruby、.NET、Java、JMS、C、php、ActionScript、XMPP、STOMP等,支持AJAX。用于在分布式系统中存储转发消息,在易用性、扩展性、高可用性等方面表现不俗。
AMQP,即Advanced Message Queuing Protocol,高级消息队列协议,是应用层协议的一个开放标准,为面向消息的中间件设计。消息中间件主要用于组件之间的解耦,消息的发送者无需知道消息使用者的存在,反之亦然。
它可以使对应的客户端(client)与对应的消息中间件(broker)进行交互。消息中间件发布者(publisher)那里收到消息(发布消息的应用,也称为producer),然后将他们转发给消费者(consumers,处理消息的应用)。由于AMQP是一个网络协议,所以发布者、消费者以及消息中间件可以部署到不同的物理机器上。
Rabbitmq使用场景:
消息队列在实际应用中常用在异步处理、应用解耦、流量削锋和消息通讯这四个场景。
二、部署Rabbitmq
注:在开始之前,主机名最好为默认的localhosts(如果不是,会在启动rabbitmq时报错,解决方法:重启主机,再启动rabbitmq)
下载rpm包(提取码:rv8g),也可以自行去官网下载所需
1、部署单台rabbitmq
[root@localhost rabbitmq]# ls                #  确定有所需rpm包
erlang-18.1-1.el6.x86_64.rpm  rabbitmq-server-3.6.6-1.el6.noarch.rpm  socat-1.7.3.2-2.el7.x86_64.rpm
[root@localhost rabbitmq]# yum -y localinstall erlang-18.1-1.el6.x86_64.rpm rabbitmq-server-3.6.6-1.el6.noarch.rpm socat-1.7.3.2-2.el7.x86_64.rpm
[root@localhost rabbitmq]# chkconfig rabbitmq-server on            # 设置为开机自启动
[root@localhost rabbitmq]# /etc/init.d/rabbitmq-server start          # 启动rabbitmq服务
Starting rabbitmq-server (via systemctl):                [  OK  ]
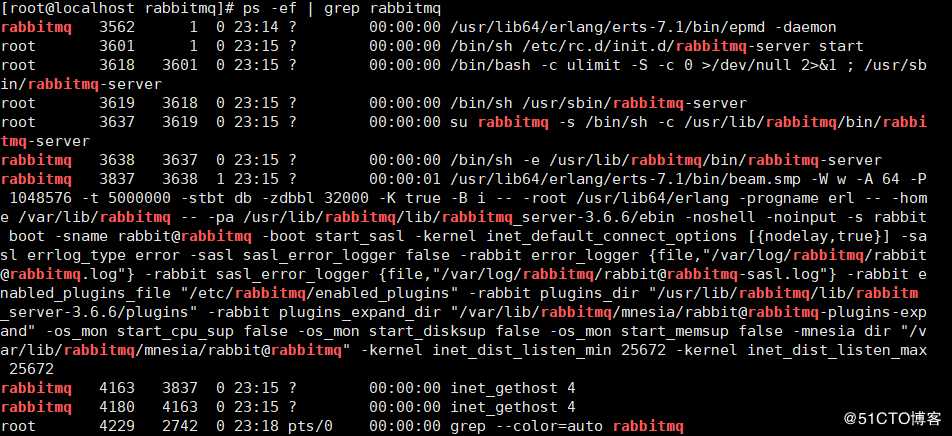
#确定rabbitmq在运行
[root@localhost rabbitmq]# ps -ef | grep rabbitmq
#开启用户远程访问
[root@localhost rabbitmq]# cat > /etc/rabbitmq/rabbitmq.config << EOF
> [{rabbit,[{loopback_users,[]}]}].
> EOF
#开启后台管理插件
[root@localhost rabbitmq]# rabbitmq-plugins enable rabbitmq_management          # 开启rabbitmq的web管理插件,以便可以通过浏览器进行访问
#下载并安装一些所需插件
[root@localhost rabbitmq]# wget https://dl.bintray.com/rabbitmq/community-plugins/rabbitmq_delayed_message_exchange-0.0.1.ez
[root@localhost rabbitmq]# cp rabbitmq_delayed_message_exchange-0.0.1.ez /usr/lib/rabbitmq/lib/rabbitmq_server-3.6.6/plugins/
[root@localhost rabbitmq]# rabbitmq-plugins enable rabbitmq_delayed_message_exchange               # 开启插件
#创建登录用户
[root@localhost rabbitmq]# rabbitmqctl add_user admin 123.com
Creating user "admin" ...
#将创建的admin用户添加至administrator组
[root@localhost rabbitmq]# rabbitmqctl set_user_tags admin administrator
Setting tags for user "admin" to [administrator] ...
用户类别及权限:
- 超级管理员(administrator) 可登陆管理控制台,可查看所有的信息,并且可以对用户,策略(policy)进行 操作。
- 监控者(monitoring) 可登陆管理控制台,同时可以查看rabbitmq节点的相关信息(进程数,内存使用情 况,磁盘使用情况等)
- 策略制定者(policymaker) 可登陆管理控制台, 同时可以对policy进行管理。但无法查看节点的相关信息(上 图红框标识的部分)。
- 普通管理者(management) 仅可登陆管理控制台,无法看到节点信息,也无法对策略进行管理。
- 其他 无法登陆管理控制台,通常就是普通的生产者和消费者。
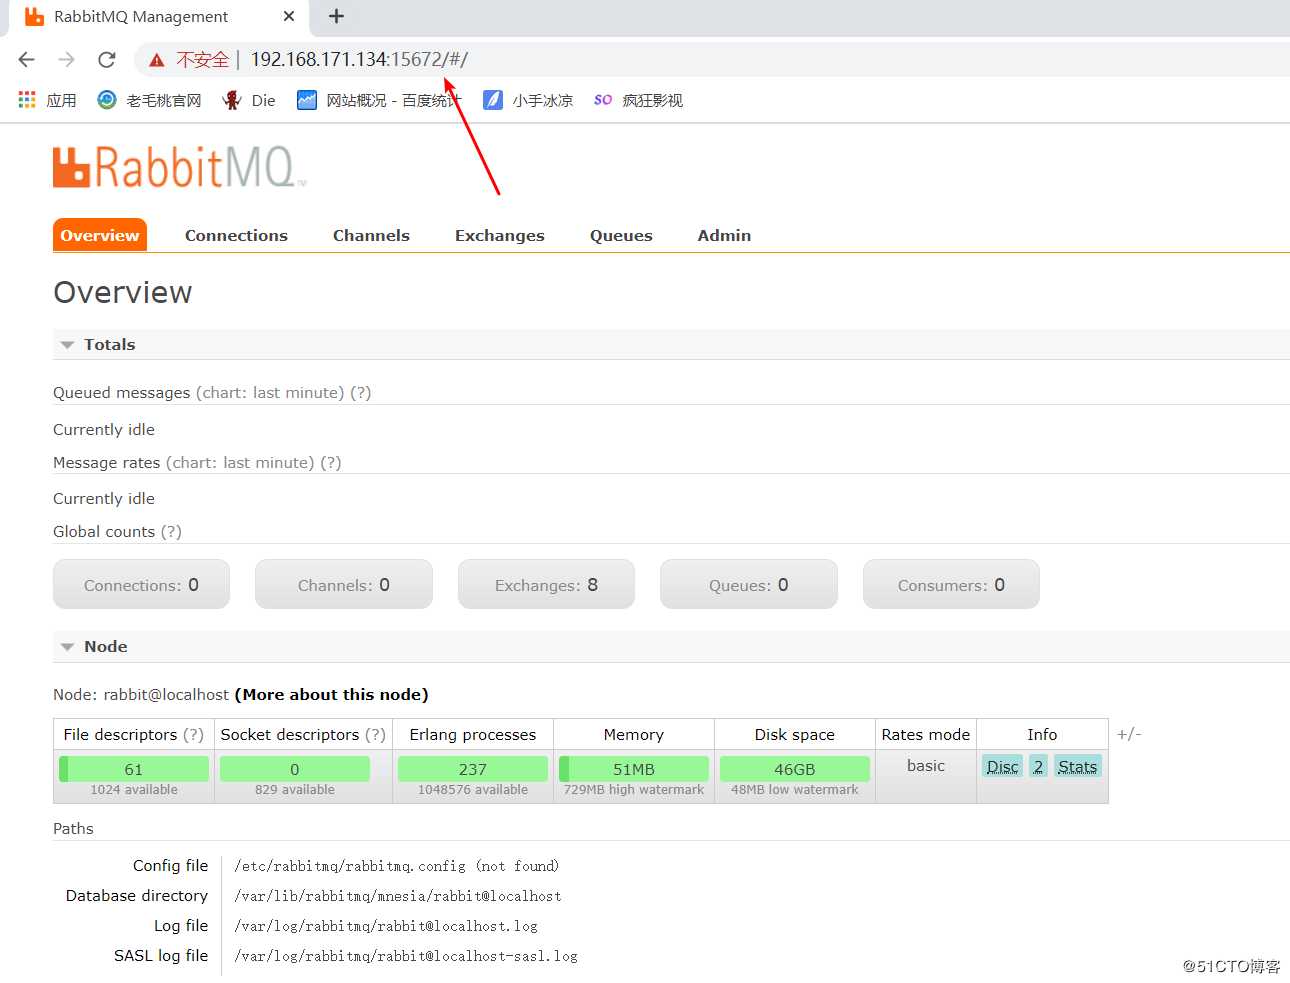
客户端访问rabbitmq服务器的15672端口,使用新创建的admin用户进行登录,登录成功后显示如下:
2、学习队列
[root@localhost ~]# yum -y install python-devel
[root@localhost ~]# curl https://bootstrap.pypa.io/get-pip.py -o get-pip.py              # 访问此网页,将其内容保存为脚本
[root@localhost ~]# python get-pip.py           # 安装pip工具
[root@localhost ~]# which pip        # 确定有此命令
/usr/bin/pip
[root@localhost ~]# pip install pika
简单队列(此时为匿名发送,不指定交换机,则直接发送到队列中。)
[root@localhost ~]# mkdir -p /opt/simplest           # 创建目录
[root@localhost ~]# cd /opt/simplest/
[root@localhost simplest]# ls          # 在此目录中写入以下两个脚本文件
receive.py  send.py
[root@localhost simplest]# cat send.py          # 发送脚本
#!/usr/bin/env python
import pika                              # 导入pika模块

connection = pika.BlockingConnection(
    pika.ConnectionParameters(host=‘localhost‘))              # 调用并创建连接,如要连接远程则改为相应的IP即可
channel = connection.channel()            # 创建连接通道,这里为无

channel.queue_declare(queue=‘hello‘)                # 定义通道的名称为hello

channel.basic_publish(exchange=‘‘, routing_key=‘hello‘, body=‘Hello World!‘)                  # 发布
print(" [x] Sent ‘Hello World!‘")
connection.close()
[root@localhost simplest]# cat receive.py             # 接受脚本
#!/usr/bin/env python
import pika

connection = pika.BlockingConnection(
    pika.ConnectionParameters(host=‘localhost‘))           # 创建连接,连接到本地
channel = connection.channel()        # 通道

channel.queue_declare(queue=‘hello‘)           # 定义通道名称,与发送脚本的队列一样

def callback(ch, method, properties, body):
    print(" [x] Received %r" % body)

channel.basic_consume(
    queue=‘hello‘, on_message_callback=callback, auto_ack=True)

print(‘ [*] Waiting for messages. To exit press CTRL+C‘)
channel.start_consuming()
[root@localhost simplest]# python send.py          # 发送消息
 [x] Sent ‘Hello World!‘
[root@localhost simplest]# python receive.py         # 如果没有发送消息,执行此脚本则会一直等待,知道手动Ctrl+c暂停
 [*] Waiting for messages. To exit press CTRL+C
 [x] Received ‘Hello World!‘
 #当同时拥有几十或上百的请求等待消息接收,则会按照时间先后进行排队,等待一条条发送
工作队列WorkQueue 模型(消息轮流被多个消费者消费,可以 理解为轮询)
[root@localhost simplest]# cd
[root@localhost ~]# mkdir /opt/work_queues
[root@localhost ~]# cd /opt/work_queues/
[root@localhost work_queues]# ls
new_task.py  worker.py
[root@localhost work_queues]# cat new_task.py
#!/usr/bin/env python
import pika
import sys

connection = pika.BlockingConnection(
    pika.ConnectionParameters(host=‘localhost‘))
channel = connection.channel()

channel.queue_declare(queue=‘task_queue‘, durable=True)

message = ‘ ‘.join(sys.argv[1:]) or "Hello World!"
channel.basic_publish(
    exchange=‘‘,
    routing_key=‘task_queue‘,
    body=message,
    properties=pika.BasicProperties(
        delivery_mode=2,  # make message persistent
    ))
print(" [x] Sent %r" % message)
connection.close()
[root@localhost work_queues]# cat worker.py
#!/usr/bin/env python
import pika
import time

connection = pika.BlockingConnection(
    pika.ConnectionParameters(host=‘localhost‘))
channel = connection.channel()

channel.queue_declare(queue=‘task_queue‘, durable=True)
print(‘ [*] Waiting for messages. To exit press CTRL+C‘)

def callback(ch, method, properties, body):
    print(" [x] Received %r" % body)
    time.sleep(body.count(b‘.‘))
    print(" [x] Done")
    ch.basic_ack(delivery_tag=method.delivery_tag)

channel.basic_qos(prefetch_count=1)
channel.basic_consume(queue=‘task_queue‘, on_message_callback=callback)

channel.start_consuming()
[root@localhost work_queues]# python new_task.py
 [x] Sent ‘Hello World!‘
[root@localhost work_queues]# ls
new_task.py  worker.py
[root@localhost work_queues]# python worker.py
 [*] Waiting for messages. To exit press CTRL+C
 [x] Received ‘Hello World!‘
 [x] Done              # 当收到后会停止接收,但没有退出,等再次轮到他时会再次接收
#当有多个消费者请求时,发送端会轮询着来进行发送消息
消息订阅
订阅者模式 一个生产者,多个消费者,消费者都有自己的队列,消息先发 送到交换机exchange,每个队列都绑定到交换机。实现一个消息被多个消费者消费。 队列如果不绑定到交换 机,消息丢失,交换机没有存储能力。 交换机:一方面是接收生产者的消息,另一方面是向队列推送消息。生 产者在发布的时候不指定交换机,则为匿名发送。
[root@localhost ~]# mkdir -p /opt/Publish_Subscribe
[root@localhost ~]# cd /opt/Publish_Subscribe/
[root@localhost Publish_Subscribe]# ls
emit_log.py  receive_logs.py
[root@localhost Publish_Subscribe]# cat emit_log.py
#!/usr/bin/env python
import pika
import sys

connection = pika.BlockingConnection(
    pika.ConnectionParameters(host=‘localhost‘))
channel = connection.channel()

channel.exchange_declare(exchange=‘logs‘, exchange_type=‘fanout‘)

message = ‘ ‘.join(sys.argv[1:]) or "info: Hello World!"
channel.basic_publish(exchange=‘logs‘, routing_key=‘‘, body=message)
print(" [x] Sent %r" % message)
connection.close()
[root@localhost Publish_Subscribe]# cat receive_logs.py
#!/usr/bin/env python
import pika

connection = pika.BlockingConnection(
    pika.ConnectionParameters(host=‘localhost‘))
channel = connection.channel()

channel.exchange_declare(exchange=‘logs‘, exchange_type=‘fanout‘)

result = channel.queue_declare(queue=‘‘, exclusive=True)
queue_name = result.method.queue

channel.queue_bind(exchange=‘logs‘, queue=queue_name)

print(‘ [*] Waiting for logs. To exit press CTRL+C‘)

def callback(ch, method, properties, body):
    print(" [x] %r" % body)

channel.basic_consume(
    queue=queue_name, on_message_callback=callback, auto_ack=True)

channel.start_consuming()
路由模式
声明交换机为direct,发送路由key为error的消息。 根据绑定的路由key,消息带哪个key,就路由
到哪个队列。可以一个队列绑定多个key
[root@localhost Routing]# ls
emit_log_direct.py  logs_from_rabbit.log  receive_logs_direct.py
[root@localhost Routing]# cat logs_from_rabbit.log
 [*] Waiting for logs. To exit press CTRL+C
[root@localhost Routing]# cat emit_log_direct.py
#!/usr/bin/env python
import pika
import sys

connection = pika.BlockingConnection(
    pika.ConnectionParameters(host=‘localhost‘))
channel = connection.channel()

channel.exchange_declare(exchange=‘direct_logs‘, exchange_type=‘direct‘)

severity = sys.argv[1] if len(sys.argv) > 1 else ‘info‘
message = ‘ ‘.join(sys.argv[2:]) or ‘Hello World!‘
channel.basic_publish(
    exchange=‘direct_logs‘, routing_key=severity, body=message)
print(" [x] Sent %r:%r" % (severity, message))
connection.close()
[root@localhost Routing]# cat receive_logs_direct.py
#!/usr/bin/env python
import pika
import sys

connection = pika.BlockingConnection(
    pika.ConnectionParameters(host=‘localhost‘))
channel = connection.channel()

channel.exchange_declare(exchange=‘direct_logs‘, exchange_type=‘direct‘)

result = channel.queue_declare(queue=‘‘, exclusive=True)
queue_name = result.method.queue

severities = sys.argv[1:]
if not severities:
    sys.stderr.write("Usage: %s [info] [warning] [error]
" % sys.argv[0])
    sys.exit(1)

for severity in severities:
    channel.queue_bind(
        exchange=‘direct_logs‘, queue=queue_name, routing_key=severity)

print(‘ [*] Waiting for logs. To exit press CTRL+C‘)

def callback(ch, method, properties, body):
    print(" [x] %r:%r" % (method.routing_key, body))

channel.basic_consume(
    queue=queue_name, on_message_callback=callback, auto_ack=True)

channel.start_consuming()
主题模式
主题模式(通配符模式) 发送到主题交换机(topic exchange)的消息不可以携带随意什么样子的路由键 (routing_key),它的路由键必须是一个由.分隔开的词语列表。这些单词随便是什么都可以,但是最好是跟携 带它们的消息有关系的词汇。
绑定键也必须拥有同样的格式。主题交换机背后的逻辑跟直连交换机很相似 —— 一个携带着特定路由键的消息 会被主题交换机投递给绑定键与之想匹配的队列。但是它的绑定键和路由键有两个特殊应用方式:
- *(星号) 用来表示一个单词.
- #(井号) 用来表示任意数量(零个或多个)单词。
[root@localhost Topics]# cat emit_log_topic.py
#!/usr/bin/env python
import pika
import sys

connection = pika.BlockingConnection(
    pika.ConnectionParameters(host=‘localhost‘))
channel = connection.channel()

channel.exchange_declare(exchange=‘topic_logs‘, exchange_type=‘topic‘)

routing_key = sys.argv[1] if len(sys.argv) > 2 else ‘anonymous.info‘
message = ‘ ‘.join(sys.argv[2:]) or ‘Hello World!‘
channel.basic_publish(
    exchange=‘topic_logs‘, routing_key=routing_key, body=message)
print(" [x] Sent %r:%r" % (routing_key, message))
connection.close()
[root@localhost Topics]# cat receive_logs_topic.py
#!/usr/bin/env python
import pika
import sys

connection = pika.BlockingConnection(
    pika.ConnectionParameters(host=‘localhost‘))
channel = connection.channel()

channel.exchange_declare(exchange=‘topic_logs‘, exchange_type=‘topic‘)

result = channel.queue_declare(‘‘, exclusive=True)
queue_name = result.method.queue

binding_keys = sys.argv[1:]
if not binding_keys:
    sys.stderr.write("Usage: %s [binding_key]...
" % sys.argv[0])
    sys.exit(1)

for binding_key in binding_keys:
    channel.queue_bind(
        exchange=‘topic_logs‘, queue=queue_name, routing_key=binding_key)

print(‘ [*] Waiting for logs. To exit press CTRL+C‘)

def callback(ch, method, properties, body):
    print(" [x] %r:%r" % (method.routing_key, body))

channel.basic_consume(
    queue=queue_name, on_message_callback=callback, auto_ack=True)

channel.start_consuming()
以上是关于部署Rabbitmq的主要内容,如果未能解决你的问题,请参考以下文章