博客主页动态线条效果
Posted 2979100039-qq-con
tags:
篇首语:本文由小常识网(cha138.com)小编为大家整理,主要介绍了博客主页动态线条效果相关的知识,希望对你有一定的参考价值。
经过一个下午你努力,我也把自己的博客主页变成了动态的效果了嘿嘿嘿。
这里声明一件事情以下内容是借鉴他人作品而写的我只是一个搬运工
借鉴博客 :https://www.cnblogs.com/panghu123/ 如若侵权请告知
先插效果图 效果如下:

接着上代码:
<script type="text/javascript">
        /**
         * Copyright (c) 2016 hustcc
         * License: MIT
         * Version: v1.0.1
         * GitHub: https://github.com/hustcc/canvas-nest.js
        **/
        !
            function () {
                function n(n, e, t) {
                    return n.getAttribute(e) || t
                }
                function e(n) {
                    return document.getElementsByTagName(n)
                }
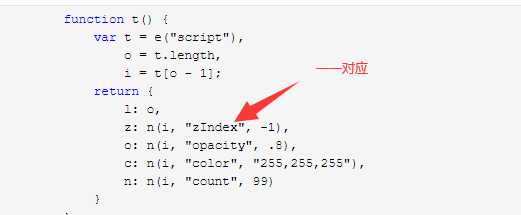
                function t() {
                    var t = e("script"),
                        o = t.length,
                        i = t[o - 1];
                    return {
                        l: o,
                        z: n(i, "zIndex", -1),
                        o: n(i, "opacity", .8),
                        c: n(i, "color", "255,255,255"),
                        n: n(i, "count", 99)
                    }
                }
                function o() {
                    a = m.width = window.innerWidth || document.documentElement.clientWidth || document.body.clientWidth,
                        c = m.height = window.innerHeight || document.documentElement.clientHeight || document.body.clientHeight
                }
                function i() {
                    r.clearRect(0, 0, a, c);
                    var n, e, t, o, m, l;
                    s.forEach(function (i, x) {
                        for (i.x += i.xa, i.y += i.ya, i.xa *= i.x > a || i.x < 0 ? -1 : 1, i.ya *= i.y > c || i.y < 0 ? -1 : 1, r.fillRect(i.x - .5, i.y - .5, 1, 1), e = x + 1; e < u.length; e++) n = u[e],
                            null !== n.x && null !== n.y && (o = i.x - n.x, m = i.y - n.y, l = o * o + m * m, l < n.max && (n === y && l >= n.max / 2 && (i.x -= .03 * o, i.y -= .03 * m), t = (n.max - l) / n.max, r.beginPath(), r.lineWidth = t / 2, r.strokeStyle = "rgba(" + d.c + "," + (t + .2) + ")", r.moveTo(i.x, i.y), r.lineTo(n.x, n.y), r.stroke()))
                    }),
                        x(i)
                }
                var a, c, u, m = document.createElement("canvas"),
                    d = t(),
                    l = "c_n" + d.l,
                    r = m.getContext("2d"),
                    x = window.requestAnimationFrame || window.webkitRequestAnimationFrame || window.mozRequestAnimationFrame || window.oRequestAnimationFrame || window.msRequestAnimationFrame ||
                        function (n) {
                            window.setTimeout(n, 1e3 / 45)
                        },
                    w = Math.random,
                    y = {
                        x: null,
                        y: null,
                        max: 2e4
                    };
                m.id = l,
                    m.style.cssText = "position:fixed;top:0;left:0;z-index:" + d.z + ";opacity:" + d.o,
                    e("body")[0].appendChild(m),
                    o(),
                    window.onresize = o,
                    window.onmousemove = function (n) {
                        n = n || window.event,
                            y.x = n.clientX,
                            y.y = n.clientY
                    },
                    window.onmouseout = function () {
                        y.x = null,
                            y.y = null
                    };
                for (var s = [], f = 0; d.n > f; f++) {
                    var h = w() * a,
                        g = w() * c,
                        v = 2 * w() - 1,
                        p = 2 * w() - 1;
                    s.push({
                        x: h,
                        y: g,
                        xa: v,
                        ya: p,
                        max: 6e3
                    })
                }
                u = s.concat([y]),
                    setTimeout(function () {
                        i()
                    },
                        100)
            }();
</script>
将代码放到博客侧边公告栏里 (要支持js代码,如果没有申请 要先申请后才能效果):

把js权限开通,然后把代码复制进去就可以了。
这里讲一下怎么修改线条属性 :
每个人背景模板会不一样上面代码颜色是默认的要修改属性才能看得清
color:线条颜色,默认值:‘0,0,0‘;RGB值:(0~255,0~255,0~255)。(注意:使用‘,‘分隔。)
pointColor:点的颜色,默认值:‘0,0,0‘;RGB值:(0~255,0~255,0~255)。(注意:使用‘,‘分隔。)
opacity:线的不透明度(0?1),默认值:0.5。
count:行数,默认值:99。
zIndex:背景的z-index属性,默认值:-1。

这样动态效果就可以了,按照自己的想要的效果调还是很好看的 over
以上是关于博客主页动态线条效果的主要内容,如果未能解决你的问题,请参考以下文章