AlertDialog创建对话框的测试
Posted de1021
tags:
篇首语:本文由小常识网(cha138.com)小编为大家整理,主要介绍了AlertDialog创建对话框的测试相关的知识,希望对你有一定的参考价值。
AlertDialog的功能是非常强大的,它可以创建各种对话框,它的结构分为:图标区、标题区、内容区、按钮区共四个区域。以这样的思路区创建AlertDialog是非常简单的。
创建AlertDialog的七大步骤:
- 创建AlertDialog.Builder对象
- 调用AlertDialog.Builder对象的setTitle()或setCustomTitle()方法设置标题
- 调用AlertDialog.Builder的setIcon方法设置图标
- 调用AlertDialog.Builder相关方法如setMessage方法、setItems方法、setSingleChoiceItems方法、setMultiChoiceItems方法、setAdapter方法、setView方法设置不同类型的对话框内容。
- 调用setPositiveButton、setNegativeButton、setNeutralButton或者setNeutralButton()方法设置多个按钮
- 调用Builder对象的create()方法创建AlertDialog对象
- 调用AlertDialog.Builder对象的create()方法创建AlertDialog对象,然后调用show()方法将对话框显示出来
对步骤4中的六种方法进行简单解析:
- setMessage方法设置对话内容为简单文本
- setItems方法设置对话框内容为简单列表项
- setSingleChoiceItems方法设置对话框内容为单选列表项
- setMultiChoiceItems方法设置对话框内容为多选列表项
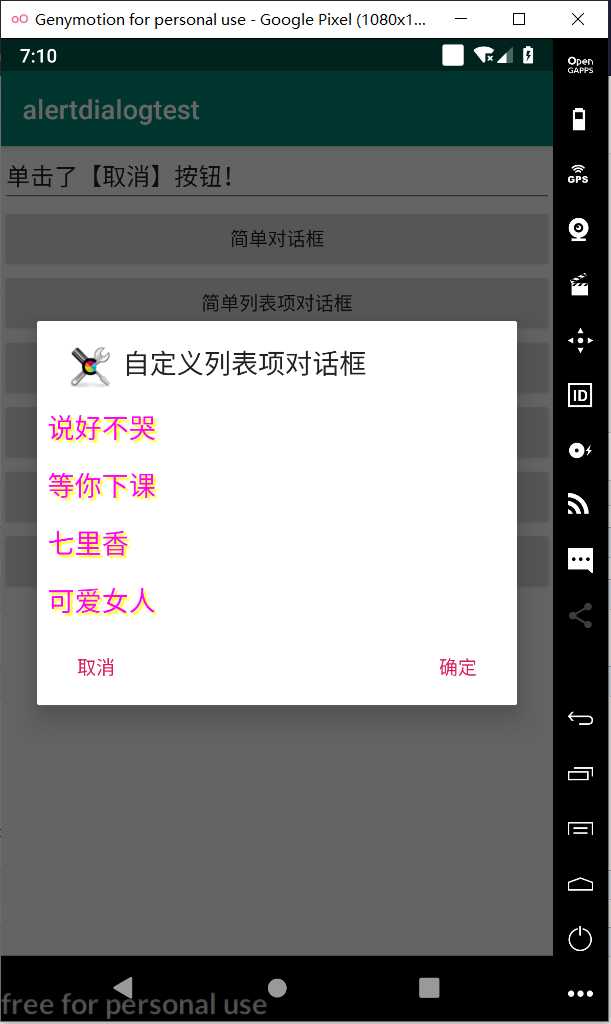
- setAdapter方法设置对话框内容为自定义列表项
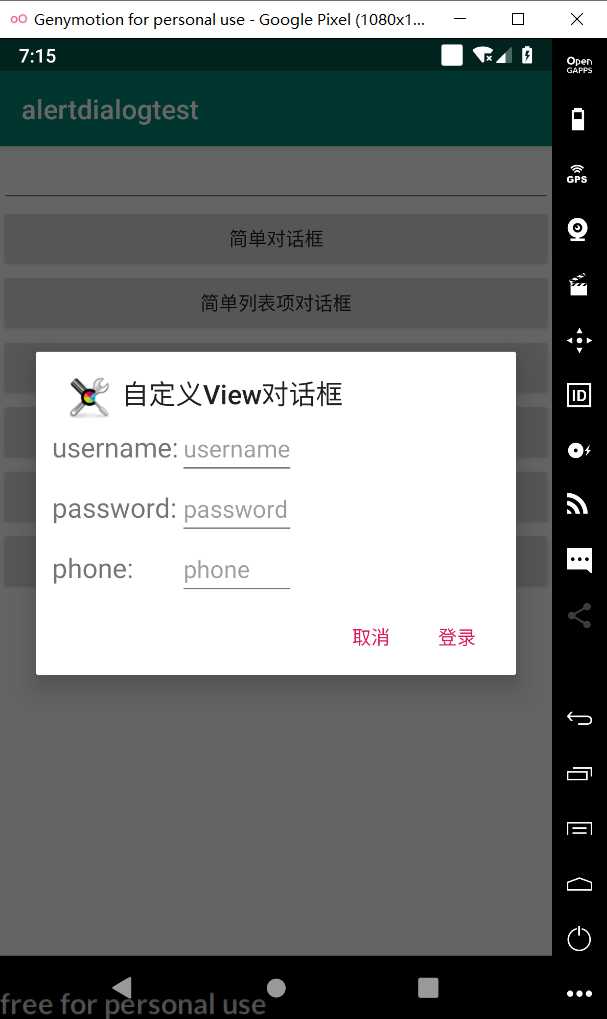
- setView方法设置对话框内容为自定义View
下面对六种方法进行一一实例演示
先创建一个布局文件,如下
<?xml version="1.0" encoding="utf-8"?>
<LinearLayout xmlns:android="http://schemas.android.com/apk/res/android"
    android:orientation="vertical"
    android:gravity="center_horizontal"
    android:layout_width="match_parent"
    android:layout_height="match_parent">
    <!-- 显示一个普通的文本编辑框组件 -->
    <EditText
        android:id="@+id/show"
        android:layout_width="match_parent"
        android:layout_height="wrap_content"
        android:editable="false"/>
    <!-- 定义一个普通的按钮组件 -->
    <Button
        android:layout_width="match_parent"
        android:layout_height="wrap_content"
        android:onClick="simple"
        android:text="简单对话框"/>
    <!-- 定义一个普通的按钮组件 -->
    <Button
        android:layout_width="match_parent"
        android:layout_height="wrap_content"
        android:onClick="simpleList"
        android:text="简单列表项对话框" />
    <!-- 定义一个普通的按钮组件 -->
    <Button
        android:layout_width="match_parent"
        android:layout_height="wrap_content"
        android:onClick="singleChoice"
        android:text="单选列表项对话框" />
    <!-- 定义一个普通的按钮组件 -->
    <Button
        android:layout_width="match_parent"
        android:layout_height="wrap_content"
        android:onClick="multiChoice"
        android:text="多选列表项对话框" />
    <!-- 定义一个普通的按钮组件 -->
    <Button
        android:layout_width="match_parent"
        android:layout_height="wrap_content"
        android:onClick="customList"
        android:text="自定义列表项对话框" />
    <!-- 定义一个普通的按钮组件 -->
    <Button
        android:layout_width="match_parent"
        android:layout_height="wrap_content"
        android:onClick="customView"
        android:text="自定义View对话框" />
</LinearLayout>
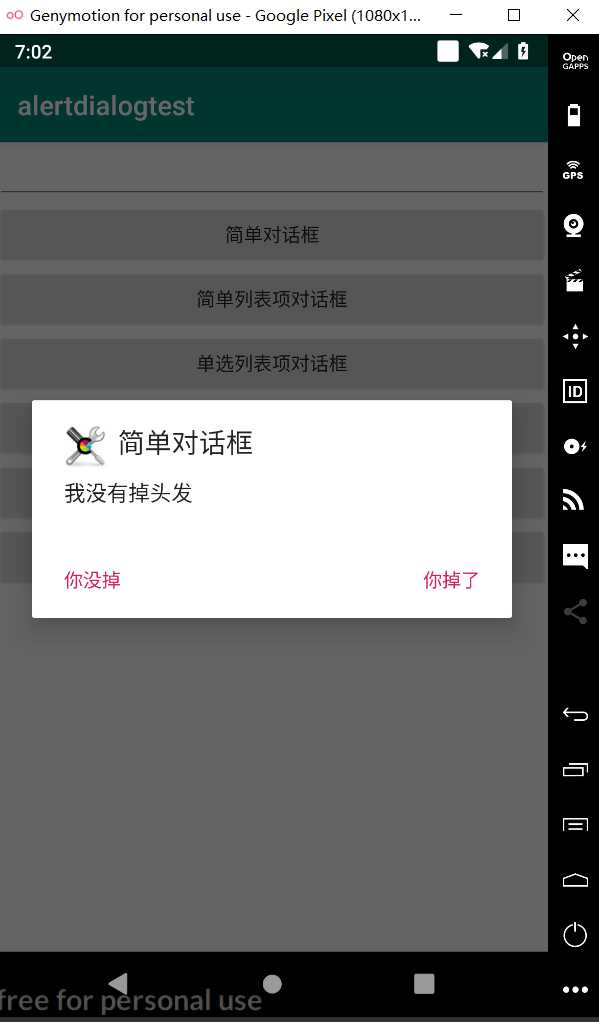
1.setMessage方法
public void simple(View source) {
        AlertDialog.Builder builder = new AlertDialog.Builder(this)
                //设置对话框标题
                .setTitle("简单对话框")
                //设置图标
                .setIcon(R.drawable.tools)
          .setMessage("我没有掉头发");
        // 为AlertDialog.Builder添加按钮
        setPositiveButton(builder);
        // 为AlertDialog.Builder添加按钮
        setNegativeButton(builder).create().show();
2.setItems方法
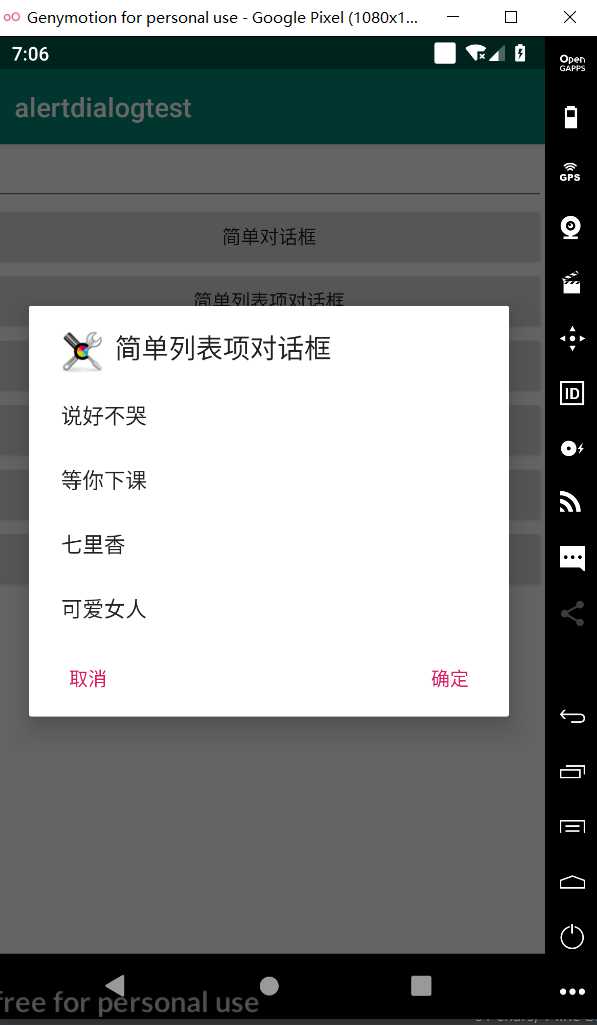
//简单列表项对话框
    private String[] items = new String[]{"说好不哭", "等你下课",
            "七里香", "可爱女人"};
    public void simpleList(View source) {
        AlertDialog.Builder builder = new AlertDialog.Builder(this)
                //设置对话框标题
                .setTitle("简单列表项对话框")
                //设置图标
                .setIcon(R.drawable.tools)
                //设置简单的列表项内容
                .setItems(items, (dialog, wh) ->
                        show.setText("你选中了《" + items[wh] + "》"));
        // 为AlertDialog.Builder添加“确定”按钮
        setPositiveButton(builder);
        // 为AlertDialog.Builder添加“取消”按钮
        setNegativeButton(builder).create().show();
    }
3.setSingleChoiceItems方法
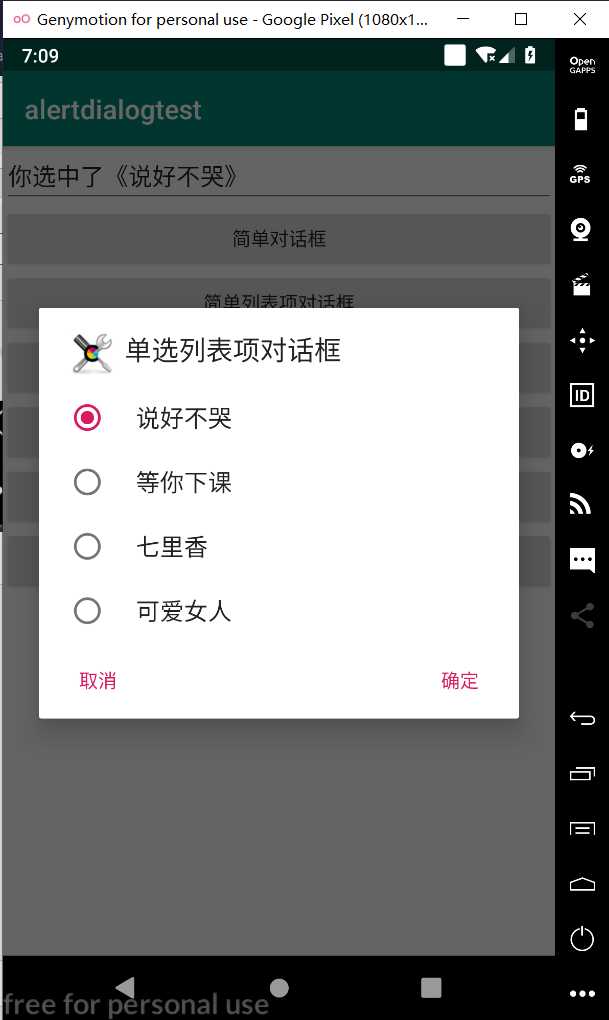
//单选列表项对话框
    public void singleChoice(View source) {
        AlertDialog.Builder builder = new AlertDialog.Builder(this)
                //设置对话框标题
                .setTitle("单选列表项对话框")
                //设置标题
                .setIcon(R.drawable.tools)
                //设置单选列表项,默认选中第二项(索引为1)
                .setSingleChoiceItems(items, 1, (dialog, which) ->
                        show.setText("你选中了《" + items[which] + "》"));
        // 为AlertDialog.Builder添加“确定”按钮
        setPositiveButton(builder);
        // 为AlertDialog.Builder添加“取消”按钮
        setNegativeButton(builder).create().show();
    }
4.setMultiChoiceItems方法
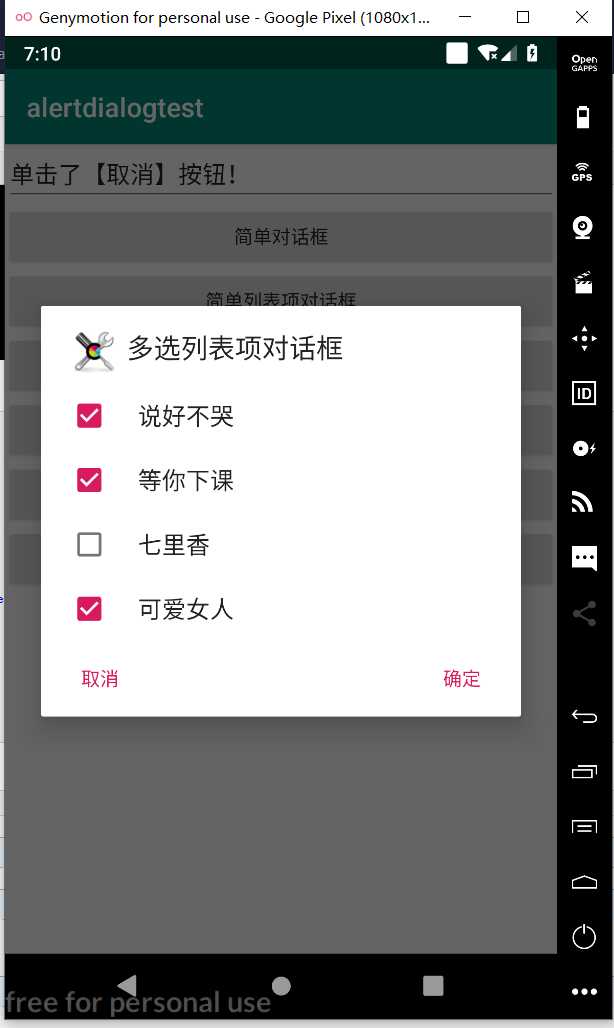
public void multiChoice(View source) {
        AlertDialog.Builder builder = new AlertDialog.Builder(this)
                //设置对话框标题
                .setTitle("多选列表项对话框")
                //设置标题
                .setIcon(R.drawable.tools)
                //设置多选列表项,设置勾选第二项、第四项
                .setMultiChoiceItems(items, new boolean[]{false, true, false, true}, null);
        // 为AlertDialog.Builder添加“确定”按钮
        setPositiveButton(builder);
        // 为AlertDialog.Builder添加“取消”按钮
        setNegativeButton(builder).create().show();
    }
5.setAdapter方法
public void customList(View source) {
        AlertDialog.Builder builder = new AlertDialog.Builder(this)
                //设置对话框标题
                .setTitle("自定义列表项对话框")
                //设置图标
                .setIcon(R.drawable.tools)
                //设置自定义列表项
                .setAdapter(new ArrayAdapter(this, R.layout.array_item, items), null);
        // 为AlertDialog.Builder添加“确定”按钮
        setPositiveButton(builder);
        // 为AlertDialog.Builder添加“取消”按钮
        setNegativeButton(builder).create().show();
    }
6.setView方法
public void customView(View source) {
        //login.xml界面布局文件
        TableLayout loginForm = (TableLayout) getLayoutInflater().inflate(R.layout.login, null);
        new AlertDialog.Builder(this)
                // 设置对话框的图标
                .setIcon(R.drawable.tools)
                // 设置对话框的标题
                .setTitle("自定义View对话框")
                // 设置对话框显示的View对象
                .setView(loginForm)
                // 为对话框设置一个“确定”按钮
                .setPositiveButton("登录", (dialog, which) -> {
                    // 此处可执行登录处理
                })
                // 为对话框设置一个“取消”按钮
                .setNegativeButton("取消", (dialog, which) -> {
                    // 取消登录,不做任何事情
                })
                // 创建并显示对话框
                .create().show();
    }
以上是关于AlertDialog创建对话框的测试的主要内容,如果未能解决你的问题,请参考以下文章