FFmpeg入门系列教程 (四)
Posted
tags:
篇首语:本文由小常识网(cha138.com)小编为大家整理,主要介绍了FFmpeg入门系列教程 (四)相关的知识,希望对你有一定的参考价值。
参考技术A 1. 注册所有容器格式和CODEC:av_register_all()2. 打开文件:avformat_open_input()
3. 从文件中提取流信息:avformat_find_stream_info()
4. 查找视频流音频流索引:av_find_best_stream()
5. 查找对应的解码器:avcodec_find_decoder()
6. 打开编解码器:avcodec_open2()
7. 为解码帧分配内存:av_frame_alloc()
8. 不停地从码流中提取出帧数据:av_read_frame()
9. 进行解码:avcodec_send_packet()
10. 获取解码后的数据:avcodec_receive_frame()
11. 解码完后,释放解码器:avcodec_close()
12. 关闭输入文件:avformat_close_input()
extern "C"
#include "libavcodec/avcodec.h"
#include "libavformat/avformat.h"
#include "libavutil/imgutils.h"
;
//输入文件路径
char *fileName = "";
int main()
//output file
FILE *outputfile_video = nullptr;
FILE *outputfile_audio = nullptr;
char *outputfilename_video = "output_video.yuv";
char *outputfilename_audio = "output_audio.pcm";
outputfile_video = fopen(outputfilename_video, "wb");
outputfile_audio = fopen(outputfilename_audio, "wb");
AVFormatContext *formatctx = NULL;
AVCodec *videoCodec = NULL;
AVCodec *audioCodec = NULL;
AVCodecContext *videoCodecctx = NULL;
AVCodecContext *audioCodecctx = NULL;
AVFrame *frame = NULL;
AVFrame *frameYUV = NULL;
AVPacket avpkt;
AVPacket *pavpkt = &avpkt;
//init
av_register_all();
formatctx = avformat_alloc_context();
//打开文件
if (avformat_open_input(&formatctx,fileName,NULL,NULL)!=0)
printf("could not open input stream.\n");
return -1;
//查找流信息
if (avformat_find_stream_info(formatctx, NULL) < 0)
printf("could not find stream information.\n");
return -1;
//==============video================
//查找视频流
int videoindex = av_find_best_stream(formatctx, AVMEDIA_TYPE_VIDEO, -1, -1, NULL, 0);
if (videoindex < 0)
printf("could not find a video stream.\n");
return -1;
//find the video decoder
videoCodecctx = avcodec_alloc_context3(NULL);
if (videoCodecctx == NULL)
printf("could not allocate video AVCodecContext.\n");
return -1;
avcodec_parameters_to_context(videoCodecctx, formatctx->streams[videoindex]->codecpar);
videoCodec = avcodec_find_decoder(videoCodecctx->codec_id);
if (videoCodec == NULL)
printf("vidoe codec not found.\n");
return -1;
//open the video decoder
if (avcodec_open2(videoCodecctx, videoCodec, NULL) < 0)
printf("could not open video codec.\n");
return -1;
//=====================================
//================audio===================
//查找音频
int audioindex = av_find_best_stream(formatctx, AVMEDIA_TYPE_AUDIO, -1, -1, NULL, 0);
if (audioindex < 0)
printf("could not find a audio stream.\n");
return -1;
//find the audio decoder
audioCodecctx = avcodec_alloc_context3(NULL);
if (audioCodecctx == NULL)
printf("could not allocate audio AVCodecContext.\n");
return -1;
avcodec_parameters_to_context(audioCodecctx, formatctx->streams[audioindex]->codecpar);
audioCodec = avcodec_find_decoder(audioCodecctx->codec_id);
if (audioCodec == NULL)
printf("audio codec not found.\n");
return -1;
//open the audio decoder
if (avcodec_open2(audioCodecctx, audioCodec, NULL) < 0)
printf("could not open audio codec.\n");
return -1;
//========================================
//output information
av_dump_format(formatctx, videoindex, fileName, 0);
av_init_packet(&avpkt);
frame = av_frame_alloc();
frameYUV = av_frame_alloc();
int video_dst_bufsize = av_image_alloc((uint8_t**)frameYUV->data, frameYUV->linesize, videoCodecctx->width, videoCodecctx->height, videoCodecctx->pix_fmt, 1);
printf("decode video file %s to %s and %s\n", fileName, outputfilename_video, outputfilename_audio);
//decode
int frame_count = 0;
while (av_read_frame(formatctx,pavpkt)>=0)
if (pavpkt->stream_index == videoindex)
if (avcodec_send_packet(videoCodecctx, pavpkt) != 0)
printf("input AVPacket to video decoder failed!\n");
return -1;
while (0 == avcodec_receive_frame(videoCodecctx, frame))
av_image_copy((uint8_t **)frameYUV->data,frameYUV->linesize,(const uint8_t **)frame->data,frame->linesize,videoCodecctx->pix_fmt,videoCodecctx->width,videoCodecctx->height);
fwrite(frameYUV->data[0], 1, video_dst_bufsize, outputfile_video);
printf("decoded frame index: %d\n", frame_count);
frame_count++;
else if (pavpkt->stream_index == audioindex)
if (avcodec_send_packet(audioCodecctx, pavpkt) != 0)
printf("input AVPacket to audio decoder failed!\n");
return -1;
while (0 == avcodec_receive_frame(audioCodecctx, frame))
size_t unpadded_linesize = frame->nb_samples*av_get_bytes_per_sample((AVSampleFormat)frame->format);
fwrite(frame->extended_data[0], 1, unpadded_linesize, outputfile_audio);
printf("decoded audio.\n");
av_packet_unref(pavpkt);
fclose(outputfile_video);
fclose(outputfile_audio);
av_frame_free(&frame);
av_frame_free(&frameYUV);
avcodec_close(videoCodecctx);
avcodec_close(audioCodecctx);
avformat_close_input(&formatctx);
return 0;
下一篇将介绍一下 PCM文件编码为AAC
Ffmpeg入门级教程(Java代码开发)
目录
1、简介
FFmpeg是一套可以用来记录、转换数字音频、视频,并能将其转化为流的开源计算机程序。采用LGPL或GPL许可证。它提供了录制、转换以及流化音视频的完整解决方案。它包含了非常先进的音频/视频编解码库libavcodec,为了保证高可移植性和编解码质量,libavcodec里很多code都是从头开发的。
FFmpeg在Linux平台下开发,但它同样也可以在其它操作系统环境中编译运行,包括Windows、Mac OS X等。
2、安装
2.1、下载
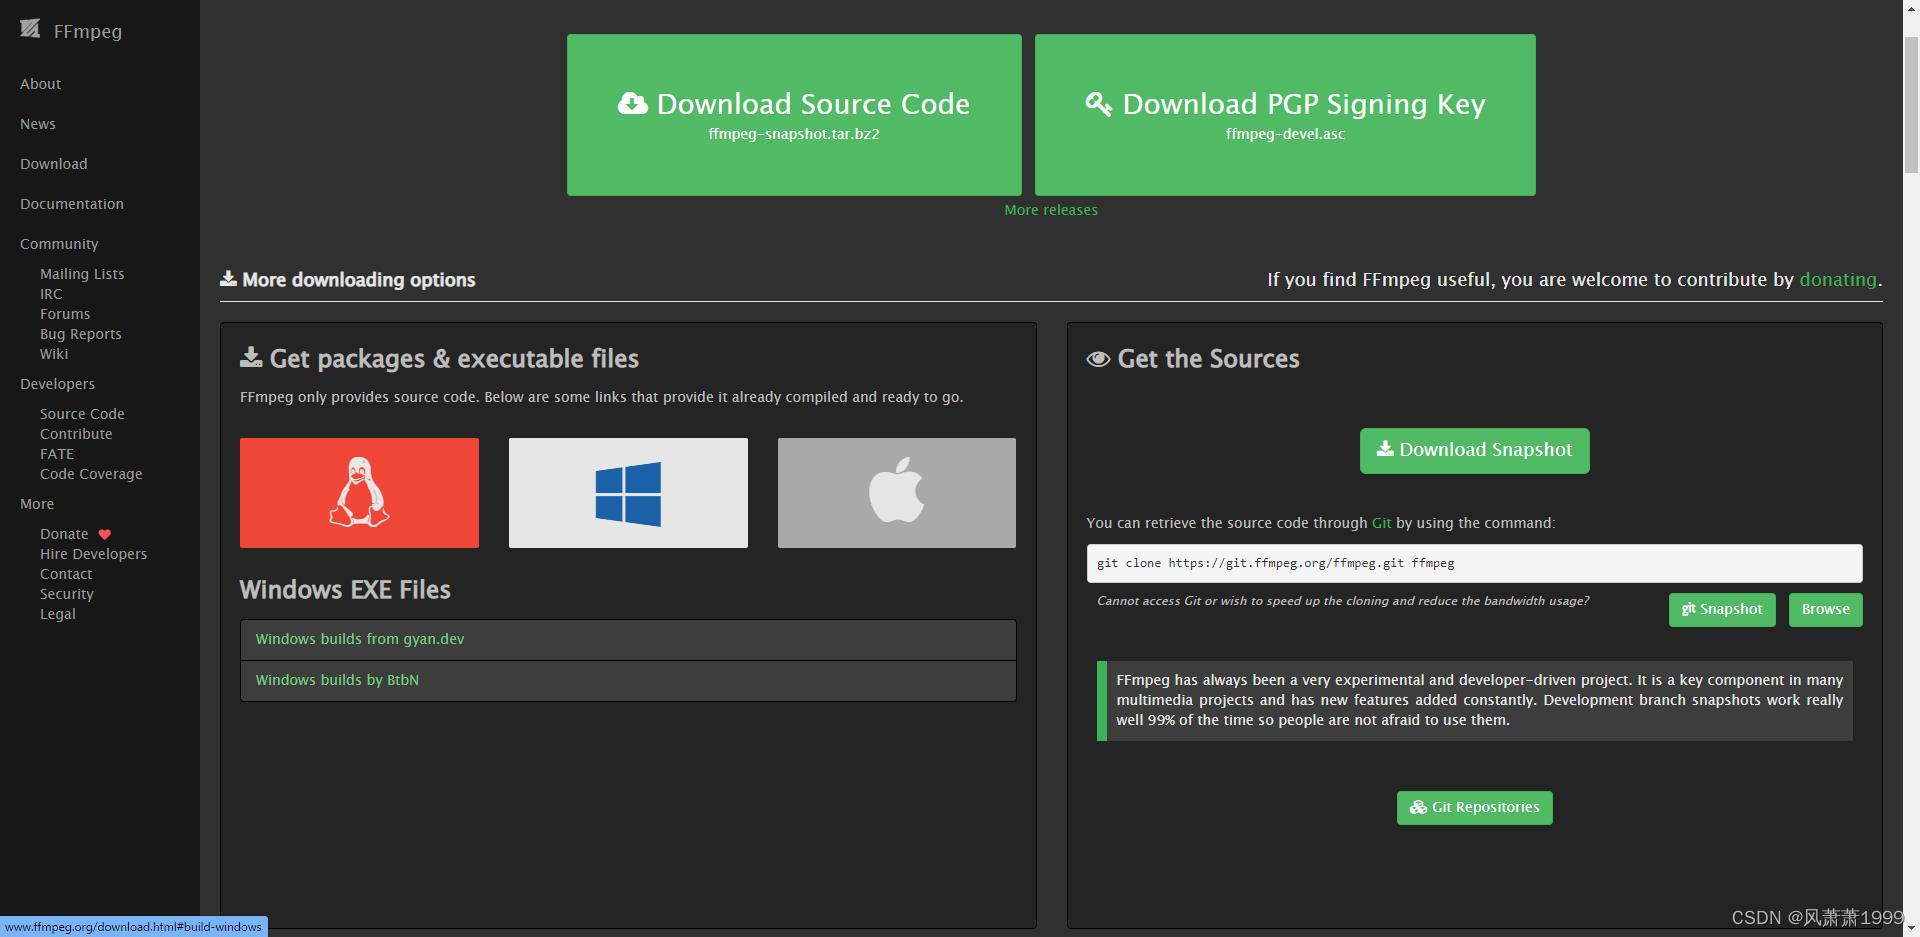
官网下载ffmpeg安装包,官网地址:http://www.ffmpeg.org/download.html

或者直接到这个链接win1064位安装ffmpeg的免安装ZIP包-编解码文档类资源-CSDN文库下载获得ffmpeg安装包,会比官网下载快些。
2.2、配置环境变量
ffmpeg安装包下载成功后,解压至电脑某个路径,复制此文件下bin文件的路径,配置环境变量。
1. bin文件夹路径:E:\\Program Files\\ffmpeg-master-latest-win64-gpl\\bin
2.环境变量配置步骤(以win10举例):1)点击“系统属性->高级系统设置->环境变量->用户变量”,选择“Path”条目,点击“编辑->新建”,把第一步的bin文件夹路径复制粘贴进去,然后点击确定即可。
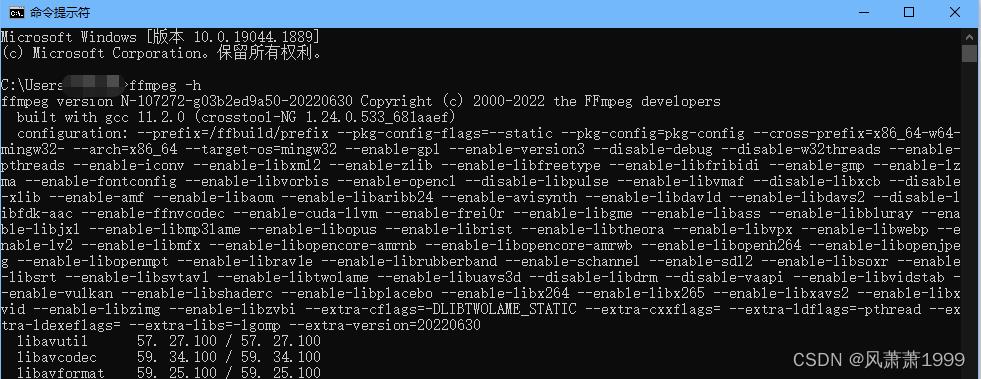
2)变量设置成功后,打开电脑的命令框,输入:ffmpeg -h 若命令框有如下内容输出则ffmpeg安装成功且设置成功
3、Java调用
ffmpeg的Java调用一般都是采用CMD命令调用本地服务的方式,例如:
ffmpeg -i sourceFilePath.mp3 -ss 409 -t 172 -vn -c:a mp3 -y targetFilePath.mp3我们后面的调用也是对此类命令进行封装、修改参数的方式进行的。
3.1、运行CMD命令的类
import java.io.BufferedReader;
import java.io.InputStreamReader;
import java.util.List;

/**
 * @date 2022/8/8 10:49
 */
public class RuntimeUtils


    public static void run(List<String> command)
        try
            BufferedReader br = null;
            try
                ProcessBuilder builder = new ProcessBuilder();
                builder.command(command);
                builder.redirectErrorStream(true);
                Process process = builder.start();
                br = new BufferedReader(new InputStreamReader(process.getInputStream()));
                String line = null;
                while ((line = br.readLine()) != null)
                    System.out.println(line);

             catch (Exception e)
                e.printStackTrace();
             finally
                if (br != null)
                    try
                        br.close();
                     catch (Exception e)
                        e.printStackTrace();


         catch (Exception e)
            e.printStackTrace();
3.2、工具类
3.2.1视频提取音频
public static Boolean audioByVideo(String videoSourceFilePath, String audioTargetFilePath)
        try
            LOGGER.info("Get Audio By Video Start, Source=", videoSourceFilePath);
            long beginTime = System.currentTimeMillis();
            File outputFile = new File(audioTargetFilePath);
            if(outputFile.exists())
                outputFile.delete();

            File outputDir = outputFile.getParentFile();
            if (!outputDir.exists())
                outputDir.mkdirs();

            // 执行的命令
            ArrayList<String> command = new ArrayList<>();
            command.add("ffmpeg");
            command.add("-hide_banner");
            command.add("-i");
            command.add(videoSourceFilePath);
            command.add("-vn");
            command.add("-b:a");
            command.add("16k");
            command.add("-c:a");
            command.add("mp3");
            command.add("-y");

            command.add(audioTargetFilePath);
            LOGGER.info("Audio By Video Command = ", StringUtils.join(command," "));
            RuntimeUtils.run(command);
            long timeConsuming = System.currentTimeMillis() - beginTime;
            LOGGER.info("Audio By Video Run Success, VideoFileName=, Time Consuming=s",videoSourceFilePath, timeConsuming/1000);
            return true;
         catch (Exception e)
            LOGGER.error("Audio By Video Run Error! VideoFileName=", videoSourceFilePath, e);
            return false;
3.2.2音频剪辑
public static boolean audioSplit(String sourceFilePath, String targetFilePath, int startSecond,int endSecond)
        try
            LOGGER.info("Audio Split Start, Source=", sourceFilePath);
            long beginTime = System.currentTimeMillis();
            File outputFile = new File(targetFilePath);
            File outputDir = outputFile.getParentFile();
            if (!outputDir.exists())
                outputDir.mkdirs();

            // 获取视频总时长,单位:秒
            int duration = endSecond - startSecond; //分割的时长
            /**
             * 执行分割命令,命令参数详解:
             * -i 指定输入文件
             * -c copy 拷贝源视频流,不对源视频进行重新编码,可以加快视频分割速度
             * -ss 指定从什么时间开始
             * -t 指定需要截取多长时间,单位:秒
             */
            ArrayList<String> command = new ArrayList<>();
            command.add("ffmpeg");//ffmpegLocator.getExecutablePath()
            command.add("-hide_banner");
            command.add("-i");
            command.add(sourceFilePath);
            command.add("-ss");
            command.add(startSecond + "");
            command.add("-t");
            command.add(duration+"");
            command.add("-vn");
            command.add("-c:a");
            command.add("mp3");
            command.add("-y");
            command.add(targetFilePath);
            LOGGER.info("Audio Split Command = ", StringUtils.join(command," "));
            RuntimeUtils.run(command);
            long timeConsuming = System.currentTimeMillis() - beginTime;
            LOGGER.info("Audio Split Success, FileName=, StartSecond=, EndSecond=,Time Consuming=s",
                    sourceFilePath, startSecond, endSecond, timeConsuming/1000);
         catch (Exception e)
            LOGGER.error("Audio Split Error, FileName=, StartSecond=, EndSecond=", sourceFilePath, startSecond, endSecond, e);
            return false;

        return true;
3.2.3视频剪辑
public static boolean videoSplit(String sourceFilePath, String targetFilePath, int startSecond,int endSecond)
        try
            LOGGER.info("Video Split Start, Source=", sourceFilePath);
            long beginTime = System.currentTimeMillis();
            File outputDir = outputFile.getParentFile();
            if (!outputDir.exists())
                outputDir.mkdirs();

            int duration = endSecond - startSecond; //分割的时长
            /**
             * 执行分割命令,命令参数详解:
             * -i 指定输入文件
             * -ss 指定从什么时间开始
             * -c ... 拷贝源视频流
             * -t 指定需要截取多长时间,单位:秒
             */
            // 执行的命令
            ArrayList<String> command = new ArrayList<>();
            command.add("ffmpeg");//ffmpegLocator.getExecutablePath()
            command.add("-hide_banner");
            command.add("-ss");
            command.add(startSecond+"");
            command.add("-c:v");
            command.add("h264");
            command.add("-c:a");
            command.add("aac");
            command.add("-t");
            command.add(duration+"");
            command.add("-i");
            command.add(sourceFilePath);
            command.add("-y");
            command.add(targetFilePath);
            LOGGER.info("Video Split Command = ", StringUtils.join(command," "));
            RuntimeUtils.run(command);
            long timeConsuming = System.currentTimeMillis() - beginTime;
            LOGGER.info("Video Split Success, FileName=, StartSecond=, EndSecond=,Time Consuming=s",
                    sourceFilePath, startSecond, endSecond, timeConsuming / 1000);
         catch (Exception e)
            LOGGER.error("Video Split Error! FileName=, StartSecond=, EndSecond=", sourceFilePath, startSecond, endSecond, e);
            return false;

        return true;
4、总结
到此这篇关于java使用ffmpeg处理视频的方法的文章就结束了,关于其他的音视频操作可参考相关命令自行拼接cmd命令行。
附录:
FFmpeg常用命令汇总_梧桐樹下的博客-CSDN博客_ffmpeg指令
以上是关于FFmpeg入门系列教程 (四)的主要内容,如果未能解决你的问题,请参考以下文章
