深入浅出Spring源码构建Spring源码阅读环境
Posted 噫!微斯人,吾谁与归
tags:
篇首语:本文由小常识网(cha138.com)小编为大家整理,主要介绍了深入浅出Spring源码构建Spring源码阅读环境相关的知识,希望对你有一定的参考价值。
本文环境:windows10 + spring-5.3.22 + gradle-7.2 + IDEA2020 + jdk11
STEP
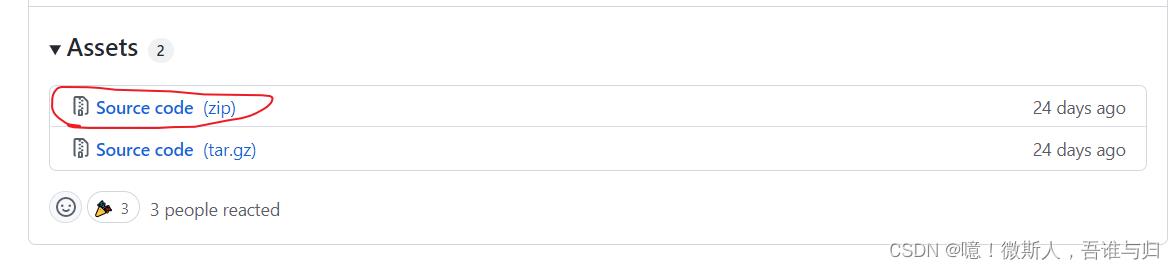
1.下载spring-framework源码
🔥 地址:https://github.com/spring-projects/spring-framework/releases
2.下载gradle工具
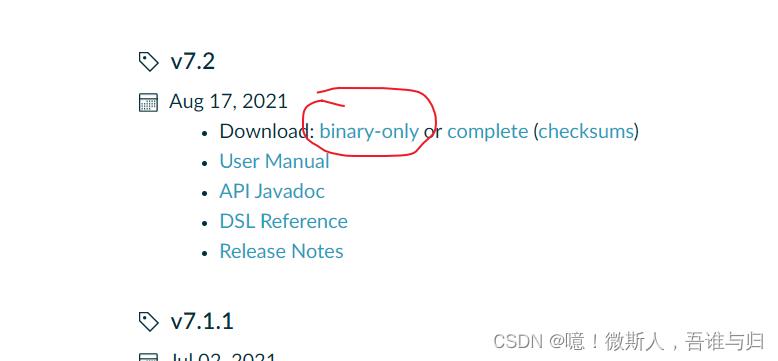
✨解压缩即可
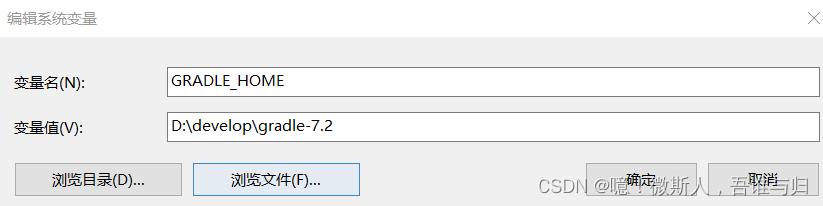
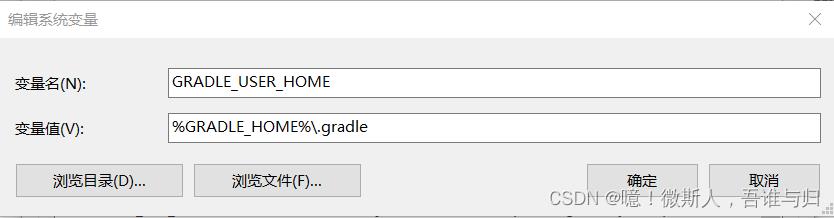
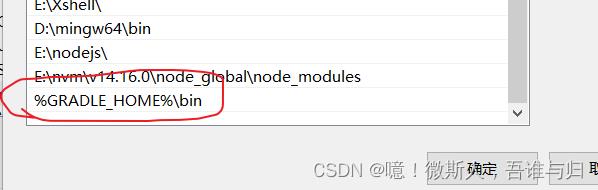
✨配置环境变量
① GRADLE_HOME : gradle工具路径
② GRADLE_USER_HOME : gradle依赖保存路径,如果不配置会默认在C盘用户目录下生成.gradle文件
③ path : %GRADLE_HOME%\\bin
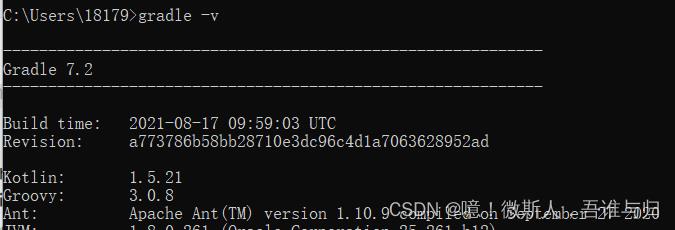
✨测试 gradle -v
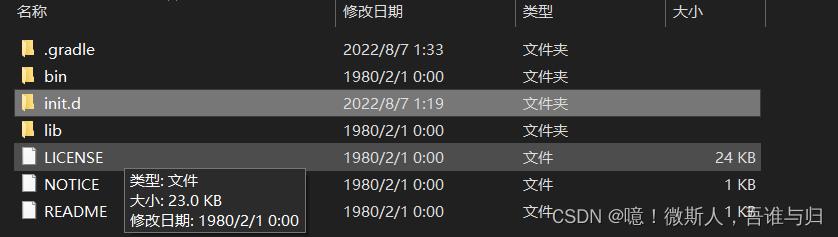
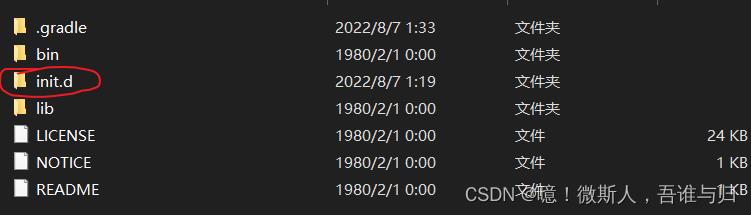
✨添加初始化脚本
📑在init.d目录下添加的脚本,每次build之前都会被执行

init.gradle内容如下(注意协议是https,否者会报不安全异常):
allprojects
    repositories
        def ALIYUN_REPOSITORY_URL = 'https://maven.aliyun.com/nexus/content/groups/public'
        def ALIYUN_JCENTER_URL = 'https://maven.aliyun.com/nexus/content/repositories/jcenter'
        all  ArtifactRepository repo ->
            if(repo instanceof MavenArtifactRepository)
                def url = repo.url.toString()
                if (url.startsWith('https://repo1.maven.org/maven2'))
                    project.logger.lifecycle "Repository $repo.url replaced by $ALIYUN_REPOSITORY_URL."
                    remove repo

                if (url.startsWith('https://jcenter.bintray.com/'))
                    project.logger.lifecycle "Repository $repo.url replaced by $ALIYUN_JCENTER_URL."
                    remove repo


        maven
            url ALIYUN_REPOSITORY_URL
            url ALIYUN_JCENTER_URL
3.修改build.gradle配置
📚找到spring-framework-5.3.22目录下的build.gradle文件,将repositories变量的内容修改为如下
	repositories
		maven  url "https://maven.aliyun.com/repository/public"
		maven  url "https://maven.aliyun.com/repository/apache-snapshots"
		maven  url "https://maven.aliyun.com/repository/gradle-plugin"
		maven  url "https://repo.springsource.org/plugins-release"
		maven  url "https://repo.spring.io/libs-spring-framework-build"
		mavenCentral()
📚新版本需要将源码提交到本地仓库,否者构建过程中可能会报错(但是没影响,可以忽略)
在spring-framework-5.3.22目录下打开git进行如下三步操作(有点耗时)
git init ---->创建一个新的本地仓库
git add * ------>将所有文件保存到暂存区
git commit -m ‘spring’ ------->提交到本地仓库

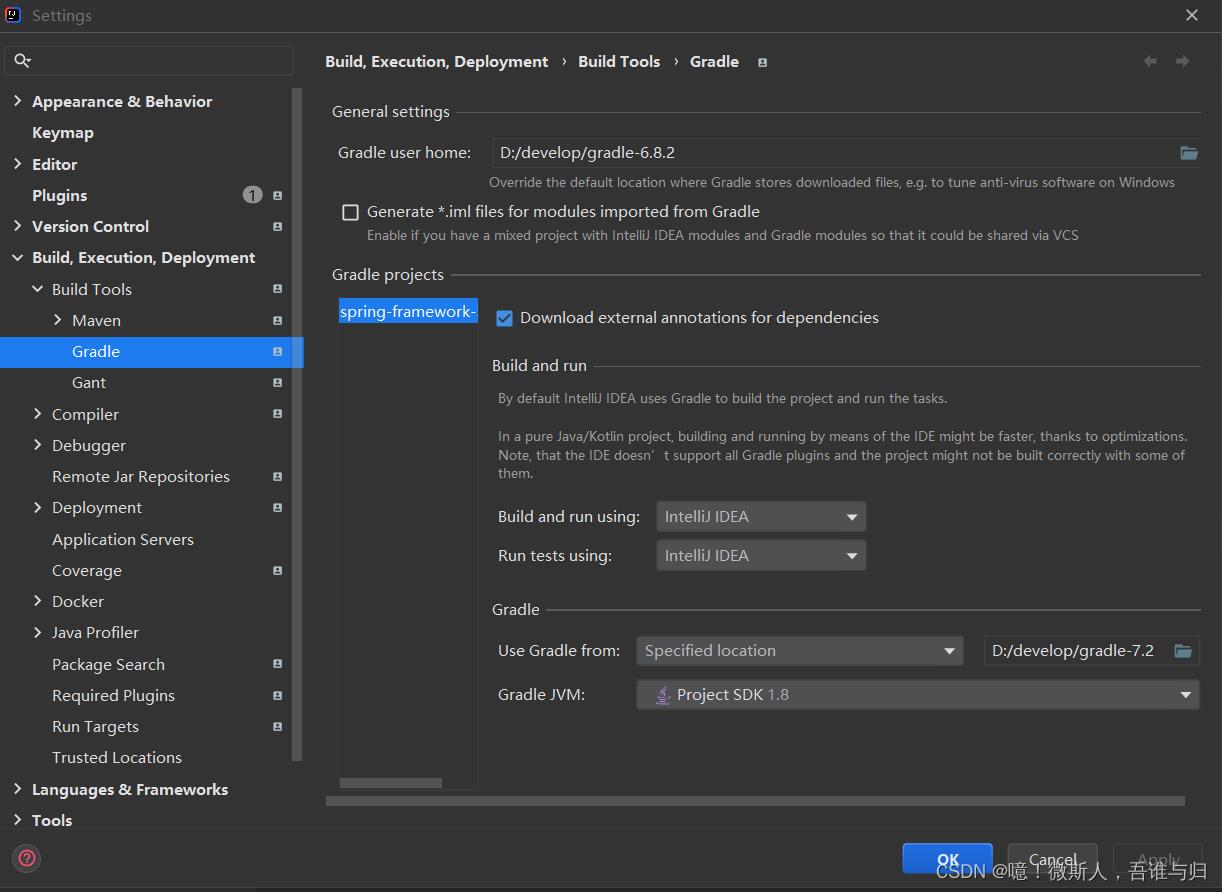
4.导入IDEA步骤
🍀找到spring-framework-5.3.22目录下的import-into-idea.md文件
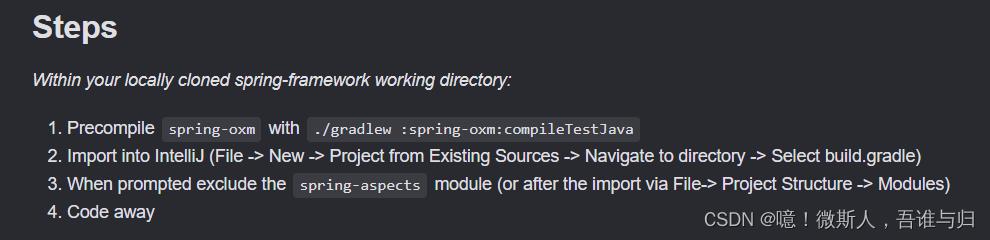
根据官方提供的四个步骤进行操作
1. 预编译spring-oxm
windows : gradlew :spring-oxm:compileTestJava(在cmd窗口,而不是powershell)
Linux : ./gradlew :spring-oxm:compileTestJava

2. 导入IDEA
Import into IntelliJ (File -> New -> Project from Existing Sources -> Navigate to directory -> Select build.gradle)
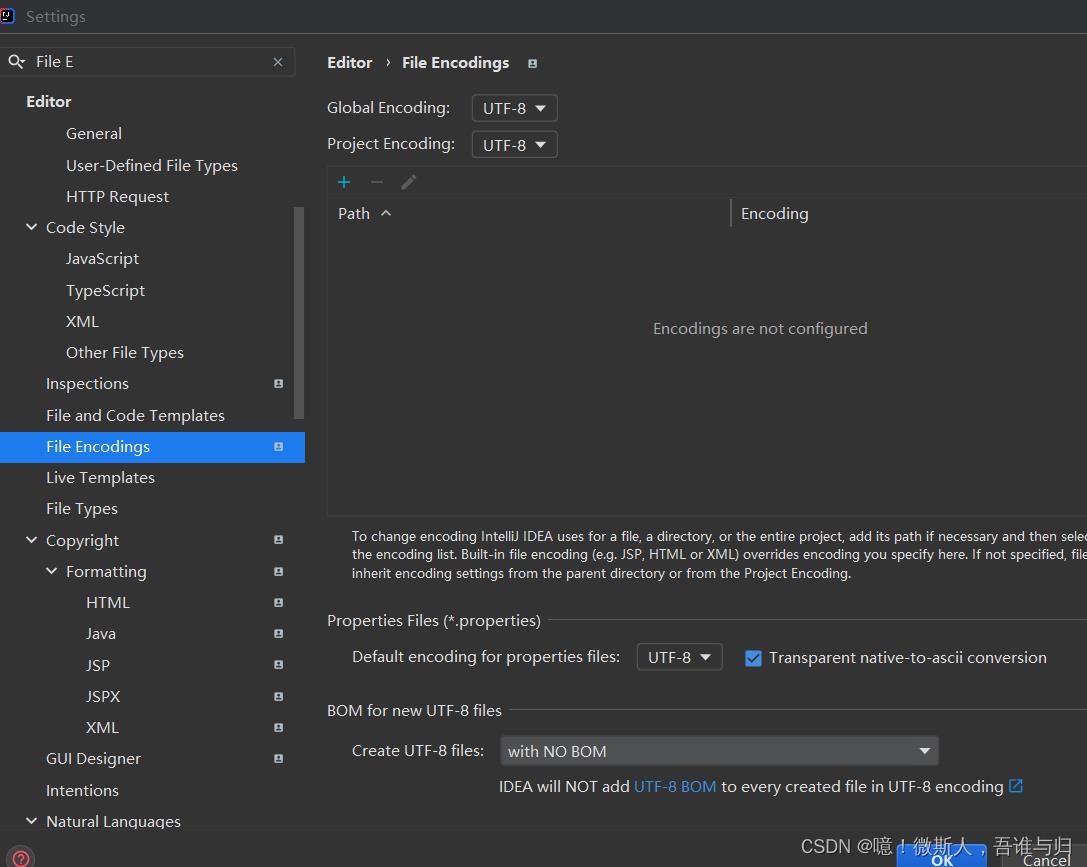
统一编码为UTF-8
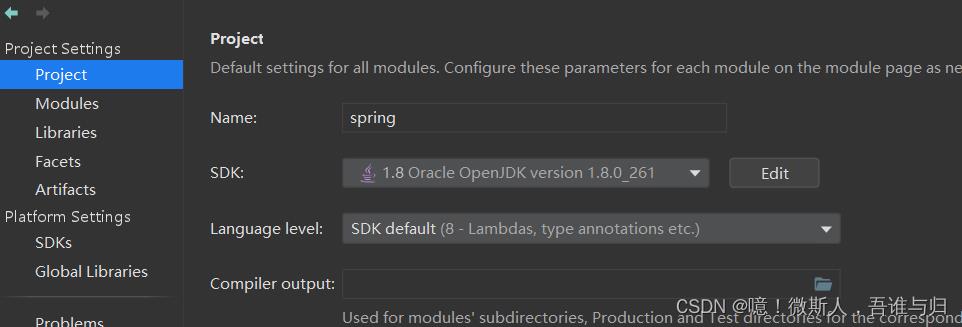
选择JDK版本
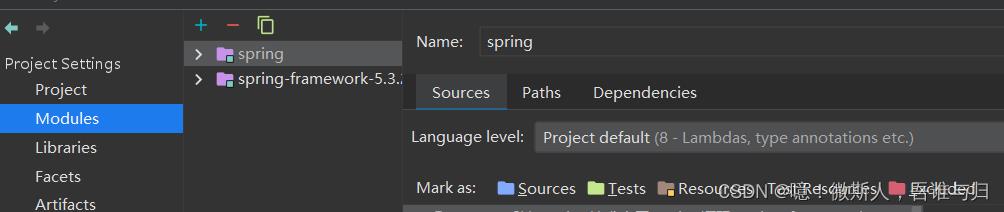
3. 排除spring-aspect模块
如果不想要排除不点开即可,否者点开会报错(就需要重启idea)
以上是关于深入浅出Spring源码构建Spring源码阅读环境的主要内容,如果未能解决你的问题,请参考以下文章