swift语言IOS8开发战记19 UIImagePickerController
Posted 秋雨暗千家
tags:
篇首语:本文由小常识网(cha138.com)小编为大家整理,主要介绍了swift语言IOS8开发战记19 UIImagePickerController相关的知识,希望对你有一定的参考价值。
我们接着上一话的内容来讲,首先在我们添加一个餐馆的页面中把点击的背景色取消掉使用的是以下语句:
cell.selectionStyle = UITableViewCellSelectionStyle.None除了none之外,还有许多颜色的选项,大家可以自己试试。然后我们需要点击小相机的图片能打开我们的相册让我们选择图片,我们在选择的代理方法中增加一个我们自己定义的方法,代码如下:
func tableView(tableView: UITableView, didSelectRowAtIndexPath indexPath: NSIndexPath) //点击行的代理方法
        var row:NSInteger = indexPath.row
        if row == 0
        self.didClickedImageView()
func didClickedImageView()
    let imagePicker = UIImagePickerController() //选择图片
    let isAvailable = UIImagePickerController.isSourceTypeAvailable(UIImagePickerControllerSourceType.Camera)
        imagePicker.sourceType = .PhotoLibrary
        if isAvailable
            imagePicker.sourceType = .Camera

        self.presentViewController(imagePicker, animated: true, completion: nil)
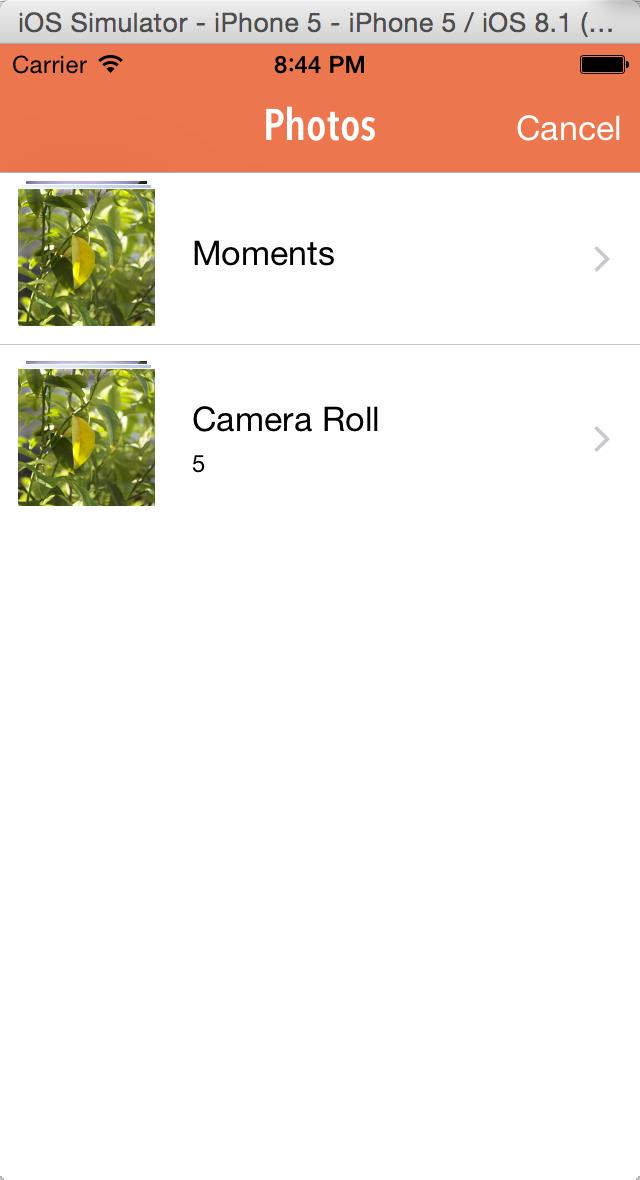
点击小相机的图标显示如下:

现在我们希望我们选择了照片之后可以把该照片保存到第一行之中,这就需要在点击第一行的时候把当前的类当做imagePicker的代理,所以把点击第一行所触发的方法didClickedImageView修改如下:
func didClickedImageView()
    let imagePicker = UIImagePickerController() //选择图片
    let isAvailable = UIImagePickerController.isSourceTypeAvailable(UIImagePickerControllerSourceType.Camera)
        imagePicker.sourceType = .PhotoLibrary
        imagePicker.delegate = self//代理设为自己
        if isAvailable
            imagePicker.sourceType = .Camera

        self.presentViewController(imagePicker, animated: true, completion: nil)
imagePicker是UIImagePickerController类型的,要实现这个类型的代理,必须继承 UINavigationControllerDelegate和UIImagePickerControllerDelegate,然后我们实现代理方法imagePickerController用来保存我们选择的图片,代码如下:
 func imagePickerController(picker: UIImagePickerController!, didFinishPickingImage image: UIImage!, editingInfo: [NSObject : AnyObject]!) //保存图片
        imageView.image = image
            picker.dismissViewControllerAnimated(true, completion: nil)
在选中图片后,效果如图

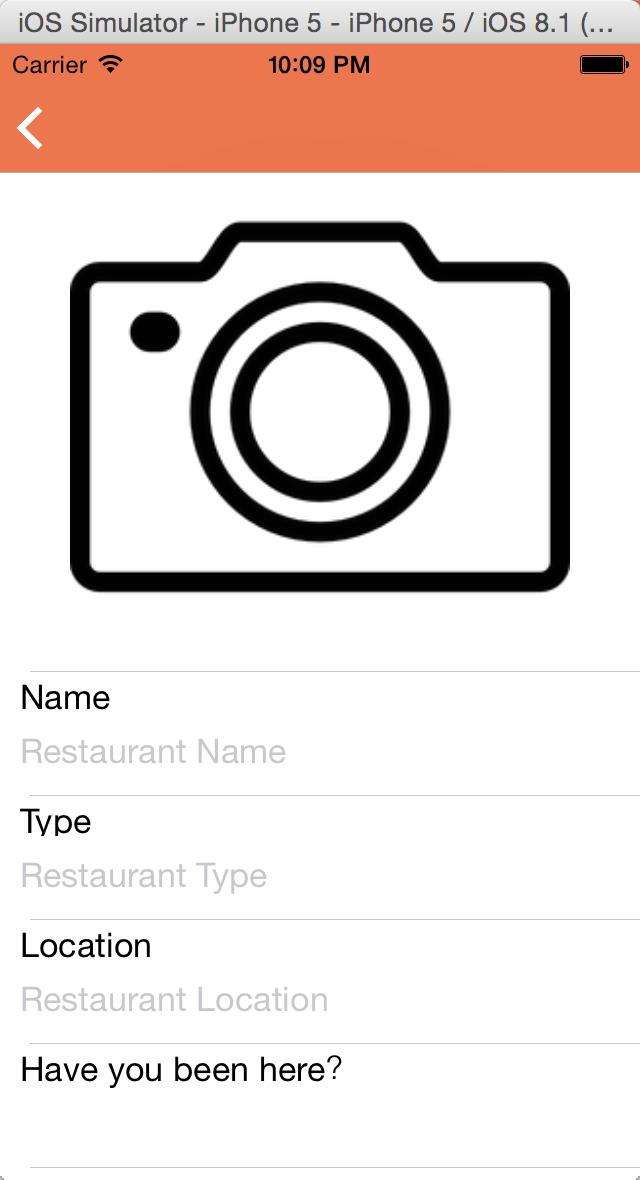
接下来我们来实现下面这几行,代码如下:
 func configureCell(cell:UITableViewCell, indexPath: NSIndexPath)
        let row:NSInteger = indexPath.row
        var nameLabel = UILabel(frame: CGRectMake(10, 5, 200, 15))
            switch row
        case 0:
         imageView = UIImageView(frame: CGRectMake(0, 0, 320, 250))
            imageView.image = UIImage(named: "camera")
            imageView.contentMode = UIViewContentMode.ScaleAspectFit
            cell.addSubview(imageView)
        case 1:
            nameLabel.text = "Name"
            cell.addSubview(nameLabel)
                var textFiled = UITextField(frame: CGRectMake(10, 20, 250, 40))
            textFiled.placeholder = "Restaurant Name"
                cell.addSubview(textFiled)
        case 2:
            nameLabel.text = "Type"
            cell.addSubview(nameLabel)
            var textFiled = UITextField(frame: CGRectMake(10, 20, 250, 40))
            textFiled.placeholder = "Restaurant Type"
            cell.addSubview(textFiled)

        case 3:
            nameLabel.text = "Location"
            cell.addSubview(nameLabel)
            var textFiled = UITextField(frame: CGRectMake(10, 20, 250, 40))
            textFiled.placeholder = "Restaurant Location"
            cell.addSubview(textFiled)
        default:
            nameLabel.text = "Have you been here?"
            cell.addSubview(nameLabel)

在最后一栏中需要加两个按钮,一个YES和一个NO,然后再导航栏中增加一个标题,NewViewController的完整代码如下:
import UIKit

class NewViewController: UIViewController,UITableViewDataSource,UITableViewDelegate,UINavigationControllerDelegate,UIImagePickerControllerDelegate
let identifier = "newCell"
    var imageView:UIImageView!
    override func viewDidLoad()
        super.viewDidLoad()
self.view.backgroundColor = UIColor.orangeColor()

        //增加一个tableview
        var tableView = UITableView(frame: self.view.bounds, style: .Plain)
        tableView.dataSource = self
        tableView.delegate = self
        tableView.registerClass(UITableViewCell.self, forCellReuseIdentifier: "newCell")
        self.view.addSubview(tableView)
        self.navigationItem.title = "New Restaurant"


    func numberOfSectionsInTableView(tableView: UITableView) -> Int
        return 1

    func tableView(tableView: UITableView, numberOfRowsInSection section: Int) -> Int
        return 5

    func tableView(tableView: UITableView, cellForRowAtIndexPath indexPath: NSIndexPath) -> UITableViewCell

        let cell = UITableViewCell(style: .Default, reuseIdentifier: "newCell")
        self.configureCell(cell, indexPath: indexPath)
        cell.selectionStyle = UITableViewCellSelectionStyle.None//选中的背景色
        return cell

    func tableView(tableView: UITableView, heightForRowAtIndexPath indexPath: NSIndexPath) -> CGFloat
        var row:NSInteger = indexPath.row
        var rowHeight:CGFloat = 62
        if row == 0

        rowHeight = 250

        return rowHeight

    func tableView(tableView: UITableView, didSelectRowAtIndexPath indexPath: NSIndexPath)
        var row:NSInteger = indexPath.row
        if row == 0
        self.didClickedImageView()


    func configureCell(cell:UITableViewCell, indexPath: NSIndexPath)
        let row:NSInteger = indexPath.row
        var nameLabel = UILabel(frame: CGRectMake(10, 5, 200, 15))
            switch row
        case 0:
         imageView = UIImageView(frame: CGRectMake(0, 0, 320, 250))
            imageView.image = UIImage(named: "camera")
            imageView.contentMode = UIViewContentMode.ScaleAspectFit
            cell.addSubview(imageView)
        case 1:
            nameLabel.text = "Name"
            cell.addSubview(nameLabel)
                var textFiled = UITextField(frame: CGRectMake(10, 20, 250, 40))
            textFiled.placeholder = "Restaurant Name"
                cell.addSubview(textFiled)
        case 2:
            nameLabel.text = "Type"
            cell.addSubview(nameLabel)
            var textFiled = UITextField(frame: CGRectMake(10, 20, 250, 40))
            textFiled.placeholder = "Restaurant Type"
            cell.addSubview(textFiled)

        case 3:
            nameLabel.text = "Location"
            cell.addSubview(nameLabel)
            var textFiled = UITextField(frame: CGRectMake(10, 20, 250, 40))
            textFiled.placeholder = "Restaurant Location"
            cell.addSubview(textFiled)
        default:
            nameLabel.text = "Have you been here?"
            cell.addSubview(nameLabel)
            var leftBtn = UIButton(frame: CGRectMake(10, 30, 50, 25))
            leftBtn.setTitle("YES", forState: .Normal)
                leftBtn.setTitleColor(UIColor.whiteColor(), forState: .Normal)
                leftBtn.backgroundColor = UIColor.redColor()
                cell.addSubview(leftBtn)
            var rightBtn = UIButton(frame: CGRectMake(90, 30, 50, 25))
            rightBtn.setTitle("NO", forState: .Normal)
            rightBtn.setTitleColor(UIColor.whiteColor(), forState: .Normal)
            rightBtn.backgroundColor = UIColor.grayColor()
                cell.addSubview(rightBtn)


    func didClickedImageView()
    let imagePicker = UIImagePickerController() //选择图片
    let isAvailable = UIImagePickerController.isSourceTypeAvailable(UIImagePickerControllerSourceType.Camera)
        imagePicker.sourceType = .PhotoLibrary
        imagePicker.delegate = self
        if isAvailable
            imagePicker.sourceType = .Camera

        self.presentViewController(imagePicker, animated: true, completion: nil)


    func imagePickerController(picker: UIImagePickerController!, didFinishPickingImage image: UIImage!, editingInfo: [NSObject : AnyObject]!) //保存图片
        imageView.image = image
            picker.dismissViewControllerAnimated(true, completion: nil)
以上是关于swift语言IOS8开发战记19 UIImagePickerController的主要内容,如果未能解决你的问题,请参考以下文章