NestJS 7.x 折腾记: 管道,一个好玩的东西!比如入参校验!
Posted crper
tags:
篇首语:本文由小常识网(cha138.com)小编为大家整理,主要介绍了NestJS 7.x 折腾记: 管道,一个好玩的东西!比如入参校验!相关的知识,希望对你有一定的参考价值。
前言
管道这个词,若是有玩过Linux的小伙伴肯定知晓,比如(看图):
意思就git的提交记录以单行显示的前三条,而且提交概要中有build这个词的~
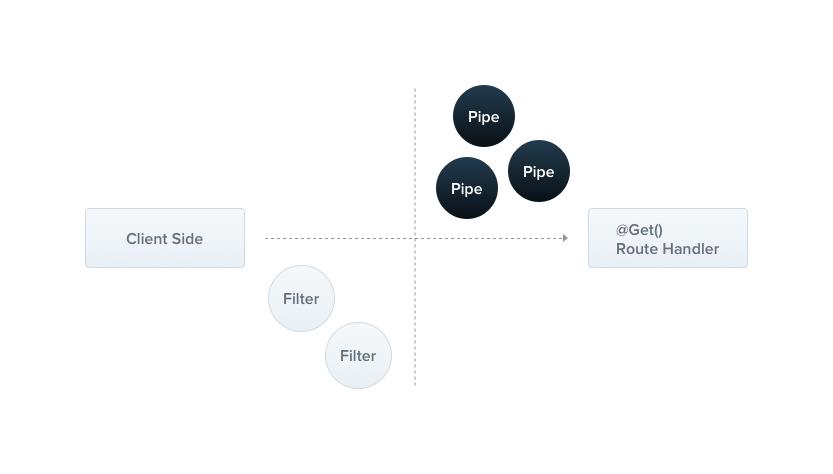
在nest里面的管道,主要是用来做入参数据类型的拦截转换;
跟ng提供的概念差不多,大同小异~~

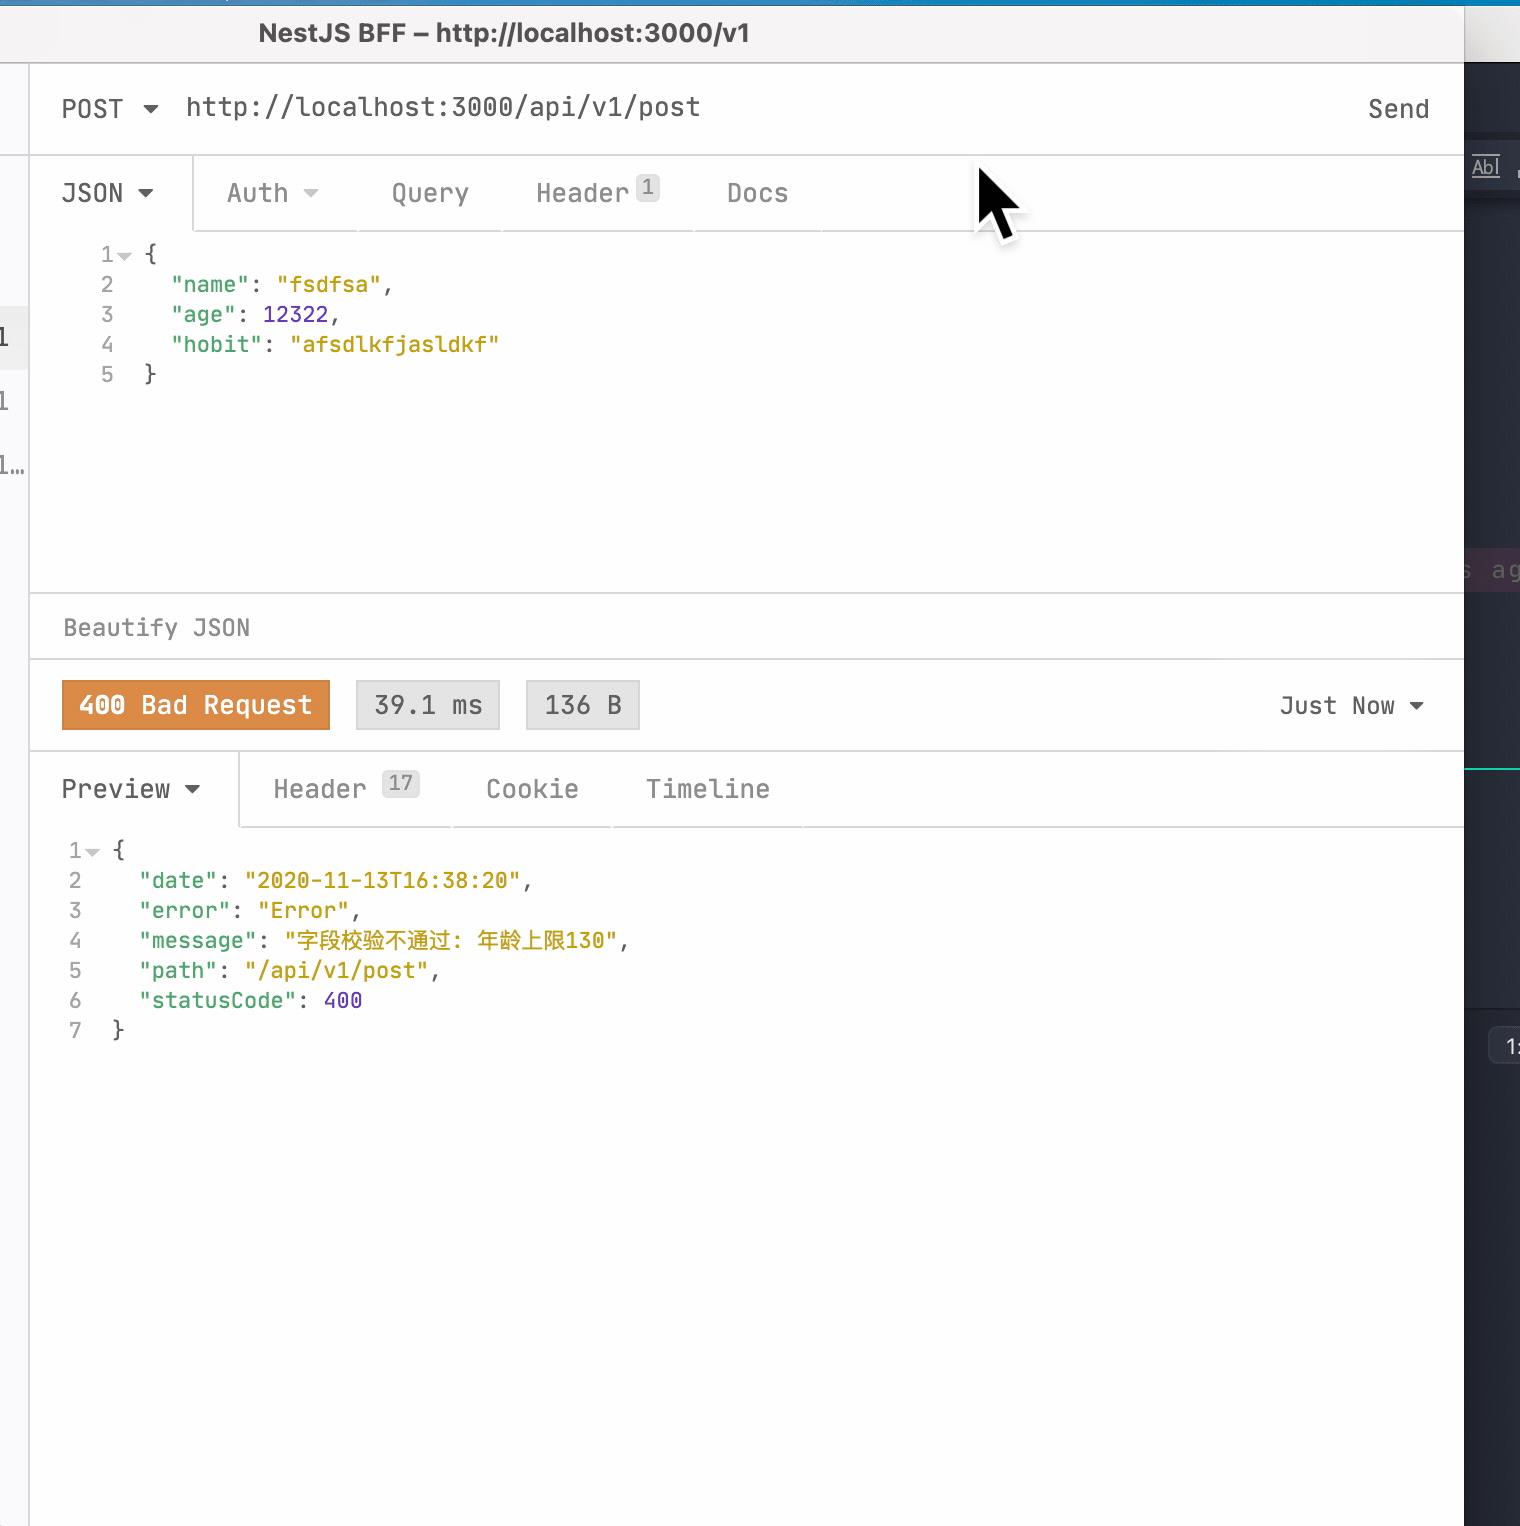
效果图
 实战
实战
其实官方教程写的挺好了,
局部管道和全局管道都写到了,
这里我们以更具通用性的入参全局管道做例子,
尽量写的更贴近业务和更为粗俗的解释吧~
安装
# class-validator: 提供非常丰富的类型装饰器
# class-transformer: 可以把常规数据快速转成类~
# https://www.npmjs.com/package/class-validator
# https://www.npmjs.com/package/class-transformer
yarn add class-validator class-transformer
封装入参拦截管道
Usage: nest <command> [options]

Options:
  -v, --version                                   Output the current version.
  -h, --help                                      Output usage information.

Commands:
  new|n [options] [name]                          Generate Nest application.
  build [options] [app]                           Build Nest application.
  start [options] [app]                           Run Nest application.
  info|i                                          Display Nest project details.
  update|u [options]                              Update Nest dependencies.
  add [options] <library>                         Adds support for an external library to your project.
  generate|g [options] <schematic> [name] [path]  Generate a Nest element.
    Available schematics:
      ┌───────────────┬─────────────┬───────────────────────────────���──────────────┐
      │ name          │ alias       │ description                                  │
      │ application   │ application │ Generate a new application workspace         │
      │ class         │ cl          │ Generate a new class                         │
      │ configuration │ config      │ Generate a CLI configuration file            │
      │ controller    │ co          │ Generate a controller declaration            │
      │ decorator     │ d           │ Generate a custom decorator                  │
      │ filter        │ f           │ Generate a filter declaration                │
      │ gateway       │ ga          │ Generate a gateway declaration               │
      │ guard         │ gu          │ Generate a guard declaration                 │
      │ interceptor   │ in          │ Generate an interceptor declaration          │
      │ interface     │ interface   │ Generate an interface                        │
      │ middleware    │ mi          │ Generate a middleware declaration            │
      │ module        │ mo          │ Generate a module declaration                │
      │ pipe          │ pi          │ Generate a pipe declaration                  │
      │ provider      │ pr          │ Generate a provider declaration              │
      │ resolver      │ r           │ Generate a GraphQL resolver declaration      │
      │ service       │ s           │ Generate a service declaration               │
      │ library       │ lib         │ Generate a new library within a monorepo     │
      │ sub-app       │ app         │ Generate a new application within a monorepo │
      │ resource      │ res         │ Generate a new CRUD resource
# 会在src/common/pipes/生成  validation.pipe.ts
# 根路径在nest-cli.json配置!默认就是src为开发根目录

nest n pi common/pipes/validation
管道实现
// src/pipe/validation.pipe.ts
import
  ArgumentMetadata,
  BadRequestException,
  Injectable,
  PipeTransform,
 from '@nestjs/common';
// plainToClass 会把一个普通的js对象转换成指定类的实例
import  plainToClass  from 'class-transformer';
// 可以识别校验装饰器数据
import  validate  from 'class-validator';

Injectable();
export class ValidationPipe implements PipeTransform
  // value 就是传入的实际数据
  // metatype 就是元数据,其实就是装饰器添加那些
  async transform(value: any,  metatype : ArgumentMetadata)
    if (!metatype || !this.toValidate(metatype))
      // 如果没有传入验证规则,则不验证,直接返回数据
      return value;

    // 将对象转换为 Class 来验证
    const object = plainToClass(metatype, value);
    // 同步阻塞,返回校验结果
    const errors = await validate(object);
    if (errors.length > 0)
      // 只需要取第一个错误信息并返回即可
      const msg = Object.values(errors[0].constraints)[0];
      // 抛出这个异常,逻辑就会交付nest的错误拦截去了
      // 要拦截这个错误做处理,可以从filters入手,以后会说到
      throw new BadRequestException(`字段校验不通过: $msg`);

    return value;

  // 这个函数的意义就是验证元数据传入的类型是否是定义内的常规类型数据
  private toValidate(metatype: any): boolean
    const types: any[] = [String, Boolean, Number, Array, Object];
    return !types.includes(metatype);
配置
主入口(main.ts)
import  AppModule  from './app.module';
import  NestFactory  from '@nestjs/core';
import  ValidationPipe  from './common/pipes/validataion.pipe';
async function bootstrap()
  const app = await NestFactory.create(AppModule,
    cors: false,
    logger: false,
  );

  // 设置全局管道
  app.useGlobalPipes(new ValidationPipe());

  await app.listen(configService.get('SERVE_LISTENER_PORT'));

bootstrap()
DTO注解
import  ApiProperty, ApiPropertyOptional  from '@nestjs/swagger';
import
  IsInt,
  IsNumberString,
  IsOptional,
  IsString,
  Max,
  Min,
 from 'class-validator';

export enum UserRole
  Boss = '后门',
  Admin = '管理员',
  User = '常规用户',


export class CreateAppDto
  @ApiProperty( enum: ['Boss', 'Admin', 'User'] )
  role: UserRole;

  @IsOptional()
  @IsString(
    message: '用户名必须为字符串',
  )
  @ApiPropertyOptional(
    description: '姓名',
  )
  readonly name?: string;

  @IsInt()
  @Min(10,  message: '年龄下限为10' )
  @Max(130,  message: '年龄上限130' )
  @ApiProperty(
    description: '年龄',
    minimum: 0,
    maximum: 130,
    required: false,
  )
  readonly age: number;

  @IsString(
    message: '爱好必须为字符串',
  )
  @ApiPropertyOptional(
    description: '爱好',
  )
  readonly hobit: string;


export class FindOneParams
  @IsNumberString()
  id: number;
Controller
import  Controller, Get, Post, HttpCode, Body, Query  from '@nestjs/common';
import
  ApiCreatedResponse,
  ApiHeader,
  ApiInternalServerErrorResponse,
  ApiOkResponse,
  ApiOperation,
  ApiParam,
  ApiQuery,
  ApiResponse,
 from '@nestjs/swagger';
import  CreateAppDto, FindOneParams, UserRole  from './app.dto';
import  AppService  from './app.service';

@Controller()
export class AppController
  constructor(private readonly appService: AppService)

  @Get()
  getHello(): string
    return this.appService.getHello();


  @ApiHeader(
    name: 'Authorization',
    description: 'Auth token',
  )
  @ApiCreatedResponse(
    description: '链接成功创建,其实就是201状态的描述',
  )
  @Post('/post')
  @HttpCode(200)
  @ApiParam( name: 'name', description: '名字', type: CreateAppDto )
  postParams(@Body() param: CreateAppDto): string
    return '测试参数' + JSON.stringify(param);


  @Get('/user')
  @ApiOperation(
    tags: ['获取用户信息'],
    description: '获取用户信息',
    deprecated: true,
  )
  @ApiQuery( name: 'id', description: '用户id' )
  @ApiResponse( description: '成功请求回来,其实就是200的描述', status: 200 )
  @ApiInternalServerErrorResponse( description: '服务端异常' )
  updateApp(@Query() query: FindOneParams)
    return JSON.stringify(query);


  @Get('/netease-news/:id')
  @ApiOkResponse( description: '成功请求回来' )
  @ApiQuery( name: 'id', description: '用户id', required: false )
  async async(@Body() body)
    const res = await this.appService.getNetEaseNew(
      'https://anapioficeandfire.com/api/characters/583',
       data: body ,
    );
    return res.data;


  @ApiQuery( name: 'role', enum: UserRole )
  @ApiOperation(
    tags: ['返回角色信息'],
    description: '返回角色信息',
  )
  @Get('/role')
  async filterByRole(@Query('role') role: UserRole = UserRole.User)
    return role;
总结
有不对之处请留言,会及时修正!谢谢阅读~
以上是关于NestJS 7.x 折腾记: 管道,一个好玩的东西!比如入参校验!的主要内容,如果未能解决你的问题,请参考以下文章
VS Code 折腾记 - (19) 一些相对实用的编码体验插件(偏前端)
在 nestjs 中使用验证管道给了我一个 classTransformer.plainToclass is not a function 错误