简单实现自定义Android TextView字体
Posted Steven Jon
tags:
篇首语:本文由小常识网(cha138.com)小编为大家整理,主要介绍了简单实现自定义Android TextView字体相关的知识,希望对你有一定的参考价值。
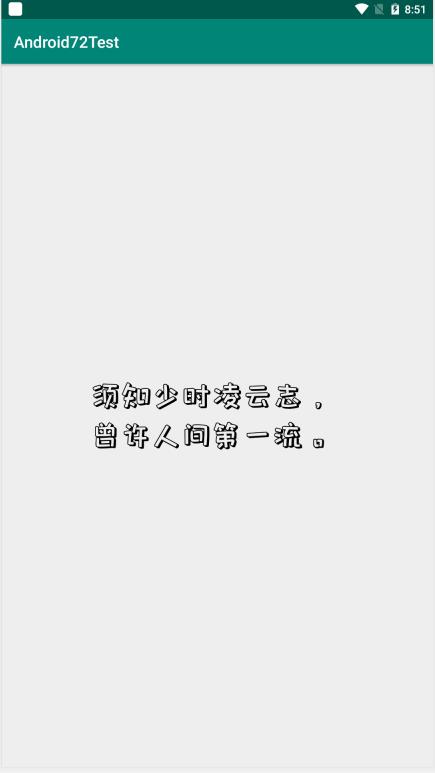
效果图:

如何做?
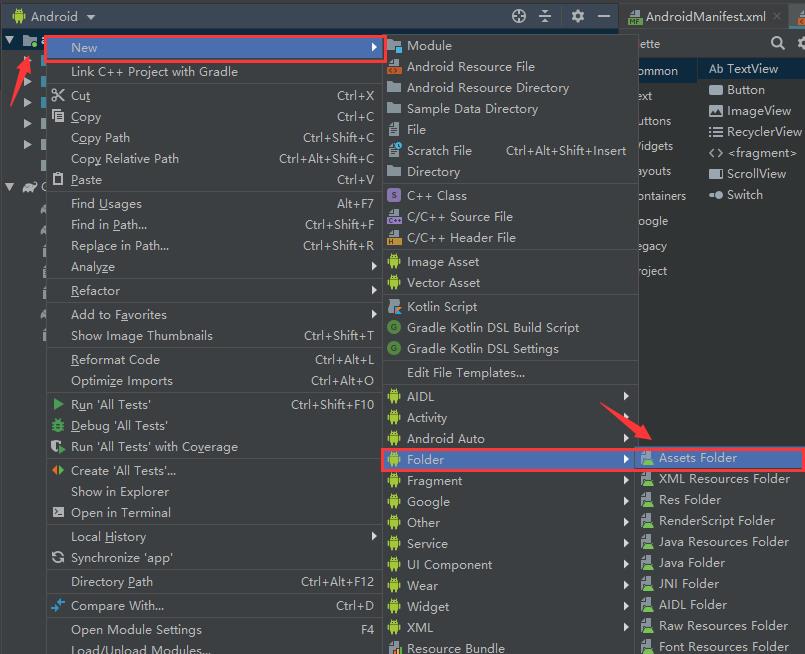
- 引入自定义字体,如果android工程里面没有
assets文件夹,在Android视图下可以右键app,选择New -> Folder -> Assets Folder

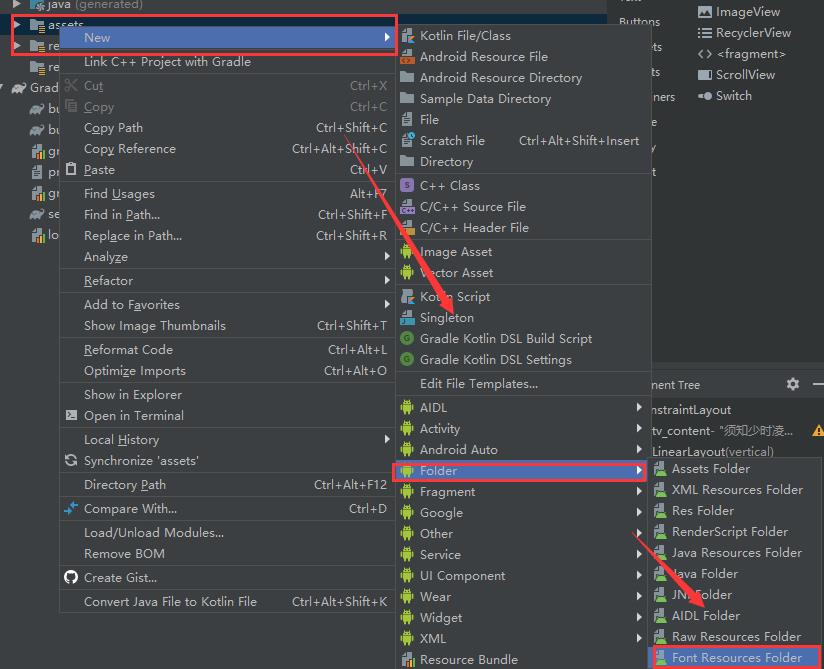
右键assets文件夹,选择New -> Folder -> Font Resources Folder

到这里要注意了!需要改下fonts文件夹的路径,就是勾上Change Folder Location,填src/main/assets/fonts,不然会按照默认路径:src/main/res/font/ 建文件夹的。

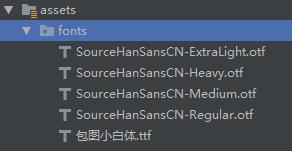
最后将字体文件复制进fonts文件夹内,格式可以是ttf,也可以是otf

- 代码使用:
        Typeface tf = Typeface.createFromAsset(getAssets(), "fonts/包图小白体.ttf");
        mTvContent.setTypeface(tf);
也可以自定义TextView:
public class BTWhiteTextView extends AppCompatTextView

    public BTWhiteTextView (Context context)
        super(context);
        init(context);


    public BTWhiteTextView (Context context, AttributeSet attrs)
        super(context, attrs);
        init(context);


    public BTWhiteTextView (Context context, AttributeSet attrs, int defStyleAttr)
        super(context, attrs, defStyleAttr);
        init(context);


    private void init(Context mContext)
        Typeface tf = Typeface.createFromAsset(mContext.getAssets(), "fonts/包图小白体.ttf");
        setTypeface(tf);
最后在xml文件上引用BTWhiteTextView即可:
<?xml version="1.0" encoding="utf-8"?>
<android.support.constraint.ConstraintLayout xmlns:android="http://schemas.android.com/apk/res/android"
    xmlns:app="http://schemas.android.com/apk/res-auto"
    xmlns:tools="http://schemas.android.com/tools"
    android:layout_width="match_parent"
    android:layout_height="match_parent"
    tools:context=".MainActivity">


    <com.xz.android72test.ui.widget.BTWhiteTextView
        android:id="@+id/tv_content"
        android:layout_width="wrap_content"
        android:layout_height="wrap_content"
        app:layout_constraintTop_toTopOf="parent"
        app:layout_constraintLeft_toLeftOf="parent"
        app:layout_constraintRight_toRightOf="parent"
        app:layout_constraintBottom_toBottomOf="parent"
        android:textSize="38sp"
        android:textColor="#000"
        android:text="须知少时凌云志,\\n曾许人间第一流。"/>

</android.support.constraint.ConstraintLayout>
非常感谢你能看到最后,如果能够帮助到你是我的荣幸。
以上是关于简单实现自定义Android TextView字体的主要内容,如果未能解决你的问题,请参考以下文章