简明 Python 教程
Posted 互联网小队
tags:
篇首语:本文由小常识网(cha138.com)小编为大家整理,主要介绍了简明 Python 教程相关的知识,希望对你有一定的参考价值。
文章目录
- 参考书籍
- 1、安装和输出
- 2、注释
- 3、常量和变量
- 4、格式化方法
- 5、案例:使用变量与字面常量
- 6、运算符
- 7、数值运算与赋值的快捷方式
- 8、计算命令
- 9、if 语句
- 10、while 语句
- 11、for 循环
- 12、break 语句
- 13、continue 语句
- 14、函数
- 15、函数参数
- 16、局部变量
- 17、**global **语句
- 18、默认参数值
- 19、关键字参数
- 20、可变参数
- 21、return 语句
- 22、**DocStrings**
- 23、模块
- 24、from..import 语句
- 25、模块的 **__name__**
- 26、编写你自己的模块
- 27、dir 函数
- 28、包
- 29、数据结构
- 30、列表
- 31、元组
- 32、字典
- 33、序列
- 34、集合
- 35、引用
- 36、有关字符串的更多内容
- 37、问题-实现
- 38、问题-维护
- 39、问题-产生错误
- 40、问题-错误修复
- 41、问题-继续改进
- 42、软件开发流程
- 43、面向对象编程(面向高阶读者)
- 44、**self**
- 45、类
- 46、方法
- 47、__init__ 方法
- 48、类变量与对象变量
- 49、继承
- 50、输入与输出
- 51、文件
- 52、**Pickle**
- 53、**Unicode**
- 54、错误异常
- 55、处理异常
- 56、抛出异常
- 57、**Try ... Finally**
- 58、with 语句
- 59、sys 模块
- 60、日志模块
- 61、更多-传递元组
- 62、更多-特殊方法
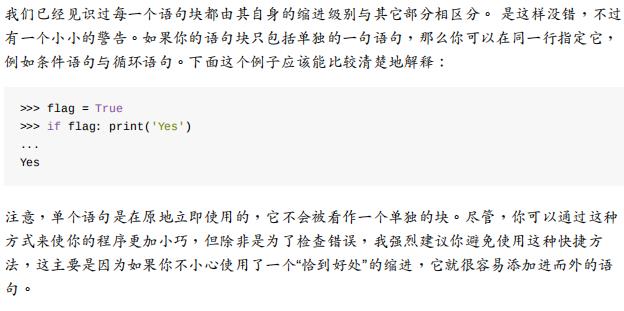
- 63、更多-单语句块
- 64、更多-Lambda 表格
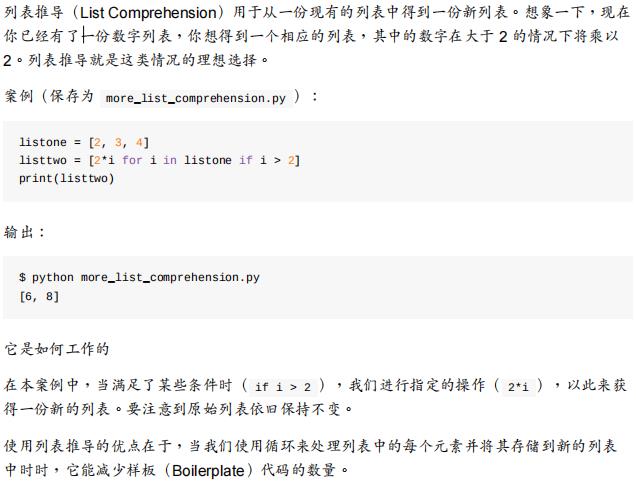
- 65、更多-列表推导
- 66、更多-在函数中接收元组与字典
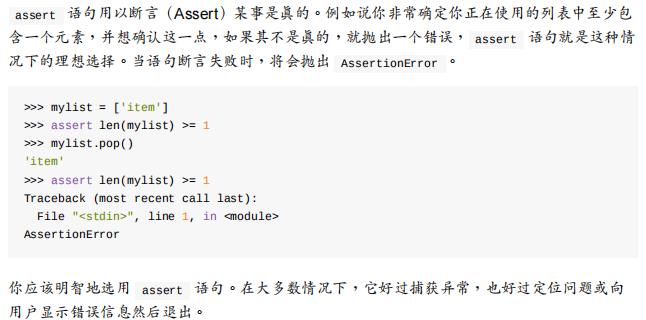
- 67、更多-assert 语句
- 68、更多-装饰器
- 69、迈出下一步
- 70、总结
参考书籍
1、安装和输出
1、官网:https://www.python.org/
2、Pycharm编辑器:https://www.jetbrains.com/zh-cn/pycharm/
3、输出
print("hello world")
2、注释
print('hello world') #注意到 print 是一个函数
# 注意到 print 是一个函数
print('hello world')
你应该在你的程序中尽可能多地使用有用的注释:
1)解释假设
2)说明重要的决定
3)解释重要的细节
4)说明你想要解决的问题
5)说明你想要在程序中克服的问题,等等。
3、常量和变量
1、字面常量
2、数字:整数(Integers)与浮点数(Floats)
3、字符串:单引号、双引号、三引号
'''这是一段多行字符串。这是它的第一行。
This is the second line.
"What's your name?," I asked.
He said "Bond, James Bond."
'''
4、格式化方法
age = 20
name = 'Swaroop'
print('0 was 1 years old when he wrote this book'.format(name, age))
print('Why is 0 playing with that python?'.format(name))

name + 'is' +str(age) + 'years old
# 对于浮点数 '0.333' 保留小数点(.)后三位
print('0:.3f'.format(1.0/3))
# 使用下划线填充文本,并保持文字处于中间位置
# 使用 (^) 定义 '___hello___'字符串长度为 11
print('0:_^11'.format('hello'))
# 基于关键词输出 'Swaroop wrote A Byte of Python'
print('name wrote book'.format(name='Swaroop', book='A Byte of Python'))
print('a', end='')
print('b', end='')

ab
print('a', end=' ')
print('b', end=' ')
print('c')

a b c
5、案例:使用变量与字面常量
# 文件名:var.py
i = 5
print(i)
i = i + 1
print(i)
s = '''This is a multi-line string.
This is the second line.'''
print(s)

5
6
This is a multi-line string.
This is the second line.
6、运算符
+ (加)
两个对象相加。
3+5 则输出 8 。 'a' + 'b' 则输出 'ab' 。

- (减)
从一个数中减去另一个数,如果第一个操作数不存在,则假定为零。
-5.2 将输出一个负数, 50 - 24 输出 26 。

* (乘)
给出两个数的乘积,或返回字符串重复指定次数后的结果。
2 * 3 输出 6 。 'la' * 3 输出 'lalala' 。

** (乘方)
返回 x 的 y 次方。
3 ** 4 输出 81 (即 3 * 3 * 3 * 3 )。

/ (除)
x 除以 y
13 / 3 输出 4.333333333333333 。

// (整除)
x 除以 y 并对结果向下取整至最接近的整数。
13 // 3 输出 4 。
-13 // 3 输出 -5 。

% (取模)
返回除法运算后的余数。
13 % 3 输出 1 。 -25.5 % 2.25 输出 1.5 。

<< (左移)
将数字的位向左移动指定的位数。(每个数字在内存中以二进制数表示,即 0 和1)
2 << 2 输出 8 。 2 用二进制数表示为 10 。
向左移 2 位会得到 1000 这一结果,表示十进制中的 8 。

>> (右移)
将数字的位向右移动指定的位数。
11 >> 1 输出 5 。
11 在二进制中表示为 1011 ,右移一位后输出 101 这一结果,表示十进制中的
5 。

& (按位与)
对数字进行按位与操作。
5 & 3 输出 1 。

| (按位或)
对数字进行按位或操作。
5 | 3 输出 7 。

^ (按位异或)
对数字进行按位异或操作。
5 ^ 3 输出 6 。

~ (按位取反)
x 的按位取反结果为 -(x+1)。
~5 输出 -6 。有关本例的更多细节可以参阅:
http://stackoverflow.com/a/11810203。

< (小于)
返回 x 是否小于 y。所有的比较运算符返回的结果均为 True 或 False 。请注意这些名称之中的大写字母。
5 < 3 输出 False , 3 < 6 输出 True 。
比较可以任意组成组成链接: 3 < 5 < 7 返回 True 。

> (大于)
返回 x 是否大于 y。
5 > 3 返回 True 。如果两个操作数均为数字,它们首先将会被转换至一种共同的
类型。否则,它将总是返回 False 。

<= (小于等于)
返回 x 是否小于或等于 y。
x = 3; y = 6; x<=y 返回 True 。

>= (大于等于)
返回 x 是否大于或等于 y。
x = 4; y = 3; x>=3 返回 True 。

== (等于)
比较两个对象是否相等。
x = 2; y = 2; x == y 返回 True 。
x = 'str'; y = 'stR'; x == y 返回 False 。
x = 'str'; y = 'str'; x == y 返回 True 。

!= (不等于)
比较两个对象是否不相等。
x = 2; y = 3; x != y 返回 True 。

not (布尔“非”)
如果 x 是 Ture ,则返回 False 。如果 x 是 False ,则返回 True 。
x = Ture; not x 返回 False 。

and (布尔“与”)
如果 x 是 False ,则 x and y 返回 False ,否则返回 y 的计算值。
当 x 是 False 时, x = False; y = True; x and y 将返回 False 。在这一情境中,
Python 将不会计算 y,因为它已经了解 and 表达式的左侧是 False ,这意味着整个
表达式都将是 False 而不会是别的值。这种情况被称作短路计算(Short-circuit Evaluation)。

or (布尔“或”)
如果 x 是 True ,则返回 True ,否则它将返回 y 的计算值。
x = Ture; y = False; x or y 将返回 Ture 。在这里短路计算同样适用。
1、按位与是针对二进制数的操作,指将两个二进制数的每一位都进行比较,如果两个相
应的二进位都为 1 则此位为 1,否则为 0。在本例中, 5 的二进制表达为 101 , 3 的
二进制表达为 11 (为补全位数进行按位操作写作 011 ),则按位与操作后的结果为
001 ,对应的十进制数为 1 。 ↩

2、按位或是针对二进制数的操作,指将两个二进制数的每一位都进行比较,如果两个相
应的二进位有一个为 1 则此位为 1,否则为 0。在本例中, 101 与 011 进行按位或操
作后的结果为 111 ,对应十进制数为 7 。 ↩

3、按位异或是针对二进制数的操作,指将两个二进制数的每一位都进行比较,如果两个
相应的二进位不同则此位为 1,相同为 0。在本例中, 101 与 011 进行按位异或操作
的结果为 110 ,对应十进制数为 6 。 ↩

4、按位取反也称作“按位取非”或“求非”或“取反”,沈洁元译本译作“按位翻转”,是针对二进
制数的操作,指将两个二进制数的每一二进位都进行取反操作, 0 换成 1 , 1 换成
0 。受篇幅与学识所限,本例具体原理不在此处赘述。读者只需按照给出的公式记忆即
可。
7、数值运算与赋值的快捷方式
a = 2
a = a * 3
变量 = 变量 运算 表达式
a = 2
a *= 3
会演变成 变量 运算 = 表达式
8、计算命令
lambda :Lambda 表达式
if - else :条件表达式
or :布尔“或”
and :布尔“与”
not x :布尔“非”
in, not in, is, is not, <, <=, >, >=, !=, == :比较,包括成员资格测试
(Membership Tests)和身份测试(Identity Tests)。
| :按位或
^ :按位异或
& :按位与
<<, >> :移动
+, - :加与减
*, /, //, % :乘、除、整除、取余
+x, -x, ~x :正、负、按位取反
** :求幂
x[index], x[index:index], x(arguments...), x.attribute :下标、切片、调用、属性引用
(expressions...), [expressions...], key: value..., expressions... :显示绑定或数组、显示列表、显示字典、显示设置
9、if 语句
number = 23
guess = int(input('Enter an integer : '))

if guess == number:
	# 新块从这里开始
	print('Congratulations, you guessed it.')
	print('(but you do not win any prizes!)')
	# 新块在这里结束
elif guess < number:
	# 另一代码块
	print('No, it is a little higher than that')
	# 你可以在此做任何你希望在该代码块内进行的事情
else:
	print('No, it is a little lower than that')
	# 你必须通过猜测一个大于(>)设置数的数字来到达这里。

print('Done')
# 这最后一句语句将在
# if 语句执行完毕后执行。
$ python if.py
Enter an integer : 50
No, it is a little lower than that
Done

$ python if.py
Enter an integer : 22
No, it is a little higher than that
Done

$ python if.py
Enter an integer : 23
Congratulations, you guessed it.
(but you do not win any prizes!)
Done
10、while 语句
number = 23
running = True

while running:
	guess = int(input('Enter an integer : '))

	if guess == number:
		print('Congratulations, you guessed it.')
		# 这将导致 while 循环中止
		running = False
	elif guess < number:
		print('No, it is a little higher than that.')
	else:
		print('No, it is a little lower than that.')
else:
	print('The while loop is over.')
	# 在这里你可以做你想做的任何事

print('Done')
$ python while.py
Enter an integer : 50
No, it is a little lower than that.
Enter an integer : 22
No, it is a little higher than that.
Enter an integer : 23
Congratulations, you guessed it.
The while loop is over.
Done
11、for 循环
for i in range(1, 5):
	print(i)
else:
	print('The for loop is over')

$ python for.py
1
2
3
4
The for loop is over
for i in list(range(5)):
	print(i)
else:
	print('The for loop is over')

$ python for.py
[0, 1, 2,3, 4]
The for loop is over
12、break 语句
while True:
	s = input('Enter something : ')
	if s == 'quit':
		break
	print('Length of the string is', len(s))
print('Done')

$ python break.py
Enter something : Programming is fun
Length of the string is 18
Enter something : When the work is done
Length of the string is 21
Enter something : if you wanna make your work also fun:
Length of the string is 37
Enter something : use Python!
Length of the string is 11
Enter something : quit
Done
13、continue 语句
while True:
	s = input('Enter something : ')
	if s == 'quit':
		break
	if len(s) < 3:
		print('Too small')
		continue
	print('Input is of sufficient length')
	# 自此处起继续进行其它任何处理

$ python continue.py
Enter something : a
Too small
Enter something : 12
Too small
Enter something : abc
Input is of sufficient length
Enter something : quit
14、函数
def say_hello():
		# 该块属于这一函数
		print('hello world')
# 函数结束

say_hello() # 调用函数
say_hello() # 再次调用函数

$ python function1.py
hello world
hello world
15、函数参数
def print_max(a, b):
	if a > b:
			print(a, 'is maximum')
	elif a == b:
			print(a, 'is equal to', b)
	else:
			print(b, 'is maximum')

# 直接传递字面值
print_max(3, 4)

x = 5
y = 7

# 以参数的形式传递变量
print_max(x, y)

$ python function_param.py
4 is maximum
7 is maximum
16、局部变量
x = 50
def func(x):
		print('x is', x)
		x = 2
		print('Changed local x to', x)

func(x)
print('x is still', x)

$ python function_local.py
x is 50
Changed local x to 2
x is still 50
17、**global **语句
x = 50

def func():
		global x

		print('x is', x)
		x = 2
		print('Changed global x to', x)

func()
print('Value of x is', x)

$ python function_global.py
x is 50
Changed global x to 2
Value of x is 2
18、默认参数值
def say(message, times=1):
		print(message * times)

say('Hello')
say('World', 5)

$ python function_default.py
Hello
WorldWorldWorldWorldWorld
19、关键字参数
def func(a, b=5, c=10):
		print('a is', a, 'and b is', b, 'and c is', c)

func(3, 7)
func(25, c=24)
func(c=50, a=100)

$ python function_keyword.py
a is 3 and b is 7 and c is 10
a is 25 and b is 5 and c is 24
a is 100 and b is 5 and c is 50
20、可变参数
def total(a=5, *numbers, **phonebook):
		print('a', a)

		#遍历元组中的所有项目
		for single_item in numbers:
				print('single_item', single_item)

		#遍历字典中的所有项目
		for first_part, second_part in phonebook.items():
				print(first_part,second_part)

print(total(10,1,2,3,Jack=1123,John=2231,Inge=1560))

$ python function_varargs.py
a 10
single_item 1
single_item 2
single_item 3
Inge 1560
John 2231
Jack 1123
None
21、return 语句
def maximum(x, y):
		if x > y:
				return x
		elif x == y:
				return 'The numbers are equal'
		else:
				return y

print(maximum(2, 3))

$ python function_return.py
3
22、DocStrings
def print_max(x, y):
		'''Prints the maximum of two numbers.打印两个数值中的最大数。

		The two values must be integers.这两个数都应该是整数'''
		# 如果可能,将其转换至整数类型
		x = int(x)
		y = int(y)

		if x > y:
				print(x, 'is maximum')
		else:
				print(y, 'is maximum')

print_max(3, 5)
print(print_max.__doc__)

$ python function_docstring.py
5 is maximum
Prints the maximum of two numbers.
The two values must be integers.
23、模块
那么如果你想在你所编写的别的程序中重用一些函数的话,应该怎么办?正如你可能想象到的那样,答案是模块(Modules)。
import sys

print('The command line arguments are:')
for i in sys.argv:
		print(i)

print('\\n\\nThe PYTHONPATH is', sys.path, '\\n')

$ python module_using_sys.py we are arguments
The command line arguments are:
module_using_sys.py
we
are
arguments
The PYTHONPATH is ['/tmp/py',
# many entries here, not shown here
'/Library/Python/2.7/site-packages',
'/usr/local/lib/python2.7/site-packages']
24、from…import 语句
from math import sqrt
print("Square root of 16 is", sqrt(16))
25、模块的 name
if __name__ == '__main__':
		print('This program is being run by itself')
else:
		print('I am being imported from another module')

$ python module_using_name.py
This program is being run by itself
$ python
>>> import module_using_name
I am being imported from another module
>>>
26、编写你自己的模块
# mymodule.py

def say_hi():
  	print('Hi, this is mymodule speaking.')

__version__ = '0.1'
# mymodule_demo.py

import mymodule
mymodule.say_hi()
print('Version', mymodule.__version__)

$ python mymodule_demo.py
Hi, this is mymodule speaking.
Version 0.1
# mymodule_demo2.py

from mymodule import say_hi, __version__
# from mymodule import *

say_hi()
print('Version', __version__)
27、dir 函数
$ python
>>> import sys

# 给出 sys 模块中的属性名称
>>> dir(sys)
['__displayhook__', '__doc__',
'argv', 'builtin_module_names',
'version', 'version_info']
# only few entries shown here

# 给出当前模块的属性名称
>>> dir()
['__builtins__', '__doc__',
'__name__', '__package__']

# 创建一个新的变量 'a'
>>> a = 5

>>> dir()
['__builtins__', '__doc__', '__name__', '__package__', 'a']

# 删除或移除一个名称
>>> del a

>>> dir()
['__builtins__', '__doc__', '__name__', '__package__']
28、包
包是指一个包含模块与一个特殊的 init.py 文件的文件夹,后者向 Python 表明这一文
件夹是特别的,因为其包含了 Python 模块。包是一种能够方便地分层组织模块的方式。
- <some folder present in the sys.path>/
		- world/
				- __init__.py
				- asia/
						- __init__.py
						- india/
								- __init__.py
								- foo.py
				- africa/
						- __init__.py
						- madagascar/
								- __init__.py
								- bar.py
29、数据结构
数据结构(Data Structures)基本上人如其名——它们只是一种结构,能够将一些数据聚合在一起。换句话说,它们是用来存储一系列相关数据的集合。
Python 中有四种内置的数据结构——列表(List)、元组(Tuple)、字典(Dictionary)和集合(Set)。我们将了解如何使用它们,并利用它们将我们的编程之路变得更加简单。
30、列表
# This is my shopping list
shoplist = ['apple', 'mango', 'carrot', 'banana']

print('I have', len(shoplist), 'items to purchase.')

print('These items are:', end=' ')
for item in shoplist:
		print(item, end=' ')

print('\\nI also have to buy rice.')
shoplist.append('rice')
print('My shopping list is now', shoplist)

print('I will sort my list now')
shoplist.sort()
print('Sorted shopping list is', shoplist)

print('The first item I will buy is', shoplist[0])
olditem = shoplist[0]
del shoplist[0]
print('I bought the', olditem)
print('My shopping list is now', shoplist)
$ python ds_using_list.py
I have 4 items to purchase.
These items are: apple mango carrot banana
I also have to buy rice.
My shopping list is now ['apple', 'mango', 'carrot', 'banana', 'rice']
I will sort my list now
Sorted shopping list is ['apple', 'banana', 'carrot', 'mango', 'rice']
The first item I will buy is apple
I bought the apple
My shopping list is now ['banana', 'carrot', 'mango', 'rice']
31、元组
# 我会推荐你总是使用括号
# 来指明元组的开始与结束
# 尽管括号是一个可选选项。
# 明了胜过晦涩,显式优于隐式。
zoo = ('python', 'elephant', 'penguin')
print('Number of animals in the zoo is', len(zoo))

new_zoo = 'monkey', 'camel', zoo
print('Number of cages in the new zoo is', len(new_zoo))
print('All animals in new zoo are', new_zoo)
print('Animals brought from old zoo are', new_zoo[2])
print('Last animal brought from old zoo is', new_zoo[2][2])
print('Number of animals in the new zoo is',
		len(new_zoo)-1+len(new_zoo[2]))
$ python ds_using_tuple.py
Number of animals in the zoo is 3
Number of cages in the new zoo is 3

All animals in new zoo are
('monkey', 'camel', ('python', 'elephant', 'penguin'))

Animals brought from old zoo are ('python', 'elephant', 'penguin')
Last animal brought from old zoo is penguin
Number of animals in the new zoo is 5
32、字典
# “ab”是地址(Address)簿(Book)的缩写

ab =
		'Swaroop': 'swaroop@swaroopch.com',
		'Larry': 'larry@wall.org',
		'Matsumoto': 'matz@ruby-lang.org',
		'Spammer': 'spammer@hotmail.com'


print("Swaroop's address is", ab['Swaroop'])

# 删除一对键值—值配对
del ab['Spammer']

print('\\nThere are  contacts in the address-book\\n'.format(len(ab)))

for name, address in ab.items():
		print('Contact  at '.format(name, address))

# 添加一对键值—值配对
ab['Guido'] = 'guido@python.org'

if 'Guido' in ab:
		print("\\nGuido's address is", ab['Guido'])
$ python ds_using_dict.py
Swaroop's address is swaroop@swaroopch.com

There are 3 contacts in the address-book

Contact Swaroop at swaroop@swaroopch.com
Contact Matsumoto at matz@ruby-lang.org
Contact Larry at larry@wall.org

Guido's address is guido@python.org
33、序列
shoplist = ['apple', 'mango', 'carrot', 'banana']
name = 'swaroop'

# Indexing or 'Subscription' operation #
# 索引或“下标(Subcription)”操作符 #
print('Item 0 is', shoplist[0])
print('Item 1 is', shoplist[1])
print('Item 2 is', shoplist[2])
print('Item 3 is', shoplist[3])
print('Item -1 is', shoplist[-1])
print('Item -2 is', shoplist[-2])
print('Character 0 is', name[0])

# Slicing on a list #
print('Item 1 to 3 is', shoplist[1:3])
print('Item 2 to end is', shoplist[2:])
print('Item 1 to -1 is', shoplist[1:-1])
print('Item start to end is', shoplist[:])

# 从某一字符串中切片 #
print('characters 1 to 3 is', name[1:3])
print('characters 2 to end is', name[2:])
print('characters 1 to -1 is', name[1:-1])
print('characters start to end is', name[:])
$ python ds_seq.py
Item 0 is apple
Item 1 is mango
Item 2 is carrot
Item 3 is banana
Item -1 is banana
Item -2 is carrot
Character 0 is s
Item 1 to 3 is ['mango', 'carrot']
Item 2 to end is ['carrot', 'banana']
Item 1 to -1 is ['mango', 'carrot']
Item start to end is ['apple', 'mango', 'carrot', 'banana']
characters 1 to 3 is wa
characters 2 to end is aroop
characters 1 to -1 is waroo
characters start to end is swaroop
>>> shoplist = ['apple', 'mango', 'carrot', 'banana']
>>> shoplist[::1]
['apple', 'mango', 'carrot', 'banana']
>>> shoplist[::2]
['apple', 'carrot']
>>> shoplist[::3]
['apple', 'banana']
>>> shoplist[::-1]
['banana', 'carrot', 'mango', 'apple']
34、集合
>>> bri = set(['brazil', 'russia', 'india'])
>>> 'india' in bri
True
>>> 'usa' in bri
False
>>> bric = bri.copy()
>>> bric.add('china')
>>> bric.issuperset(bri)
True
>>> bri.remove('russia')
>>> bri & bric # OR bri.intersection(bric)
'brazil', 'india'
35、引用
print('Simple Assignment')
shoplist = ['apple', 'mango', 'carrot', 'banana']
# mylist 只是指向同一对象的另一种名称
mylist = shoplist

# 我购买了第一项项目,所以我将其从列表中删除
del shoplist[0]

print('shoplist is', shoplist)
print('mylist is', mylist)
# 注意到 shoplist 和 mylist 二者都
# 打印出了其中都没有 apple 的同样的列表,以此我们确认
# 它们指向的是同一个对象

print('Copy by making a full slice')
# 通过生成一份完整的切片制作一份列表的副本
mylist = shoplist[:]
# 删除第一个项目
del mylist[0]

print('shoplist is', shoplist)
print('mylist is', mylist)
# 注意到现在两份列表已出现不同
$ python ds_reference.py
Simple Assignment
shoplist is ['mango', 'carrot', 'banana']
mylist is ['mango', 'carrot', 'banana']
Copy by making a full slice
shoplist is ['mango', 'carrot', 'banana']
mylist is ['carrot', 'banana']
36、有关字符串的更多内容
# 这是一个字符串对象
name = 'Swaroop'

if name.startswith('Swa'):
		print('Yes, the string starts with "Swa"')

if 'a' in name:
		print('Yes, it contains the string "a"')

if name.find('war') != -1:
		print('Yes, it contains the string "war"')

delimiter = '_*_'
mylist = ['Brazil', 'Russia', 'India', 'China']
print(delimiter.join(mylist))
$ python ds_str_methods.py
Yes, the string starts with "Swa"
Yes, it contains the string "a"
Yes, it contains the string "war"
Brazil_*_Russia_*_India_*_China
37、问题-实现
我想要一款能为我所有重要的文件创建备份的程序。
- 需要备份的文件与目录应在一份列表中予以指定。
- 备份必须存储在一个主备份目录中。
- 备份文件将打包压缩成 zip 文件。
- zip 压缩文件的文件名由当前日期与时间构成。
- 我们使用在任何 GNU/Linux 或 Unix 发行版中都会默认提供的标准 zip 命令进行打包。 在这里你需要了解到只要有命令行界面,你就可以使用任何需要用到的压缩或归档命 令。
import os
import time

# 1. 需要备份的文件与目录将被
# 指定在一个列表中。
# 例如在 Windows 下:
# source = ['"C:\\\\My Documents"', 'C:\\\\Code']
# 又例如在 Mac OS X 与 Linux 下:
source = ['/Users/swa/notes']
# 在这里要注意到我们必须在字符串中使用双引号
# 用以括起其中包含空格的名称。

#2. 备份文件必须存储在一个
#主备份目录中
#例如在 Windows 下:
# target_dir = 'E:\\\\Backup'
# 又例如在 Mac OS X 和 Linux 下:
target_dir = '/Users/swa/backup'
# 要记得将这里的目录地址修改至你将使用的路径

# 3. 备份文件将打包压缩成 zip 文件。
# 4. zip 压缩文件的文件名由当前日期与时间构成。
target = target_dir + os.sep + \\
				time.strftime('%Y%m%d%H%M%S') + '.zip'

# 如果目标目录还不存在,则进行创建
if not os.path.exists(target_dir):
		os.mkdir(target_dir) # 创建目录

# 5. 我们使用 zip 命令将文件打包成 zip 格式
zip_command = 'zip -r 0 1'.format(target,
																			' '.join(source))

# 运行备份
print('Zip command is:')
print(zip_command)
print('Running:')
if os.system(zip_command) == 0:
		print('Successful backup to', target)
else:
		print('Backup FAILED')
$ python backup_ver1.py
Zip command is:
zip -r /Users/swa/backup/20140328084844.zip /Users/swa/notes
Running:
adding: Users/swa/notes/ (stored 0%)
adding: Users/swa/notes/blah1.txt (stored 0%)
adding: Users/swa/notes/blah2.txt (stored 0%)
adding: Users/swa/notes/blah3.txt (stored 0%)
Successful backup to /Users/swa/backup/20140328084844.zip
38、问题-维护
import os
import time

# 1. 需要备份的文件与目录将被
# 指定在一个列表中。
# 例如在 Windows 下:
# source = ['"C:\\\\My Documents"', 'C:\\\\Code']
# 又例如在 Mac OS X 与 Linux 下:
source = ['/Users/swa/notes']
# 在这里要注意到我们必须在字符串中使用双引号
# 用以括起其中包含空格的名称。

# 2. 备份文件必须存储在一个
# 主备份目录中
# 例如在 Windows 下:
# target_dir = 'E:\\\\Backup'
# 又例如在 Mac OS X 和 Linux 下:
target_dir = '/Users/swa/backup'
# 要记得将这里的目录地址修改至你将使用的路径

# 如果目标目录不存在则创建目录
if not os.path.exists(target_dir):
		os.mkdir(target_dir) # 创建目录

# 3. 备份文件将打包压缩成 zip 文件。
# 4. 将当前日期作为主备份目录下的子目录名称
today = target_dir + os.sep + time.strftime('%Y%m%d')
# 将当前时间作为 zip 文件的文件名
now = time.strftime('%H%M%S')

# zip 文件名称格式
target = today + os.sep + now + '.zip'

# 如果子目录尚不存在则创建一个
if not os.path.exists(today):
		os.mkdir(today)
		print('Successfully created directory', today)

# 5. 我们使用 zip 命令将文件打包成 zip 格式
zip_command = 'zip -r 0 1'.format(target,
																			' '.join(source))

# 运行备份
print('Zip command is:')
print(zip_command)
print('Running:')
if os.system(zip_command) == 0:
		print('Successful backup to', target)
else:
		print('Backup FAILED')
$ python backup_ver2.py
Successfully created directory /Users/swa/backup/20140329
Zip command is:
zip -r /Users/swa/backup/20140329/073201.zip /Users/swa/notes
Running:
adding: Users/swa/notes/ (stored 0%)
adding: Users/swa/notes/blah1.txt (stored 0%)
adding: Users/swa/notes/blah2.txt (stored 0%)
adding: Users/swa/notes/blah3.txt (stored 0%)
Successful backup to /Users/swa/backup/20140329/073201.zip
39、问题-产生错误
import os
import time

# 1. 需要备份的文件与目录将被
# 指定在一个列表中。
# 例如在 Windows 下:
# source = ['"C:\\\\My Documents"', 'C:\\\\Code']
# 又例如在 Mac OS X 与 Linux 下:
source = ['/Users/swa/notes']
# 在这里要注意到我们必须在字符串中使用双引号
# 用以括起其中包含空格的名称。

# 2. 备份文件必须存储在一个
# 主备份目录中
# 例如在 Windows 下:
# target_dir = 'E:\\\\Backup'
# 又例如在 Mac OS X 和 Linux 下:
target_dir = '/Users/swa/backup'
# 要记得将这里的目录地址修改至你将使用的路径

# 如果目标目录还不存在,则进行创建
if not os.path.exists(target_dir):
os.mkdir(target_dir) # 创建目录

# 3. 备份文件将打包压缩成 zip 文件。
# 4. 将当前日期作为主备份目录下的
# 子目录名称
today = target_dir + os.sep + time.strftime('%Y%m%d')
# 将当前时间作为 zip 文件的文件名
now = time.strftime('%H%M%S')

# 添加一条来自用户的注释以创建
# zip 文件的文件名
comment = input('Enter a comment --> ')
# 检查是否有评论键入
if len(comment) == 0:
		target = today + os.sep + now + '.zip'
else:
		target = today + os.sep + now + '_' +
				comment.replace(' ', '_') + '.zip'

# 如果子目录尚不存在则创建一个
if not os.path.exists(today):
		os.mkdir(today)
		print('Successfully created directory', today)

# 5. 我们使用 zip 命令将文件打包成 zip 格式
zip_command = "zip -r 0 1".format(target,
																			' '.join(source))

# 运行备份
print('Zip command is:')
print(zip_command)
print('Running:')
if os.system(zip_command) == 0:
		print('Successful backup to', target)
else:
		print('Backup FAILED')
$ python backup_ver3.py
File "backup_ver3.py", line 39
target = today + os.sep + now + '_' +
                                    ^
SyntaxError: invalid syntax
40、问题-错误修复
import os
import time

# 1. 需要备份的文件与目录将被
# 指定在一个列表中。
# 例如在 Windows 下:
# source = ['"C:\\\\My Documents"', 'C:\\\\Code']
# 又例如在 Mac OS X 与 Linux 下:
source = ['/Users/swa/notes']
# 在这里要注意到我们必须在字符串中使用双引号
# 用以括起其中包含空格的名称。

# 2. 备份文件必须存储在一个
# 主备份目录中
# 例如在 Windows 下:
# target_dir = 'E:\\\\Backup'
# 又例如在 Mac OS X 和 Linux 下:
target_dir = '/Users/swa/backup'
# 要记得将这里的目录地址修改至你将使用的路径

# 如果目标目录还不存在,则进行创建
if not os.path.exists(target_dir):
		os.mkdir(target_dir) # 创建目录

# 3. 备份文件将打包压缩成 zip 文件。
# 4. 将当前日期作为主备份目录下的
# 子目录名称
today = target_dir + os.sep + time.strftime('%Y%m%d')
# 将当前时间作为 zip 文件的文件名
now = time.strftime('%H%M%S')

# 添加一条来自用户的注释以创建
# zip 文件的文件名
comment = input('Enter a comment --> ')
# 检查是否有评论键入
if len(comment) == 0:
		target = today + os.sep + now + '.zip'
else:
		target = today + os.sep + now + '_' + \\
			comment.replace(' ', '_') + '.zip'

# 如果子目录尚不存在则创建一个
if not os.path.exists(today):
		os.mkdir(today)
		print('Successfully created directory', today)

# 5. 我们使用 zip 命令将文件打包成 zip 格式
zip_command = 'zip -r 0 1'.format(target,
																			' '.join(source))

# 运行备份
print('Zip command is:')
print(zip_command)
print('Running:')
if os.system(zip_command) == 0:
		print('Successful backup to', target)
else:
		print('Backup FAILED')
$ python backup_ver4.py
Enter a comment --> added new examples
Zip command is:
zip -r /Users/swa/backup/20140329/074122_added_new_examples.zip /Users/swa/notes
Running:
adding: Users/swa/notes/ (stored 0%)
adding: Users/swa/notes/blah1.txt (stored 0%)
adding: Users/swa/notes/blah2.txt (stored 0%)
adding: Users/swa/notes/blah3.txt (stored 0%)
Successful backup to /Users/swa/backup/20140329/074122_added_new_examples.zip
41、问题-继续改进
第四版程序已经是一份对大多数用户来说都能令人满意地工作运行的脚本了,不过总会有改进的余地在。例如,你可以在程序中添加 -v 选项来指定程序的显示信息的详尽1程度,从而使你的程序可以更具说服力,或者是添加 -q 选项使程序能静默(Quiet)运行。
另一个可以增强的方向是在命令行中允许额外的文件与目录传递到脚本中。我们可以从sys.argv 列表中获得这些名称,然后我们可以通过 list 类提供的 extend 方法把它们添加到我们的 source 列表中.
最重要的改进方向是不使用 os.system 方法来创建归档文件,而是使用 zipfile 或 tarfile 内置的模块来创建它们的归档文件。这些都是标准库的一部分,随时供你在你的电脑上没有 zip 程序作为没有外部依赖的情况下使用这些功能。
不过,在上面的例子中,我一直都在使用 os.system 这种方式作为创建备份的手段,这样就能保证案例对于所有人来说都足够简单同时也确实有用。
你可以试试编写第五版脚本吗?在脚本中使用 zipfile 模块而非 os.system 调用。
42、软件开发流程
1、What/做什么(分析)
2、How/怎么做(设计)
3、Do It/开始做(执行)
4、Test/测试(测试与修复错误)
5、Use/使用(操作或开发)
6、Maintain/维护(改进)
43、面向对象编程(面向高阶读者)
44、self
45、类

46、方法
47、init 方法

48、类变量与对象变量
类变量(Class Variable)是共享的(Shared)——它们可以被属于该类的所有实例访问。 该类变量只拥有一个副本,当任何一个对象对类变量作出改变时,发生的变动将在其它所有实例中都会得到体现。
对象变量(Object variable)由类的每一个独立的对象或实例所拥有。在这种情况下,每个对象都拥有属于它自己的字段的副本,也就是说,它们不会被共享,也不会以任何方式与其它不同实例中的相同名称的字段产生关联。
# coding=UTF-8
class Robot:
		"""表示有一个带有名字的机器人。"""
# 一个类变量,用来计数机器人的数量
population = 0

def __init__(self, name):
		"""初始化数据"""
		self.name = name
		print("(Initializing )".format(self.name))

		# 当有人被创建时,机器人
		# 将会增加人口数量
		Robot.population += 1

def die(self):
		"""我挂了。"""
		print(" is being destroyed!".format(self.name))

		Robot.population -= 1

		if Robot.population == 0:
				print(" was the last one.".format(self.name))
		else:
				print("There are still :d robots working.".format(
							Robot.population))

def say_hi(self):
		"""来自机器人的诚挚问候
		没问题,你做得到。"""
		print("Greetings, my masters call me .".format(self.name))

@classmethod
def how_many(cls):
		"""打印出当前的人口数量"""
		print("We have :d robots.".format(cls.population))

droid1 = Robot("R2-D2")
droid1.say_hi()
Robot.how_many()

droid2 = Robot("C-3PO")
droid2.say_hi()
Robot.how_many()

print("\\nRobots can do some work here.\\n")
print("Robots have finished their work. So let's destroy them.")
droid1.die()
droid2.die()

Robot.how_many()
(Initializing R2-D2)
Greetings, my masters call me R2-D2.
We have 1 robots.
(Initializing C-3PO)
Greetings, my masters call me C-3PO.
We have 2 robots.

Robots can do some work here.

Robots have finished their work. So let's destroy them.
R2-D2 is being destroyed!
There are still 1 robots working.
C-3PO is being destroyed!
C-3PO was the last one.
We have 0 robots.
49、继承
面向对象编程的一大优点是对代码的重用(Reuse),重用的一种实现方法就是通过继承 (Inheritance)机制。继承最好是想象成在类之间实现类型与子类型(Type and Subtype)关系的工具。
# coding=UTF-8

class SchoolMember:
		'''代表任何学校里的成员。'''
		def __init__(self, name, age):
				self.name = name
				self.age = age
				print('(Initialized SchoolMember: )'.format(self.name))

		def tell(self):
			'''告诉我有关我的细节。'''
			print('Name:"" Age:""'.format(self.name, self.age), end=" ")

class Teacher(SchoolMember):
		'''代表一位老师。'''
		def __init__(self, name, age, salary):
  			SchoolMember.__init__(self, name, age)
  			self.salary = salary
  			print('(Initialized Teacher: )'.format(self.name))

		def tell(self):
  			SchoolMember.tell(self)
  			print('Salary: ":d"'.format(self.salary))

class Student(SchoolMember):
  	'''代表一位学生。'''
		def __init__(self, name, age, marks):
				SchoolMember.__init__(self, name, age)
				self.marks = marks
				print('(Initialized Student: )'.format(self.name))
		def tell(self):
				SchoolMember.tell(self)
				print('Marks: ":d"'.format(self.marks))

t = Teacher('Mrs. Shrividya', 40, 30000)
s = Student('Swaroop', 25, 75)

# 打印一行空白行
print()

members = [t, s]
for member in members:
		# 对全体师生工作
		member.tell()
$ python oop_subclass.py
(Initialized SchoolMember: Mrs. Shrividya)
(Initialized Teacher: Mrs. Shrividya)
(Initialized SchoolMember: Swaroop)
(Initialized Student: Swaroop)

Name:"Mrs. Shrividya" Age:"40" Salary: "30000"
Name:"Swaroop" Age:"25" Marks: "75"
50、输入与输出
def reverse(text):
		return text[::-1]

def is_palindrome(text):
		return text == reverse(text)

something = input("Enter text: ")
if is_palindrome(something):
		print("Yes, it is a palindrome")
else:
		print("No, it is not a palindrome")

$ python3 io_input.py
Enter text: sir
No, it is not a palindrome
$ python3 io_input.py
Enter text: madam
Yes, it is a palindrome
$ python3 io_input.py
Enter text: racecar
Yes, it is a palindrome
51、文件
你可以通过创建一个属于 file 类的对象并适当使用它的 read 、 readline 、 write 方法来打开或使用文件,并对它们进行读取或写入。读取或写入文件的能力取决于你指定以何种方式打开文件。最后,当你完成了文件,你可以调用 close 方法来告诉 Python 我们已经完成了对该文件的使用。
poem = '''\\
Programming is fun
When the work is done
if you wanna make your work also fun:
use Python!
'''

# 打开文件以编辑('w'riting)
f = open('poem.txt', 'w')
# 向文件中编写文本
f.write(poem)
# 关闭文件
f.close()

# 如果没有特别指定,
# 将假定启用默认的阅读('r'ead)模式
f = open('poem.txt')
while True:
    line = f.readline()
    # 零长度指示 EOF
    if len(line) == 0:
    break
    # 每行(`line`)的末尾
    # 都已经有了换行符
    #因为它是从一个文件中进行读取的
    print(line, end='')
# 关闭文件
f.close()
$ python3 io_using_file.py
Programming is fun
When the work is done
if you wanna make your work also fun:
use Python!
52、Pickle
Python 提供了一个叫作 Pickle 的标准模块,通过它你可以将任何纯 Python 对象存储到一个文件中,并在稍后将其取回。这叫作持久地(Persistently)存储对象。
import pickle

# The name of the file where we will store the object
shoplistfile = 'shoplist.data'
# The list of things to buy
shoplist = ['apple', 'mango', 'carrot']

# Write to the file
f = open(shoplistfile, 'wb')
# Dump the object to a file
pickle.dump(shoplist, f)
f.close()

# Destroy the shoplist variable
del shoplist

# Read back from the storage
f = open(shoplistfile, 'rb')
# Load the object from the file
storedlist = pickle.load(f)
print(storedlist)

$ python io_pickle.py
['apple', 'mango', 'carrot']
要想将一个对象存储到一个文件中,我们首先需要通过 open 以写入(write)二进制 (binary)模式打开文件,然后调用 pickle 模块的 dump 函数。这一过程被称作封装 (Pickling)。 接着,我们通过 pickle 模块的 load 函数接收返回的对象。这个过程被称作拆封(Unpickling)。
53、Unicode
# encoding=utf-8
import io

f = io.open("abc.txt", "wt", encoding="utf-8")
f.write(u"Imagine non-English language here")
f.close()

text = io.open("abc.txt", encoding="utf-8").read()
print(text)
54、错误异常
>>> Print("Hello World")
Traceback (most recent call last):
File "<stdin>", line 1, in <module>
NameError: name 'Print' is not defined
>>> print("Hello World")
Hello World
>>> s = input('Enter something --> ')
Enter something --> Traceback (most recent call last):
File "<stdin>", line 1, in <module>
EOFError
55、处理异常
try:
		text = input('Enter something --> ')
except EOFError:
		print('Why did you do an EOF on me?')
except KeyboardInterrupt:
		print('You cancelled the operation.')
else:
		print('You entered '.format(text))
# Press ctrl + d
$ python exceptions_handle.py
Enter something --> Why did you do an EOF on me?

# Press ctrl + c
$ python exceptions_handle.py
Enter something --> ^CYou cancelled the operation.

$ python exceptions_handle.py
Enter something --> No exceptions
You entered No exceptions
56、抛出异常
你可以通过 raise 语句来引发一次异常,具体方法是提供错误名或异常名以及要抛出 (Thrown)异常的对象。 你能够引发的错误或异常必须是直接或间接从属于 Exception (异常) 类的派生类。
# encoding=UTF-8
class ShortInputException(Exception):
    '''一个由用户定义的异常类'''
    def __init__(self, length, atleast):
        Exception.__init__(self)
        self.length = length
        self.atleast = atleast

try:
		text = input('Enter something --> ')
		if len(text) < 3:
				raise ShortInputException(len(text), 3)
		# 其他工作能在此处继续正常运行
except EOFError:
		print('Why did you do an EOF on me?')
except ShortInputException as ex:
		print(('ShortInputException: The input was ' +
					'0 long, expected at least 1')
					.format(ex.length, ex.atleast))
else:
		print('No exception was raised.')
$ python exceptions_raise.py
Enter something --> a
ShortInputException: The input was 1 long, expected at least 3

$ python exceptions_raise.py
Enter something --> abc
No exception was raised.
57、Try … Finally
import sys
import time

f = None
try:
    f = open("poem.txt")
    # 我们常用的文件阅读风格
    while True:
        line = f.readline()
        if len(line) == 0:
        		break
        print(line, end='')
        sys.stdout.flush()
        print("Press ctrl+c now")
        # 为了确保它能运行一段时间
        time.sleep(2)
        except IOError:
        print("Could not find file poem.txt")
except KeyboardInterrupt:
		print("!! You cancelled the reading from the file.")
finally:
		if f:
				f.close()
		print("(Cleaning up: Closed the file)")
$ python exceptions_finally.py
Programming is fun
Press ctrl+c now
^C!! You cancelled the reading from the file.
(Cleaning up: Closed the file)
58、with 语句
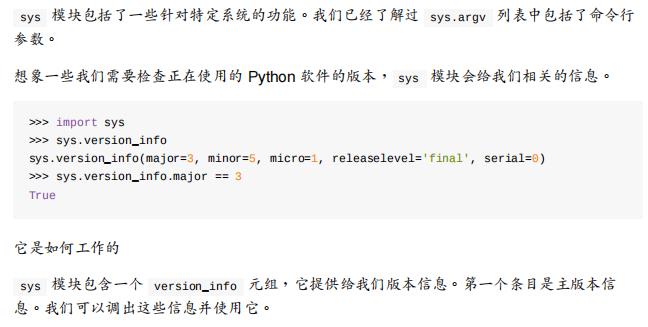
59、sys 模块
60、日志模块
如果你想将一些调试(Debugging)信息或一些重要的信息储存在某个地方,以便你可以检查你的程序是否如你所期望那般运行,应该怎么做?你应该如何将这些信息“储存在某个地方”?这可以通过 logging 模块来实现。
import os
import platform
import logging

if platform.platform().startswith('Windows'):
		logging_file = os.path.join(os.getenv('HOMEDRIVE'),
									os.getenv('HOMEPATH'),
									'test.log')
else:
		logging_file = os.path.join(os.getenv('HOME'),
																'test.log')

print("Logging to", logging_file)

logging.basicConfig(
	level=logging.DEBUG,
	format='%(asctime)s : %(levelname)s : %(message)s',
	filename=logging_file,
	filemode='w',
)

logging.debug("Start of the program")
logging.info("Doing something")
logging.warning("Dying now")
$ python stdlib_logging.py
Logging to /Users/swa/test.log

$ cat /Users/swa/test.log
2014-03-29 09:27:36,660 : DEBUG : Start of the program
2014-03-29 09:27:36,660 : INFO : Doing something
2014-03-29 09:27:36,660 : WARNING : Dying now
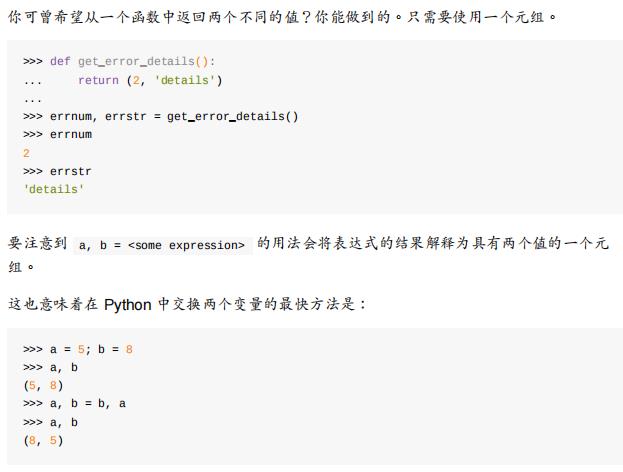
61、更多-传递元组
62、更多-特殊方法

63、更多-单语句块
64、更多-Lambda 表格

65、更多-列表推导
66、更多-在函数中接收元组与字典

67、更多-assert 语句
68、更多-装饰器
装饰器(Decorators)是应用包装函数的快捷方式。这有助于将某一功能与一些代码一遍又一遍地“包装”。举个例子,我为自己创建了一个 retry 装饰器,这样我可以将其运用到任何函数之中,如果在一次运行中抛出了任何错误,它就会尝试重新运行,直到最大次数 5 次,并且每次运行期间都会有一定的延迟。这对于你在对一台远程计算机进行网络调用的情况十分有用。
from time import sleep
from functools import wraps
import logging
logging.basicConfig()
log = logging.getLogger("retry")

def retry(f):
    @wraps(f)
    def wrapped_f(*args, **kwargs):
    		MAX_ATTEMPTS = 5
    		for attempt in range(1, MAX_ATTEMPTS + 1):
    				try:
    						return f(*args, **kwargs)
    				except:
    						log.exception("Attempt %s/%s failed : %s",
    													attempt,
                              MAX_ATTEMPTS,
                              (args, kwargs))
    						sleep(10 * attempt)
    		log.critical("All %s attempts failed : %s",
                    MAX_ATTEMPTS,
                    (args, kwargs))
    return wrapped_f

counter = 0

@retry
def save_to_database(arg):
    print("Write to a database or make a network call or etc.")
    print("This will be automatically retried if exception is thrown.")
    global counter
    counter += 1
    # 这将在第一次调用时抛出异常
    # 在第二次运行时将正常工作(也就是重试)
    if counter < 2:
    		raise ValueError(arg)

if __name__ == '__main__':
		save_to_database("Some bad value")
$ python more_decorator.py
Write to a database or make a network call or etc.
This will be automatically retried if exception is thrown.
ERROR:retry:Attempt 1/5 failed : (('Some bad value',), )
Traceback (most recent call last):
	File "more_decorator.py", line 14, in wrapped_f
		return f(*args, **kwargs)
	File "more_decorator.py", line 39, in save_to_database
		raise ValueError(arg)
ValueError: Some bad value
Write to a database or make a network call or etc.
This will be automatically retried if exception is thrown.
69、迈出下一步
1、编写一款你自己的命令行地址簿程序,你可以用它浏览、添加、编辑、删除或搜索你的 联系人,例如你的朋友、家人、同事,还有他们诸如邮件地址、电话号码等多种信息。 这些详细信息必须被妥善储存以备稍后的检索。
2、创建一个网站,学习使用 Flask 来创建你自己的网站。
3、假设你希望使用 Python 来创建你自己的图形程序。这可以通过采用一个 GUI(Graphical User Interface,图形用户界面)库和它们的 Python 绑定来实现。绑定是允许你用 Python 编写你自己的程序,然后使用它们在 C 或 C++ 或其它语言写编写的库。
70、总结
现在我们已经行至本书末尾,不过,正如人们所说,这是昭示着开始的终结!你现在已经是一名狂热 Python 用户,毫无疑问,你已准备好通过 Python 来解决诸多问题了。你可以开始自动化你的电脑,去做任何你以前难以想象的事情,你可以开始编写你自己的游戏,开始做更多更多的事,远不仅此。来,让我们出发吧!
以上是关于简明 Python 教程的主要内容,如果未能解决你的问题,请参考以下文章