OpenGL入门01.使用OpenGL绘制一个点
Posted stq_wyy
tags:
篇首语:本文由小常识网(cha138.com)小编为大家整理,主要介绍了OpenGL入门01.使用OpenGL绘制一个点相关的知识,希望对你有一定的参考价值。
做Unity时间久了,越发觉得仅依赖Unity引擎开发,以后的路会越来越窄,所以笔者打算自己动手做引擎了,提升自己对引擎底层的认识,同时也拓宽自己的职业发展道路。让我们先从OpenGL开始。打算OpenGL分成三个部分学习。文章作为自己的学习笔记进行分享,如有错误,也欢迎大佬指点~
我们在Windows平台下,不依赖现有的一些库,使用Visual Studio来进行开发,这里使用的是VS2019的版本,安装了番茄助手。有需要的可以去下载一下。首先,我们使用vs创建一个空工程。然后添加一个main.cpp文件和ggl.h文件。
main.cpp:
#include "ggl.h"
#pragma comment(lib,"opengl32.lib")
#pragma comment(lib,"glu32.lib")

//监听用户操作
LRESULT CALLBACK GLWindowProc(HWND hwnd, UINT msg, WPARAM wParam, LPARAM IParam)

	switch (msg)

        //用户关闭窗口
		case WM_CLOSE:
			PostQuitMessage(0);
			return 0;

    //返回系统默认处理函数
	return DefWindowProc(hwnd, msg, wParam, IParam);

INT WINAPI WinMain(HINSTANCE hInstance, HINSTANCE hPrevInstance, LPSTR lpCmdLine, int nShowCmd)

	//注册窗口
	WNDCLASSEX wndclass;
	wndclass.cbClsExtra = 0;
	wndclass.cbSize = sizeof(WNDCLASSEX);
	wndclass.cbWndExtra = 0;
	wndclass.hbrBackground = NULL;
	wndclass.hCursor = LoadCursor(NULL, IDC_ARROW);
	wndclass.hIcon = NULL;
	wndclass.hIconSm = NULL;
	wndclass.hInstance = hInstance;
	wndclass.lpfnWndProc = GLWindowProc;
	wndclass.lpszClassName = L"GLWindow";
	wndclass.lpszMenuName = NULL;
	wndclass.style = CS_VREDRAW | CS_HREDRAW;
	ATOM atom = RegisterClassEx(&wndclass);
	if (!atom)

		MessageBox(NULL,L"Register Fail",L"Error",MB_OK);
		return 0;

	//设置窗口的视口大小
	RECT rect;
	rect.left = 0;
	rect.right = 800;
	rect.top = 0;
	rect.bottom = 600;
	AdjustWindowRect(&rect, WS_OVERLAPPEDWINDOW, NULL);
	int windowWidth = rect.right - rect.left;
	int windiwHeight = rect.bottom - rect.top;

	//创建窗口
	HWND hwnd = CreateWindowEx(NULL, L"GLWindow", L"OpenGL Window", WS_OVERLAPPEDWINDOW,
		100, 100, windowWidth, windiwHeight,
		NULL, NULL, hInstance, NULL);

	//搭建OpenGL渲染环境---------------------------
	HDC dc = GetDC(hwnd);
	PIXELFORMATDESCRIPTOR pfd;
	memset(&pfd, 0, sizeof(PIXELFORMATDESCRIPTOR));
	pfd.nVersion = 1;
	pfd.nSize = sizeof(PIXELFORMATDESCRIPTOR);
	pfd.cColorBits = 32;//RGBA每个通道8bit
	pfd.cDepthBits = 24;//深度缓冲区
	pfd.cStencilBits = 8;//模板缓冲区
	pfd.iPixelType = PFD_TYPE_RGBA;//像素格式
	pfd.dwFlags = PFD_DRAW_TO_WINDOW | PFD_SUPPORT_OPENGL | PFD_DOUBLEBUFFER;

    //选取像素格式
	int pixelFormat = ChoosePixelFormat(dc, &pfd);
    //设置像素格式
	SetPixelFormat(dc, pixelFormat, &pfd);

    //创建OpenGL渲染环境
	HGLRC rc = wglCreateContext(dc);
    //使渲染环境生效
	wglMakeCurrent(dc, rc);

	//选中投影矩阵
	glMatrixMode(GL_PROJECTION);

	//给投影矩阵赋值,垂直方向视角,宽高比,最近看到距离,最远看到距离
	gluPerspective(50.0f, 800.0f / 600.0f, 0.1f, 1000.0f);

    //切换到模型视口矩阵
	glMatrixMode(GL_MODELVIEW);

    //加载单位矩阵
	glLoadIdentity();

    //设置视口背景颜色
	glClearColor(0.1, 0.4, 0.6, 1.0);

    //显示窗口
	ShowWindow(hwnd, SW_SHOW);
	UpdateWindow(hwnd);
	//让窗口一直存在
	MSG msg;
	while (true)

		if (PeekMessage(&msg, NULL, NULL, NULL, PM_REMOVE))

			if (msg.message == WM_QUIT)

				break;

			TranslateMessage(&msg);
			DispatchMessage(&msg);


		glClear(GL_COLOR_BUFFER_BIT);

        //设置颜色
        glColor4ub(255, 255, 255, 255);

        //设置点的大小
		glPointSize(20.0f);
		//开始绘制
		glBegin(GL_POINTS);

        //设置点的位置
		glVertex3f(0.0f, 0.0f, -0.5f);

		//结束绘制
		glEnd();
        //交换OpenGL前后两个缓冲区
		SwapBuffers(dc);

	return 0;
ggl.h:
#pragma once
#include <windows.h>
#include <gl/gl.h>
#include <gl/glu.h>
#define GL_CLAMP_TO_EDGE 0x812F
#include <stdio.h>
#include <math.h>
#include <string.h>
#include <string>
#include <sstream>
#include <vector>
#include <functional>
ggl.h中就是引用了一些头文件。
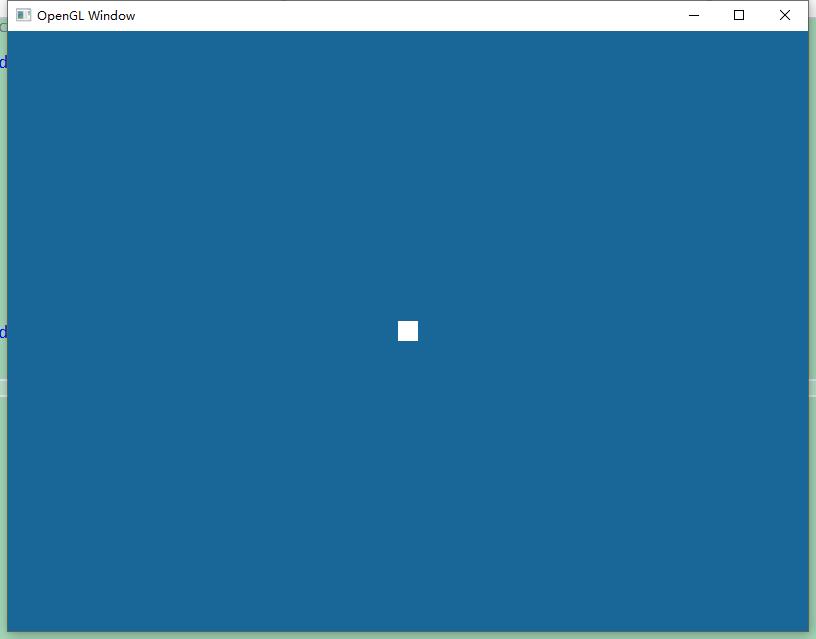
至次,一个点就绘制在屏幕上了。

以上是关于OpenGL入门01.使用OpenGL绘制一个点的主要内容,如果未能解决你的问题,请参考以下文章