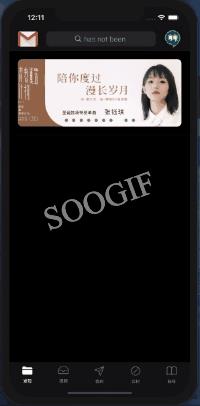
使用 UICollectionView 实现首页卡片轮播效果
Posted HelloWord杰少
tags:
篇首语:本文由小常识网(cha138.com)小编为大家整理,主要介绍了使用 UICollectionView 实现首页卡片轮播效果相关的知识,希望对你有一定的参考价值。
本文同步发表于我的微信公众号,扫一扫文章底部的二维码或在微信搜索
HelloWorld杰少 即可关注。
前言
今天跟大家来聊聊一个强大的 UI 控件: UICollectionView。UICollectionView 是 ios6 之后引入的一个新的 UI 控件,与 UITableView 有着很多相似的地方,在开发过程中我们都会选择使用它们俩来为 App 的整个页面进行布局,比如说淘宝的首页;相比 UITbleView,UICollectionView 的功能比它要强大的多,它支持水平与垂直俩种方向的布局,开发者可以完全自定义一套 layout 布局方案,实现出意想不到的效果。
废话不多说,接下来,咱就步入正题吧!如何使用 UICollectionView 实现网易云首页卡片轮播效果。

思路分析
通过观察上面的图我们可以得出,这个网易云的轮播控件有三个特点,分别是:
- 支持图片手动横向滚动
- 支持图片自动的滚动播放
- 底部的分页控件会高亮显示出当前的图片是哪一张
好了,既然已经分析出来了它的特点,那接下来就进入到编程环节吧!
JUST DO IT
想到滚动,大家首先想到的肯定是用 UIScrollView + UIImageView 的方式来实现,但是 UICollectionView 给我们提供了更好的选择,因为它本身继承自 UIScrollView 然后又支持横向滚动,所以使用 UICollectionView 来实现横向滚动效果是最好不过的。
代码片段如下:
    // 布局
    private var collectionViewFlowLayout: UICollectionViewFlowLayout!

    // collection
    private var collectionView: UICollectionView!

    // 构建 UI
    private func configUI()
        collectionViewFlowLayout = UICollectionViewFlowLayout()
        collectionViewFlowLayout.scrollDirection = .horizontal
        collectionViewFlowLayout.minimumLineSpacing = 0
        collectionViewFlowLayout.minimumInteritemSpacing = 0
        collectionViewFlowLayout.sectionInset = UIEdgeInsets.zero
        collectionViewFlowLayout.itemSize = CGSize(width: self.frame.size.width, height: self.frame.size.height)

        collectionView = UICollectionView(frame: CGRect(x: 0, y: 0, width: self.frame.size.width, height: self.frame.size.height), collectionViewLayout: collectionViewFlowLayout)
        collectionView.register(JJNewsImageViewCell.self, forCellWithReuseIdentifier: JJScrollBannerCellID)
        collectionView.isPagingEnabled = true
        collectionView.showsVerticalScrollIndicator = false
        collectionView.showsHorizontalScrollIndicator = false
        collectionView.delegate = self
        collectionView.dataSource = self
        collectionView.backgroundColor = UIColor.clear
        self.addSubview(collectionView)


    // MARK: - UICollectionViewDelegate, UICollectionViewDataSource
extension JJNewsBanner :UICollectionViewDelegate, UICollectionViewDataSource

    func collectionView(_ collectionView: UICollectionView, numberOfItemsInSection section: Int) -> Int
        return self.totalItemCount


    func collectionView(_ collectionView: UICollectionView, cellForItemAt indexPath: IndexPath) -> UICollectionViewCell
        if self.imageUrlStrArray != nil
            let cell = collectionView.dequeueReusableCell(withReuseIdentifier: JJScrollBannerCellID, for: indexPath) as! JJNewsImageViewCell
            cell.setupUI(imageName: nil, imageUrl: (self.imageUrlStrArray != nil ? self.imageUrlStrArray![indexPath.row].pic : nil), placeholderImage: self.placeholderImage, contentMode: self.myContentMode)
            return cell
         else
            let cell = collectionView.dequeueReusableCell(withReuseIdentifier: JJScrollBannerCellID, for: indexPath)
            return cell


    func collectionView(_ collectionView: UICollectionView, didSelectItemAt indexPath: IndexPath)
        if self.itemDidClickedBlock != nil
            self.itemDidClickedBlock!(indexPath.row % self.sourceCount)
然后,支持图片的自动播放与分页控件高亮就比较简单了,我们可以使用定时器 Timer 与 UIPageController 控件来实现。
代码片段如下:
    // 定时器
    private var scrollTimer: Timer?

    // 是否自动轮播
    public var autoScroll = true
        didSet
            self.invalidateTimer()
            if autoScroll
                self.setupTimer()


    // 轮播时间间隔
    public var autoScrollTimeInterval: TimeInterval = 2.0
        didSet
            self.invalidateTimer()
            if autoScrollTimeInterval > 0
                self.setupTimer()


    // 分页控件
    private var pageControl: UIPageControl?

    // 轮播次数
    private var loopTimes = 100

      // 分页控件位置
    public var pageControlAliment: PageControlAligment = .center

    // 分页控件类型
    public var pageControlType: PageControlType = .classic

    // 当前分页控件颜色
    public var currentPageDotColor = UIColor.white

    // 默认分页控件颜色
    public var pageDotColor = UIColor.gray

    // 分页控件默认距离的边距
    public var pageControlMargin: CGFloat = 10

    // 分页控件大小,注意:当PageControlType不等于自定义类型时,只能影响当前分页控件的大小,不能影响分页控件原点的大小
    public var pageControlDotSize: CGSize = CGSize(width: 10, height: 10)


    // 设置定时器
    public func setupTimer()
        self.invalidateTimer()

        if self.autoScroll
            self.scrollTimer = Timer.scheduledTimer(timeInterval: self.autoScrollTimeInterval, target: self, selector: #selector(automaticScroll), userInfo: nil, repeats: true)
            RunLoop.main.add(self.scrollTimer!, forMode: .common)


    // 使定时器失效
    public func invalidateTimer()
        if self.scrollTimer != nil
            self.scrollTimer?.invalidate()
            self.scrollTimer = nil


    @objc private func automaticScroll()
        if self.totalItemCount == 0
            return


        var targetIndex = self.currentIndex() + 1
        self.scrollToIndex(targetIndex: &targetIndex)
到这里这个轮播控件的功能已经初步完成了,但是如果要正式在 app 中使用,并且达到很好的用户体验还是有很大的优化空间的。
首先第一点,我们要对 UIPageControl 的样式进行调整,加上约束,并提供一个获取当前页索引的接口,代码如下:
extension JJNewsBanner

    override func layoutSubviews()
        super.layoutSubviews()

        if self.collectionView.contentOffset.x == 0 && self.totalItemCount > 0
            var targetIndex = 0
            if self.loopTimes > 0
                targetIndex = 0

            if self.collectionView.numberOfItems(inSection: 0) == self.totalItemCount && self.loopTimes > 1
                self.startScrollToItem(targetIndex: targetIndex, animated: false)


        if self.pageControl != nil
            var pSize: CGSize = CGSize(width: 0, height: 0)
            if self.pageControl!.isKind(of: UIPageControl.self)
                pSize = CGSize(width: CGFloat(self.sourceCount) * self.pageControlDotSize.width, height: self.pageControlDotSize.height)


            let pX: CGFloat = 0
            let pY = self.frame.height - margin - pSize.height - pageControlMargin

            let pageControlFrame = CGRect(x: pX, y: pY, width: self.frame.width, height: pSize.height)
            self.pageControl!.frame = pageControlFrame

            if #available(iOS 14.0, *)
                self.pageControl?.backgroundStyle = .automatic


    // 设置滚动分页控件
    private func setupPageControl()
        if self.imageUrlStrArray == nil
            return

        if self.pageControl != nil
            self.pageControl?.removeFromSuperview()


        switch self.pageControlType
        case .none:
            self.pageControl = nil
        case .classic:
            let tmpPageControl = UIPageControl()
            tmpPageControl.numberOfPages = self.sourceCount
            tmpPageControl.currentPageIndicatorTintColor = self.currentPageDotColor
            tmpPageControl.pageIndicatorTintColor = self.pageDotColor
            tmpPageControl.isUserInteractionEnabled = false
            tmpPageControl.currentPage = self.pageControlIndex(cellIndex: self.currentIndex())
            self.addSubview(tmpPageControl)
            self.pageControl = tmpPageControl
        case .custom:
            self.pageControl = nil


    // 页转换
    private func pageControlIndex(cellIndex: Int) -> Int
        if self.sourceCount > 0
            return cellIndex % self.sourceCount
         else
            return 0


    // 当前页面索引
    private func currentIndex() -> Int
        if collectionView.frame.width == 0 || collectionView.frame.height == 0
            return 0


        var index = 0
        index = Int((self.collectionView.contentOffset.x + self.collectionViewFlowLayout.itemSize.width * 0.5) / self.collectionViewFlowLayout.itemSize.width)

        return max(0, index)
第二点,由于这个轮播图滚动支持手动滚动与自动滚动俩种方式,所以要加上控制的逻辑,当我们手动滚动查看图片的时候,定时器就失效,当我们手势拖拽动画结束的时候再重新开启定时器,实现代码如下:
    override func willMove(toSuperview newSuperview: UIView?)

        if newSuperview == nil
            self.invalidateTimer()


    // 拖拽动画开始
    public func scrollViewWillBeginDragging(_ scrollView: UIScrollView)
        self.invalidateTimer()


    // 拖拽动画停止
    public func scrollViewDidEndDragging(_ scrollView: UIScrollView, willDecelerate decelerate: Bool)
        self.setupTimer()
对以上俩点进行优化处理后,我们的轮播控件就否就可以披挂上阵了呢!万事具备,只欠东风啊(数据),最后还得给轮播控件提供一个对外的数据加载接口,代码如下:
 // 网络图片URL
    private var imageUrlStrArray: [BannerModel]?
        didSet
            self.collectionView.reloadData()
            self.setupPageControl()
            self.invalidateTimer()

            if autoScroll
                self.setupTimer()


            self.layoutIfNeeded()


    // 更新 UI
    public func updateUI(imageUrlStrArray: [AnyObject]?, placeholderImage: UIImage?)

        self.imageUrlStrArray = imageUrlStrArray as? [BannerModel]
        self.placeholderImage = placeholderImage
结尾
今天文章的到这里就结束了,内容相对来说比较简单,里面阐述的文字部分比较少,代码比较多(比较乱),有的同学可能看的不是很明白,那是因为我展示的代码只是局部的代码片段,主要是想给大家简单的讲述一下我的实现思路,因为代码太多,对于大家的阅读体验是非常不好的,所以我打算在最下方留下代码的链接,如果大家感兴趣的话,可以直接通过这个链接去获取全部代码,最后看一下实现后的效果吧!

全部代码链接:
https://github.com/ShenJieSuzhou/SwiftScrollBanner
相关阅读:
UE4 如何实现与 iOS 原生之间的数据交互
UE4 开发之如何创建 iOS 平台插件
UE4 开发之实现按钮事件响应
UE4 开发之配置 Xcode 调试环境
关注我的技术公众号,获取优质技术文章。
微信扫一扫下方二维码即可关注:
以上是关于使用 UICollectionView 实现首页卡片轮播效果的主要内容,如果未能解决你的问题,请参考以下文章
