python邮箱自动发送
Posted _WILLPOWER_
tags:
篇首语:本文由小常识网(cha138.com)小编为大家整理,主要介绍了python邮箱自动发送相关的知识,希望对你有一定的参考价值。
文章目录
key.ahk
^2::
path := Explorer_GetPath()
all := Explorer_GetAll()
sel := Explorer_GetSelected()
run "./main.exe" "%sel%" 1
return

^3::
Send ^c
if(clipboard="")

	run "./main.exe" "./tmp.jpg" 3

else

	run "./main.exe" "%clipboard%" 2

return
Explorer_GetPath(hwnd="")

	if !(window := Explorer_GetWindow(hwnd))
		return ErrorLevel := "ERROR"
	if (window="desktop")
		return A_Desktop
	path := window.LocationURL
	path := RegExReplace(path, "ftp://.*@","ftp://")
	StringReplace, path, path, file:///
	StringReplace, path, path, /, \\, All

	; thanks to polyethene
	Loop
		If RegExMatch(path, "i)(?<=%)[\\da-f]1,2", hex)
			StringReplace, path, path, `%%hex%, % Chr("0x" . hex), All
		Else Break
	return path

Explorer_GetAll(hwnd="")

	return Explorer_Get(hwnd)

Explorer_GetSelected(hwnd="")

	return Explorer_Get(hwnd,true)


Explorer_GetWindow(hwnd="")

	; thanks to jethrow for some pointers here
    WinGet, process, processName, % "ahk_id" hwnd := hwnd? hwnd:WinExist("A")
    WinGetClass class, ahk_id %hwnd%

	if (process!="explorer.exe")
		return
	if (class ~= "(Cabinet|Explore)WClass")

		for window in ComObjCreate("Shell.Application").Windows
			if (window.hwnd==hwnd)
				return window

	else if (class ~= "Progman|WorkerW")
		return "desktop" ; desktop found

Explorer_Get(hwnd="",selection=false)

	if !(window := Explorer_GetWindow(hwnd))
		return ErrorLevel := "ERROR"
	if (window="desktop")

		ControlGet, hwWindow, HWND,, SysListView321, ahk_class Progman
		if !hwWindow ; #D mode
			ControlGet, hwWindow, HWND,, SysListView321, A
		ControlGet, files, List, % ( selection ? "Selected":"") "Col1",,ahk_id %hwWindow%
		base := SubStr(A_Desktop,0,1)=="\\" ? SubStr(A_Desktop,1,-1) : A_Desktop
		Loop, Parse, files, `n, `r

			path := base "\\" A_LoopField
			IfExist %path% ; ignore special icons like Computer (at least for now)
				ret .= path "`n"


	else

		if selection
			collection := window.document.SelectedItems
		else
			collection := window.document.Folder.Items
		for item in collection
			ret .= item.path "`n"

	return Trim(ret,"`n")
config.json
    "send": "1152679377@qq.com",
    "code": "2222",
    "receive": "2860864024@qq.com"
main.py
# 发送多种类型的邮件
from email.mime.multipart import MIMEMultipart
from email.mime.text import MIMEText
import smtplib
import json
from socket import MsgFlag
from sys import argv
import time
import pathlib
import os
from sys import exit
from PIL import ImageGrab
from numpy import imag

msg_from = '1152679377@qq.com'  # 发送方邮箱
passwd = ' '  # 就是上面的授权码
to = ['2860864024@qq.com']  # 接受方邮箱


# 读取配置文件
def Read_Config(config_Path):
    global msg_from, passwd, to
    with open(config_Path, 'r', encoding='utf-8') as fp:
        json_data = json.load(fp)
        msg_from = json_data['send']
        passwd = json_data['code']
        to = json_data['receive']


if __name__ == '__main__':
    extFileList = ['.pdf', '.doc', '.docx', '.xlsx', '.rtf', '.wps', '.wpt', '.doc', '.dot', '.rtf', '.txt', '.docx', '.dotx', '.docm', '.dotm', '.xml', '.mht', '.mhtml', '.html', '.htm', '.pdf', '.xps', '.odt', '.jpg',
                   '.jpeg', '.jpe', '.png', '.pns', '.et', '.ett', '.xls', '.xlt', '.xlsx', '.xlsm', '.xlsb', '.xlts', '.xltx', '.xltm', '.dpf', '.dps', '.dpt', '.ppt', '.pot', '.pps', '.pptx', '.pptm', '.potx', '.potm', '.ppsx', '.ppsm']
    script, first, second = argv
    # 通过second参数判断是处理文字还是处理处理文件
    # 转化为绝对路径
    if second == '1' or second == '3':
        script = os.path.abspath(script)
        # 获取该文件(1个)
        filepath = first.splitlines(False)[0]
        # print(filepath)
        # 读取配置文件
        Read_Config(os.path.join(os.path.dirname(script), 'config.json'))
        # print(msg_from)
        # print(passwd)
        # print(to)
        # time.sleep(4)
        # exit(1)
        # 判断是否为文件
        if(os.path.isfile(filepath) == False):
            exit(1)
        #判断文件是否为pdf, word以及excel
        extName = pathlib.Path(filepath).suffix
        # print(extName)
        if(extName not in extFileList):
            exit(1)
        if(second == '3'):
            image = ImageGrab.grabclipboard() # 获取剪贴板文件
            image.save('./tmp.jpg')
            filepath = "./tmp.jpg"
        # print(os.path.basename(filepath))
        # time.sleep(4)
        # exit(1)
        # 设置邮件内容
        # MIMEMultipart类可以放任何内容
        msg = MIMEMultipart()
        conntent = "自动发送的文件"
        # 把内容加进去
        msg.attach(MIMEText(conntent, 'plain', 'utf-8'))
        # 添加附件
        att1 = MIMEText(open(filepath, 'rb').read(), 'base64', 'utf-8')  # 打开附件
        att1['Content-Type'] = 'application/octet-stream'  # 设置类型是流媒体格式
        # att1['Content-Disposition'] = 'attachment;filename=%s' % os.path.basename(filepath).encode('utf-8')  # 设置描述信息
        att1.add_header('Content-Disposition', 'attachment',
                        filename=('gbk', '', os.path.basename(filepath)))

        msg.attach(att1)  # 加入到邮件中

        # 设置邮件主题
        msg['Subject'] = "自动发送邮件"

        # 发送方信息
        msg['From'] = msg_from

        # 开始发送

        # 通过SSL方式发送,服务器地址和端口
        s = smtplib.SMTP_SSL("smtp.qq.com", 465)
        # 登录邮箱
        s.login(msg_from, passwd)
        # 开始发送
        s.sendmail(msg_from, to, msg.as_string())
        # print("邮件发送成功")
    elif second == '2':
        Read_Config(os.path.join(os.path.dirname(script), 'config.json'))
        # 设置邮件内容
        # MIMEMultipart类可以放任何内容
        msg = MIMEMultipart()
        conntent = first
        # 把内容加进去
        msg.attach(MIMEText(conntent, 'plain', 'utf-8'))

        # 设置邮件主题
        msg['Subject'] = "自动发送"

        # 发送方信息
        msg['From'] = msg_from

        # 开始发送

        # 通过SSL方式发送,服务器地址和端口
        s = smtplib.SMTP_SSL("smtp.qq.com", 465)
        # 登录邮箱
        s.login(msg_from, passwd)
        # 开始发送
        s.sendmail(msg_from, to, msg.as_string())
使用ctrl+2发送文件管理器选中文件
ctrl+3发送截图或者选中文字
注意
生成文件使用
pyinstaller -w -F main.py
其中-w
截图保存,需要目录下有个tmp.jpg的文件!

要求
首先需要获取自己QQ的授权码
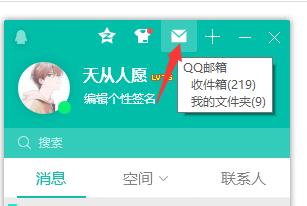
点击QQ,进入邮箱

然后点击左上方设置

点击账户

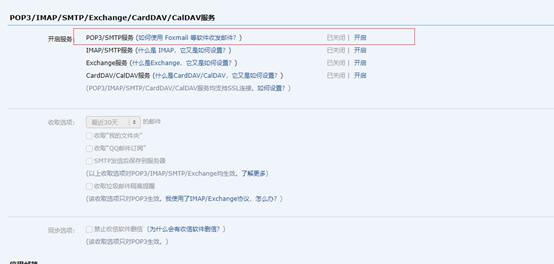
往下拉

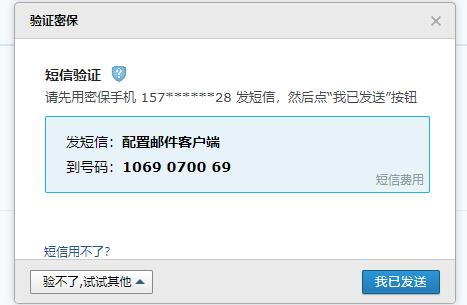
将此项开启,然后会让你验证,最后给你授权码

然后打开config.json文件,右键通过记事本方式打开即可


然后需要安装一个软件

点击安装,安装完成后,直接点击

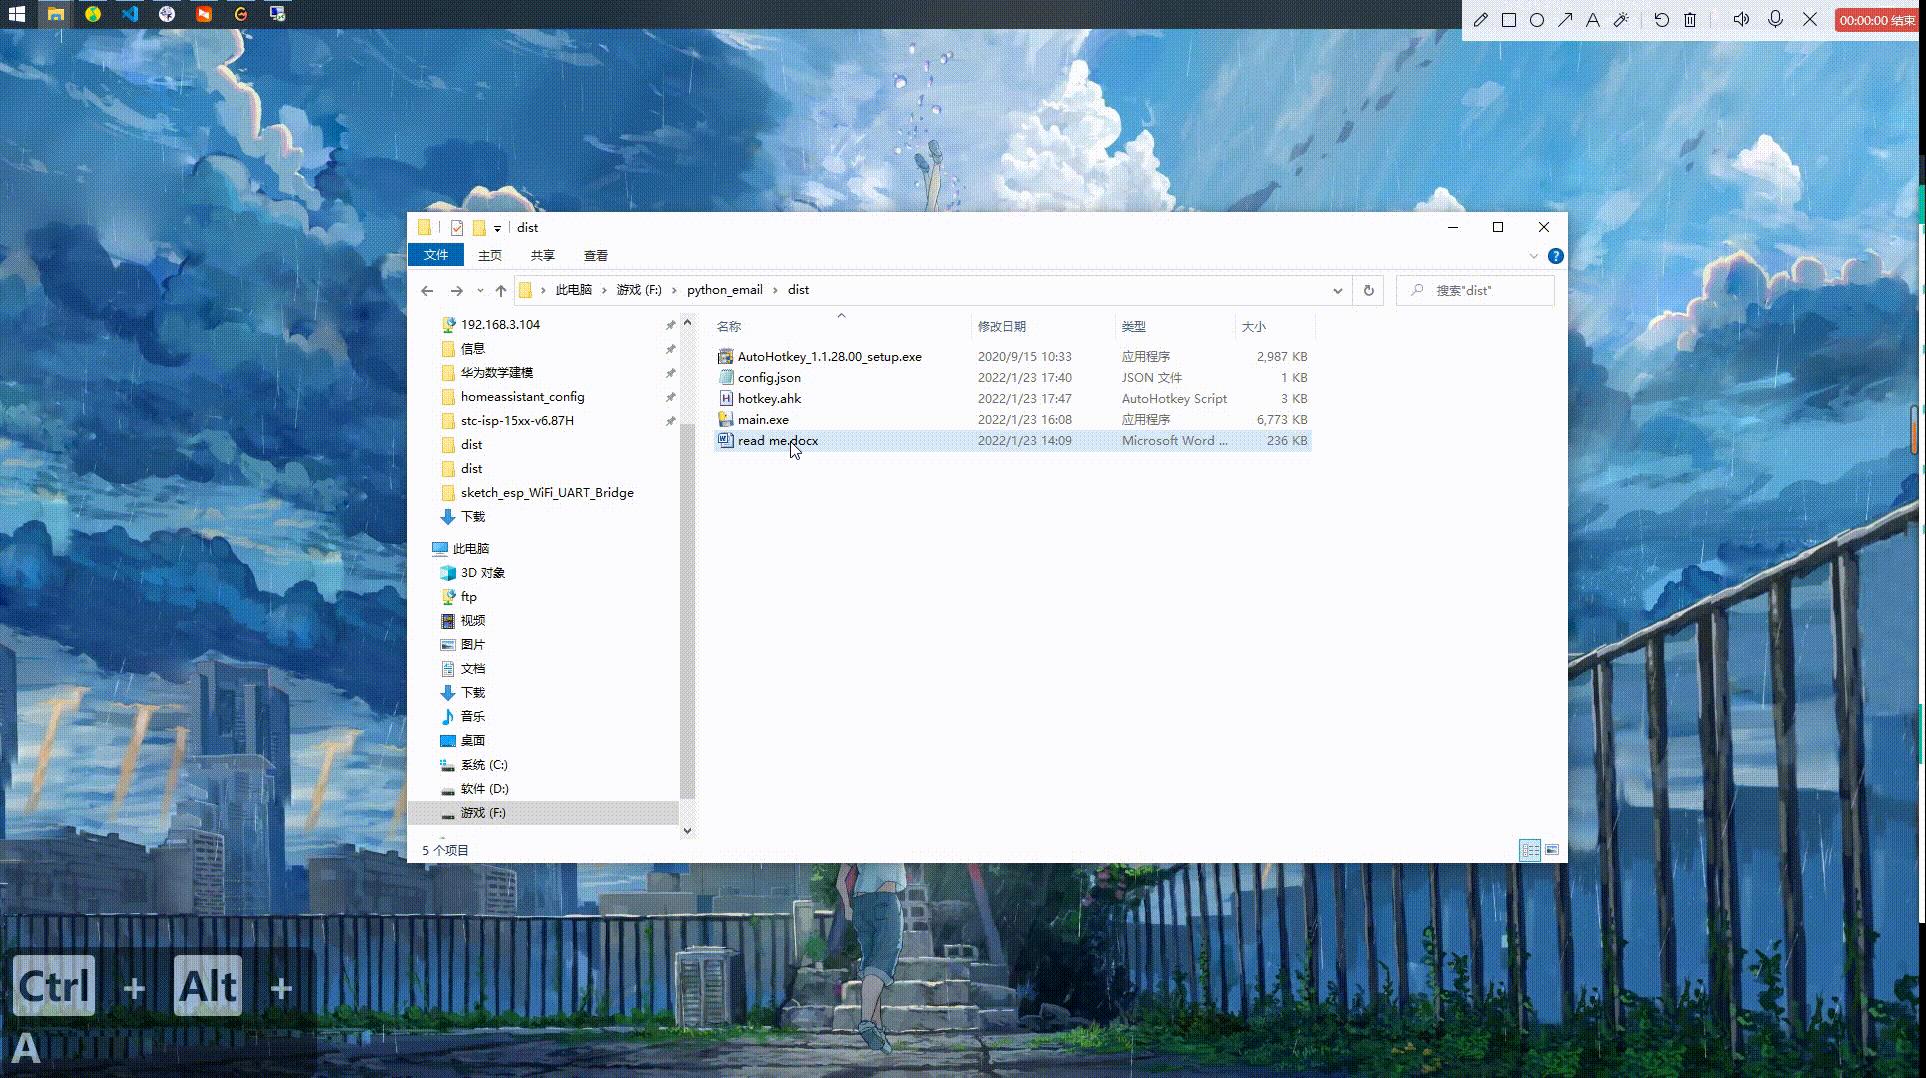
然后,就可以点击想要发送的文件,按下ctrl+3发送.你可以直接用readme.docx试一下
效果

参考链接
以上是关于python邮箱自动发送的主要内容,如果未能解决你的问题,请参考以下文章