SpringBoot+SpringCloud+Nutty打造分布式在线消息推送服务(实例)
Posted Huterox
tags:
篇首语:本文由小常识网(cha138.com)小编为大家整理,主要介绍了SpringBoot+SpringCloud+Nutty打造分布式在线消息推送服务(实例)相关的知识,希望对你有一定的参考价值。
文章目录
前言
其实关于这个的话,我先前的几篇博文:
SpringBoot+Netty+Vue+Websocket实现在线推送/聊天系统
实用水文篇–SpringBoot整合Netty实现消息推送服务器
其实已经说的非常明白了,但是每想到后台还是有人找我要代码,因为完整的代码其实在博文里面都是贴出来了的,当然前面的博文我都是给一个类似于脚手架的东西,没有给出实际的案例。那么今天也是直接给出代码的案例吧,这里再次声明,所有的代码都是在这两篇博文里面有的,如果做了修改在本文当中会给出提示。此外的话,我们的项目是完全开源的,但是在开发阶段不开源,因为有一些铭感信息。在开发完成之后开源,这里请见谅,当然也是为什么我没有办法给出源码的原因(暂时)也是为什么你可以在我的那两篇博文看到完整的代码信息的原因。
Tips:
在我的频道只会告诉你怎么做饭,不会把饭菜做好了再给你,如果需要,那是另外“价格”。
那么废话不多说,我们开始。
技术架构
我们今天来看到我们的一个案例。首先是我们的技术架构:
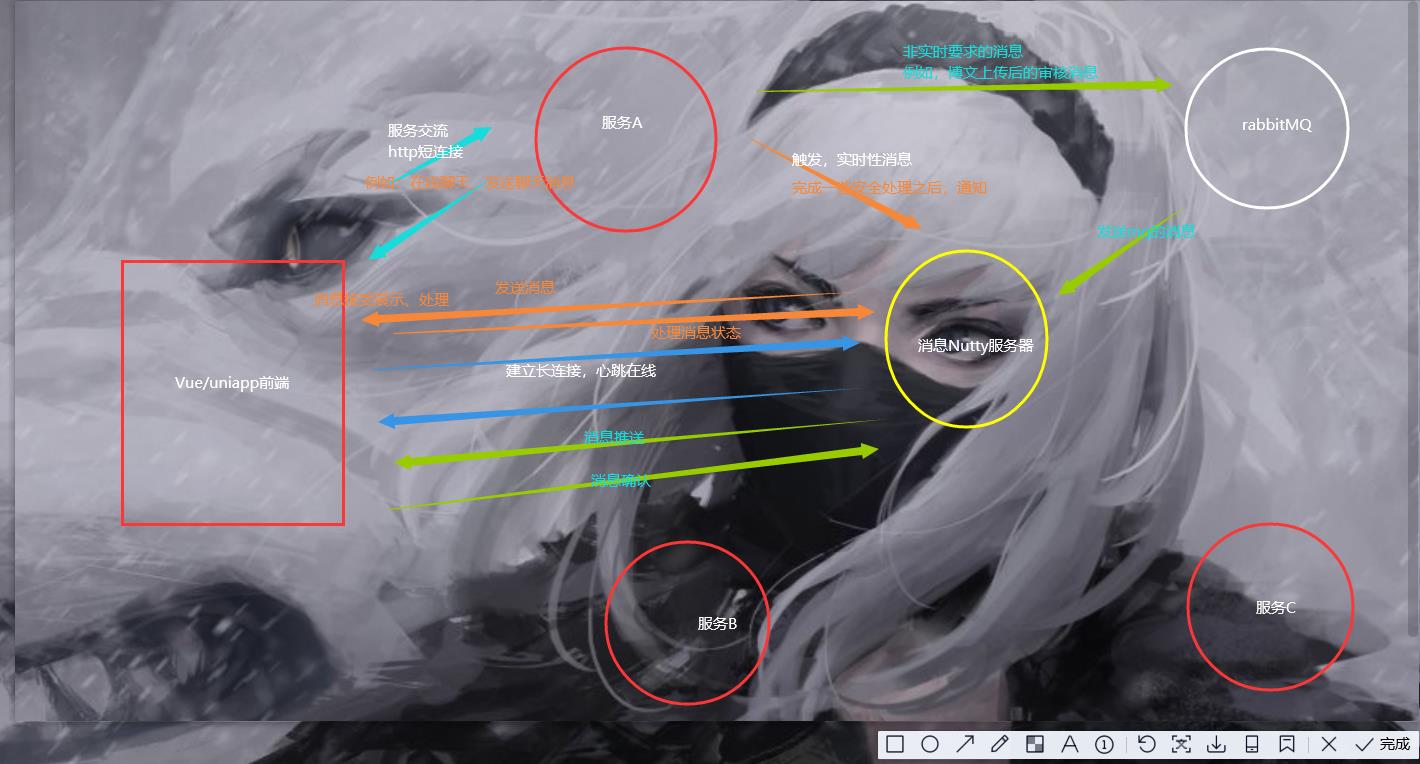
那么在我们今天的话是这样的:
- 用户上传博文
- 博文通过之后发送审核消息给前端
- 前端对消息进行展示
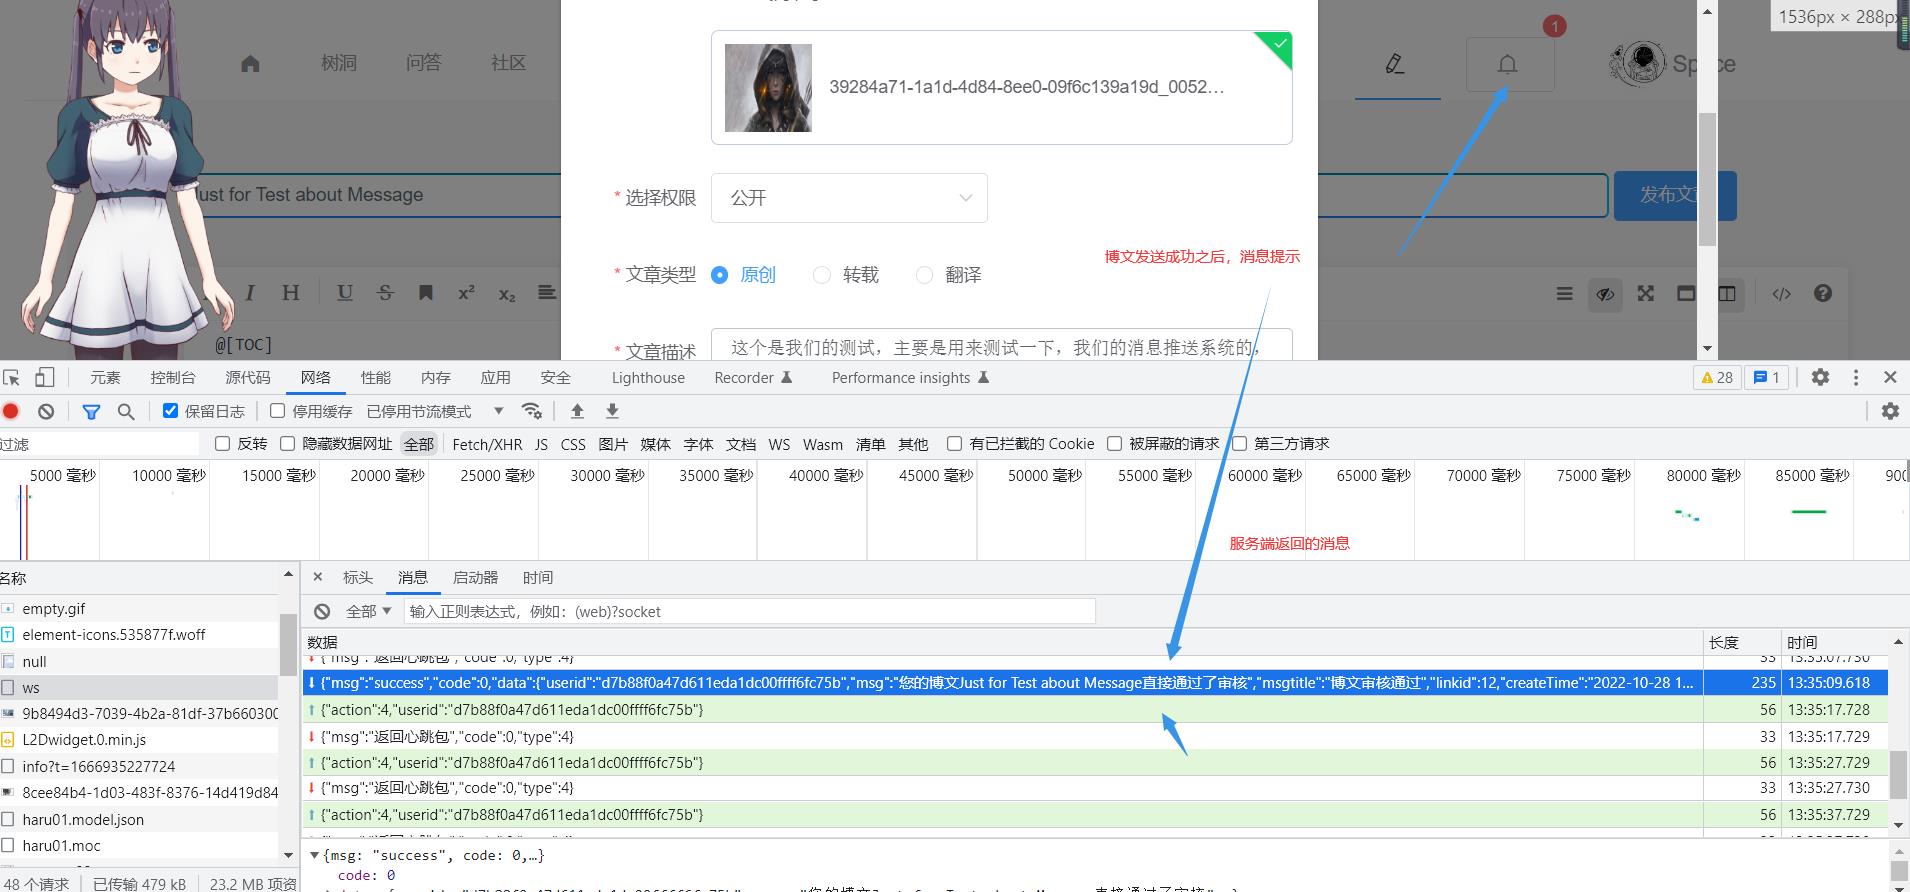
效果图
这个是我们上传博文,博文通过之后会看到消息有个提示。
之后到具体的页面可以看到消息
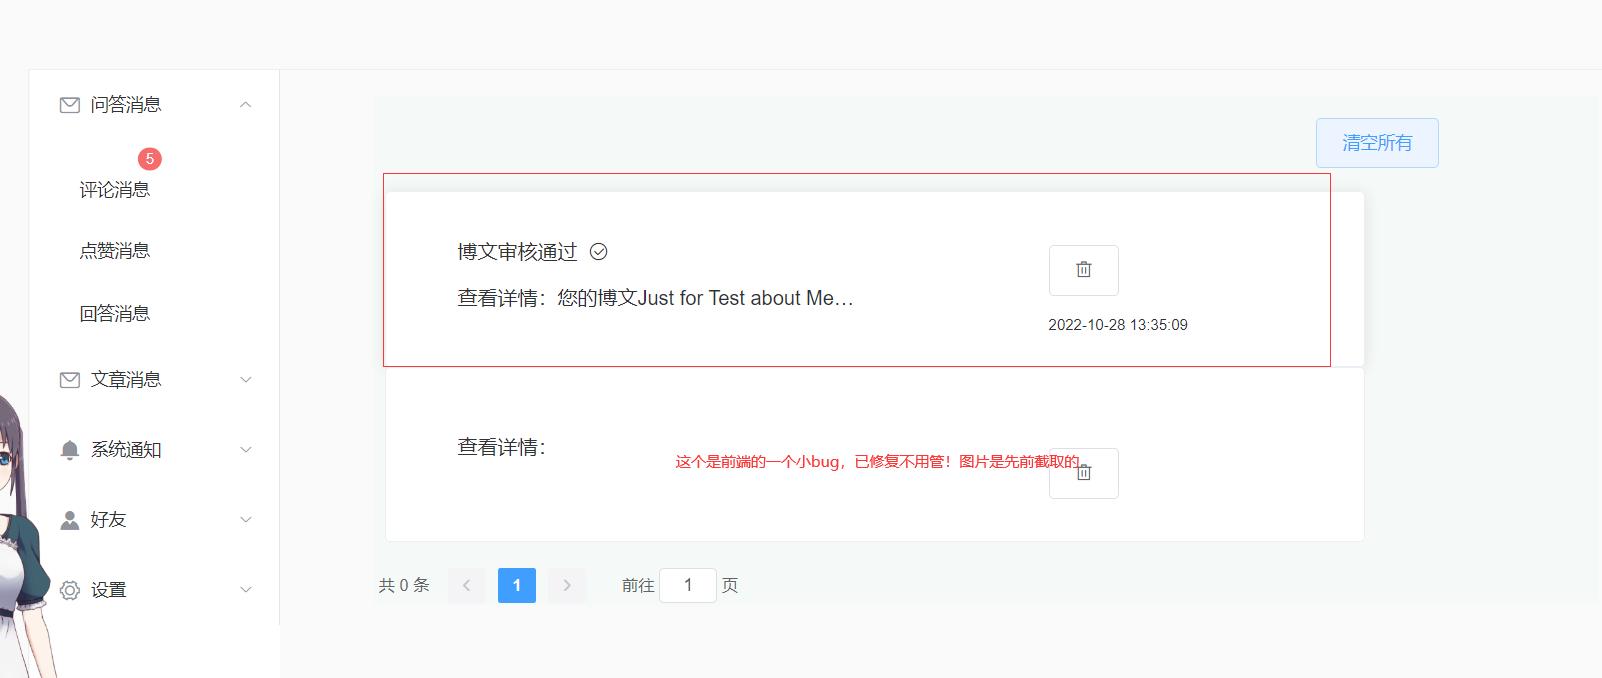
因为图片是中午截取的,有个小bug没有调整,但是不要在意这些,这个bug是很简单的,因为一开始我这边做过初始化,没有清除缓存罢了。
后端项目
之后的话来看到我们的后端的一个服务情况。
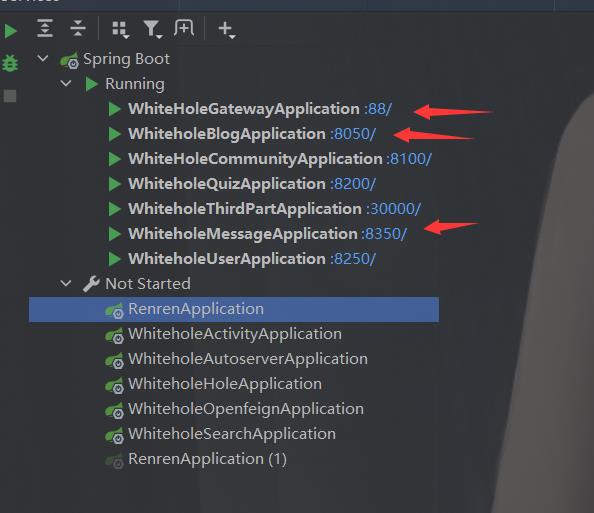
我们要进行互动的服务就是这三个,一个是网关,一个是博文的服务,还有就是我们的消息服务器。因为我们是用户上传成功后再显示的。
那么关于博客的模块的话在这块有完整的说明:
SpringBoot + Vue实现博文上传+展示+博文列表
我们这边做的就是一个系列。当然只是演示实际上,你用先前我给出的代码是完全可以实现效果的,我们这边只是说用那一套代码来真正做我们具体的业务。
消息数据定义
存储结构
那么在开始之前的话,我们这边对我们的消息服务器设计了对应的数据库用来存储消息。
这一块看你自己,我们这边肯定是要的。
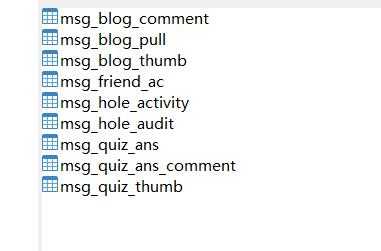
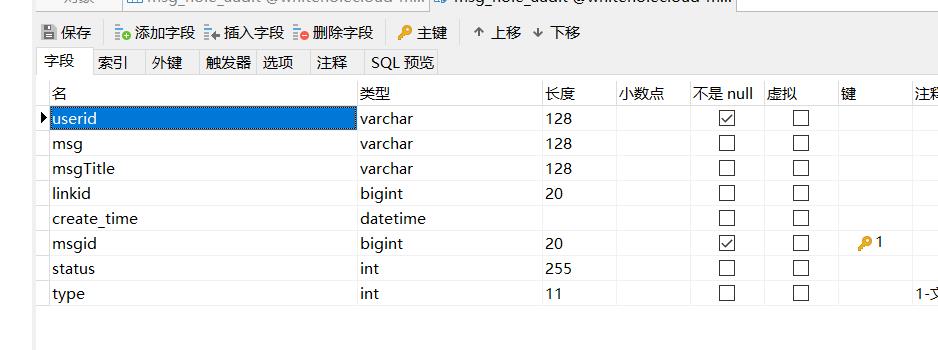
那么我们这次的案例需要使用到的表是这个表:
消息状态
之后的话,我们需要对我们的消息进行定义。
我们在这里对消息的状态做出如下定义:
- 消息具备两者状态,针对两个情况
- 签收状态,即,服务器确定用户在线,并且将消息传输到了客户端,为签收状态。
- 阅读状态,在保证已签收的情况下,用户是否已经阅读消息,这部分的逻辑有客户端代码处理。
- 对应未签收的消息,用户上线时,请求服务器是否存在未签收的消息,如果有,进行统一读取,存储到本地
- 对于未读消息,主要是对用户的状态进行一个判断,消息已经缓存到用户本地。
那么此时的话,我们就已经说清楚了这个。在我们的数据库里面status这个字段就是用来判断用户是不是签收了消息的。至于用户到底有没有读取消息,那么完全就是客户端需要做的判断了。
当然你也可以设计为全部由服务端来处理。
Nutty消息服务
项目结构
ok,说完了这个的话,我们再来看到我们的消息服务端是怎么处理的。
首先我们依然是和先前的博文一样,保留了先前的东西。
但是我们这边多了Controller,和Dao层。
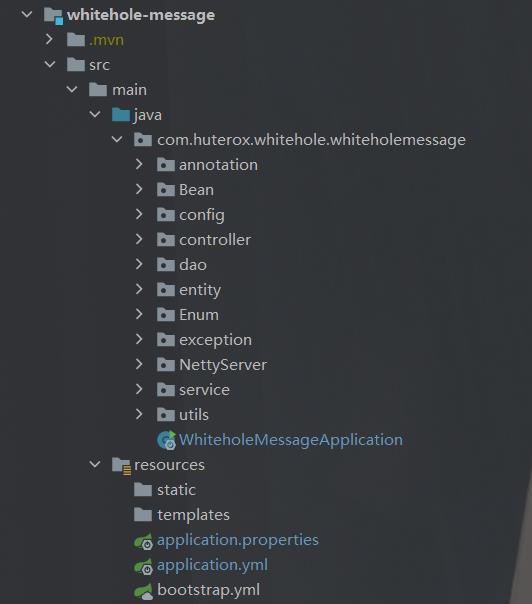
那么在这边的话,我们需要关注的只有这几个东西:
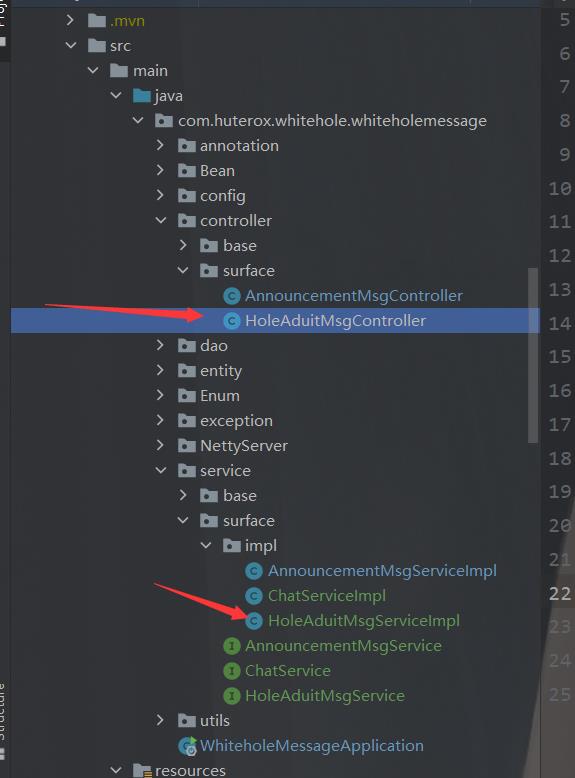
这几个东西就是我们来实现前面的效果的实际的业务代码。
除了这些当然还有我们的Dao,但是这个是根据你的业务来的,这里我就不展示了,类比嘛。
改动
那么说完了这些,我们来看到和先前的代码有哪些改动的东西。
消息bean
首先是我们的消息的改动。
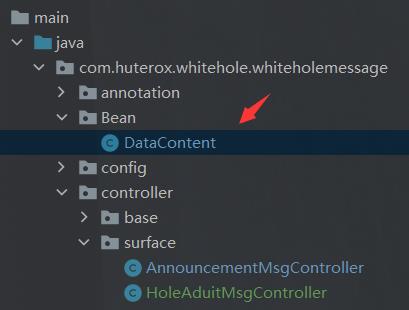
@AllArgsConstructor
@NoArgsConstructor
@ToString
/**
 * 由于我们这边Nutty处理的消息只有注册,所以话这里只需要
 * 保留action和userid即可
 * */
public class DataContent implements Serializable
    private Integer action;
    private String userid;
那么我们的消息的类型是这样的:
public enum MessageActionEnum

    //定义消息类型

    CONNECT(1,"第一次(或重连)初始化连接"),
    CHAT(2,"聊天消息"),
    SIGNED(3,"消息签收"),
    KEEPALIVE(4,"客户端保持心跳"),
    PULL_FRIEND(5, "拉取好友"),
    HOLEADUITMSG(6,"审核消息");


    public final Integer type;
    public final String content;
    MessageActionEnum(Integer type,String content)
        this.type = type;
        this.content = content;
消息处理器
既然我们的这个消息类型变了,那么我们的这个代码也变了:
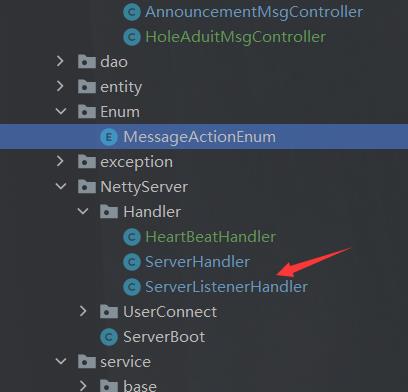
@Component
@ChannelHandler.Sharable

public class ServerListenerHandler extends SimpleChannelInboundHandler<TextWebSocketFrame>

    private static final Logger log = LoggerFactory.getLogger(ServerBoot.class);
    static
        //先初始化出来
        UserConnectPool.getChannelMap();
        UserConnectPool.getChannelGroup();


    @Override
    protected void channelRead0(ChannelHandlerContext ctx, TextWebSocketFrame msg) throws Exception
        String content = msg.text();
        /**获取客户端传过来的消息*/
        DataContent dataContent = JsonUtils.jsonToPojo(content, DataContent.class);
        assert dataContent != null;
        Integer action = dataContent.getAction();
        Channel channel =  ctx.channel();
        /**
         * 根据消息类型对其进行处理,我们这里只做两个事情
         * 1. 注册用户
         * 2. 心跳在线
         * */
        if(Objects.equals(action, MessageActionEnum.CONNECT.type))
            /**
             * 2.1 当websocket 第一次 open 的时候,
             * 初始化channel,把用的 channel 和 userid 关联起来
             * */
            String userid = dataContent.getUserid();
            AttributeKey<String> key = AttributeKey.valueOf("userId");
            ctx.channel().attr(key).setIfAbsent(userid);
            UserConnectPool.getChannelMap().put(userid,channel);
            UserConnectPool.output();

         else if(Objects.equals(action, MessageActionEnum.KEEPALIVE.type))
            /**
             * 心跳包的处理
             * */

            System.out.println("收到来自channel 为["+channel+"]的心跳包"+dataContent);
            channel.writeAndFlush(
                    new TextWebSocketFrame(
                            JsonUtils.objectToJson(R.ok("返回心跳包").
                                    put("type", MessageActionEnum.KEEPALIVE.type))
                    )
            );
            System.out.println("已返回消息");


    @Override
    public void handlerAdded(ChannelHandlerContext ctx) throws Exception
        //接收到请求
        log.info("有新的客户端链接:[]", ctx.channel().id().asLongText());
        AttributeKey<String> key = AttributeKey.valueOf("userId");
        ctx.channel().attr(key).setIfAbsent("temp");
        UserConnectPool.getChannelGroup().add(ctx.channel());


    @Override
    public void handlerRemoved(ChannelHandlerContext ctx) throws Exception
        String chanelId = ctx.channel().id().asShortText();
        log.info("客户端被移除:channel id 为:"+chanelId);
        removeUserId(ctx);
        UserConnectPool.getChannelGroup().remove(ctx.channel());


    @Override
    public void exceptionCaught(ChannelHandlerContext ctx, Throwable cause) throws Exception
        cause.printStackTrace();
        //发生了异常后关闭连接,同时从channelgroup移除
        ctx.channel().close();
        removeUserId(ctx);
        UserConnectPool.getChannelGroup().remove(ctx.channel());


    /**
     * 删除用户与channel的对应关系
     */
    private void removeUserId(ChannelHandlerContext ctx)
        AttributeKey<String> key = AttributeKey.valueOf("userId");
        String userId = ctx.channel().attr(key).get();
        UserConnectPool.getChannelMap().remove(userId);
这个就是我们核心的消息处理器。
那么其他的关于Nutty的玩意我压根没有改动。
消息转换pojo工具
这里还有咱们的消息转换的工具类。这个的话,我也给一下:
public class JsonUtils

    // 定义jackson对象
    private static final ObjectMapper MAPPER = new ObjectMapper();

    /**
     * 将对象转换成json字符串。
     * <p>Title: pojoToJson</p>
     * <p>Description: </p>
     * @param data
     * @return
     */
    public static String objectToJson(Object data)
        try
            String string = MAPPER.writeValueAsString(data);
            return string;
         catch (JsonProcessingException e)
            e.printStackTrace();

        return null;


    /**
     * 将json结果集转化为对象
     *
     * @param jsonData json数据
     * @param beanType 对象类型
     * @return
     */
    public static <T> T jsonToPojo(String jsonData, Class<T> beanType)
        try
            T t = MAPPER.readValue(jsonData, beanType);
            return t;
         catch (Exception e)
            e.printStackTrace();

        return null;


    /**
     * 将json数据转换成pojo对象list
     * <p>Title: jsonToList</p>
     * <p>Description: </p>
     * @param jsonData
     * @param beanType
     * @return
     */
    public static <T>List<T> jsonToList(String jsonData, Class<T> beanType)
        JavaType javaType = MAPPER.getTypeFactory().constructParametricType(List.class, beanType);
        try
            List<T> list = MAPPER.readValue(jsonData, javaType);
            return list;
         catch (Exception e)
            e.printStackTrace();


        return null;
前面应该是有给的。
重点就是咱们的这个Controller这一块。
审核消息处理
controller
我们首先来看到我们的Controller
@RestController
@RequestMapping("/message/holeAduit")
public class HoleAduitMsgController

    @Autowired
    HoleAduitMsgService holeAduitMsgService;

    @PostMapping("/aduit")
    public R holeAduitMsg(@Validated @RequestBody HoleAduitMsgQ holeAduitMsgQ)
        return holeAduitMsgService.holeaduitMsg(holeAduitMsgQ);
我们只看到这一个接口,因为其他的都是类似的。
那么这里的话我们还是需要一个请求的实体类的。
那么这个实体类的话是这个样子的:
@Data
@AllArgsConstructor
@NoArgsConstructor
public class HoleAduitMsgQ
    @NotEmpty
    private String userid;
    private String msg;
    private String msgtitle;
    private Long linkid;
    private Integer type;
这个实体类的话,是被我封装了这里:
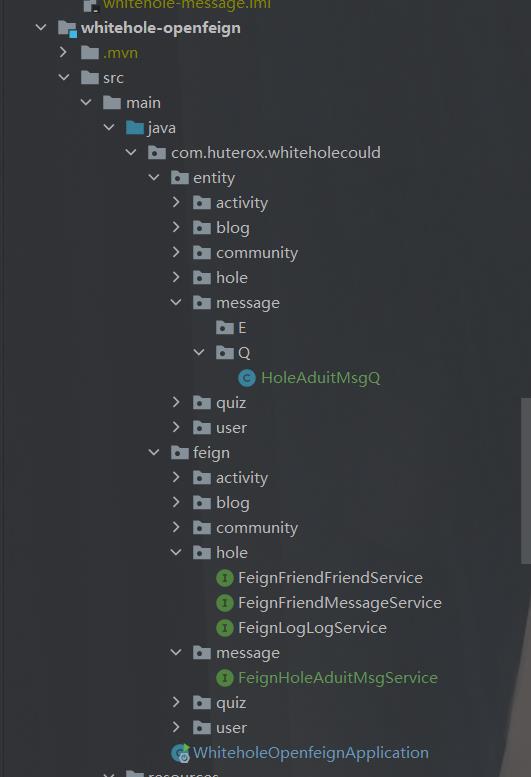
因为我们是一个微服务,所以的话,对应的这个请求我们都是放在了第三方的一个包下面。
那么对于的还有咱们暴露出来的服务。
@FeignClient("message")
@RequestMapping("/message/holeAduit")
public interface FeignHoleAduitMsgService

    @PostMapping("/aduit")
    public R holeAduitMsg(@RequestBody HoleAduitMsgQ holeAduitMsgQ);
之后的话,我们可以看到具体的实现类。
实现类
@Service
public class HoleAduitMsgServiceImpl implements HoleAduitMsgService

    @Autowired
    HoleAuditService auditService;

    @Override
    public R holeaduitMsg(HoleAduitMsgQ holeAduitMsgQ)
        //1.对消息进行存储,只要用户在线的话,我们就直接先给他签收一下
        String userid = holeAduitMsgQ.getUserid();
        Channel channel = UserConnectPool.getChannelFromMap(userid);
        HoleAuditEntity holeAuditEntity = new HoleAuditEntity();
        BeanUtils.copyProperties(holeAduitMsgQ,holeAuditEntity);
        holeAuditEntity.setCreateTime(DateUtils.getCurrentTime());

        if(channel!=null)
            //这边只是保证存在,双层保险,这个时候的话就是在线
            Channel realChannel = UserConnectPool.getChannelGroup().find(channel.id());
            if(realChannel!=null)
                holeAuditEntity.setStatus(1);
                //我们这边直接转发消息就好了,不需要再额外处理
                realChannel.writeAndFlush(
                        new TextWebSocketFrame(
                                JsonUtils.objectToJson(
                                        Objects.requireNonNull(R.ok().put("data", holeAuditEntity))
                                                .put("type", MessageActionEnum.HOLEADUITMSG.type)
                                )
                        )
                );


        //这里进行消息的存储
        auditService.save(holeAuditEntity);
        return R.ok();
这里面的逻辑其实非常简单,就几个步骤。
1.接受请求
2.判断用户是否在线,在线推送,并保存设置为已签收(消息)
如果不在线,不进行推送,但是保存消息并设置为未签收
这里的话就是非常简单的。
服务调用
之后的话,就是我们的调用。我们的调用是在我们的博客服务进行调用的。
我们先看到我们完整的博客服务的实现类。
public class BlogUpServiceImpl implements BlogUpService
@Autowired
FeignUserService feignUserService;
@Autowired
ContentService contentService;
@Autowired
FeignHeadimgService feignHeadimgService;
@Autowired
WordFilter wordFilter;
@Autowired
BlogService blogService;
@Autowired
FeignLogActicleService feignLogActicleService;
@Autowired
RedisUtils redisUtils;
@Autowired
FeignHoleAduitMsgService feignHoleAduitMsgService;
private final static Double threshold = 0.05;
/**
* 接口对用户进行十分钟限制
* 1.完成用户博文的上传
* 2.存储用户博文,博文对应信息
* 3.修改用户日志
* */
@Override
public R blogUp(UpBlogEntity entity)
String userid = entity.getUserid();
String backMessage = "success";
//接口限流
if(redisUtils.hasKey(RedisTransKey.getBlogUpKey(entity.getUserid())))
return R.error(BizCodeEnum.OVER_UPBLOG.getCode(), BizCodeEnum.OVER_UPBLOG.getMsg());
R info = feignUserService.info(userid);
String userString = FastJsonUtils.toJson(info.get("user"));
UserEntity user = FastJsonUtils.fromJson(userString, UserEntity.class);
if(user!=null)
String context = entity.getContext();
String blogInfo = entity.getInfo();
/**
* 先对context和bloginfo进行校验,是否为存在不友好的信息
* */
int countContext = wordFilter.wordCount(context);
int countInfo = wordFilter.wordCount(blogInfo);
int status = 1;
//博文的摘要过滤,只要摘要没有过,直接先打回去!
if(countInfo>=blogInfo.length()*threshold)
return R.error(BizCodeEnum.BAD_BLOGINFO.getCode(),BizCodeEnum.BAD_BLOGINFO.getMsg());
//博文内容的过滤
if(countContext>=context.length()*threshold)
//直接就是没有通过审核
return R.error(BizCodeEnum.BAD_CONTEXT.getCode(),BizCodeEnum.BAD_CONTEXT.