Metamask插件中-添加网络和切换网络
Posted JackieDYH
tags:
篇首语:本文由小常识网(cha138.com)小编为大家整理,主要介绍了Metamask插件中-添加网络和切换网络相关的知识,希望对你有一定的参考价值。
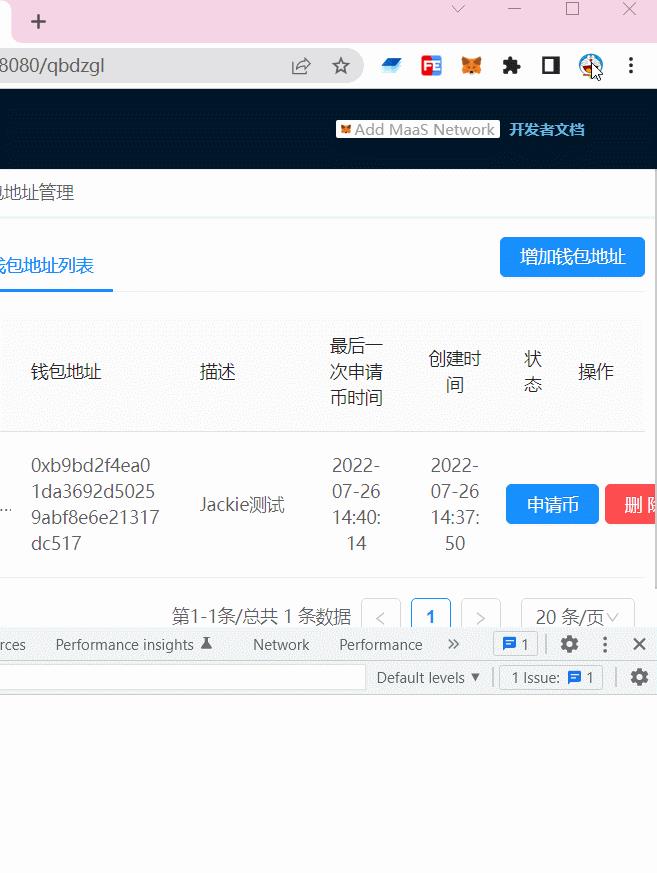
Dapp中,自动给用户Metamask添加一个网络(比如BNB主网或BNB测试网),程序主动切换用户Metamask的网络为指定网络(比如BNB主网)
Metamask新增了一个AddEthereumChainParameter 的api,可以自动给用户Metamask添加一个网络,并把当前页面连接到这个网络。
执行这个api时,如果用户的Metamask还没有添加参数指定的网络,则Metamask会弹出一个提示框,提示用户当前页面要给Metamask添加一个网络,并显示要添加网络的信息。如果用户点确定,Metamask就会添加这个网络到用户的钱包。
如果用户的Metamask已经添加了参数指定的网络,但是当前钱包连接的网络不是这个网络,则Metamask会弹出一个提示框,提示用户当前页面要把Metamask的网络切换到指定网络,如果用户点确定,Metamask当前连接的网络就会切换到指定网络。
以上判断Metamask是否添加了指定网络,是根据参数中的ChainID来判断,网络id一样就认为是同一个网络。
如果执行时Metamask已经添加了指定网络,当前也正好连接的是这个网络,则什么也不会执行,不会有任何提示。
在官方文档中,说这个api必须由用户主动操作来触发(点某个按钮),但是实测并不需要,在页面加载时,程序自动执行这个api也是可以的。所以可以在应用初始化的地方,固定执行这个api,这样当用户没有添加网络时,会自动添加;用户没有连接到网络时,会自动连接;用户已连接网络时,什么也不会做。
演示
添加节点
// 添加链节点
async changeNetwork(id)
let cfg = chainBase[id];
// console.log(cfg);
if (!window.ethereum)
  return false;

// eslint-disable-next-line @typescript-eslint/no-explicit-any
const request = (window.ethereum).request;
// 获取当前链id
const chainId = await request( method: "eth_chainId" );
console.log(`chainId:$chainId`);
if (chainId == cfg.chainId)
  message.warning(`当前链已经是:$cfg.chainName`);
 else
  message.warning(`正在切换链为:$cfg.chainName`);


try
// 切换
  await request(
	method: "wallet_switchEthereumChain",
	params: [ chainId: cfg.chainId ],
  );
  return true;
 catch (e)
  // eslint-disable-next-line @typescript-eslint/no-explicit-any
  const err = e;
  console.log(err);
  if (err.code === 4902)
	try
// 添加
	  await request(
		method: "wallet_addEthereumChain",
		params: [cfg],
	  );
	 catch (addError)
	  console.error(addError);

   else
	message.error(`ERROR:$err.message`);

  return true;

,
常用链节点信息
const ChainCfg =
    1:
        chainId: '0x1',
        chainName: 'Ethereum Mainnet',
        nativeCurrency:
            name: 'ETH',
            symbol: 'ETH',
            decimals: 18,
        ,
        rpcUrls: ['https://mainnet.infura.io/v3/9aa3d95b3bc440fa88ea12eaa4456161'],
        blockExplorerUrls: ['https://etherscan.io'],
    ,
    3:
        chainId: '0x3',
        chainName: 'Ropsten testNet',
        nativeCurrency:
            name: 'ETH',
            symbol: 'ETH',
            decimals: 18,
        ,
        rpcUrls: ['https://ropsten.infura.io/v3/9aa3d95b3bc440fa88ea12eaa4456161'],
        blockExplorerUrls: ['https://ropsten.etherscan.io'],
    ,
    42:
        chainId: '0x2a',
        chainName: 'Kovan testNet',
        nativeCurrency:
            name: 'ETH',
            symbol: 'ETH',
            decimals: 18,
        ,
        rpcUrls: ['https://kovan.infura.io/v3/9aa3d95b3bc440fa88ea12eaa4456161'],
        blockExplorerUrls: ['https://kovan.etherscan.io'],
    ,
    56:
        chainId: '0x38',
        chainName: 'Binance Smart Chain',
        nativeCurrency:
            name: 'BNB',
            symbol: 'BNB',
            decimals: 18,
        ,
        rpcUrls: ['https://bsc-dataseed.binance.org/'],
        blockExplorerUrls: ['https://bscscan.com/'],
    ,
    97:
        chainId: '0x61',
        chainName: 'Binance Smart Chain - TestNet',
        nativeCurrency:
            name: 'BNB',
            symbol: 'BNB',
            decimals: 18,
        ,
        rpcUrls: ['https://data-seed-prebsc-1-s1.binance.org:8545/'],
        blockExplorerUrls: ['https://testnet.bscscan.com/'],
    ,
    1088:
        chainId: '0x440',
        chainName: 'Maas - TestNet',
        nativeCurrency:
            name: 'Maas',
            symbol: 'Maas',
            decimals: 18,
        ,
        rpcUrls: ['https://maas-test-node.onchain.com/'],
        blockExplorerUrls: ['https://maas-test-explorer.onchain.com/'],
    ,
    2088:
        chainId: '0x828',
        chainName: 'Maas',
        nativeCurrency:
            name: 'Maas',
            symbol: 'Maas',
            decimals: 18,
        ,
        rpcUrls: ['https://maas-node.onchain.com/'],
        blockExplorerUrls: ['https://maas-explorer.onchain.com/'],
    ,
;

export default ChainCfg;
代码
const addNetwork = () =>
    window.ethereum.request(
        method: 'wallet_addEthereumChain', // Metamask的api名称
        params: [
            chainId: "0x80", // 网络id,16进制的字符串
            chainName: "HecoMain", // 添加到钱包后显示的网络名称
            rpcUrls: [
                'https://http-mainnet-node.huobichain.com', // rpc地址
            ],
            iconUrls: [
                'https://testnet.hecoinfo.com/favicon.png' // 网络的图标,暂时没看到在哪里会显示
            ],
            blockExplorerUrls: [
                'https://hecoinfo.com' // 网络对应的区块浏览器
            ],
            nativeCurrency:   // 网络主币的信息
                name: 'HT',
                symbol: 'HT',
                decimals: 18

        ]
    )

addNetwork()以上是关于Metamask插件中-添加网络和切换网络的主要内容,如果未能解决你的问题,请参考以下文章
