程序媛过中秋的正确打开方式——使用Python绘制月饼消消乐,素描图,词云图,字符画图及提取轮廓
Posted 程序媛一枚~
tags:
篇首语:本文由小常识网(cha138.com)小编为大家整理,主要介绍了程序媛过中秋的正确打开方式——使用Python绘制月饼消消乐,素描图,词云图,字符画图及提取轮廓相关的知识,希望对你有一定的参考价值。
程序媛过中秋的正确打开方式——使用Python绘制月饼消消乐,素描图,词云图,字符画图及提取轮廓
这篇博客将介绍如何使用Python绘制月饼消消乐,素描图,词云图,字符画图及提取轮廓。
使用Python绘制端午dragboat消消乐 美轮美奂的界面效果
1. 效果图
选了我最爱的小林老师的漫画图~
纵有千种风情,更与谁人说。
中秋月饼原始图VS素描图:
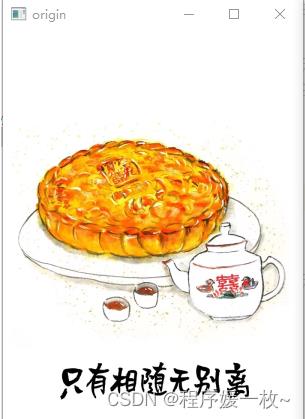
原始图 VS 正常风格素描图 VS 漫画风格素描图 VS 写实风格素描图如下:
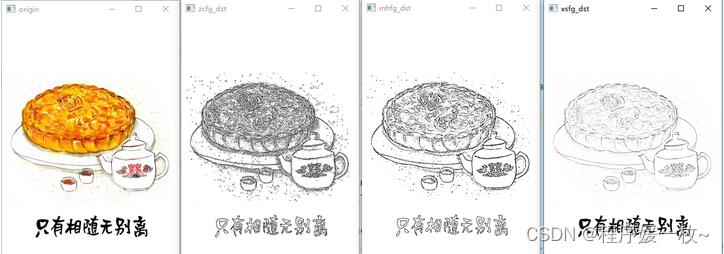
原始图2 VS 正常风格素描图 VS 漫画风格素描图 VS 写实风格素描图如下:

中秋月饼词云图如下:

默认彩色词云图 VS自定义灰色词云图 VS 端午粽子原图(背景色、轮廓线、轮廓颜色、词云颜色均可配置)
背景色白色 轮廓线红色 轮廓线宽度5,词云彩色及灰色

设置词云黑色背景

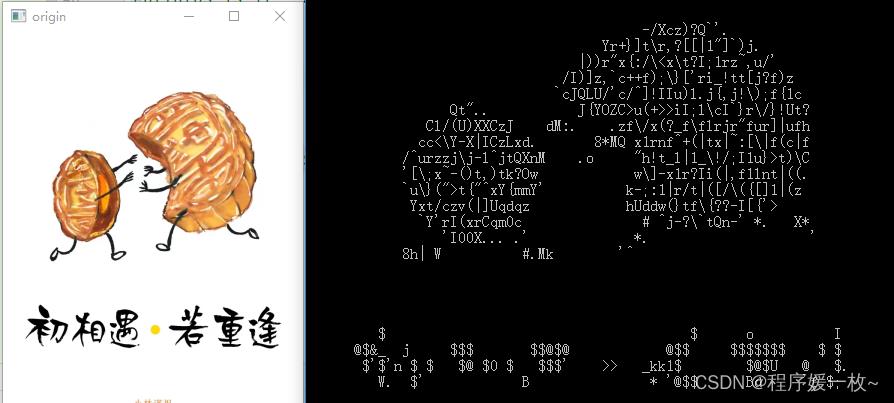
月饼原图VS字符画

字符画
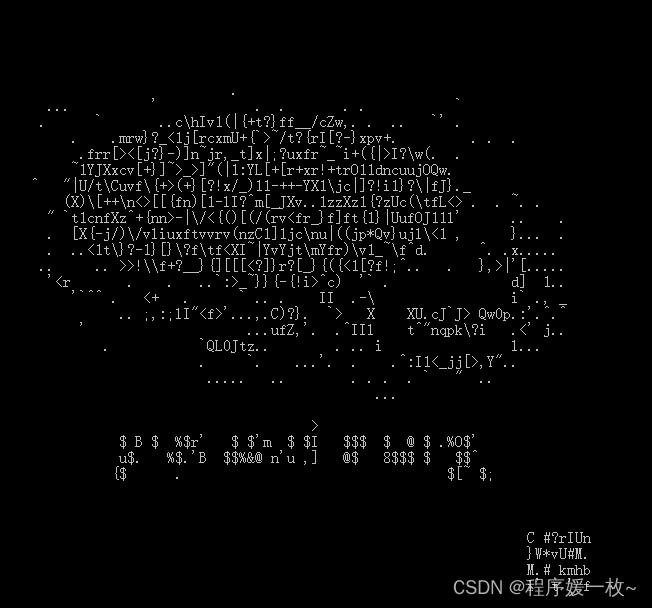
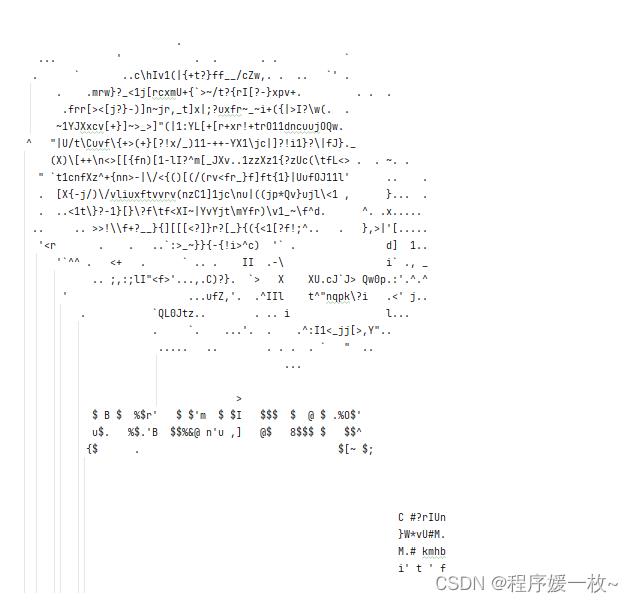
月饼原图VS字符画2:
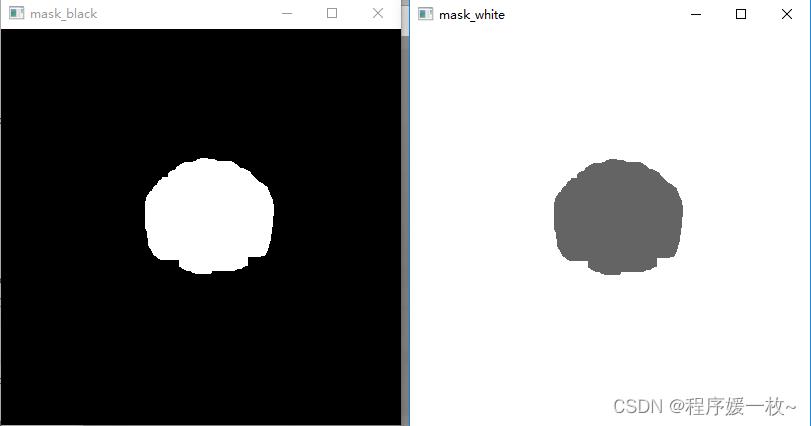
月饼轮廓提取(抠图),并分别用白色黑色做背景色,也可以是其他色彩做背景色


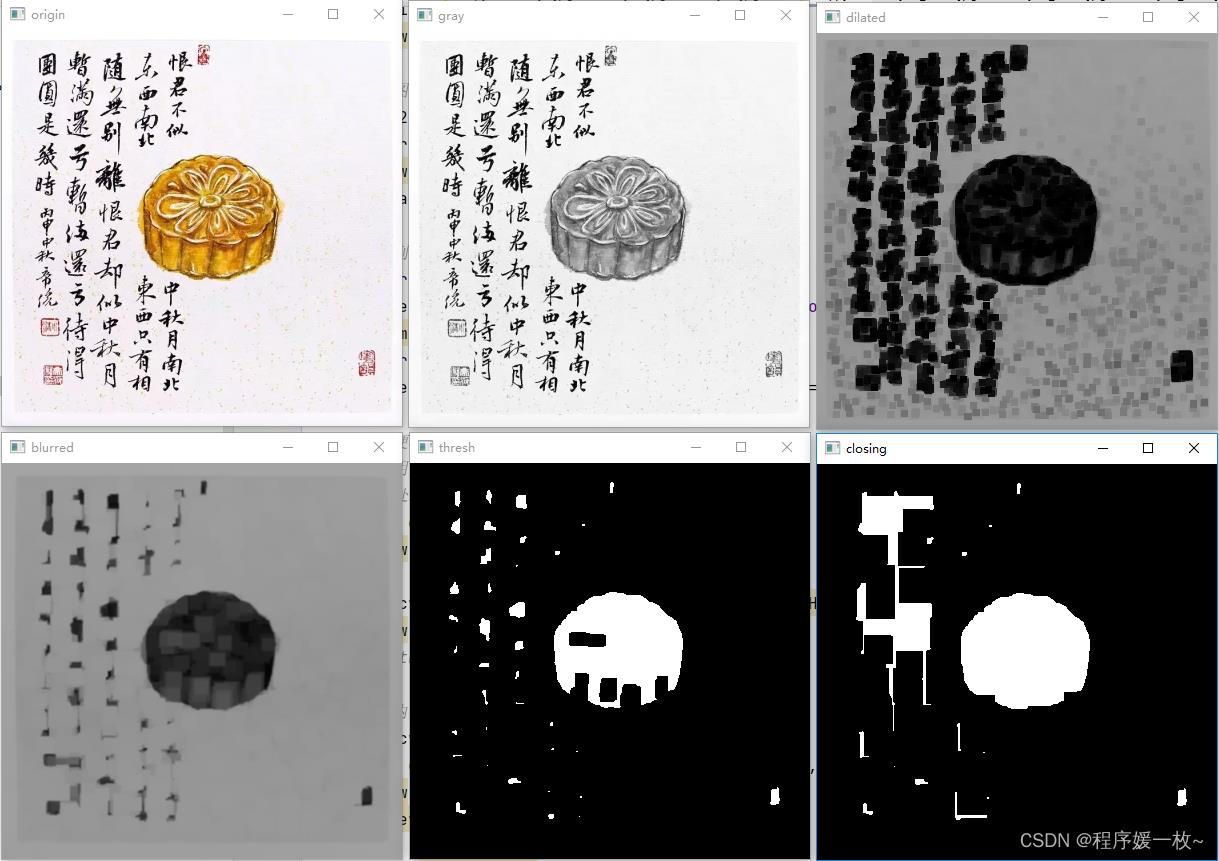
轮廓提取过程图,原始图 & 灰度图 & 腐蚀膨胀图 & 高斯模糊图 & 阈值化图 & 闭合图如下
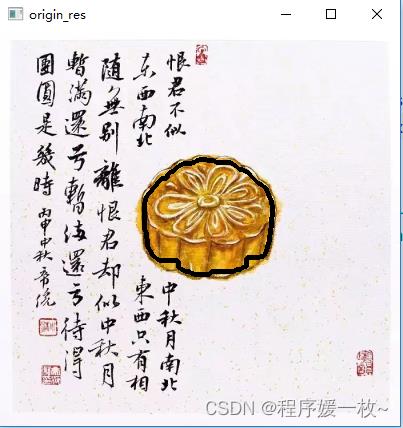
原始图像上绘制提取的轮廓

2. 源码
2.1 素描图源码
# 素描图

import cv2
import imutils

def make_sm(before_path, after_path):
    # 加载图片
    origin = cv2.imread(before_path)
    origin = imutils.resize(origin, width=500)
    cv2.imshow("origin", origin)
    # 转为灰度图
    img_gray = cv2.cvtColor(origin, cv2.COLOR_RGB2GRAY)
    # 对图片进行高斯模糊,参数ksize表示高斯核的大小,sigmaX和sigmaY分别表示高斯核在 X 和 Y 方向上的标准差
    img_blur = cv2.GaussianBlur(img_gray, ksize=(21, 21), sigmaX=0, sigmaY=0)
    # 对原图和模糊图像进行融合,cv2.divide()本质上进行的是两幅图像素级别的除法操作,其得到的结果可以简单理解为两幅图之间有明显差异的部分
    divide = cv2.divide(img_gray, img_blur, scale=255)
    cv2.imshow("after", divide)
    cv2.waitKey(0)
    # 保存结果
    cv2.imwrite(after_path, divide)


if __name__ == '__main__':
    before_path = 'imgs/xrr.jpg'
    after_path = 'imgs/xrr.jpg'
    make_sm(before_path, after_path)
2.2 词云图源码
# 彩色月饼图
from os import path
from PIL import Image
import numpy as np
import matplotlib.pyplot as plt
import os

from wordcloud import WordCloud, STOPWORDS, ImageColorGenerator

# 获取数据目录
d = path.dirname(__file__) if "__file__" in locals() else os.getcwd()

# 读取填充的文本
text = open(path.join(d, 'imgs/word.txt'),mode='r',encoding='utf-8').read()

# 读取masked原图彩色图像
alice_coloring = np.array(Image.open(path.join(d, 'imgs/bdd_.jpg')))
stopwords = set(STOPWORDS)
stopwords.add("said")

# 背景色
# 字体大小 轮廓颜色 轮廓宽度
wc = WordCloud(background_color="white", max_words=2000, mask=alice_coloring,
               stopwords=stopwords, max_font_size=40, random_state=42,contour_width=5,contour_color="blue")
# 生成词云
wc.generate(text)

# 创建图片颜色
image_colors = ImageColorGenerator(alice_coloring)

# 展示图像
fig, axes = plt.subplots(1, 3)
axes[0].imshow(wc, interpolation="bilinear")
# 重新填充颜色并展示
# 也可以在构造函数里进行颜色赋值
axes[1].imshow(wc.recolor(color_func=image_colors), interpolation="bilinear")
axes[2].imshow(alice_coloring, cmap=plt.cm.gray, interpolation="bilinear")
for ax in axes:
    ax.set_axis_off()
plt.show()
2.3 字符画源码
#-*- coding=utf-8 -*-
# 字符画
from PIL import Image

IMG = 'imgs/bx.jpg'      #设置图片文件
WIDTH = 75     #设置字符画的宽
HEIGHT = 40     #设置字符画的高
OUTPUT = 'imgs/bx.txt'      #设置存放字符画的文本文件
ascii_char = list("$@B%8&WM#*oahkbdpqwmZO0QLCJUYXzcvunxrjft/\\|()1[]?-_+~<>i!lI;:,\\"^`'. ")    #设置显示的字符集

#将256灰度映射到70个字符上
def get_char(r,g,b,alpha = 256):
    #alpha为透明度
    # 判断 alpha 值,为0表示全透明
    if alpha == 0:
        return ' '

    # 获取字符集的长度,这里为 70
    length = len(ascii_char)
    # 将 RGB 值转为灰度值 gray,灰度值范围为 0-255
    gray = int(0.2126 * r + 0.7152 * g + 0.0722 * b)

    # 灰度值范围为 0-255,而字符集只有 70
    # 需要进行如下处理才能将灰度值映射到指定的字符上
    #防止当灰度值为255时,输出的第70个字符超出列表索引,所以需要将(255+1)
    unit = (255.0 + 1)/length

    # 返回灰度值对应的字符
    return ascii_char[int(gray/unit)]

if __name__ == '__main__':

    # 打开并调整图片的宽和高
    im = Image.open(IMG)
    im = im.resize((WIDTH,HEIGHT), Image.NEAREST)

    # 初始化输出的字符串
    txt = ""

    # 遍历图片中的每一行
    for i in range(HEIGHT):
        # 遍历该行中的每一列
        for j in range(WIDTH):
            # 将 (j,i) 坐标的 RGB 像素转为字符后添加到 txt 字符串
            txt += get_char(*im.getpixel((j,i)))
        # 遍历完一行后需要增加换行符
        txt += '\\n'
    # 输出到屏幕
    print(txt)
    with open(OUTPUT,'w') as f:
        f.write(txt)
2.4 中秋月饼轮廓提取
# 进行月饼轮廓的提取
# 并分别生成黑色 & 白色背景的中秋月饼图片
import argparse

import cv2
import imutils
import numpy as np

# 构建命令行参数及解析
# --image 输入图像路径
ap = argparse.ArgumentParser()
ap.add_argument("-i", "--image", required=False, default='imgs/bx.jpg',
                help="path to input image(bdd or xrr or both)")
args = vars(ap.parse_args())

image = cv2.imread(args["image"])
image = imutils.resize(image, width=400)
origin = image.copy()
cv2.imshow("origin", image)

# 转换灰度图
gray = cv2.cvtColor(image, cv2.COLOR_BGR2GRAY)
gray1 = gray.copy()
cv2.imshow("gray", gray)
gray = gray - 90  # 整体亮度调整下,方便提取

# 应用一系列腐蚀膨胀
for i in range(0, 3):
    dilated = cv2.erode(gray.copy(), None, iterations=i + 1)
    cv2.imshow("dilated", dilated)
for i in range(0, 3):
    dilated = cv2.dilate(dilated, None, iterations=i + 1)

# 预处理以便将前景与背景分割开来
# 检测是该用阈值还是模糊预处理步骤
# 高斯模糊处理以减少高频噪声
blurred = cv2.GaussianBlur(dilated, (3, 3), 0)
cv2.imshow("blurred", blurred)

thresh = cv2.threshold(blurred, 60, 255, cv2.THRESH_BINARY_INV)[1]
cv2.imshow("thresh", thresh)
# cv2.waitKey(0)

# 构建矩形内核,并执行闭合操作
kernel = cv2.getStructuringElement(cv2.MORPH_RECT, (27, 27))
closing = cv2.morphologyEx(thresh, cv2.MORPH_CLOSE, kernel)
cv2.imshow("closing", closing)
cv2.waitKey(0)

cnts = cv2.findContours(closing, 1, 2)
cnts = imutils.grab_contours(cnts)

# 轮廓面积排序只保留最大的
cnts = sorted(cnts, key=cv2.contourArea, reverse=True)[:1]

# 分别生成黑色背景端午粽子,白色背景端午粽子
mask_black = np.zeros(image.shape[:2], dtype="uint8")
mask_white = np.ones(image.shape[:2], dtype="uint8") * 255
mask_white2 = np.ones(image.shape, dtype="uint8") * 255
for i, cnt in enumerate(cnts):
    # 在图像上绘制轮廓
    cv2.drawContours(image, [cnt], -1, (0, 0, 255), 3)
    cv2.drawContours(mask_black, [cnt], -1, (255, 255, 255), -1)
    cv2.drawContours(mask_white2, [cnt], -1, (0, 0, 0), -1)
    cv2.drawContours(mask_white, [cnt], -1, (100, 100, 100), -1)
    cv2.imwrite(str(args['image'].replace('.jpg', '_mask.jpg')), image)

cv2.imshow("origin_res", image)
cv2.imshow("mask_black", mask_black)
cv2.imshow("mask_white", mask_white)

# 应用掩码图像
masked_black = cv2.bitwise_and(origin, origin, mask=mask_black)
masked_white = cv2.bitwise_and(origin, origin, mask=mask_white)
cv2.imshow("masked_white2222222", np.hstack([masked_black, mask_white2]))
masked_white2 = cv2.bitwise_or(masked_black, mask_white2)
cv2.imshow("masked_black", masked_black)
cv2.imshow("masked_white", masked_white)
cv2.imshow("masked_white2", masked_white2)
cv2.imwrite(str(args['image'].replace('.jpg', '_black.jpg')), masked_black)
cv2.imwrite(str(args['image'].replace('.jpg', '_white.jpg')), masked_white)
cv2.waitKey(0)
cv2.destroyAllWindows()
参考
- https://blog.csdn.net/u010410697/article/details/118576619?spm=1001.2014.3001.5502
- http://amueller.github.io/word_cloud/auto_examples/colored.html
以上是关于程序媛过中秋的正确打开方式——使用Python绘制月饼消消乐,素描图,词云图,字符画图及提取轮廓的主要内容,如果未能解决你的问题,请参考以下文章