Windows/Mac平台下Visual Studio Code C++开发环境搭建
Posted sesiria
tags:
篇首语:本文由小常识网(cha138.com)小编为大家整理,主要介绍了Windows/Mac平台下Visual Studio Code C++开发环境搭建相关的知识,希望对你有一定的参考价值。
Windows/Mac平台下Visual Studio Code C++开发环境搭建
第一部分:Windows平台(Mingw32+Visual Studio Code)
发现使用Mingw32有一个缺陷,很多c++11的功能都无法编译。更不要说后续的C++14和C++17了。难道Windows下只能用微软自家的编译器?
参考了知乎上这篇文章
https://www.zhihu.com/question/30315894
决定使用Mingw-W64和CLang来搭建开发环境参考第二部分。
一,安装必要组件
Visual Studio Code x64
https://code.visualstudio.com/docs/?dv=win
Git
https://git-scm.com/download/win
Windows平台下(使用Visual Studio自带的cc或者Mingw32-gcc)
这里使用mingw32-gcc/g++
https://sourceforge.net/projects/mingw/files/
二,环境配置
1)配置MingGW的环境变量
参考这篇博文
http://blog.sina.com.cn/s/blog_a67a99d70101kwy3.html
Path中添加Mingw的工具集:
C:\\MinGW\\bin
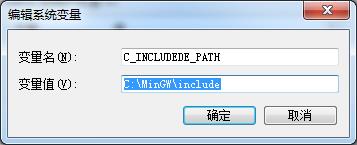
添加C和CPP的头文件默认路径

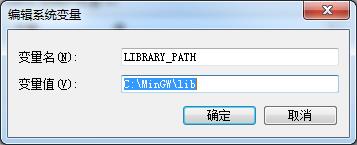
添加lib库路径
2)配置Visual Studio Code
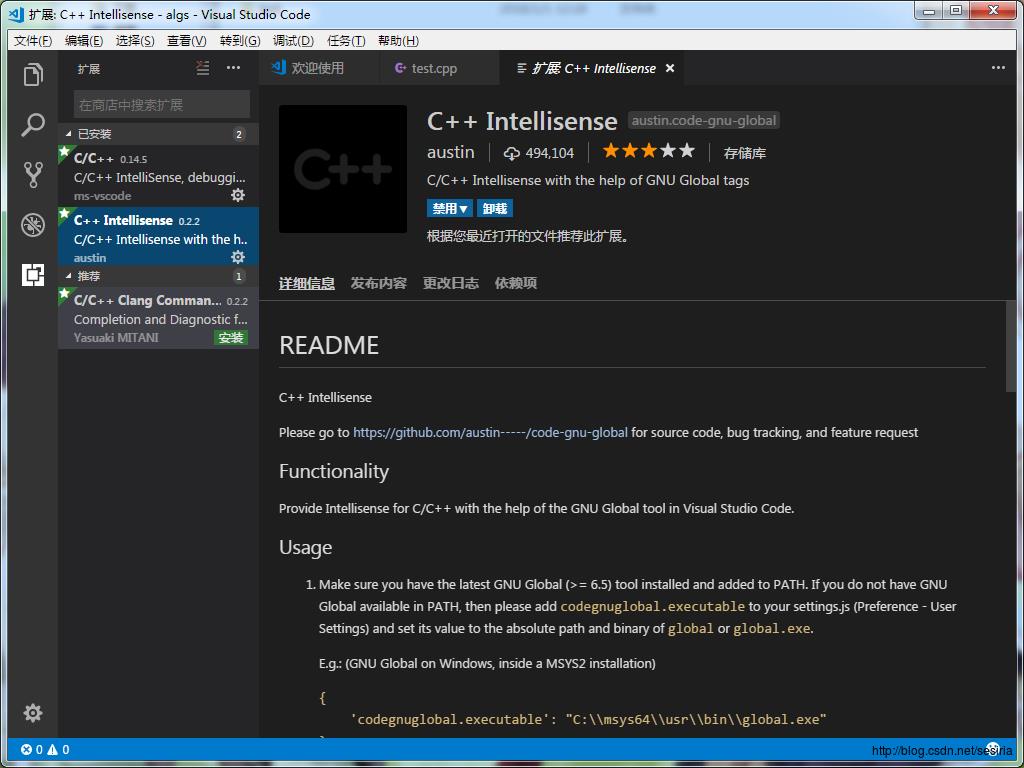
首先安装C/C++扩展插件
接着配置Vscode的中的编译环境。参考文档(https://code.visualstudio.com/docs/languages/cpp)
配置包含库:
首先尝试写一个test.cpp
然后包含stdio.h会提示差找不到头文件stdio.h这时候打开c_cpp_properties.json
配置如下,根据你时机安装的MinGw环境来配置。
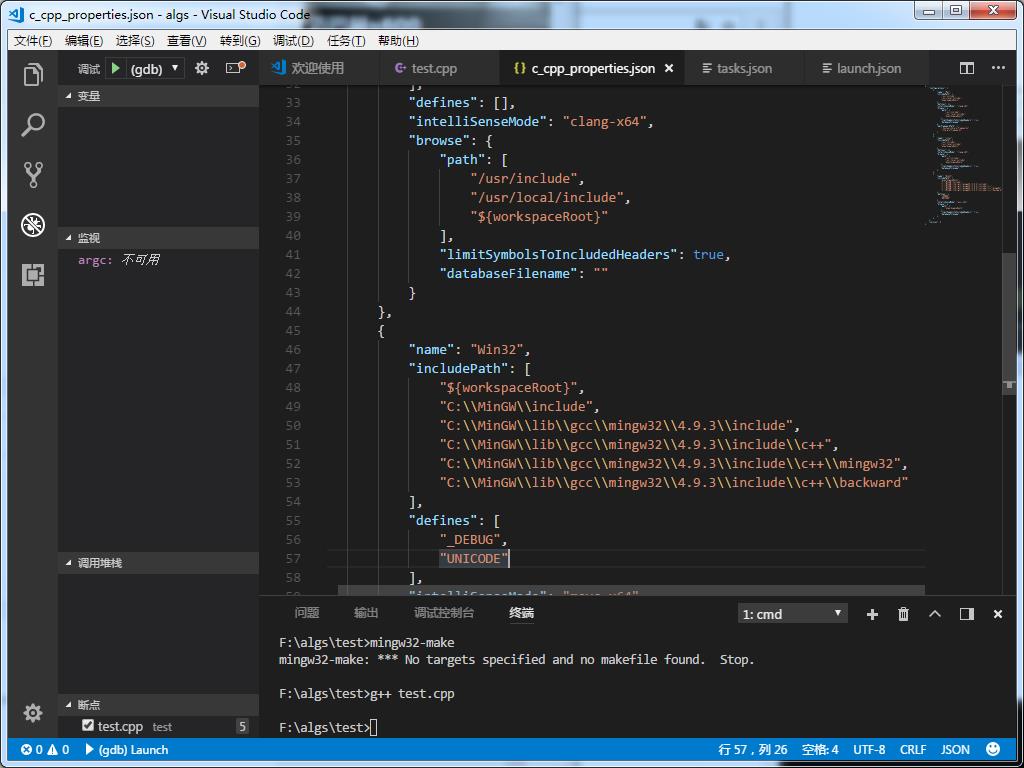
这是本机的C/C++依赖头的配置。
                "C:\\\\MinGW\\\\include",
                "C:\\\\MinGW\\\\lib\\\\gcc\\\\mingw32\\\\4.9.3\\\\include",
                "C:\\\\MinGW\\\\lib\\\\gcc\\\\mingw32\\\\4.9.3\\\\include\\\\c++",
                "C:\\\\MinGW\\\\lib\\\\gcc\\\\mingw32\\\\4.9.3\\\\include\\\\c++\\\\mingw32",
                "C:\\\\MinGW\\\\lib\\\\gcc\\\\mingw32\\\\4.9.3\\\\include\\\\c++\\\\backward"
(主要是给VSCode的只能感知和语法分析查找依赖关系使用)
接着配置Vscode的一键build(有时候频繁测试修改代码的时候一键编译还是比每次都要你手动敲编译命令快的)
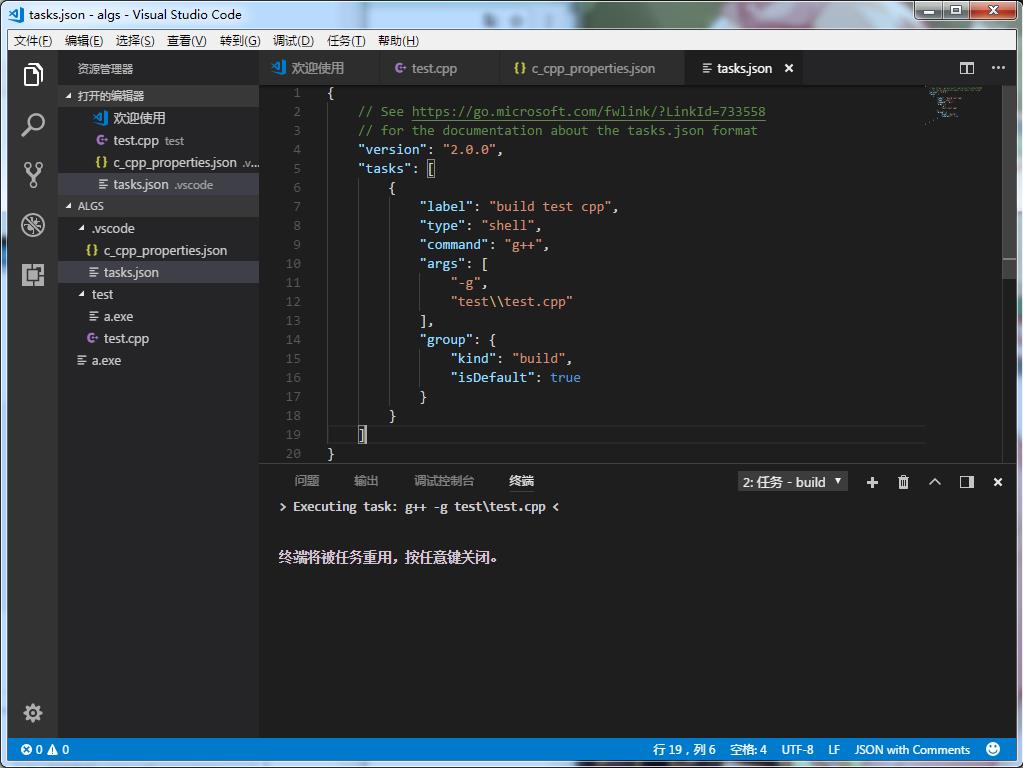
配置task.json
选择Shift+Command+P 并选择Tasks:Configure Tasks.选择从其他模板生成task.json
然后编辑如下:
    // See https://go.microsoft.com/fwlink/?LinkId=733558
    // for the documentation about the tasks.json format
    "version": "2.0.0",
    "tasks": [

            "label": "build test cpp",
            "type": "shell",
            "command": "g++",
            "args" :[
                "-g", "test.cpp"
            ]

    ]
注意cpp文件的路径。
接着选择Ctrl+Shift+B可以进行一键build操作。会自动扩展task.json
以后可以使用快捷键Ctrl+Shift+B来一键build这个任务。
(这个还是不太方便,如果需要同时编译多个互相依赖的文件,这太不方便后续还是改用make脚本。不过大部分情况命令行足够用了)
配置调试脚本
按Ctrl+Shift+P 选择 Debug:Open Launch.json会创建一个json文件
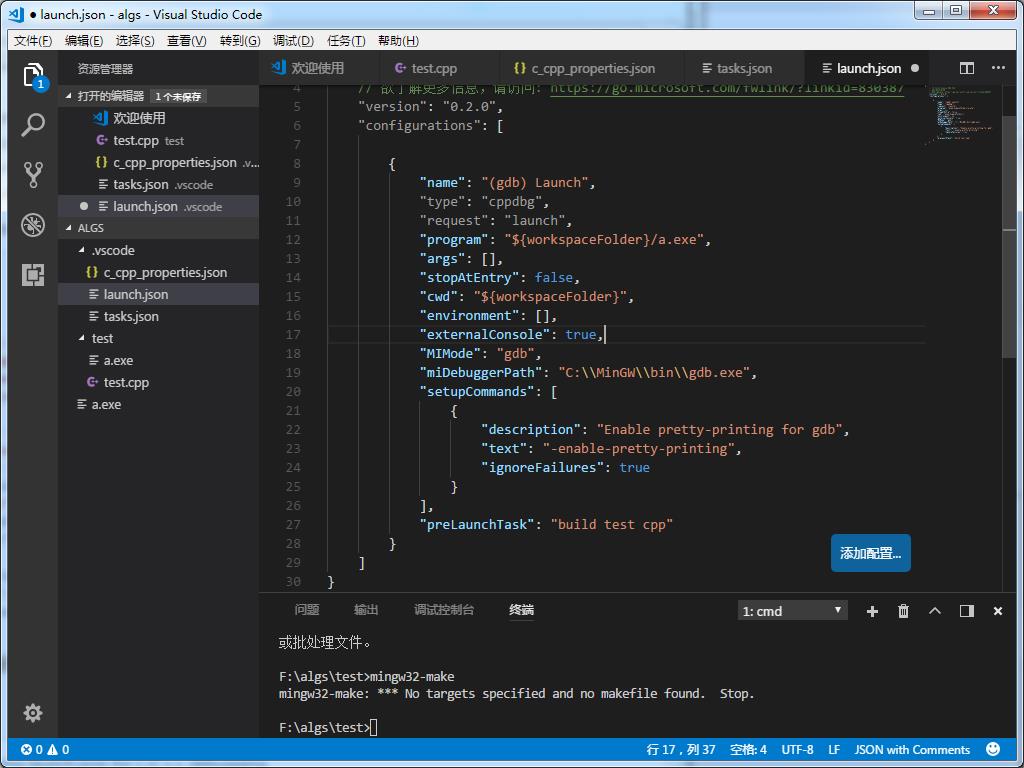
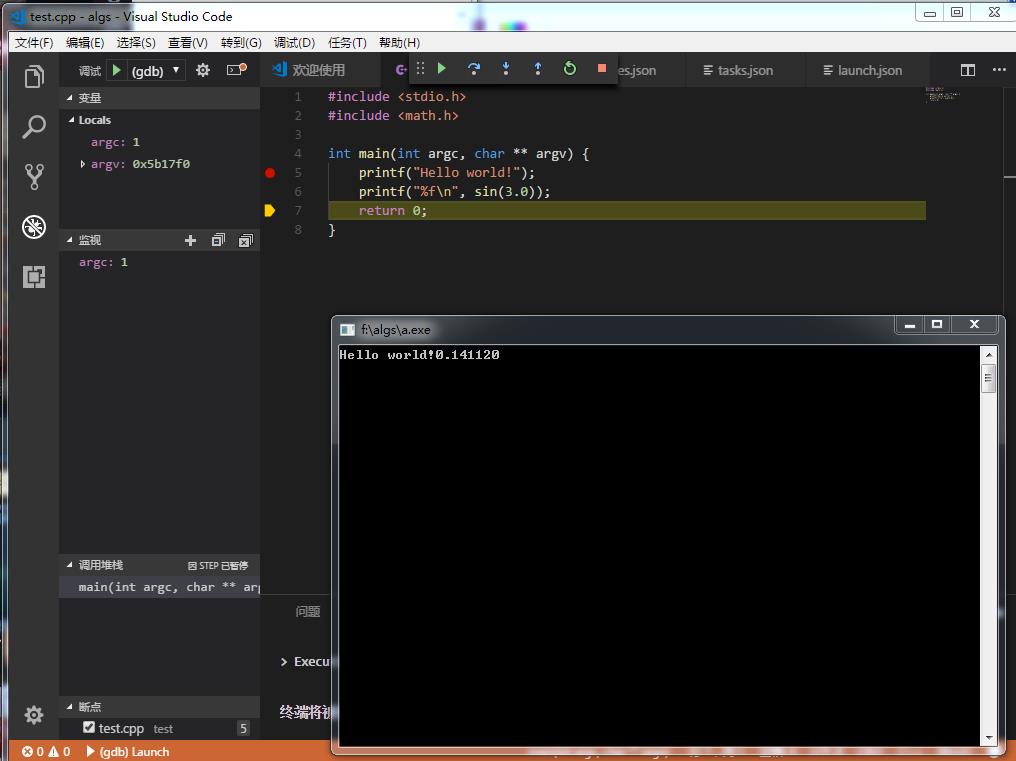
接着在调试窗口就可以选择gdb(launch)来进行调试了,并且可以设置断点,查看调用堆栈,设置变量watch等。
后续还可以配置make脚本来批量编译多个相互依赖的文件。一键clean之类的。
参考这篇博文:
http://blog.csdn.net/sesiria/article/details/78758705
第二部分:Windows下配置Mingw-W64和Clang+Visual Studio Code开发环境。
下载最新版的Mingw-W64(这里只需要编译x86_64的版本)
https://sourceforge.net/projects/mingw-w64/?source=typ_redirect
准备工作,删除所有已经安装过的Mingw版本并且删除所有环境变量。
一,安装Clang for Windows x64
http://releases.llvm.org/download.html
Clang for Windows (64-bit)
环境变量选择添加所有User
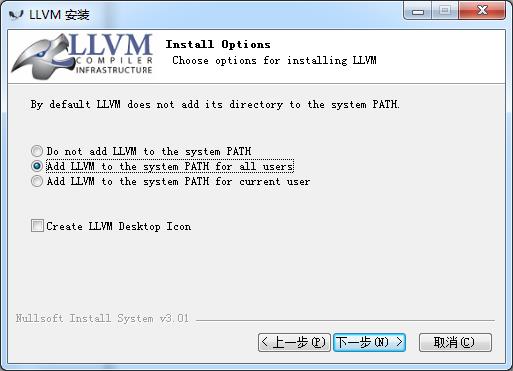
安装路径选择c:\\llvm
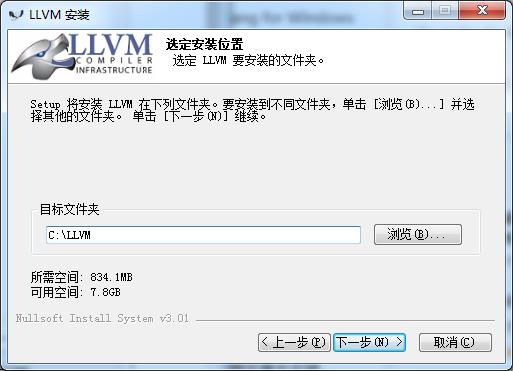
最后会弹出一个错误“MSVC integration install failed”因为Clang默认会去集成微软的cl编译器。本机没有安装所以不用管(我们集成Mingw)
二,安装Mingw-W64 (x86_64版本)
安装时候选择如下: x86_64 线程库用posix
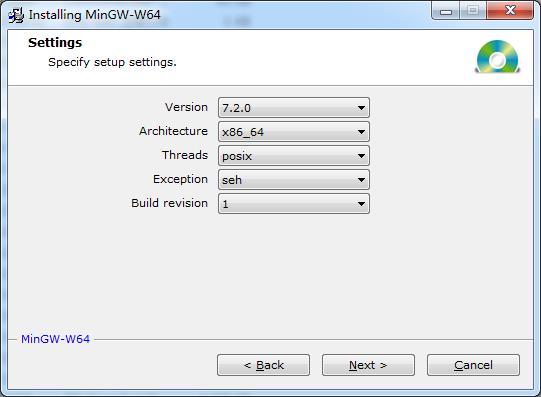
接着安装程序会下载很多组件,漫长的等待。
第三部:集成Mingw-64和Clang
因为Clang是没有头文件的。因此如果分开安装Mingw-w64和Clang还需要去PATH配置各种Mingw-w64的参数
为了一劳永逸这里就把Mingw-64和Clang进行集成方便后续的环境配置。
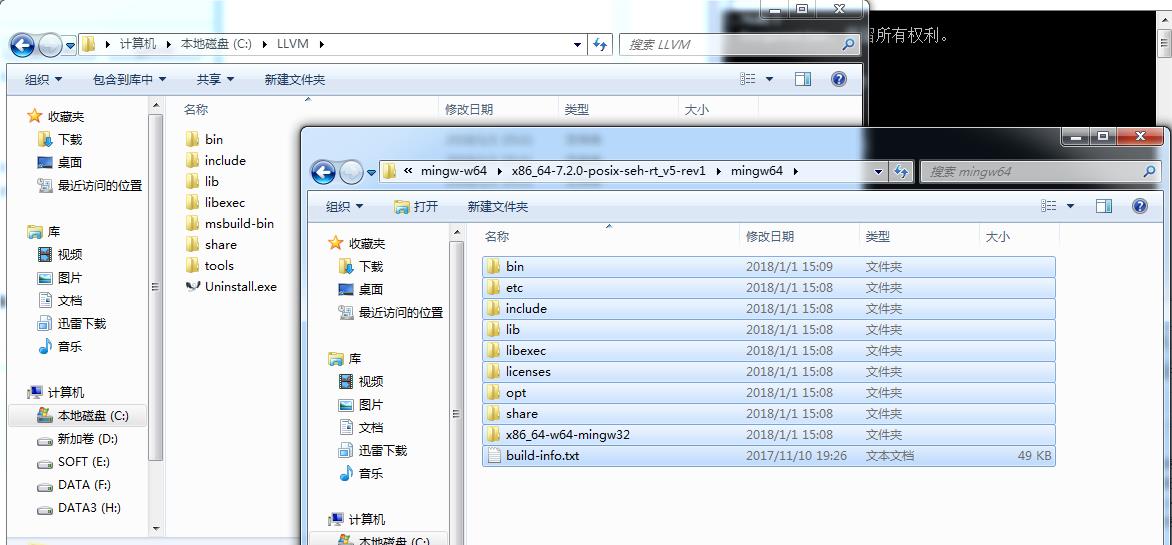
把Mingw64下的所有文件复制到c:\\llvm目录下。
第四部分,配置以下4个json文件。
c_cpp_properties.json
            "name": "Win32",
            "intelliSenseMode": "clang-x64",
            "includePath": [
                "$workspaceRoot",
                "C:/llvm/lib/gcc/x86_64-w64-mingw32/7.2.0/include/c++",
                "C:/llvm/lib/gcc/x86_64-w64-mingw32/7.2.0/include/c++/x86_64-w64-mingw32",
                "C:/llvm/lib/gcc/x86_64-w64-mingw32/7.2.0/include/c++/backward",
                "C:/llvm/lib/gcc/x86_64-w64-mingw32/7.2.0/include",
                "C:/llvm/include",
                "C:/llvm/x86_64-w64-mingw32/include",
                "C:/llvm/lib/gcc/x86_64-w64-mingw32/7.2.0/include-fixed"
            ],
            "defines": [
                "_DEBUG",
                "UNICODE",
                "__GNUC__=7",
                "__cdecl=__attribute__((__cdecl__))"
            ],
            "browse":
                "path": [
                    "$workspaceRoot",
                    "C:/llvm/lib/gcc/x86_64-w64-mingw32/7.2.0/include/c++",
                    "C:/llvm/lib/gcc/x86_64-w64-mingw32/7.2.0/include/c++/x86_64-w64-mingw32",
                    "C:/llvm/lib/gcc/x86_64-w64-mingw32/7.2.0/include/c++/backward",
                    "C:/llvm/lib/gcc/x86_64-w64-mingw32/7.2.0/include",
                    "C:/llvm/include",
                    "C:/llvm/x86_64-w64-mingw32/include",
                    "C:/llvm/lib/gcc/x86_64-w64-mingw32/7.2.0/include-fixed"
                ],
                "limitSymbolsToIncludedHeaders": true,
                "databaseFilename": ""
task.json 编译选项
    // See https://go.microsoft.com/fwlink/?LinkId=733558
    // for the documentation about the tasks.json format
    "version": "2.0.0",
    "tasks": [

            "label": "Compile",
            "type": "shell",
            "command": "clang++",
            "args": [
                "$file",
                "-o", // 指定输出文件名,不加该参数则默认输出a.exe
                "$fileDirname/$fileBasenameNoExtension.exe",
                "-g", // 生成和调试有关的信息
                "-Wall", // 开启额外警告
                "-static-libgcc", // 静态链接
                "-fcolor-diagnostics",
                "--target=x86_64-w64-mingw", // 默认target为msvc,不加这一条就会找不到头文件
                "-std=c++11" // C语言最新标准为c11,或根据自己的需要进行修改
            ],
            "group":
                "kind": "build",
                "isDefault": true


    ]
    // 使用 IntelliSense 了解相关属性。
    // 悬停以查看现有属性的描述。
    // 欲了解更多信息,请访问: https://go.microsoft.com/fwlink/?linkid=830387
    "version": "0.2.0",
    "configurations": [


            "name": "(gdb) Launch",
            "type": "cppdbg",
            "request": "launch",
            "program": "$fileDirname/$fileBasenameNoExtension.exe",
            "args": [],
            "stopAtEntry": false,
            "cwd": "$workspaceFolder",
            "environment": [],
            "externalConsole": true,
            "internalConsoleOptions": "neverOpen",
            "MIMode": "gdb",
            "miDebuggerPath": "gdb.exe",
            "setupCommands": [

                    "description": "Enable pretty-printing for gdb",
                    "text": "-enable-pretty-printing",
                    "ignoreFailures": true

            ],
            "preLaunchTask": "Compile"

    ]
    "C_Cpp.clang_format_sortIncludes": true, // 格式化时调整include的顺序(按字母排序)
    "C_Cpp.intelliSenseEngine": "Default", // 可以为Default或Tag Parser,后者较老,功能较简单。具体差别参考cpptools插件文档
    "C_Cpp.errorSquiggles": "Disabled", // 因为有clang的lint,所以关掉
    "editor.formatOnType": true, // 输入时就进行格式化,默认触发字符较少,分号可以触发
    "editor.snippetSuggestions": "top", // snippets代码优先显示补全

    "clang.cflags": [ // 控制c语言静态检测的参数
        "--target=x86_64-w64-mingw",
        "-std=c11",
        "-Wall"
    ],
    "clang.cxxflags": [ // 控制c++静态检测时的参数
        "--target=x86_64-w64-mingw",
        "-std=c++17",
        "-Wall"
    ],
    "clang.completion.enable":false // 效果稍好,但太卡,故关掉
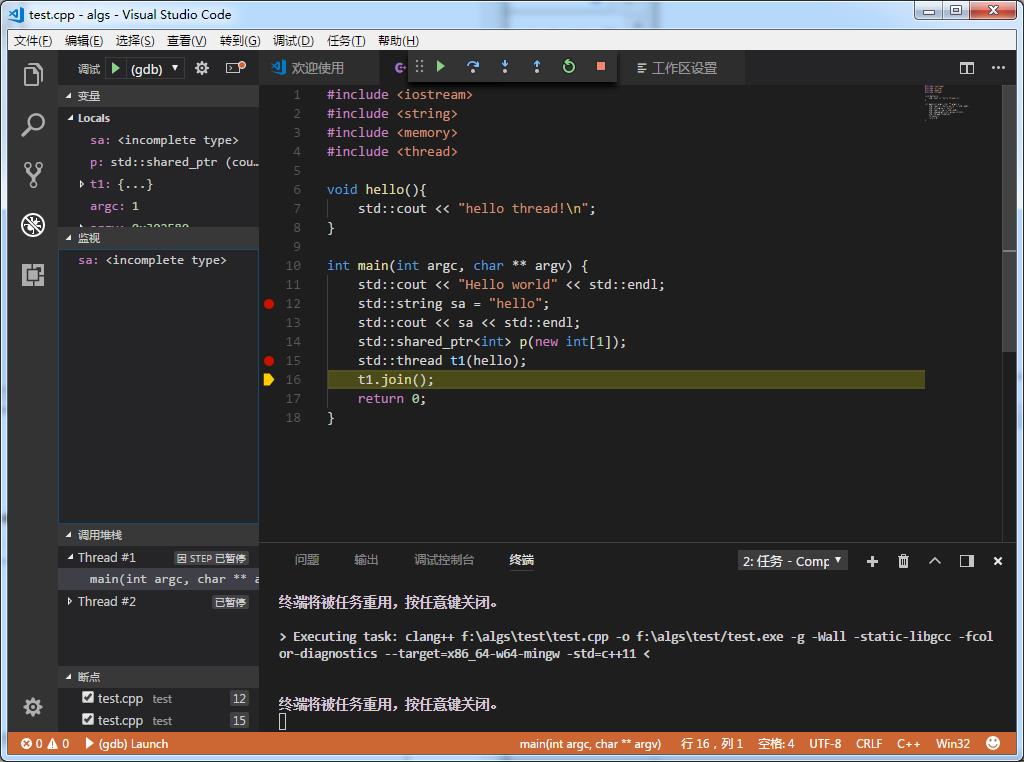
最后终于可以正常编译C++代码了 setting已经设置Clang支持C++17的语法规范。(智能感知)
同时编译选项根据实际情况来设置(C++11已经够用了)
在Windows下clang默认使用MSVC作为target对象。需要修改如下:
clang++ test\\test.cpp -Wall -static-libgcc -fcolor-diagnostics --target=x86_64-w64-mingw -std=c++11这样才能正常编译。否则会提示找不到MSVC toolchain
不过这些后续还是会写成makefile。总算大功告成了
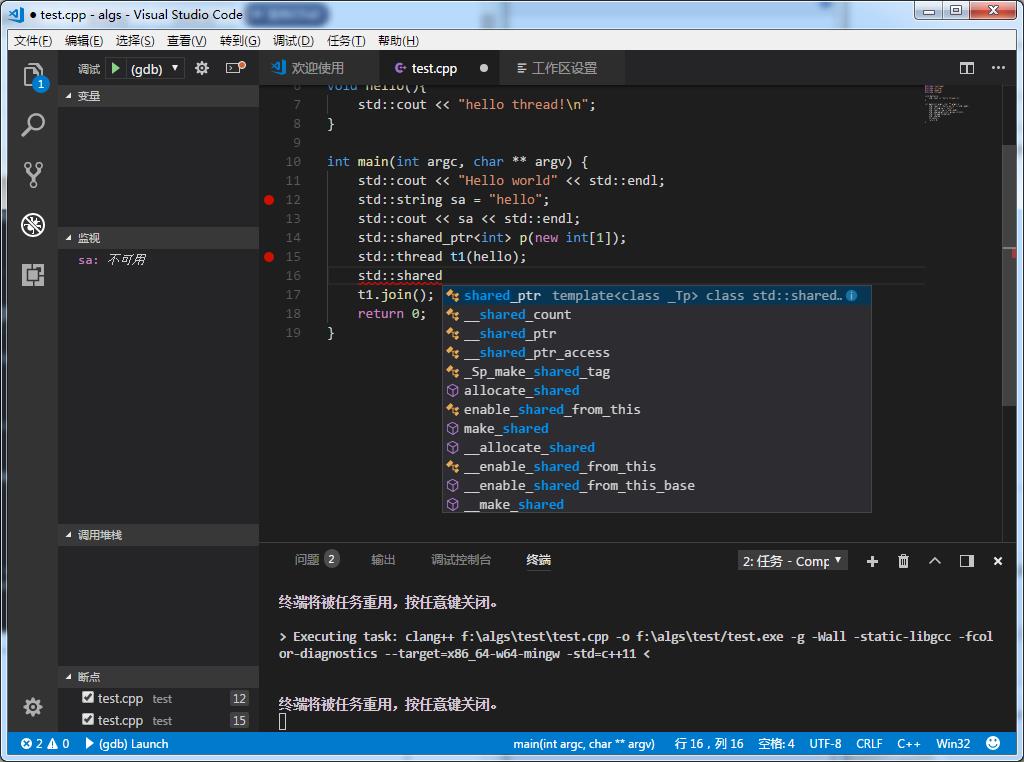
最终测试界面如下:
VSC上还有Clang的的智能补全插件。

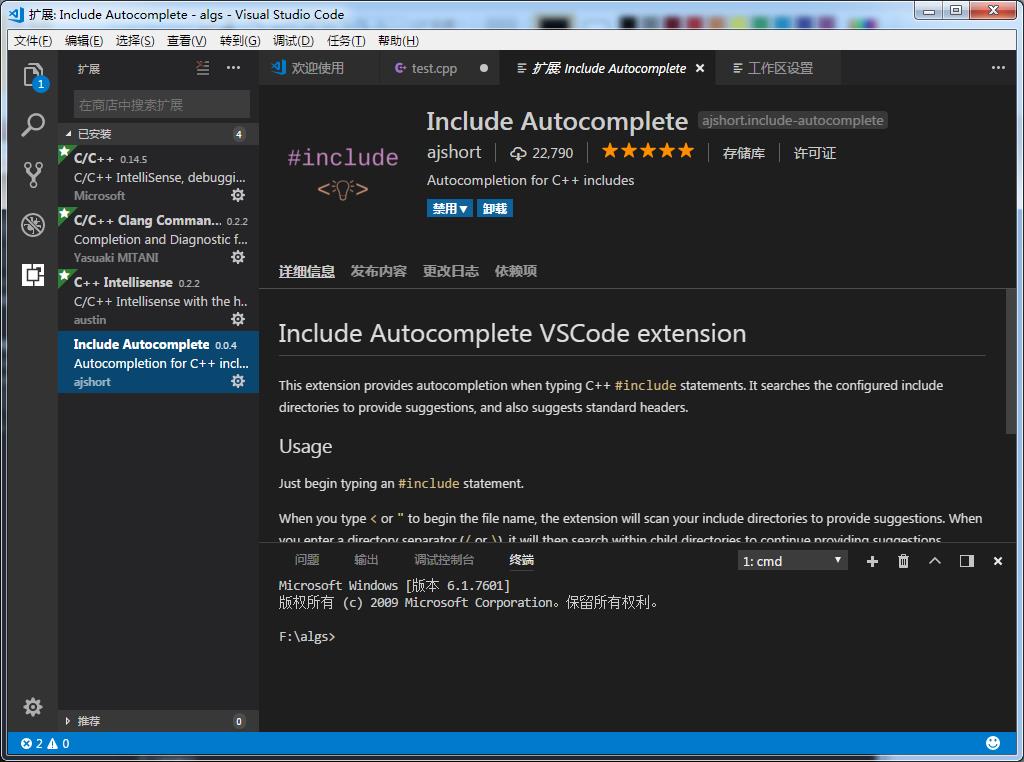
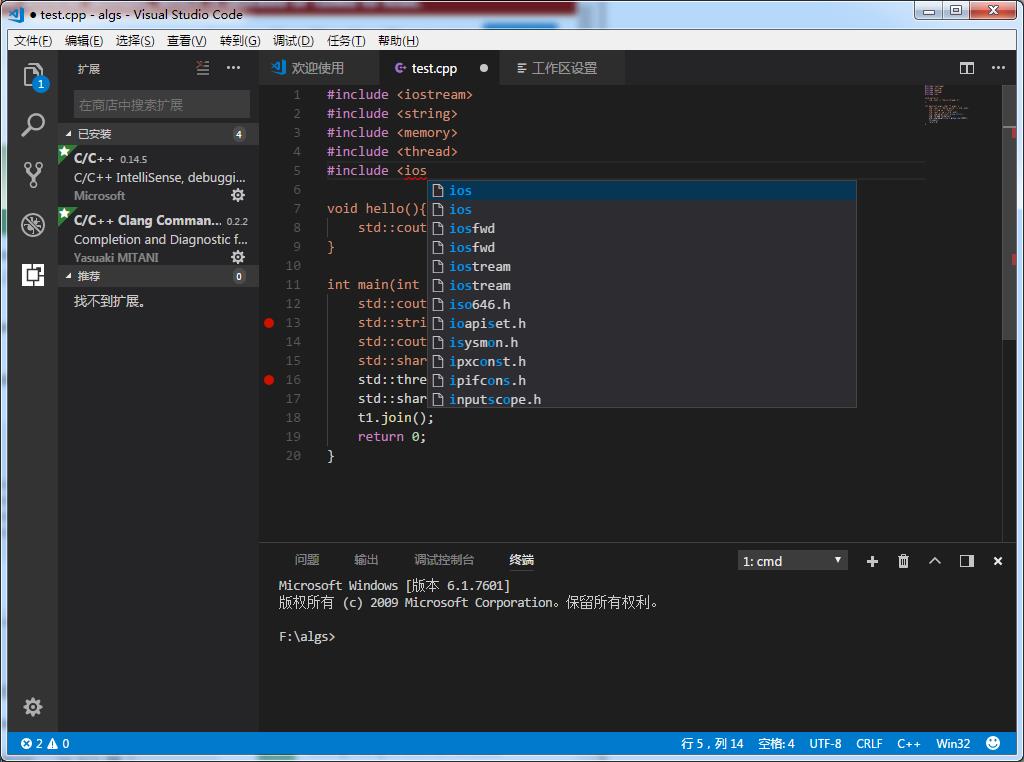
最后再装一个Include补全
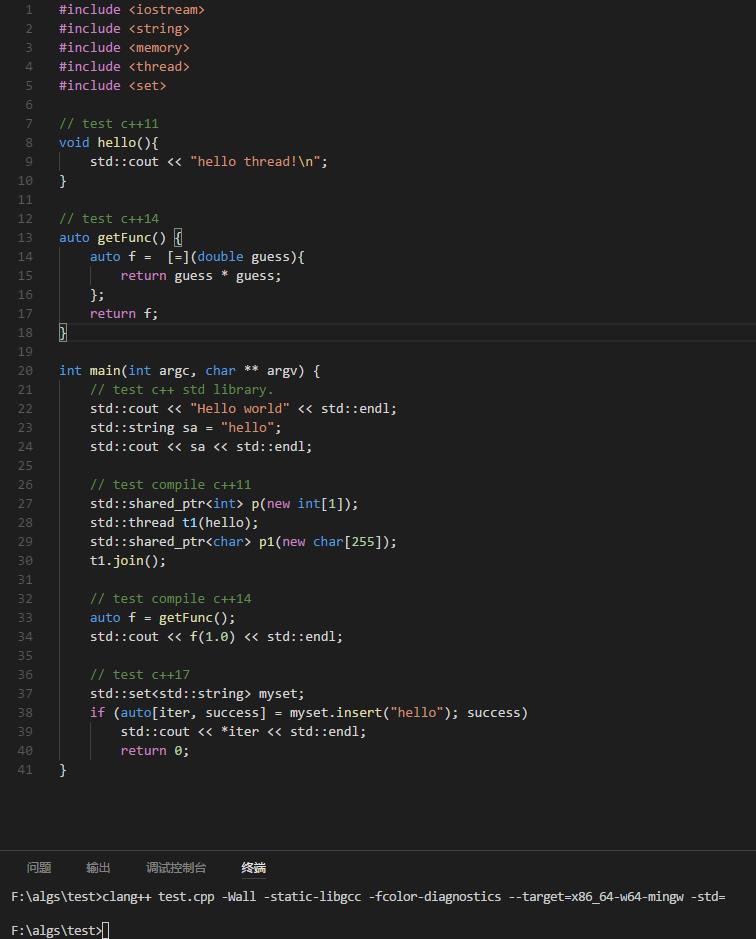
最后测试一下C++11, C++14, C++17
备注1:笔者后来在另外一台安装了Visual Studio的机器上尝试整合Mingw-w64和Clang的时候出现了问题。整合以后导致g++和clang都无法正常工作。
后来还是尝试分开安卓。并配置独立的路径。
这是另外一台机器上配置的c_cpp_properties.json
第三部分:MacOSX下配置Visual Studio Code C++开发环境
一,安装必要的组件
1. 安装Vscode步骤同上
2. 默认已经安装好Clang+llvm,除非要自己装gcc/g++(比如为了使用C++17这些新特性)。通常推荐使用默认的clang+llvm即可
3. git默认也安装好了。
二,配置部分
1)Vscode配置
Vscode默认已经能识别出标准C/C++库的头文件,不需要特别配置。
配置task.json同上
配置launch.json同上
2)Clang并不需要配置。如果是gcc配置参考如上。
注意:MacOSX自带的Clang是4.2.1版本。默认只支持C++11。虽然说暂时来讲足够用。但是如果要使用C++14或者C++17 ,需要另外进行一些配置。
几个配置文件
c_cpp_properties.json
    "configurations": [

            "name": "Mac",
            "includePath": [
                "/Library/Developer/CommandLineTools/usr/include/c++/v1",
                "/usr/local/include",
                "/Library/Developer/CommandLineTools/usr/lib/clang/9.0.0/include",
                "/Library/Developer/CommandLineTools/usr/include",
                "/usr/include",
                "$workspaceRoot"
            ],
            "defines": [
                "_DEBUG",
                "UNICODE",
                "__GNUC__=7",
                "__cdecl=__attribute__((__cdecl__))"
            ],
            "intelliSenseMode": "clang-x64",
            "browse":
                "path": [
                    "/Library/Developer/CommandLineTools/usr/include/c++/v1",
                    "/usr/local/include",
                    "/Library/Developer/CommandLineTools/usr/lib/clang/9.0.0/include",
                    "/Library/Developer/CommandLineTools/usr/include",
                    "/usr/include",
                    "$workspaceRoot"
                ],
                "limitSymbolsToIncludedHeaders": true,
                "databaseFilename": ""
            ,
            "macFrameworkPath": [
                "/System/Library/Frameworks",
                "/Library/Frameworks"
            ]
        ,

            "name": "Linux",
            "includePath": [
                "/usr/include",
                "/usr/local/include",
                "$workspaceRoot"
            ],
            "defines": [],
            "intelliSenseMode": "clang-x64",
            "browse":
                "path": [
                    "/usr/include",
                    "/usr/local/include",
                    "$workspaceRoot"
                ],
                "limitSymbolsToIncludedHeaders": true,
                "databaseFilename": ""

        ,

            "name": "Win32",
            "includePath": [
                "C:/Program Files (x86)/Microsoft Visual Studio 14.0/VC/include",
                "$workspaceRoot"
            ],
            "defines": [
                "_DEBUG",
                "UNICODE"
            ],
            "intelliSenseMode": "msvc-x64",
            "browse":
                "path": [
                    "C:/Program Files (x86)/Microsoft Visual Studio 14.0/VC/include/*",
                    "$workspaceRoot"
                ],
                "limitSymbolsToIncludedHeaders": true,
                "databaseFilename": ""


    ],
    "version": 3
task.json
由于clang的版本问题有些参数并不支持windows上的。
    // See https://go.microsoft.com/fwlink/?LinkId=733558
    // for the documentation about the tasks.json format
    "version": "2.0.0",
    "tasks": [

            "label": "Compile",
            "type": "shell",
            "command": "clang++",
            "args": [
                "$file",
                "-o", // 指定输出文件名,不加该参数则默认输出a.exe
                "$fileDirname/$fileBasenameNoExtension.out",
                "-g", // 生成和调试有关的信息
                "-Wall", // 开启额外警告
                "-fcolor-diagnostics",
                "-std=c++11" // C语言最新标准为c11,或根据自己的需要进行修改
            ],
            "group":
                "kind": "build",
                "isDefault": true


    ]
launch.json
    // Use IntelliSense to learn about possible attributes.
    // Hover to view descriptions of existing attributes.
    // For more information, visit: https://go.microsoft.com/fwlink/?linkid=830387
    "version": "0.2.0",
    "configurations": [


            "name": "(lldb) Launch",
            "type": "cppdbg",
            "request": "launch",
            "program": "$fileDirname/$fileBasenameNoExtension.out",//"enter program name, for example $workspaceFolder/a.out",

            "args": [],
            "stopAtEntry": false,
            "cwd": "$workspaceFolder",
            "environment": [],
            "externalConsole": true,
            "MIMode": "lldb",
            "preLaunchTask": "Compile"

    ]
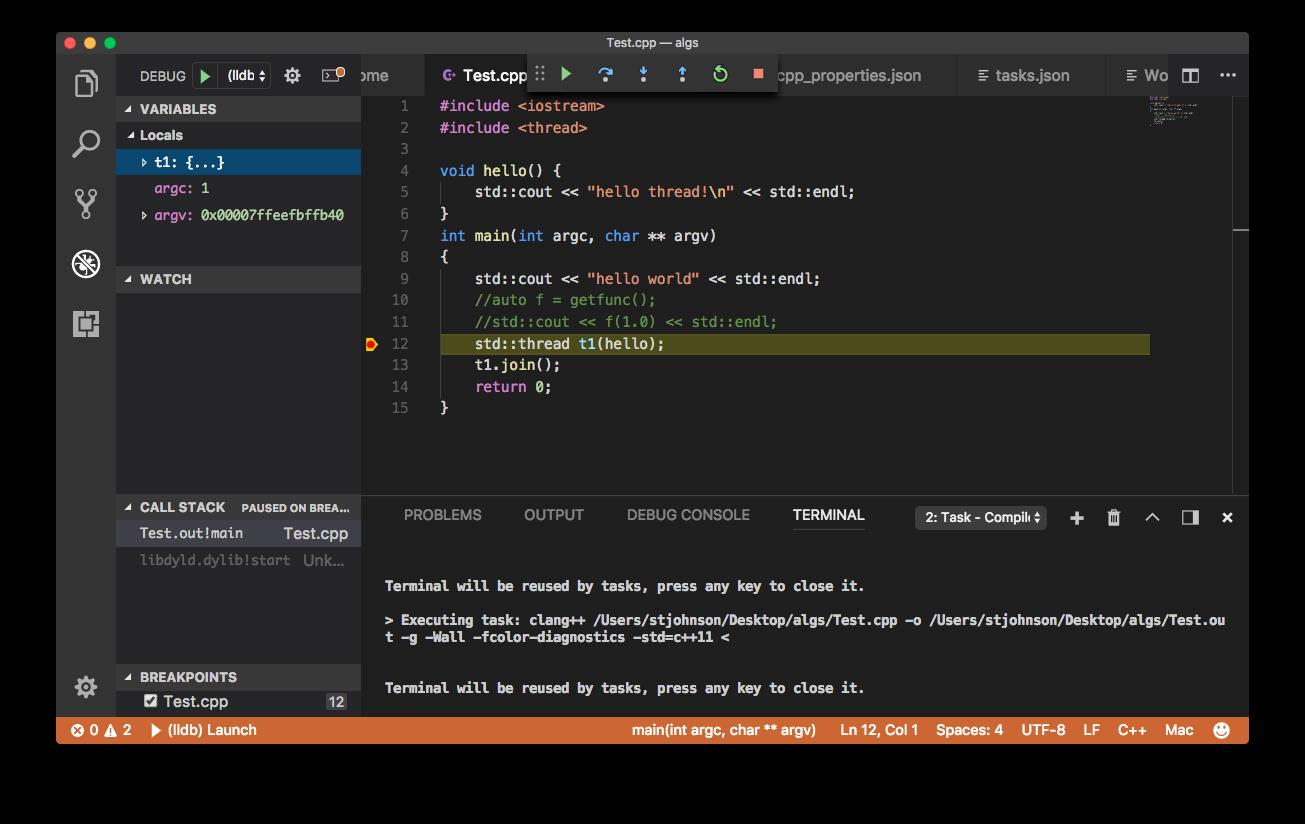
配置好的界面。基本功能够用了。如果要支持C++14和C++17 后续再研究如何配置使用新版的Clang
以上是关于Windows/Mac平台下Visual Studio Code C++开发环境搭建的主要内容,如果未能解决你的问题,请参考以下文章