MongoDB数据库简介安装和基本使用
Posted @魏大大
tags:
篇首语:本文由小常识网(cha138.com)小编为大家整理,主要介绍了MongoDB数据库简介安装和基本使用相关的知识,希望对你有一定的参考价值。
文章目录
MongoDB数据库简介、安装和基本使用
一、前言
1.1 基本概念介绍
我们在学习的过程中,接触过大量的数据库,例如Sql Server、mysql、Mybatis等,它们都属于传统的关系数据库,也就是基于二维表的数据。
今天我们学习的MongoDB数据库不是传统的关系型数据库,它介于关系型数据库和非关系型数据库之间,是非关系数据库中功能最丰富,最像关系数据库的NoSQL(Not Only Sql)数据库,以key-value形式存储,不遵循传统关系数据库的基本要求、表结构等特征。
NoSQL主要用于协助解决大数据查询问题,在大数据时代有重要的意义。
1.2 Nosql和关系数据库对比
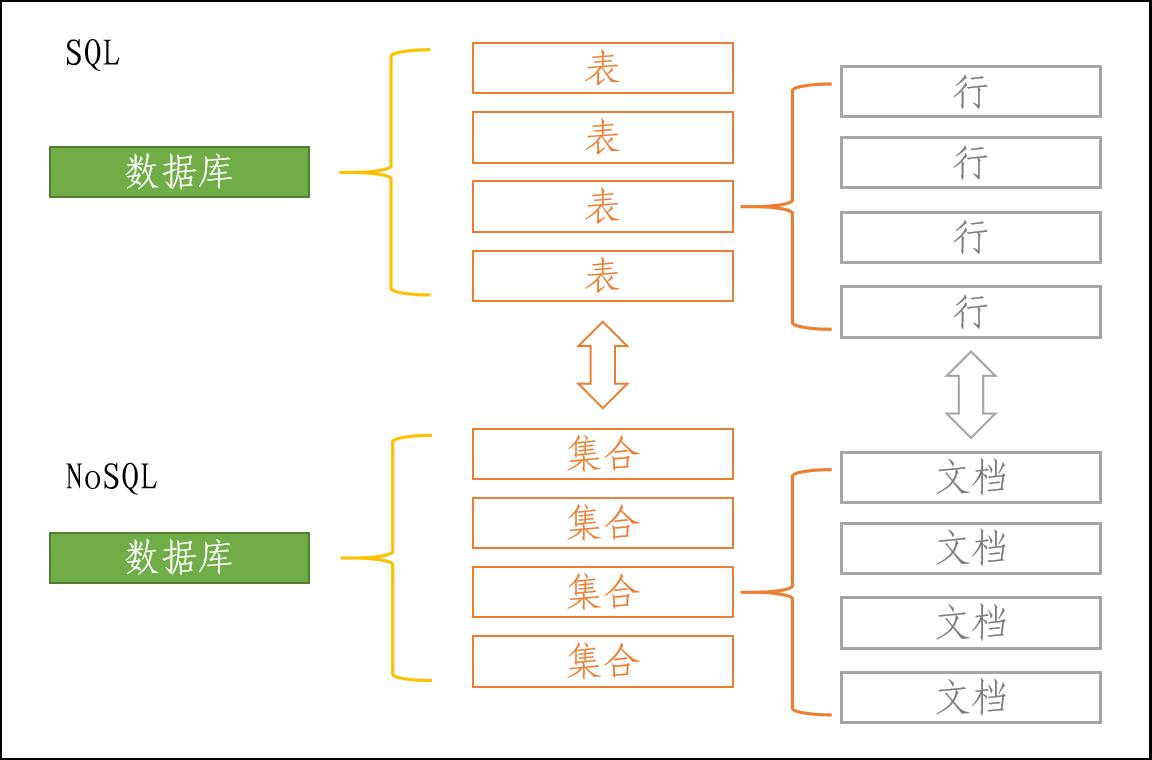
非结构型数据库没有行、列的概念,使用JSON存储数据,集合相当于关系数据库中的表,文档相当于行。
二、安装
2.1 下载
访问MongoDB官网:www.mongodb.com下载即可,这里是社区版下载链接https://www.mongodb.com/try/download/community。
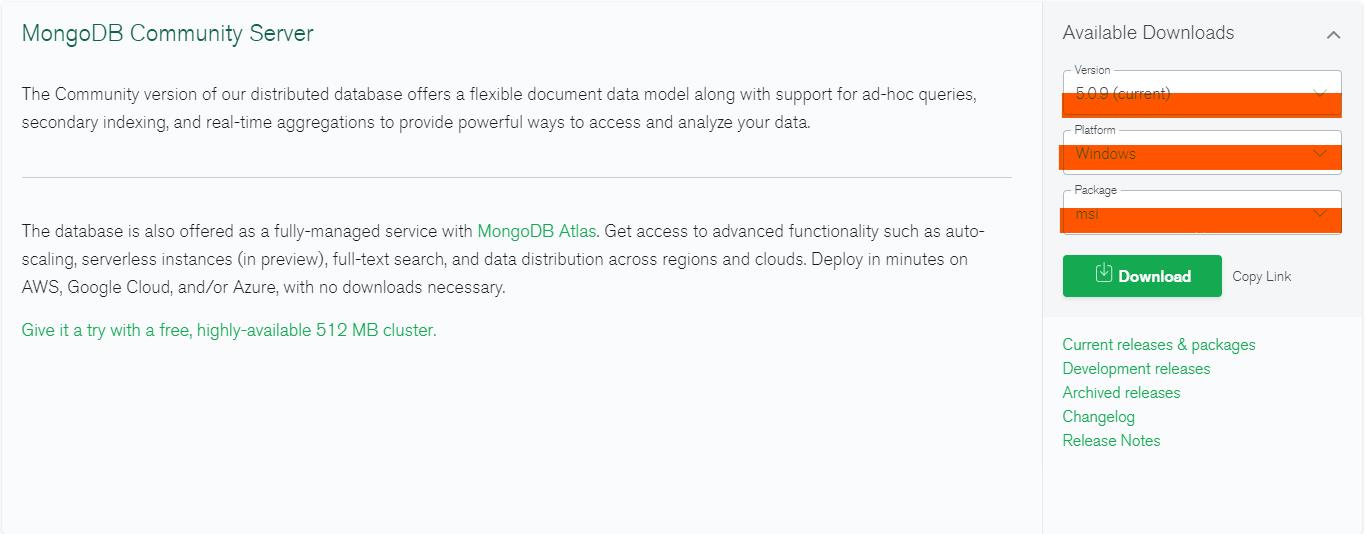
注意选择正确的版本、平台和包,这里下载的是5.0.9版本、Windows平台、MSI安装包。
国外的网站不一定好下载,下面是我上传的CSDN资源(免费):
2.2 安装
- 双击安装包
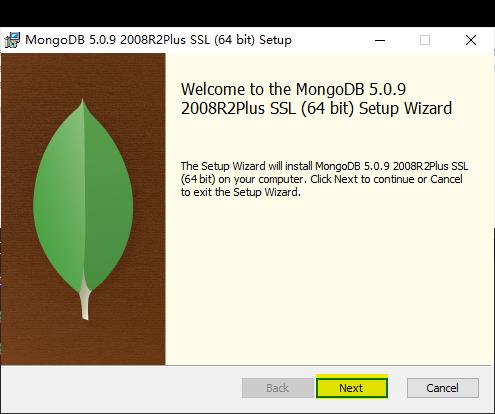
- 一直下一步

- 自定义安装

- 选择安装位置
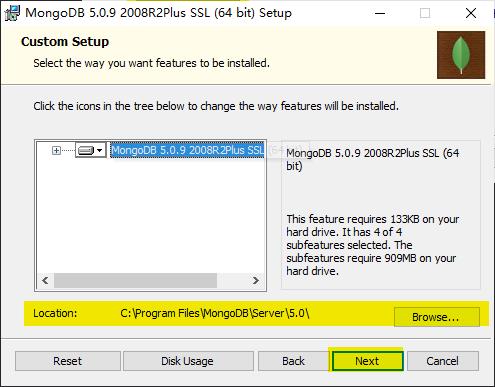
- 选择数据存放位置(建议选择一个空间大的磁盘)

- 不要选择安装
MongoDB Compass(网络不好会下载失败,可以后面再装)
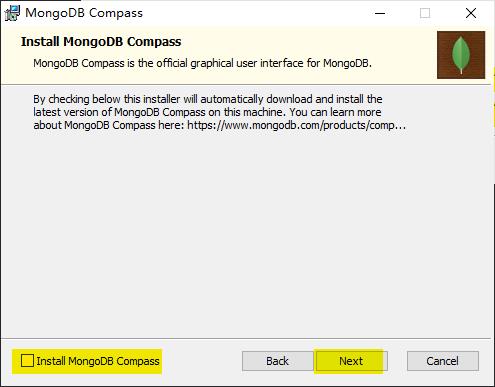
- 点击安装
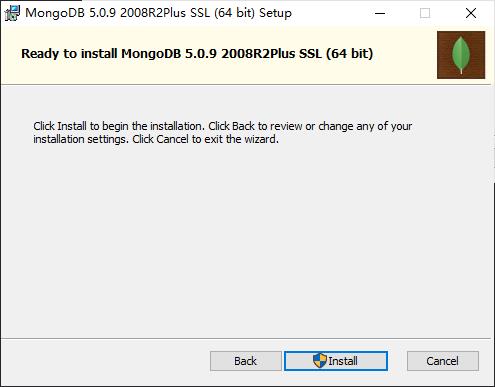
2.4 环境变量
- 复制
MongoDB的bin目录的路径,我这里是:D:MongoDb\\bin

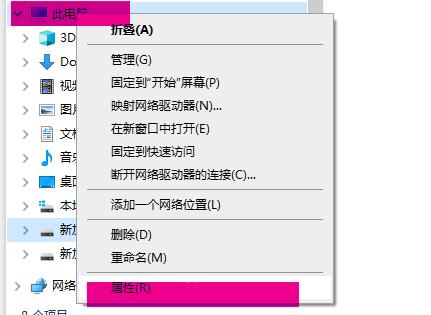
- 右键点击文件夹左侧的“此电脑”,选择“属性”:此电脑
->属性
- 新建一个环境变量
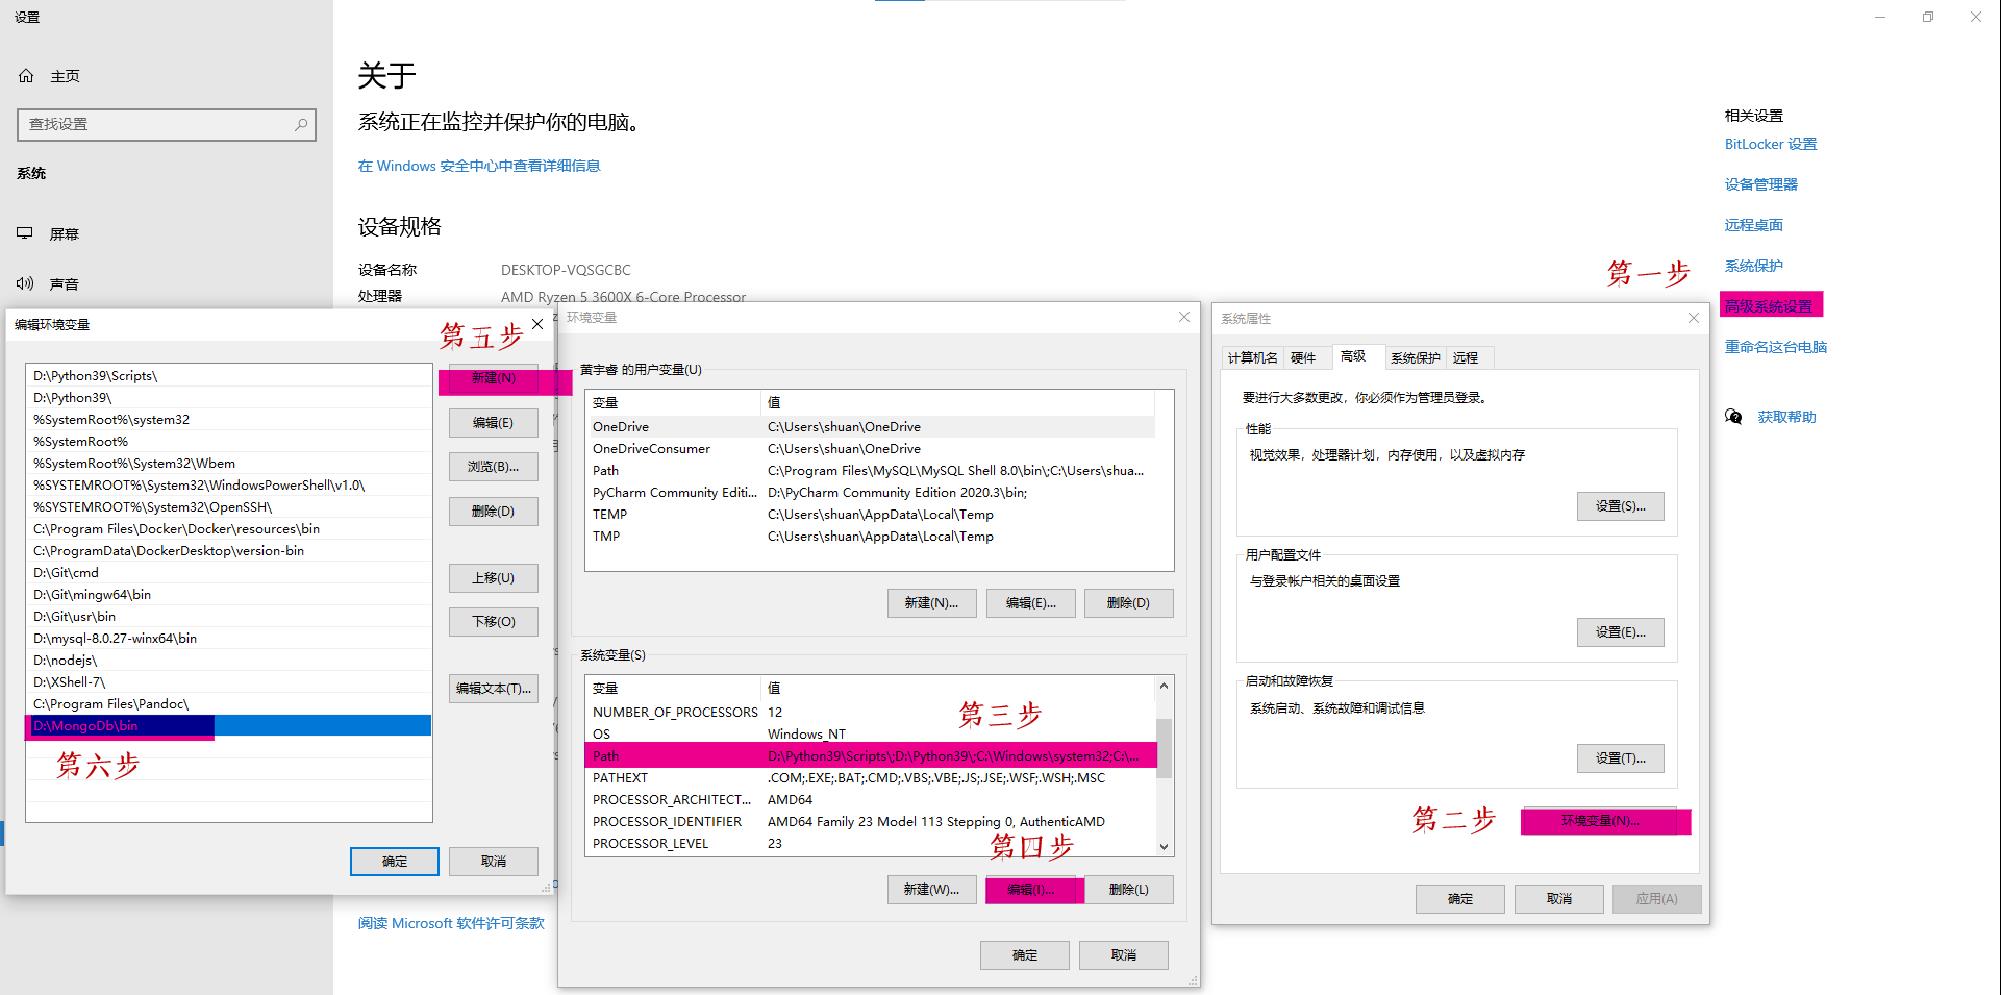
- 打开终端输入:
mongo,输出内容如下(可能会有不同,我这里是5.0.8版本)
PS E:\\Code> mongo
MongoDB shell version v5.0.8
connecting to: mongodb://127.0.0.1:27017/?compressors=disabled&gssapiServiceName=mongodb
Implicit session: session  "id" : UUID("bdfd1afc-e66b-4211-bf91-16e80d6845d5")
MongoDB server version: 5.0.8
================
Warning: the "mongo" shell has been superseded by "mongosh",
which delivers improved usability and compatibility.The "mongo" shell has been deprecated and will be removed in
an upcoming release.
For installation instructions, see
https://docs.mongodb.com/mongodb-shell/install/
================
---
The server generated these startup warnings when booting:
        2022-07-16T07:08:30.841+08:00: Access control is not enabled for the database. Read and write access to data and configuration is unrestricted
---
---
        Enable MongoDB's free cloud-based monitoring service, which will then receive and display
        metrics about your deployment (disk utilization, CPU, operation statistics, etc).

        The monitoring data will be available on a MongoDB website with a unique URL accessible to you
        and anyone you share the URL with. MongoDB may use this information to make product
        improvements and to suggest MongoDB products and deployment options to you.

        To enable free monitoring, run the following command: db.enableFreeMonitoring()
        To permanently disable this reminder, run the following command: db.disableFreeMonitoring()
---
>
三、简单使用
首先在终端输入mongo建立数据库连接,后面才能执行命令!注意,下面的命令都是连续的,建议顺序学习。
3.1 show dbs
查看数据库,刚安装的MongoDB会有三个基本的数据库,不要删除它们,如下:
> show dbs
admin   0.000GB
config  0.000GB
local   0.000GB
3.2 use db_name
选择一个想要操作的数据库需要使用use db_name指令
> use db_posts
switched to db db_posts
注意:
这里可以选择一个不存在的数据库,如果这样就可以用来创建一个新的数据库。
但是这个时候数据库还没有创建,需要插入数据后才创建数据库。
3.3 insert()
insert()方法用于给指定的集合插入数据,例如:
> db.user.insert(username:'小明',age:12)
WriteResult( "nInserted" : 1 )
注意:
数据库不能直接插入数据,需要向集合中插入数据(文档),这里的
user就是一个集合。如果
user不存在就会创建一个新的user表,数据插入的格式就是标准的JSON格式。
这个时候就创建了一个新的数据库db_posts和一个新的用户表user,并且往表中插入了一个数据。如果我们使用show dbs就可以看到数据库db_posts了。
> show dbs
admin     0.000GB
config    0.000GB
db_posts  0.000GB
local     0.000GB
3.4 show collections
查看当前数据库中有多少表(集合)需要使用show collections命令:
> show collections
user
3.5 find()
使用db.表名.find()可以查询表中所有的数据:
> db.user.find()
 "_id" : ObjectId("62d285cbb9789c8ce412e785"), "username" : "小明", "age" : 12
我们可以多插入几条数据:
> db.user.insert(username:'小红',age:99)
WriteResult( "nInserted" : 1 )
> db.user.insert(username:'小强',age:999)
WriteResult( "nInserted" : 1 )
> db.user.find()
 "_id" : ObjectId("62d285cbb9789c8ce412e785"), "username" : "小明", "age" : 12
 "_id" : ObjectId("62d28835b9789c8ce412e786"), "username" : "小红", "age" : 99
 "_id" : ObjectId("62d2884cb9789c8ce412e787"), "username" : "小强", "age" : 999
3.6 drop()
删除一个集合需要使用db.表名.drop():
> db.user.drop()
true
> show collections
>
3.7 dropDatabase()
删除数据库,这里有个尴尬的地方是,没有集合的数据库是不显示的,也就是说在执行dropDatabase之前数据库已经不可见了。反正这个语法就是删数据库的,不要在意这些细节了。
> db.dropDatabase()
 "ok" : 1
> show dbs
admin   0.000GB
config  0.000GB
local   0.000GB
以上是关于MongoDB数据库简介安装和基本使用的主要内容,如果未能解决你的问题,请参考以下文章