springboot—— 使用STS作为IDE实现MVC模式的Web程序
Posted 玛丽莲茼蒿
tags:
篇首语:本文由小常识网(cha138.com)小编为大家整理,主要介绍了springboot—— 使用STS作为IDE实现MVC模式的Web程序相关的知识,希望对你有一定的参考价值。
前言:
1. 在springboot的官网推荐了两种开发环境,一个是IDEA,另一个就是Spring Tool Suite(STS)。之前一直在IDEA上,今天用STS试一下。并比较二者的区别。
2. 有两种方法使用STS,一种是在eclipse里下载STS的插件,一种是下载STS整个IDE。因为我的eclipse版本比较老不支持STS插件,所以我选择了后者。
一、下载安装STS(spring Tool Suite 4)
1. 下载jar包
目前spring官网已经不支持spring Tool Suite 3了。所以直接下载的STS 4,地址:Spring | Tools
下载下来是一个jar包
2. 解压jar包
找到jar包的路径,在该路径下打开cmd。
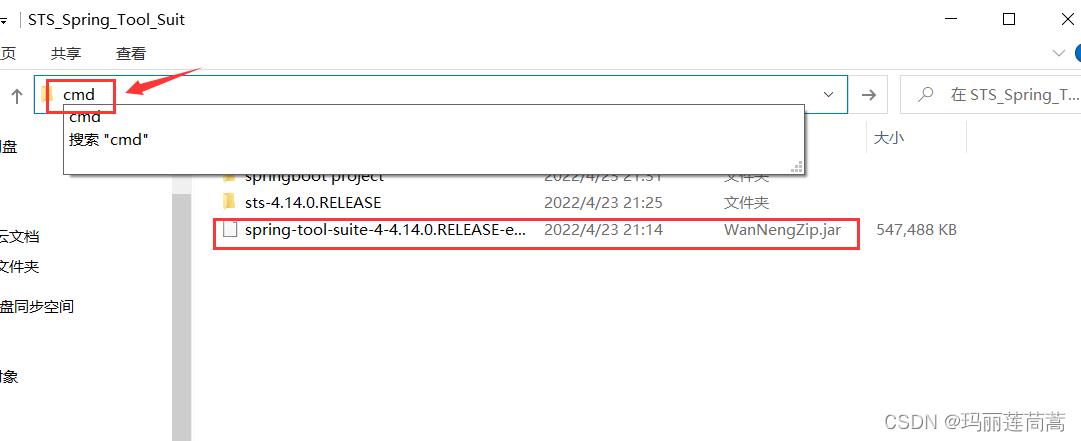
输入如下命令解压jar包。

得到安装包的可执行文件,安装STS。
在同级目录下生成一个“sts-4.14.0.RELEASE”文件夹,打开这个文件夹就能看见下面的STS可执行程序。
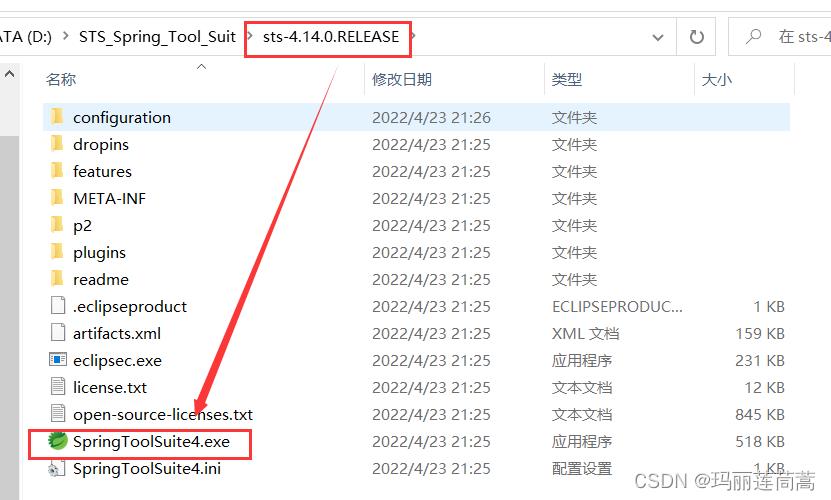
双击进入。
二、新建一个基于Thymeleaf的springboot web项目
2.1 新建项目
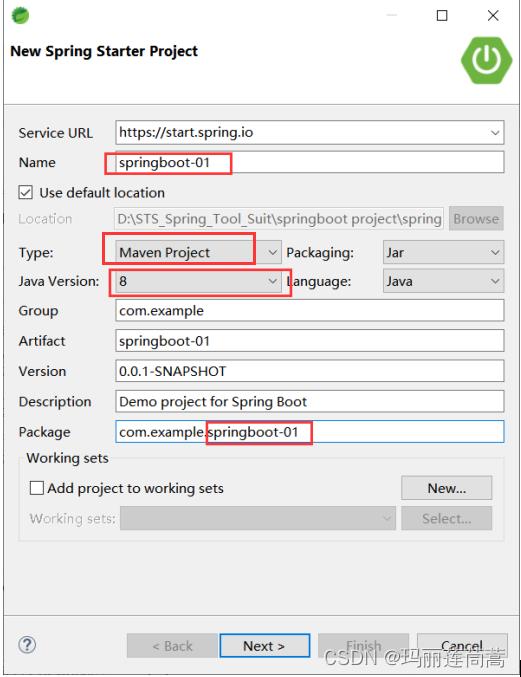
1. 选择maven项目。我的java version要选8,然后起个名字就可以了
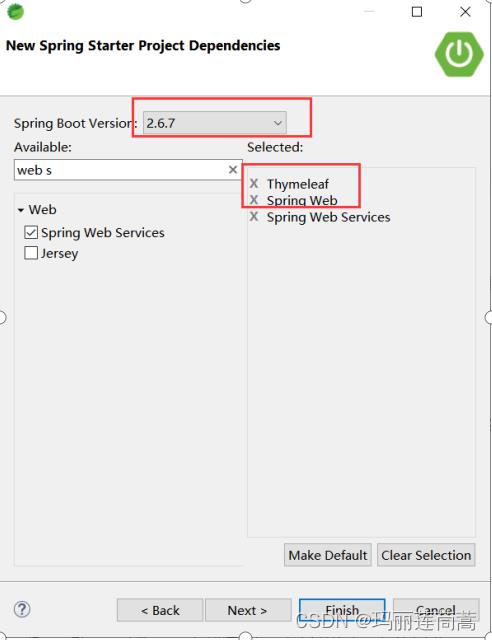
2. 选择模板。web项目的话,前两个Thymeleaf和Spring web必选。
到这里为止和IDEA里差不多。来看一下二者目录结构(左IDEA,右STS)。
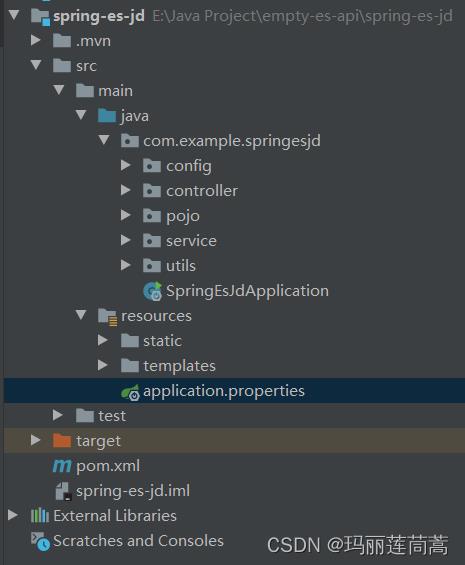

稍有不同,但其实是差不多的。
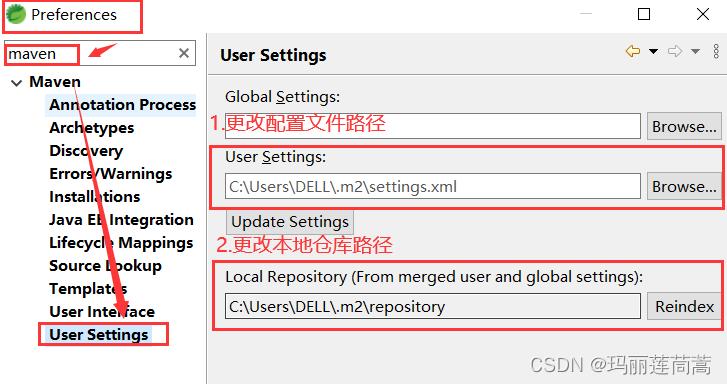
对了,在STS里maven的本地仓库也是默认在下面这个路径下。
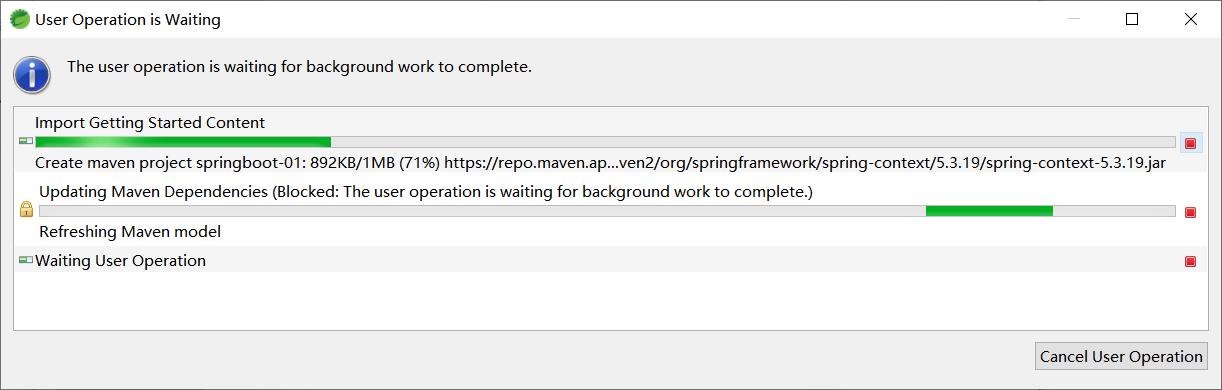
C:\\Users\\User\\.m2\\repository 而且在STS里构建项目不会和IDEA一样提醒你是否更改本地仓库的路径,直接按照默认的来,所以第一个项目有些慢,可以看到正在往C盘那个默认的本地仓库里下东西。
当然,我们可以和IDEA里一样更改本地仓库的路径:
2.2 配置web应用的上下文路径
在application.properties文件中配置如下内容:
server.servlet.context-path=/ch5_2 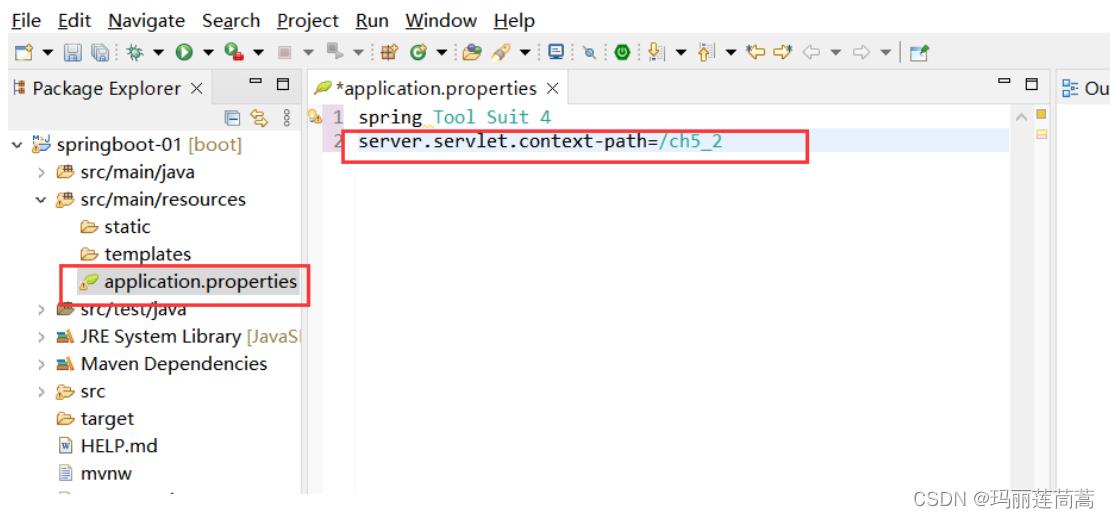
这样,我们访问这个项目的时候,在浏览器地址栏输入http://localhost:8080/ch5_2就可以了。
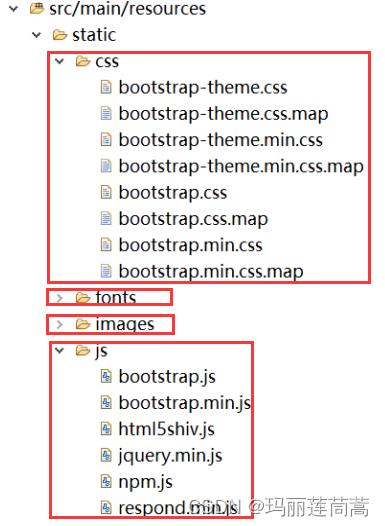
2.3 导入静态资源
JS脚本、CSS样式、图片等静态文件默认放置在src/main/resources/static目录下。
2.4 创建实体类Book
创建名为com.example.springboot01.model的包,并在该包中创建名为Book的实体类。此实体类用在模板页面展示数据。
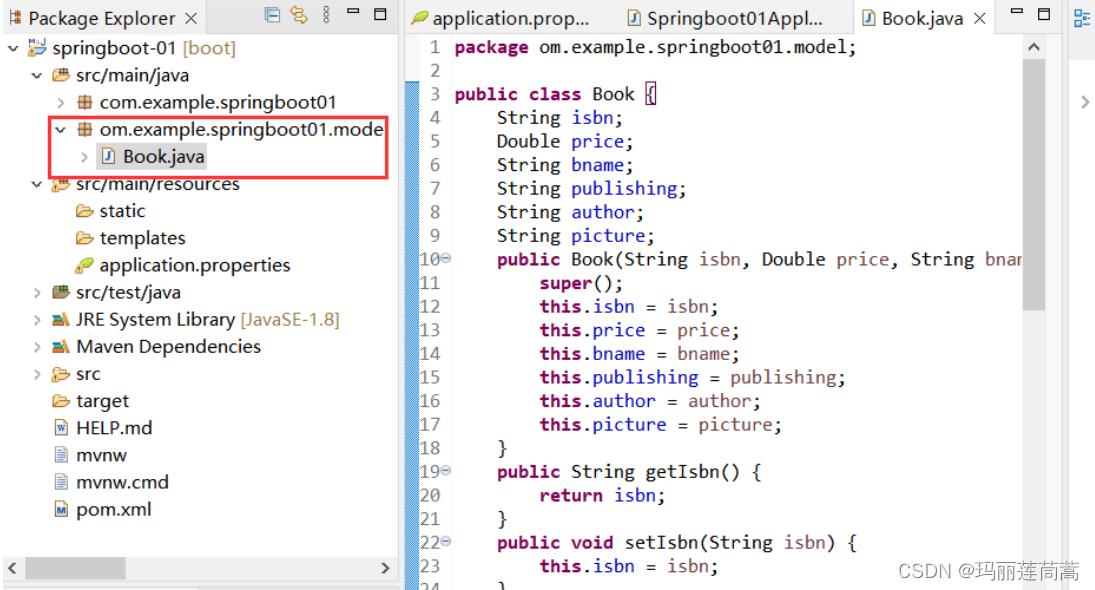
package om.example.springboot01.model;

public class Book
	String isbn;
	Double price;
	String bname;
	String publishing;
	String author;
	String picture;
	public Book(String isbn, Double price, String bname, String publishing, String author, String picture)
		super();
		this.isbn = isbn;
		this.price = price;
		this.bname = bname;
		this.publishing = publishing;
		this.author = author;
		this.picture = picture;

	public String getIsbn()
		return isbn;

	public void setIsbn(String isbn)
		this.isbn = isbn;

	public Double getPrice()
		return price;

	public void setPrice(Double price)
		this.price = price;

	public String getBname()
		return bname;

	public void setBname(String bname)
		this.bname = bname;

	public String getPublishing()
		return publishing;

	public void setPublishing(String publishing)
		this.publishing = publishing;

	public String getAuthor()
		return author;

	public void setAuthor(String author)
		this.author = author;

	public String getPicture()
		return picture;

	public void setPicture(String picture)
		this.picture = picture;
2.5 创建控制器类ThymeleafController
创建名为com.example.springboot01.controller的包,并在该包中创建名为ThymeleafController的控制器类。在该控制器类中,实例化Book类的多个对象,并保存到集合ArrayList<Book>中。

package com.example.springboot01.controller;

import java.util.ArrayList;
import java.util.List;

import org.springframework.stereotype.Controller;
import org.springframework.ui.Model;
import org.springframework.web.bind.annotation.RequestMapping;

import om.example.springboot01.model.Book;

@Controller
public class ThymeleafController
	@RequestMapping("/")
	public String index(Model model)
		Book teacherGeng = new Book(
				"9787302464259",
				59.5,
				"Java 2实用教程(第5版)",
				"清华大学出版社",
				"耿祥义",
				"073423-02.jpg"
				);
		List<Book> chenHeng = new ArrayList<Book>();
		Book b1 = new Book(
				"9787302529118",
				69.8,
				"Java Web开发从入门到实战(微课版)",
				"清华大学出版社",
				"陈恒",
				"082526-01.jpg"
				);
		chenHeng.add(b1);
		Book b2 = new Book(
				"9787302502968",
				69.8,
				"Java EE框架整合开发入门到实战——Spring+Spring MVC+MyBatis(微课版)",
				"清华大学出版社",
				"陈恒",
				"079720-01.jpg");
		chenHeng.add(b2);
		model.addAttribute("aBook", teacherGeng);
		model.addAttribute("books", chenHeng);
		return "index";
2.6 View视图页面
Thymeleaf模板默认将视图页面放在src/main/resources/templates目录下。因此,我们在src/main/resources/templates目录下新建html页面文件index.html。在该页面中,使用Thymeleaf模板显示控制器类TestThymeleafController中的model对象数据。
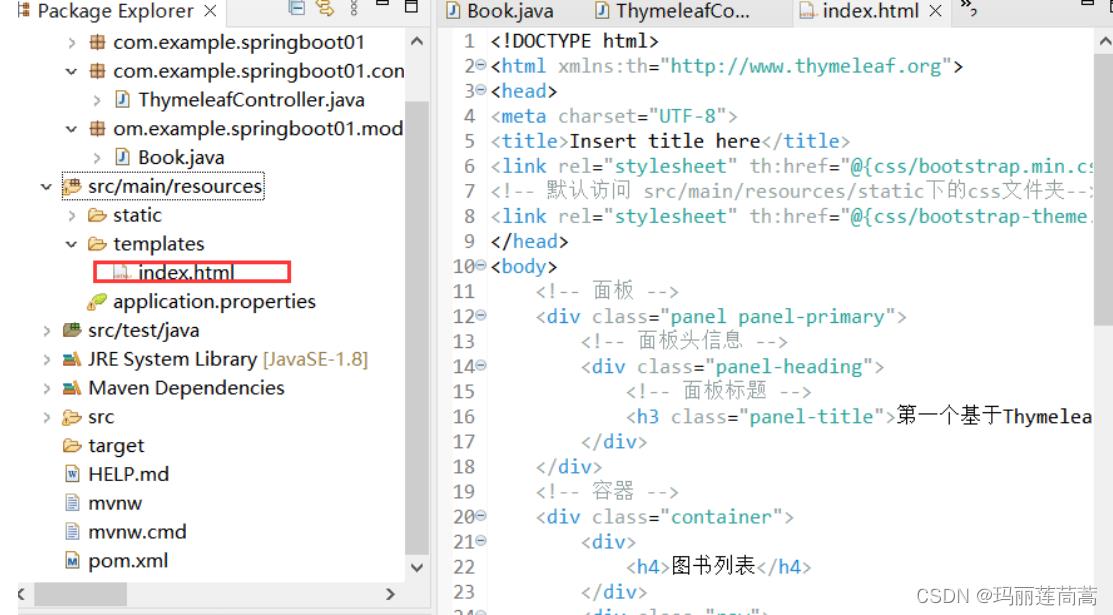
<!DOCTYPE html>
<html xmlns:th="http://www.thymeleaf.org">
<head>
<meta charset="UTF-8">
<title>Insert title here</title>
<link rel="stylesheet" th:href="@css/bootstrap.min.css" />
<!-- 默认访问 src/main/resources/static下的css文件夹-->
<link rel="stylesheet" th:href="@css/bootstrap-theme.min.css" />
</head>
<body>
<!-- 面板 -->
<div class="panel panel-primary">
<!-- 面板头信息 -->
<div class="panel-heading">
<!-- 面板标题 -->
<h3 class="panel-title">第一个基于Thymeleaf模板引擎的Spring Boot Web应用</h3>
</div>
</div>
<!-- 容器 -->
<div class="container">
<div>
<h4>图书列表</h4>
</div>
<div class="row">
<!-- col-md针对桌面显示器 col-sm针对平板 -->
<div class="col-md-4 col-sm-6">
<a href="">
<img th:src="'images/' + $aBook.picture" alt="图书封面" style="height: 180px; width: 40%;"/>
</a>
<!-- caption容器中放置其他基本信息,比如标题、文本描述等 -->
<div class="caption">
<h4 th:text="$aBook.bname"></h4>
<p th:text="$aBook.author"></p>
<p th:text="$aBook.isbn"></p>
<p th:text="$aBook.price"></p>
<p th:text="$aBook.publishing"></p>
</div>
</div>
<!-- 循环取出集合数据 -->
<div class="col-md-4 col-sm-6" th:each="book:$books">
<a href="">
<img th:src="'images/' + $book.picture" alt="图书封面" style="height: 180px; width: 40%;"/>
</a>
<div class="caption">
<h4 th:text="$book.bname"></h4>
<p th:text="$book.author"></p>
<p th:text="$book.isbn"></p>
<p th:text="$book.price"></p>
<p th:text="$book.publishing"></p>
</div>
</div>
</div>
</div>
</body>
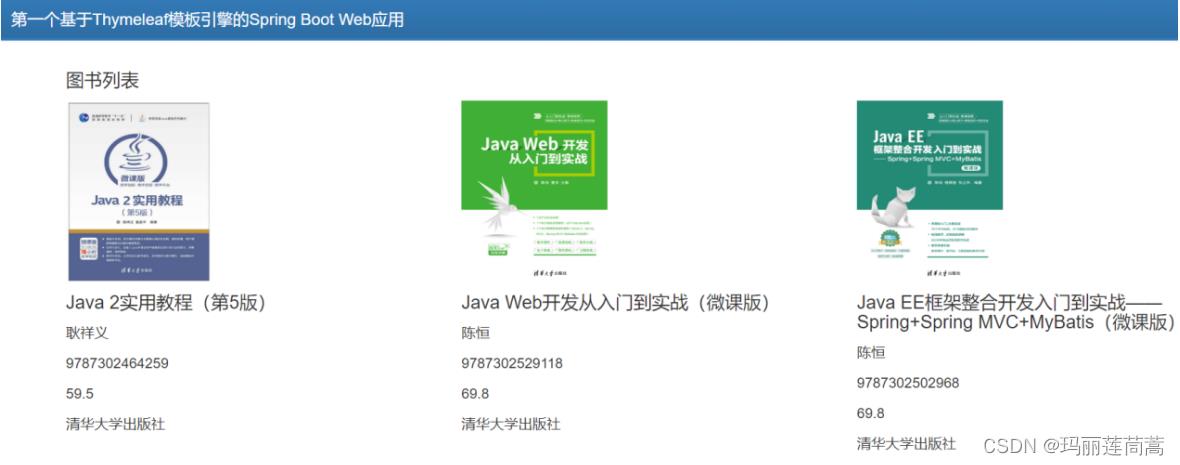
</html>2.7 运行
首先,运行自动生成的springboot01Application.java主类。然后,访问http://localhost:8080/
ch5_2/。运行效果如下图所示。
以上是关于springboot—— 使用STS作为IDE实现MVC模式的Web程序的主要内容,如果未能解决你的问题,请参考以下文章