管理信息系统 课程设计
Posted wangze019
tags:
篇首语:本文由小常识网(cha138.com)小编为大家整理,主要介绍了管理信息系统 课程设计相关的知识,希望对你有一定的参考价值。
系统概要说明
本系统主要对于不同种类的电影,一些用户对于这些电影的评价,我们可以看待不同的用户对于不同种类的电影的不同,用户可以对于一些别人发布的影评进行评论,就好像两个人交流一样,对于发表的电影的赏析,进行交流,可以更好的让用户去了解这些视频。也可以发表自己不同的建议,就像两个人在面对面的交流一样。一些对电影喜欢的人可以更好的去了解电影的评价,和一些自己兴趣爱好相同的人进行心得的交流。
网站结构设计
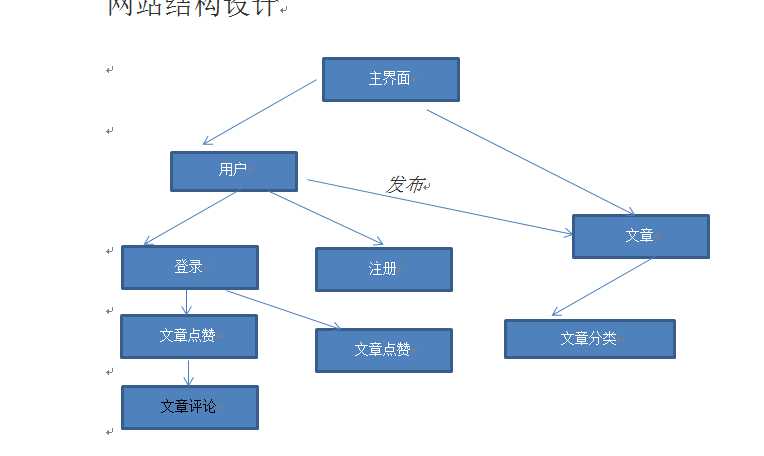
模块详细设计
首页
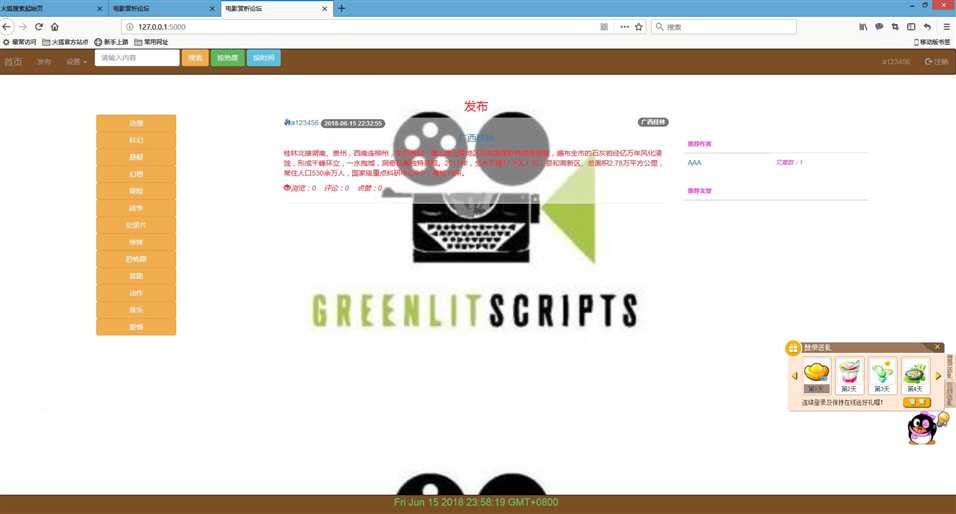
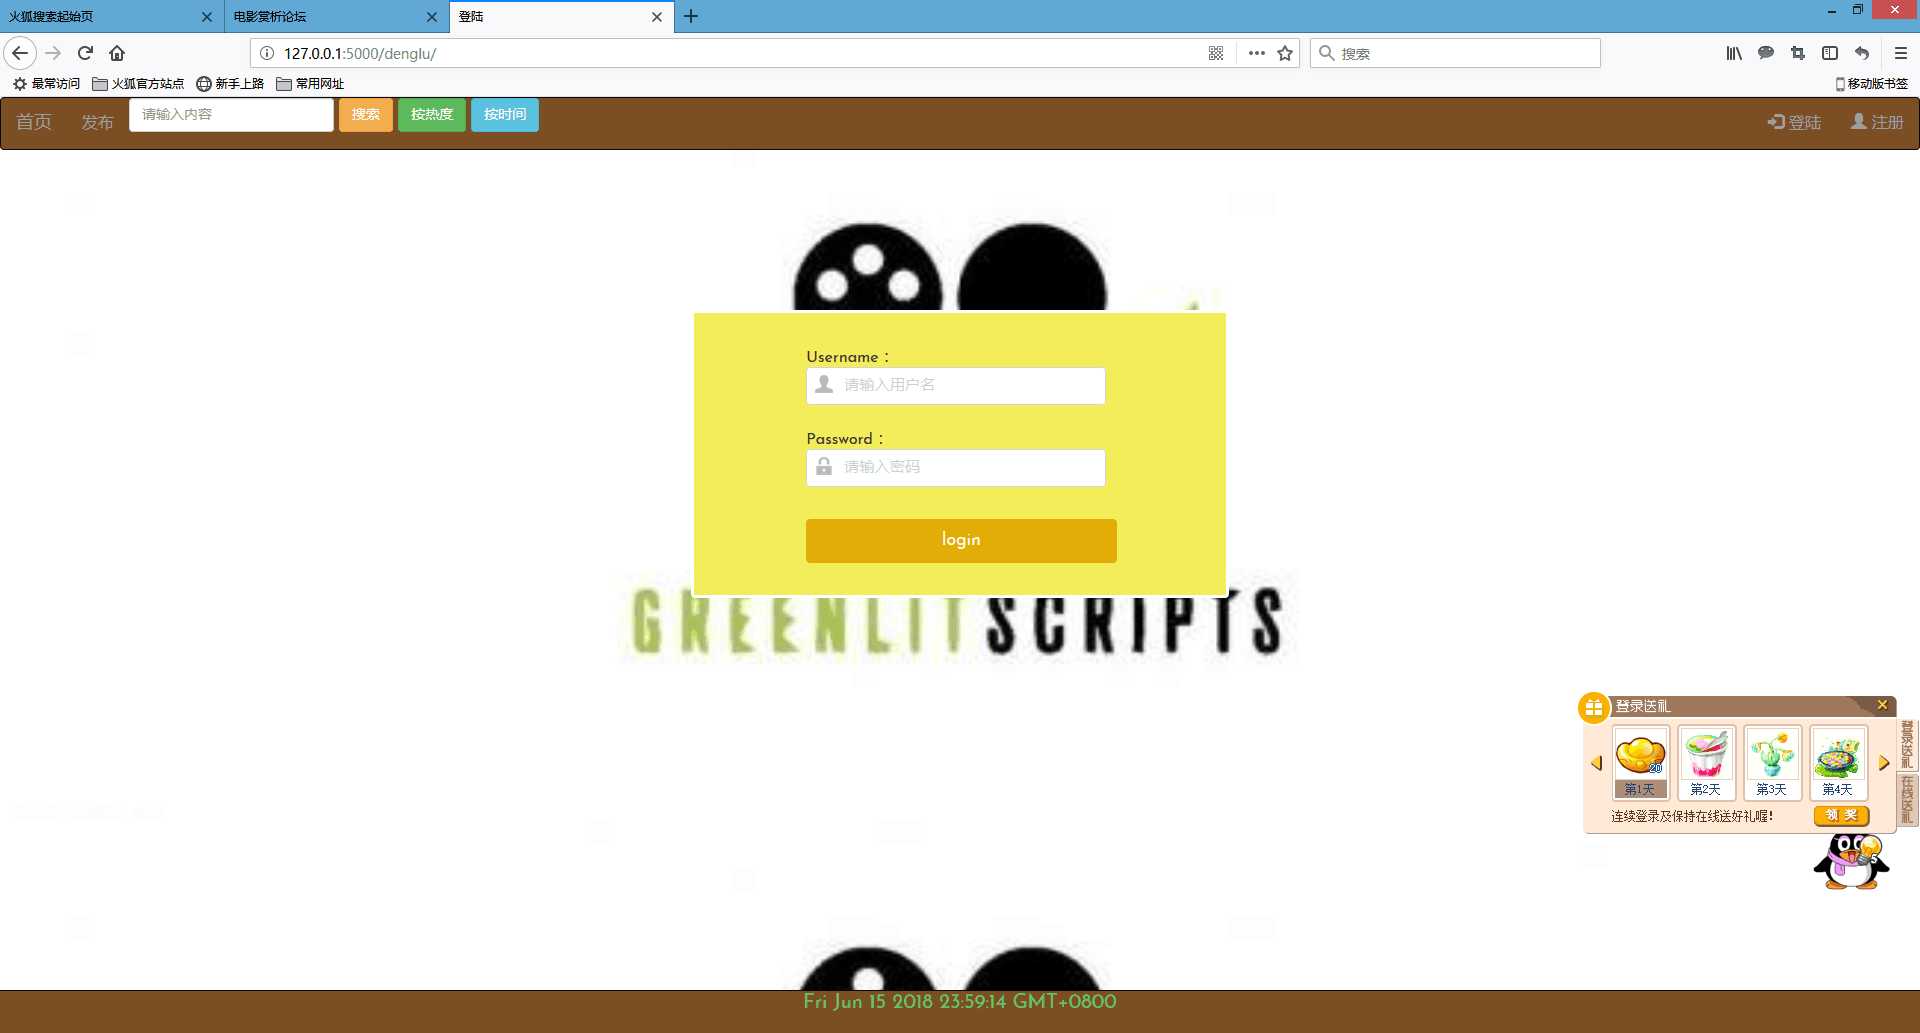
登录
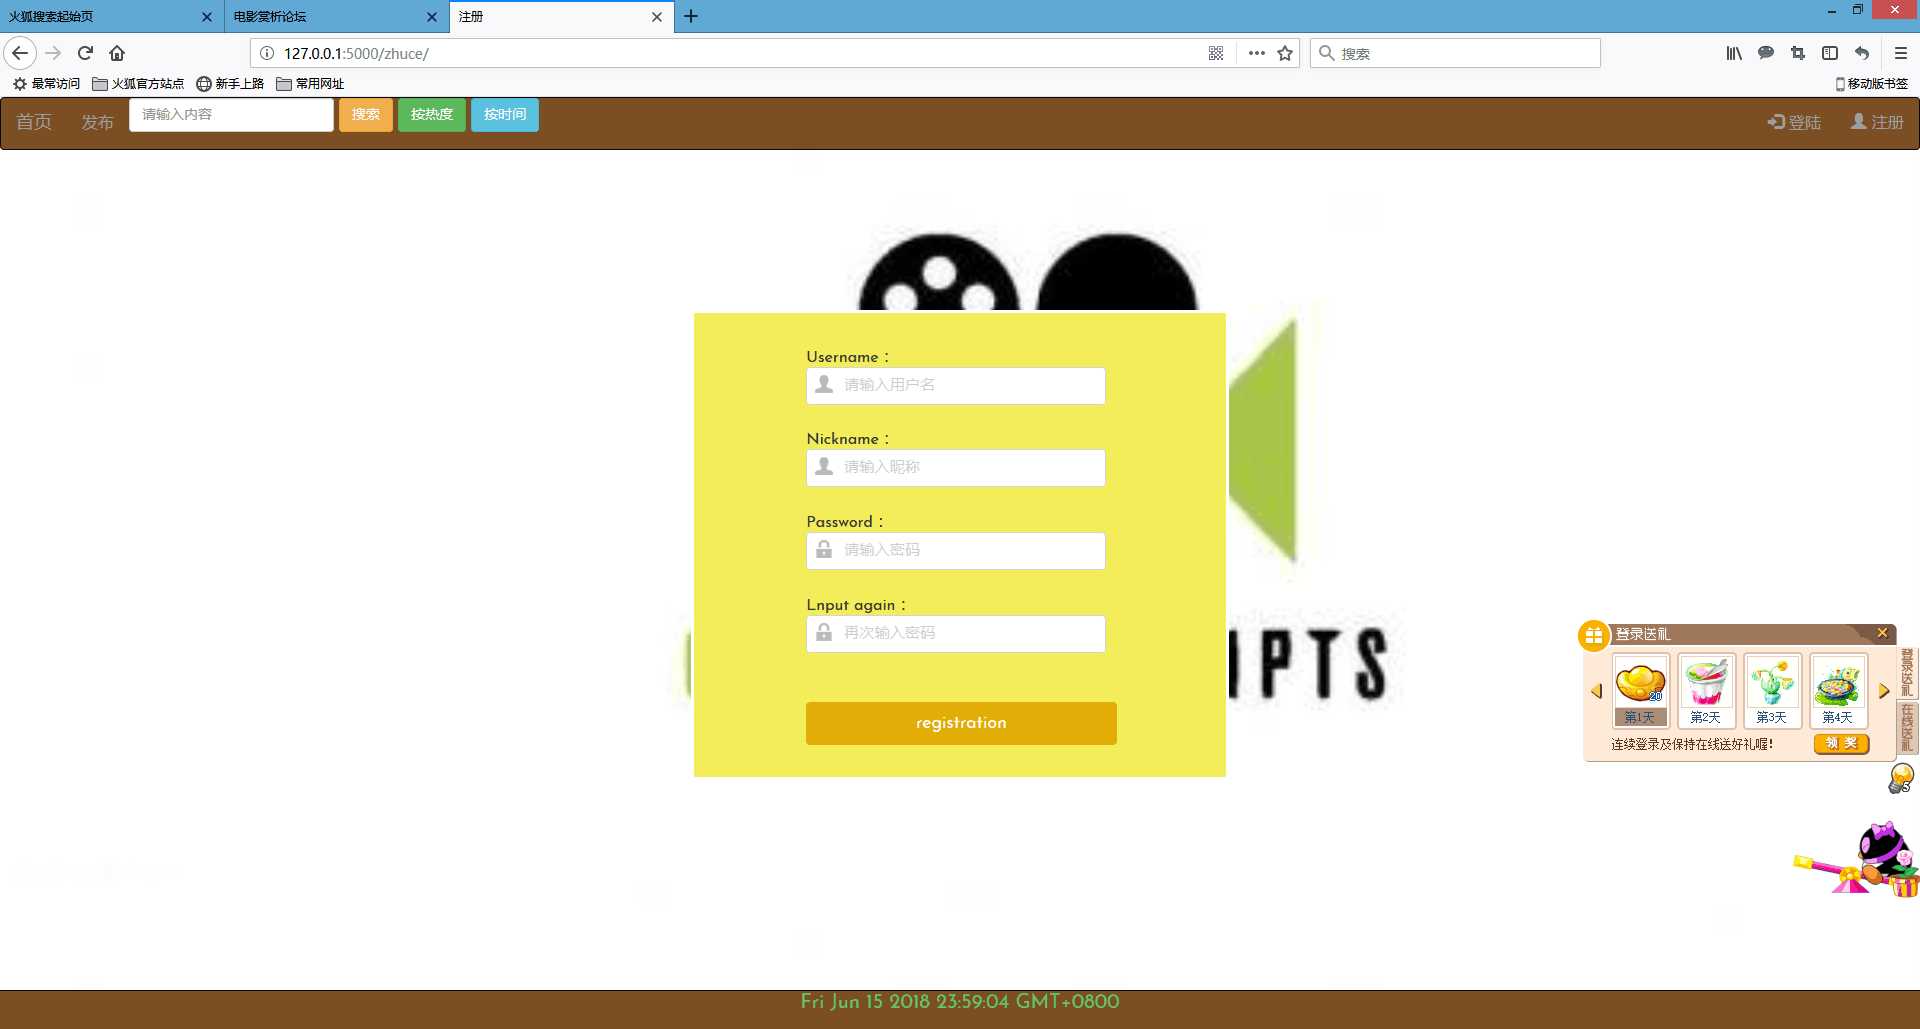
注册
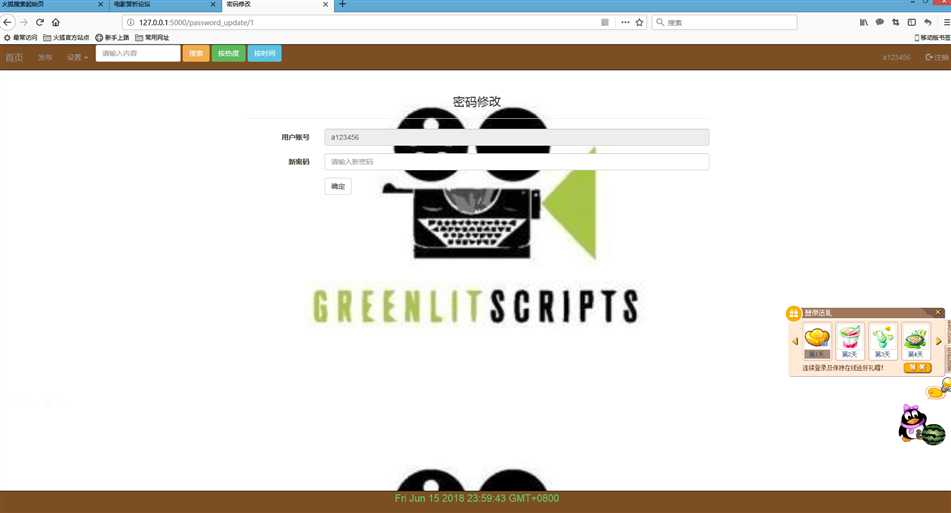
修改
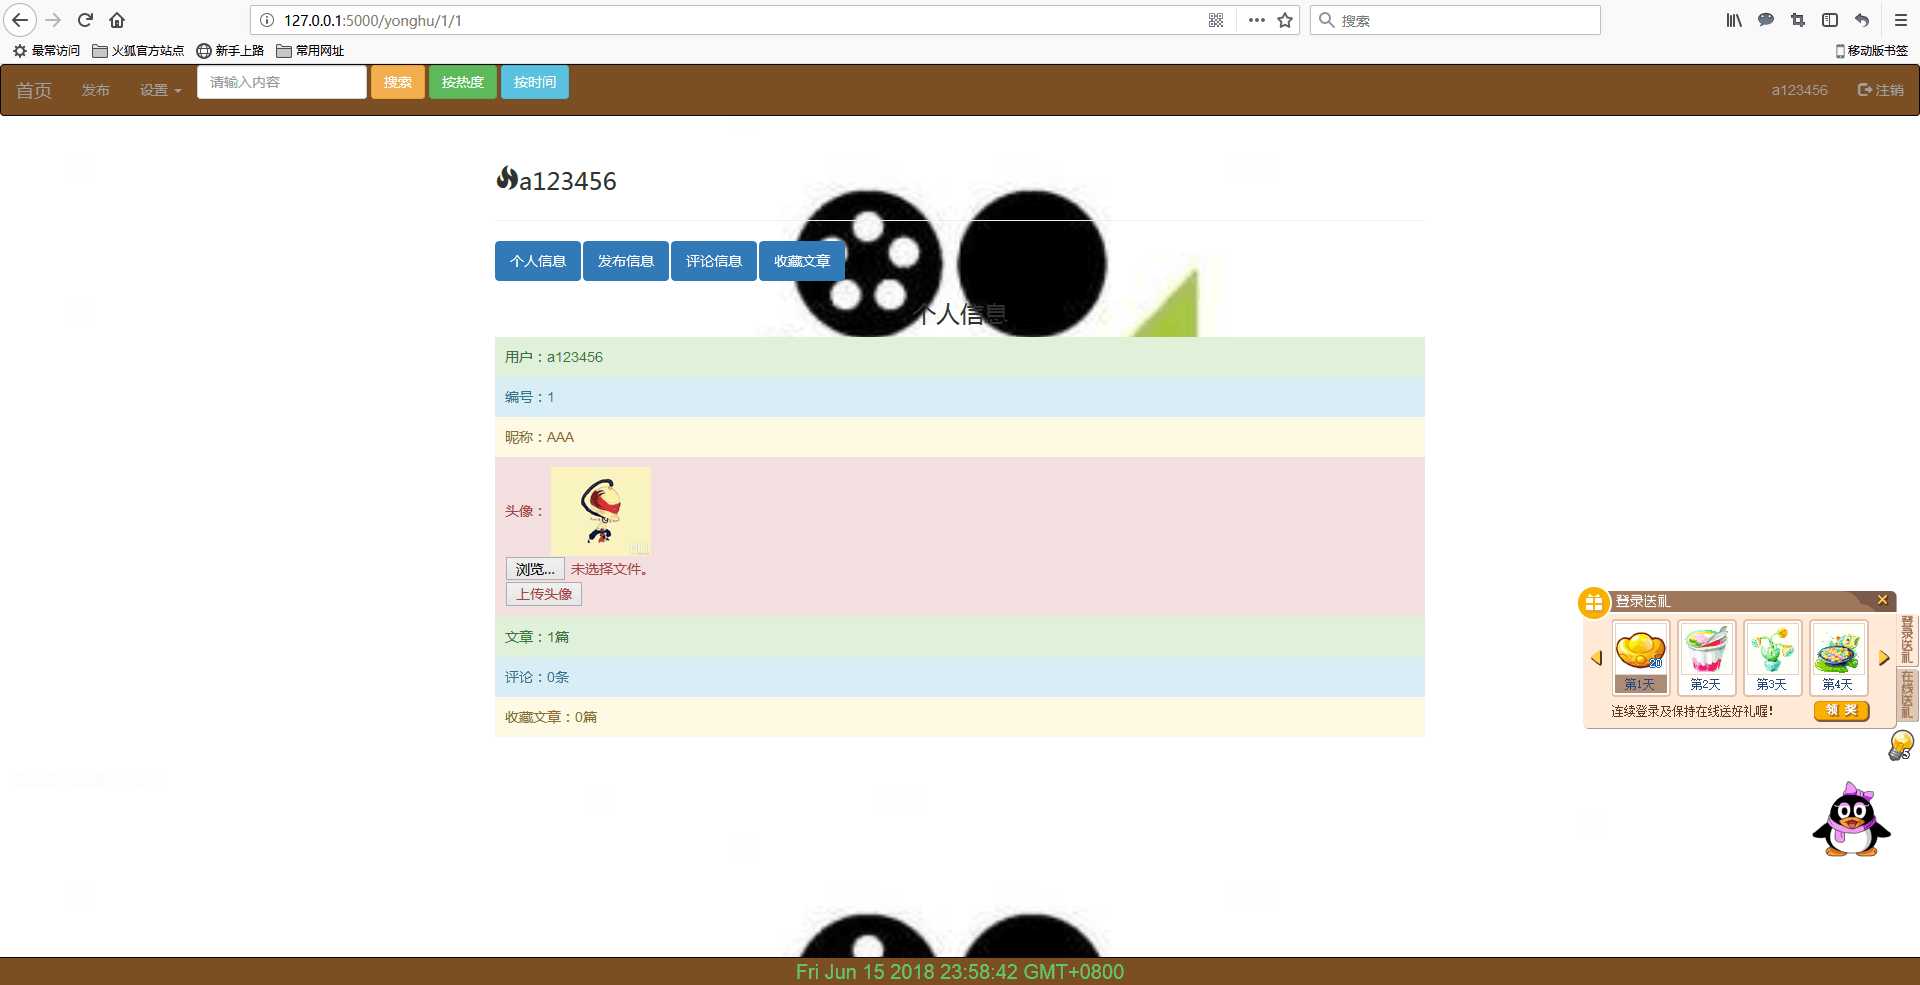
个人中心
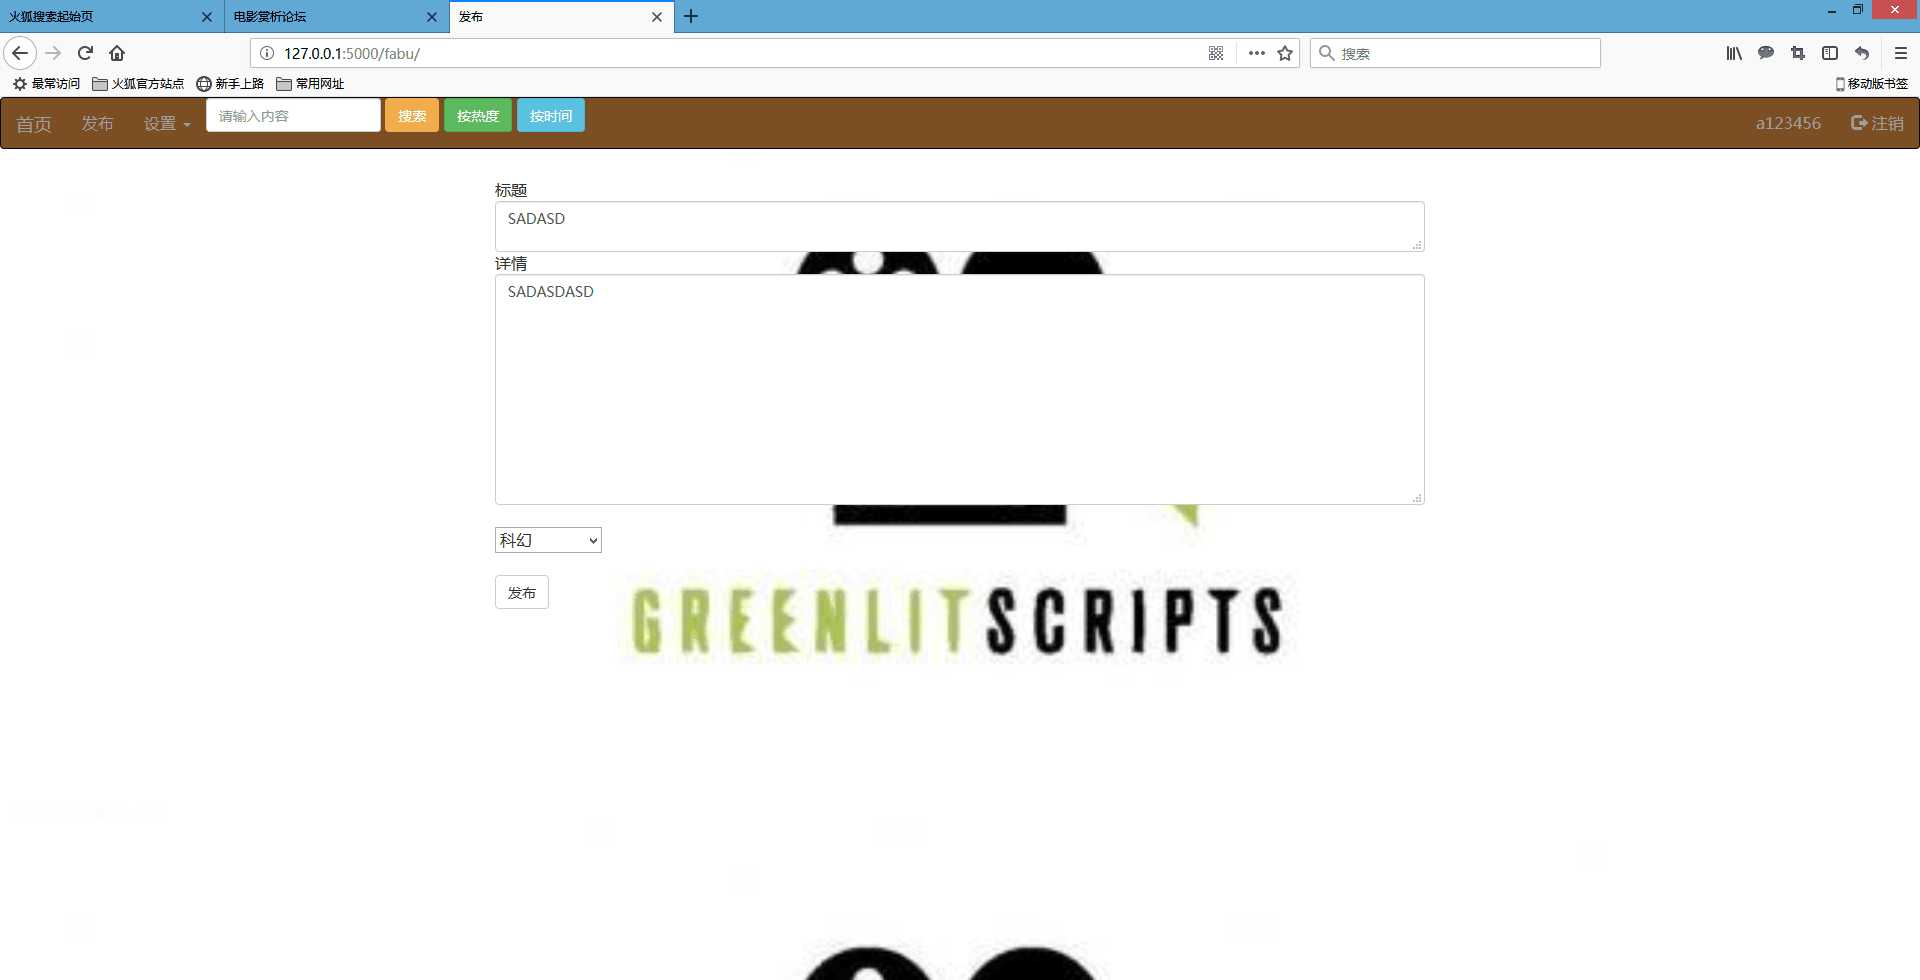
发布
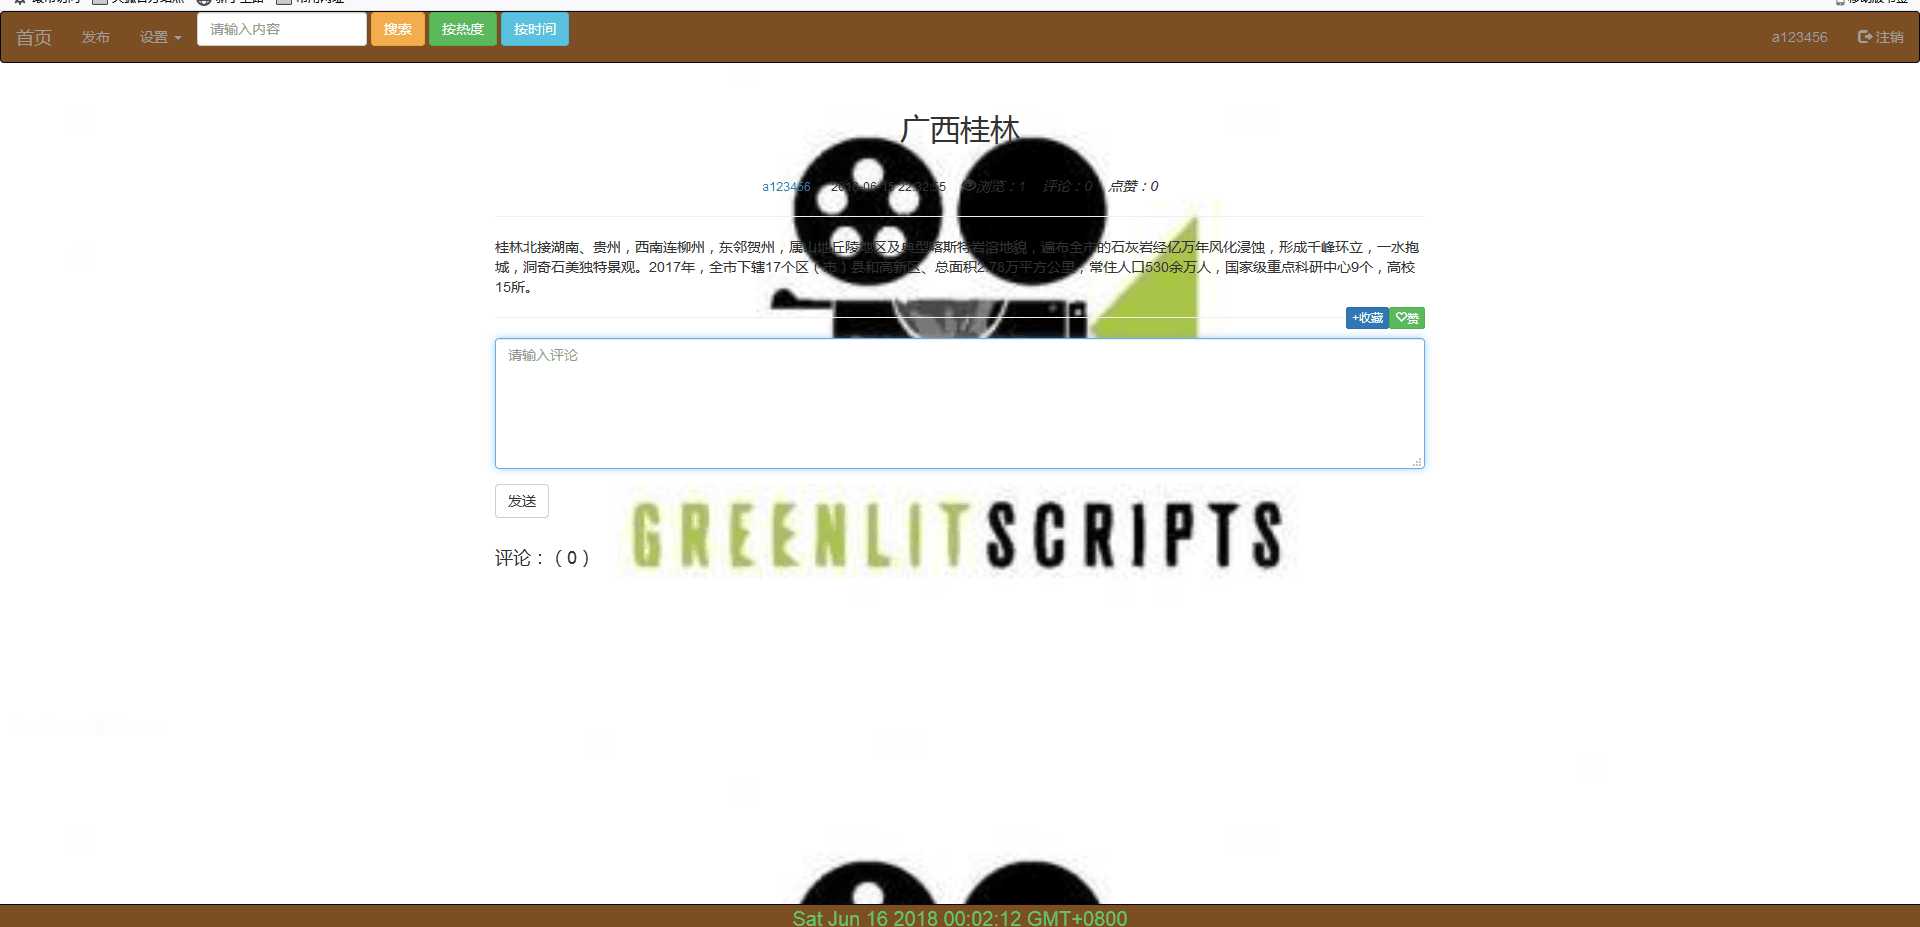
评论
数据库设计
数据库的设计,我们的用户表,用户表的建立,包括有用户名和密码,还有用户的昵称,和用户的图片。
class User(db.Model):
__tablename__ = ‘user‘ # 类对应的表名user
id = db.Column(db.Integer, primary_key=True, autoincrement=True)
username = db.Column(db.String(20), nullable=False)
_password = db.Column(db.String(200), nullable=False)
nickname = db.Column(db.String(20), nullable=True)
img = db.Column(db.String(100),default=None)
文章表:标题,内容,和发布时间,时间是可以根据创建的时候自动更新的。文章的类型,文章的作者。
class Fabu(db.Model):
# 问答
__tablename__ = ‘fabu‘
id = db.Column(db.Integer, primary_key=True, autoincrement=True)
title = db.Column(db.String(100), nullable=False)
detail = db.Column(db.Text, nullable=False)
leixing = db.Column(db.String(20), nullable=True)
creat_time = db.Column(db.DateTime, default=datetime.now)
author_id = db.Column(db.Integer, db.ForeignKey(‘user.id‘))
评论表:作者的名称,评论的内容,评论的时间,评论的作者
class Comment(db.Model): # 评论
__tablename__ = ‘comment‘
id = db.Column(db.Integer, primary_key=True, autoincrement=True)
author_id = db.Column(db.Integer,
db.ForeignKey(‘user.id‘))
fabu_id = db.Column(db.Integer,
db.ForeignKey(‘fabu.id‘))
creat_time = db.Column(db.DateTime, default=datetime.now)
detail = db.Column(db.Text, nullable=False)
fabu = db.relationship(‘Fabu‘,
backref=db.backref(‘comments‘, order_by=creat_time.desc)) # order_by=creat_time.desc按时间降序
author = db.relationship(‘User‘, backref=db.backref(‘comments‘))
系统实现的关键算法与数据结构
算法是对于一些功能的实现进行的,通过后台的运行来建立的一系列的运算,对于一些数据的传输,和算法对于一些功能的实现,比如对于一些文章进行分类和排序,,对于用户的密码进行分析,对用户的密码进行加密。
方法实现代码如下:
from flask import Flask, render_template, request, redirect, url_for, session
from flask_sqlalchemy import SQLAlchemy
import config,os
from functools import wraps
from datetime import datetime
from sqlalchemy import or_, and_
from werkzeug.security import generate_password_hash, check_password_hash

app = Flask(__name__)  # 创建Flask对象
app.config.from_object(config)  # 关联config.py文件进来
db = SQLAlchemy(app)  # 建立和数据库的关系映射


class User(db.Model):  # 创建类User
    __tablename__ = ‘user‘  # 类对应的表名user
    id = db.Column(db.Integer, primary_key=True, autoincrement=True)  # autoincrement自增长
    username = db.Column(db.String(20), nullable=False)  # nullable是否为空
    _password = db.Column(db.String(200), nullable=False)  # 密码加密内部使用
    nickname = db.Column(db.String(20), nullable=True)
    img = db.Column(db.String(100),default=None)

    @property  # 定义函数,需要用属性时可以用函数代替
    def password(self):  # 密码加密外部使用
        return self._password

    @password.setter
    def password(self, row_password):  # 密码进来时进行加密,generate_password_hash是一个密码加盐哈希函数,生成的哈希值可通过check_password_hash()进行验证。
        self._password = generate_password_hash(row_password)

    def check_password(self, row_password):  # check_password_hash函数用于验证经过generate_password_hash哈希的密码。若密码匹配,则返回真,否则返回假。
        result = check_password_hash(self._password, row_password)
        return result


class Fabu(db.Model):   # 问答
    __tablename__ = ‘fabu‘
    id = db.Column(db.Integer, primary_key=True, autoincrement=True)
    title = db.Column(db.String(100), nullable=False)
    detail = db.Column(db.Text, nullable=False)
    leixing = db.Column(db.String(20), nullable=True)
    creat_time = db.Column(db.DateTime, default=datetime.now)  # 提交时间会自己赋值
    author_id = db.Column(db.Integer, db.ForeignKey(‘user.id‘))  # 数据类型是db.Integer,db.ForeignKey参数指定外键是哪个表中哪个id
    author = db.relationship(‘User‘, backref=db.backref(‘fabu‘))  # 建立关联,其author属性将返回与问答相关联的用户实例,相当于数据库中的表连接
    # 第一个参数表明这个关系的另一端是哪个类,第二个参数backref,将向User类中添加一个fabu属性,从而定义反向关系,这一属性可访问Fabu类,获取的是模型对象
    yuedu = db.Column(db.Integer, nullable=False)


class Comment(db.Model):   # 评论
    __tablename__ = ‘comment‘
    id = db.Column(db.Integer, primary_key=True, autoincrement=True)
    author_id = db.Column(db.Integer, db.ForeignKey(‘user.id‘))
    fabu_id = db.Column(db.Integer, db.ForeignKey(‘fabu.id‘))
    creat_time = db.Column(db.DateTime, default=datetime.now)
    detail = db.Column(db.Text, nullable=False)
    fabu = db.relationship(‘Fabu‘,
                           backref=db.backref(‘comments‘, order_by=creat_time.desc))  # order_by=creat_time.desc按时间降序
    author = db.relationship(‘User‘, backref=db.backref(‘comments‘))


class Shoucang(db.Model):   # 收藏
    __tablename__ = ‘shoucang‘
    id = db.Column(db.Integer, primary_key=True, autoincrement=True)
    author_id = db.Column(db.Integer, db.ForeignKey(‘user.id‘))
    fabu_id = db.Column(db.Integer, db.ForeignKey(‘fabu.id‘))
    fabu = db.relationship(‘Fabu‘, backref=db.backref(‘shoucangs‘))
    author = db.relationship(‘User‘, backref=db.backref(‘shoucangs‘))


class Dianzang(db.Model):   # 点赞
    __tablename__ = ‘dianzang‘
    id = db.Column(db.Integer, primary_key=True, autoincrement=True)
    author_id = db.Column(db.Integer, db.ForeignKey(‘user.id‘))
    fabu_id = db.Column(db.Integer, db.ForeignKey(‘fabu.id‘))
    fabu = db.relationship(‘Fabu‘, backref=db.backref(‘dianzangs‘))
    author = db.relationship(‘User‘, backref=db.backref(‘dianzangs‘))


# db.create_all()  # 测试是否连接成功

‘‘‘
# 插入功能
user = User(username=‘15‘,password=‘12‘)
db.session.add(user)
db.session.commit()

# 查询功能
user=User.query.filter(User.username=="15").first()
print(user.username,user.password)

# 修改功能
user=User.query.filter(User.username=="15").first()
user.password=‘888‘
db.session.commit()

# 删除功能
user=User.query.filter(User.username=="15").first()
db.session.delete(user)
db.session.commit()
‘‘‘


# session会话连接
# filter()过滤器
# route制定路径和函数之间的关系
# def定义一个变量


# 跳转首页。
@app.route(‘/‘)
def daohang():
    pl = request.args.get(‘pl‘)   # 接收顺序排列的关键词,接收不到就按时间排列
    if pl == ‘按热度‘:
        context = {
            ‘fabus‘: Fabu.query.order_by(‘-yuedu‘).all(),
            ‘author‘: User.query.all(),
            ‘ydfabu‘: Fabu.query.filter(Fabu.yuedu > 5).all()  # 当发布的文章阅读量大于多少时取出这些文章,显示在首页的推荐文章
            # order_by(‘-creat_time‘)按时间降序排列,Fabu.query.all()查出了Fabu类的所有元组
        }
        return render_template(‘daohang.html‘, **context)
    else:
        context = {
            ‘fabus‘: Fabu.query.order_by(‘-creat_time‘).all(),
            ‘author‘: User.query.all(),
            ‘ydfabu‘: Fabu.query.filter(Fabu.yuedu > 5).all()  # 当发布的文章阅读量大于多少时取出这些文章,显示在首页的推荐文章
            # order_by(‘-creat_time‘)按时间降序排列,Fabu.query.all()查出了Fabu类的所有元组
        }
        return render_template(‘daohang.html‘, **context)


# 跳转测试。
@app.route(‘/lin/‘)
def lin():
    return ‘lin‘


# 跳转登陆。
@app.route(‘/denglu/‘, methods=[‘GET‘, ‘POST‘])  # methods定义它有两种请求方式
def denglu():
    if request.method == ‘GET‘:
        return render_template(‘denglu.html‘)
    else:
        username = request.form.get(‘user‘)  # post请求模式,安排对象接收数据
        password = request.form.get(‘pass‘)
        user = User.query.filter(User.username == username).first()  # 作查询,并判断
        if user:  # 判断用户名
            if user.check_password(password):  # 判断密码
                session[‘user‘] = username  # 利用session添加传回来的值username
                session[‘user_id‘] = user.id
                session.permanent = True  # 设置session过期的时间
                return redirect(url_for(‘daohang‘))
            else:
                return u‘用户密码错误‘
        else:
            return u‘用户不存在,请先注册‘


# 跳转密码修改页。
@app.route(‘/password_update/<user_id>‘)
def password_update(user_id):
    users = User.query.filter(User.id == user_id).first()  # 查询出要修改密码的该用户
    return render_template(‘password_update.html‘, users=users)


# 跳转修改密码后接受数据。
@app.route(‘/password_update1/‘, methods=[‘POST‘])
def password_update1():
    username = request.form.get(‘username‘)  # 接收username的值,知道要修改的是哪个用户
    password = request.form.get(‘password‘)
    users = User.query.filter(User.username == username).first()  # 查询出要修改用户的整条信息
    users.password = password  # 执行修改
    db.session.commit()
    return redirect(url_for(‘yonghu‘, username_id=users.id, tag=‘1‘))


@app.context_processor  # 上下文处理器,定义变量然后在所有模板中都可以调用,类似idea中的model
def mycontext():
    user = session.get(‘user‘)
    user_id = session.get(‘user_id‘)
    if user:
        return {‘sessionusername‘: user, ‘sessionuserid‘: user_id}  # 包装到username,在所有html模板中可调用
    else:
        return {}  # 返回空字典,因为返回结果必须是dict


# 跳转注销。
@app.route(‘/logout‘)
def logout():
    session.clear()  # 注销时删除所有session
    return redirect(url_for(‘daohang‘))


# 跳转注册。
@app.route(‘/zhuce/‘, methods=[‘GET‘, ‘POST‘])  # methods定义它有两种请求方式,因为它在表单的请求是post,类似我们在idea中的sava请求模式
def zhuce():
    if request.method == ‘GET‘:
        return render_template(‘zhuce.html‘)
    else:
        username = request.form.get(‘user‘)  # post请求模式,安排对象接收数据
        password = request.form.get(‘pass‘)
        nickname = request.form.get(‘nickname‘)
        user = User.query.filter(User.username == username).first()  # 作查询,并判断
        if user:
            return u‘该用户已存在‘
        else:
            user = User(username=username, password=password, nickname=nickname)  # 将对象接收的数据赋到User类中,即存到数据库
            db.session.add(user)  # 执行操作
            db.session.commit()
            return redirect(url_for(‘denglu‘))  # redirect重定向


# 跳转某页面之前先进行登录。定义decorator可以增强函数功能,装饰器本身是函数,入参是函数,返回值也是函数
def loginFirst(fabu):
    @wraps(fabu)  # 加上wraps,它可以保留原有函数的__name__,docstring
    def wrapper(*args, **kwargs):  # 定义wrapper函数将其返回,用*args, **kwargs把原函数的参数进行传递
        if session.get(‘user‘):  # 只有经过登陆,session才能记住并get到值
            return fabu(*args, **kwargs)
        else:
            return redirect(url_for(‘denglu‘))

    return wrapper


# 跳转图片。
@app.route(‘/tupian/‘)
def tupian():
    return render_template(‘tupian.html‘)


# 跳转发布。
@app.route(‘/fabu/‘, methods=[‘GET‘, ‘POST‘])  # methods定义它有两种请求方式
@loginFirst  # 将decorator定义的增强函数放在待增强函数定义的上面
def fabu():
    if request.method == ‘GET‘:
        return render_template(‘fabu.html‘)
    else:
        title = request.form.get(‘title‘)  # post请求模式,安排对象接收数据
        detail = request.form.get(‘detail‘)
        leixing = request.form.get(‘leixing‘)
        yuedu = 0
        author_id = User.query.filter(
            User.username == session.get(‘user‘)).first().id  # 将session get到的user进行查询并取出id放到外键author_id中
        fabu = Fabu(title=title, detail=detail, author_id=author_id, leixing=leixing,
                    yuedu=yuedu)  # 将对象接收的数据赋到Fabu类中,即存到数据库
        db.session.add(fabu)  # 执行操作
        db.session.commit()  # 提交到数据库
        return redirect(url_for(‘daohang‘))  # redirect重定向


# 跳转发布详情
@app.route(‘/fabuview/<fabu_id>‘)  # 和idea的update一样,将id带到控制器
def fabuview(fabu_id):
    yes = Shoucang.query.filter(  # yes用在用户详情页判断是否已收藏的按钮
        and_(
            Shoucang.author_id == session.get(‘user_id‘), Shoucang.fabu_id == fabu_id
        )
    ).first()
    dzyes = Dianzang.query.filter(  # dzyes用在用户详情页判断是否已点赞的按钮
        and_(
            Dianzang.author_id == session.get(‘user_id‘), Dianzang.fabu_id == fabu_id
        )
    ).first()
    fa = Fabu.query.filter(Fabu.id == fabu_id).first()  # 根据主页带回来的id查询出整条元组记录,丢进fa
    comments = Comment.query.filter(Comment.fabu_id == fabu_id).all()  # 根据带回来的Fabu的id在Comment查询出所有评论
    fa.yuedu = fa.yuedu + 1  # 定义浏览功能,每次进去详情页,浏览次数加1
    db.session.commit()
    return render_template(‘fabuview.html‘, fa=fa, comments=comments, yes=yes,
                           dzyes=dzyes)  # 把值fa丢进键fa,在fabuview.html页面调用


# 方法二:
# fabu={
# ‘fa‘:Fabu.query.filter(Fabu.id == fabu_id).first()
# }
# return render_template(‘fabuview.html‘,**fabu)


# 跳转评论。
@app.route(‘/comment/‘, methods=[‘POST‘])
@loginFirst  # 装饰器,跳转某页面之前先进行登录
def comment():
    detail = request.form.get(‘pinglun‘)  # post请求模式,安排对象接收数据
    author_id = User.query.filter(User.username == session.get(‘user‘)).first().id
    fabu_id = request.form.get(‘fa_id‘)
    comment = Comment(detail=detail, author_id=author_id, fabu_id=fabu_id)  # 将对象接收的数据赋到Comment类中,即存到数据库
    db.session.add(comment)  # 执行操作
    db.session.commit()  # 提交到数据库
    return redirect(url_for(‘fabuview‘, fabu_id=fabu_id))  # 重定向到fabuview请求时要带fabu_id


# 跳转用户详情
@app.route(‘/yonghu/<username_id>/<tag>‘)  # 为了把页面分开,我们在html页面传了一个tag参数
def yonghu(username_id, tag):
    user = User.query.filter(User.id == username_id).first()
    shoucang = Shoucang.query.filter(Shoucang.author_id == username_id).all()
    context = {
        ‘userid‘: user.id,
        ‘username‘: user.username,
        ‘nickname‘: user.nickname,
        ‘fabus‘: user.fabu,
        ‘comments‘: user.comments,
        ‘shoucang‘: shoucang,
        ‘img‘:user.img
    }  # 根据tag的不同去到不同页面,一个请求跳转3个不同页面
    if tag == ‘1‘:
        return render_template(‘yonghu1.html‘, **context)
    elif tag == ‘2‘:
        return render_template(‘yonghu2.html‘, **context)
    elif tag == ‘3‘:
        return render_template(‘yonghu3.html‘, **context)
    else:
        return render_template(‘yonghu4.html‘, **context)


# @app.route(‘/yonghu2/<username_id>‘)
# def yonghu2(username_id):
#     user = User.query.filter(User.id == username_id).first()
#     context = {
#         ‘userid‘:user.id,
#         ‘username‘:user.username,
#         ‘fabus‘:user.fabu,
#         ‘comments‘:user.comments
#     }
#     return render_template(‘yonghu2.html‘,**context)
#
#
# @app.route(‘/yonghu3/<username_id>‘)
# def yonghu3(username_id):
#     user = User.query.filter(User.id == username_id).first()
#     context = {
#         ‘userid‘:user.id,
#         ‘username‘:user.username,
#         ‘fabus‘:user.fabu,
#         ‘comments‘:user.comments
#     }
#     return render_template(‘yonghu3.html‘,**context)


# 跳转首页搜索

@app.route(‘/search/‘)
def search():
    sousuo = request.args.get(‘sousuo‘)  # args获取关键字,区别form
    author = User.query.all()
    ydfabu = Fabu.query.filter(Fabu.yuedu > 5).all()
    fabus = Fabu.query.filter(
        or_(  # 两种查询条件
            Fabu.title.contains(sousuo),  # contains模糊查
            Fabu.detail.contains(sousuo)
        )
    ).order_by(‘-creat_time‘)
    return render_template(‘daohang.html‘, fabus=fabus, author=author, ydfabu=ydfabu)  # fabus要和原首页数据模型一样


# 跳转高级分类查询
@app.route(‘/fenlei/‘)
def fenlei():
    fenlei = request.args.get(‘fenlei‘)  # args获取关键字,区别form
    author = User.query.all()
    ydfabu = Fabu.query.filter(Fabu.yuedu > 5).all()
    fenlei_fabus = Fabu.query.filter(
        or_(  # 两种查询条件
            # Fabu.title.contains(fenlei),  # contains模糊查
            Fabu.leixing.contains(fenlei),
            # Fabu.creat_time.contains(fenlei)
        )
    ).order_by(‘-creat_time‘)
    return render_template(‘daohang.html‘, fabus=fenlei_fabus, author=author, ydfabu=ydfabu)  # fabus要和原首页数据模型一样


# 跳转文章收藏
@app.route(‘/shoucang/‘, methods=[‘POST‘])
@loginFirst
def shoucang():
    scfabu_id = request.form.get(‘scfabu_id‘)
    scuser_id = request.form.get(‘scuser_id‘)
    shoucang = Shoucang(fabu_id=scfabu_id, author_id=scuser_id)
    db.session.add(shoucang)  # 执行操作
    db.session.commit()  # 提交到数据库
    return redirect(url_for(‘fabuview‘, fabu_id=scfabu_id))


# 跳转文章点赞
@app.route(‘/dianzang/‘, methods=[‘POST‘])
@loginFirst
def dianzang():
    dzfabu_id = request.form.get(‘dzfabu_id‘)
    dzuser_id = request.form.get(‘dzuser_id‘)
    dianzang = Dianzang(fabu_id=dzfabu_id, author_id=dzuser_id)
    db.session.add(dianzang)  # 执行操作
    db.session.commit()  # 提交到数据库
    return redirect(url_for(‘fabuview‘, fabu_id=dzfabu_id))

#上传头像
@app.route(‘/uploadLogo/<user_id>‘, methods=[‘GET‘, ‘POST‘])
def uploadLogo(user_id):
    user = User.query.filter(User.id == user_id).first()
    f = request.files[‘logo‘]
    basepath = os.path.dirname(__file__)  # 当前文件所在路径
    upload_path = os.path.join(basepath, ‘static/img‘, f.filename)  # 注意:没有的文件夹一定要先创建,不然会提示没有该路径
    f.save(upload_path)
    user.img = ‘img/‘ + f.filename
    db.session.commit()
    return redirect(url_for(‘yonghu‘, username_id=user_id,tag=1));


if __name__ == ‘__main__‘:
    app.run(debug=True)
以上是关于管理信息系统 课程设计的主要内容,如果未能解决你的问题,请参考以下文章
20155234 2017-2018-1《信息安全系统设计基础》课程总结