使用 dotnet-monitor 在 Kubernetes 中收集 .NET metrics
Posted dotNET跨平台
tags:
篇首语:本文由小常识网(cha138.com)小编为大家整理,主要介绍了使用 dotnet-monitor 在 Kubernetes 中收集 .NET metrics相关的知识,希望对你有一定的参考价值。
使用 dotnet-monitor 在 Kubernetes 中收集 .NET metrics
Intro
dotnet-monitor 是微软推出的一个帮助我们诊断和监控 .NET 应用程序的工具,在 Kubernetes 中我们可以让 dotnet-monitor 作为 sidecar 运行,无侵入地监控 .NET 应用,今天我们就来介绍一下如果在 Kubernetes 中使用吧
GetStarted
作为 sidecar 运行的时候,我们只需要修改应用的 deployment 对应的 yaml 文件即可,下面是一个示例:
apiVersion: apps/v1
kind: Deployment
metadata:
  name: sparktodo-api
  labels:
    app: sparktodo-api
spec:
  replicas: 1
  revisionHistoryLimit: 0
  selector:
    matchLabels:
      app: sparktodo-api
  minReadySeconds: 0
  strategy:
    type: RollingUpdate
    rollingUpdate:
      maxUnavailable: 1
      maxSurge: 1

  template:
    metadata:
      annotations:
        prometheus.io/scrape: "true"
        prometheus.io/port: "52323"
      labels:
        app: sparktodo-api

    spec:
      containers:
        - name: sparktodo-api
          image: weihanli/sparktodo-api:latest
          imagePullPolicy: Always
          resources:
            requests:
              memory: "64Mi"
              cpu: "20m"
            limits:
              memory: "128Mi"
              cpu: "50m"
          env:
          - name: DOTNET_DiagnosticPorts
            value: /diag/port
          ports:
            - name: http
              containerPort: 80
              protocol: TCP
          livenessProbe:
            httpGet:
              path: /health
              port: 80
            initialDelaySeconds: 60
            periodSeconds: 30
          readinessProbe:
            httpGet:
              path: /health
              port: 80
            initialDelaySeconds: 60
            periodSeconds: 30
          volumeMounts:
          - mountPath: /diag
            name: diagvol
          - mountPath: /dumps
            name: dumpsvol
        - name: monitor
          image: mcr.microsoft.com/dotnet/monitor
          args: [ "--no-auth" ]
          imagePullPolicy: Always
          ports:
            - containerPort: 52323
          env:
          - name: DOTNETMONITOR_DiagnosticPort__ConnectionMode
            value: Listen
          - name: DOTNETMONITOR_DiagnosticPort__EndpointName
            value: /diag/port
          - name: DOTNETMONITOR_Storage__DumpTempFolder
            value: /dumps
          - name: DOTNETMONITOR_Urls
            value: "http://+:52323"
          volumeMounts:
          - mountPath: /diag
            name: diagvol
          - mountPath: /dumps
            name: dumpsvol
          resources:
            requests:
              cpu: 20m
              memory: 32Mi
            limits:
              cpu: 50m
              memory: 256Mi
      volumes:
      - name: diagvol
        emptyDir:
      - name: dumpsvol
        emptyDir:
为了方便对比,下面是一个变更对比
template:
    metadata:
+      annotations:
+        prometheus.io/scrape: "true"
+        prometheus.io/port: "52323"
      labels:
        app: sparktodo-api

    spec:
      containers:
        - name: sparktodo-api
          image: weihanli/sparktodo-api:latest
          imagePullPolicy: Always
          resources:
            requests:
              memory: "64Mi"
              cpu: "20m"
            limits:
              memory: "128Mi"
              cpu: "50m"
+          env:
+          - name: DOTNET_DiagnosticPorts
+            value: /diag/port
          ports:
            - name: http
              containerPort: 80
              protocol: TCP
          livenessProbe:
            httpGet:
              path: /health
              port: 80
            initialDelaySeconds: 60
            periodSeconds: 30
          readinessProbe:
            httpGet:
              path: /health
              port: 80
            initialDelaySeconds: 60
            periodSeconds: 30
+          volumeMounts:
+          - mountPath: /diag
+            name: diagvol
+          - mountPath: /dumps
+            name: dumpsvol
+        - name: monitor
+          image: mcr.microsoft.com/dotnet/monitor
+          args: [ "--no-auth" ]
+          imagePullPolicy: Always
+          ports:
+            - containerPort: 52323
+          env:
+          - name: DOTNETMONITOR_DiagnosticPort__ConnectionMode
+            value: Listen
+          - name: DOTNETMONITOR_DiagnosticPort__EndpointName
+            value: /diag/port
+          - name: DOTNETMONITOR_Storage__DumpTempFolder
+            value: /dumps
+          - name: DOTNETMONITOR_Urls
+            value: "http://+:52323"
+          volumeMounts:
+          - mountPath: /diag
+            name: diagvol
+          - mountPath: /dumps
+            name: dumpsvol
+          resources:
+            requests:
+              cpu: 20m
+              memory: 32Mi
+            limits:
+              cpu: 50m
+              memory: 256Mi
+      volumes:
+      - name: diagvol
+        emptyDir:
+      - name: dumpsvol
+        emptyDir:
与没有使用 dotnet-monitor 之前相比,主要的变化有这几个方面:
增加了一个
dotnet-monitor的容器增加了 volume 和
DiagnosticPorts配置以支持 .NET 应用和dotnet-monitor的通信增加了 Prometheus 的配置以让 Prometheus 从
dotnet-monitor拉取 metrics
实际效果:
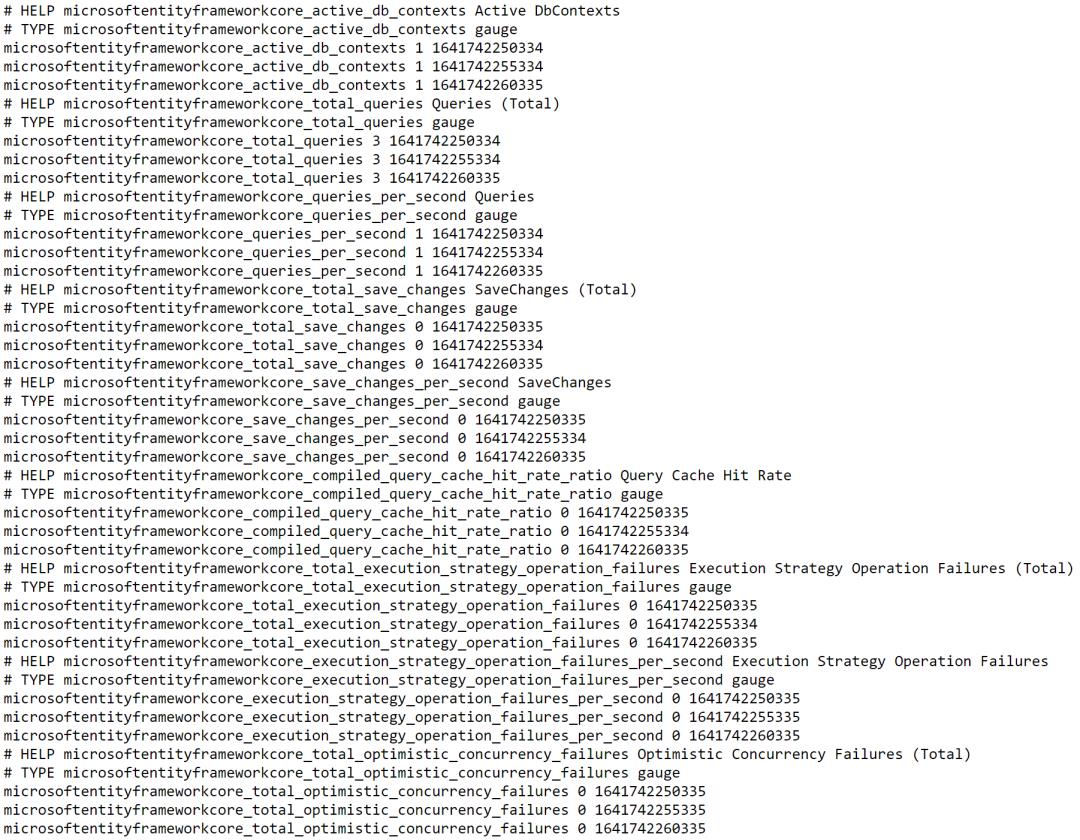
metrics 示例:
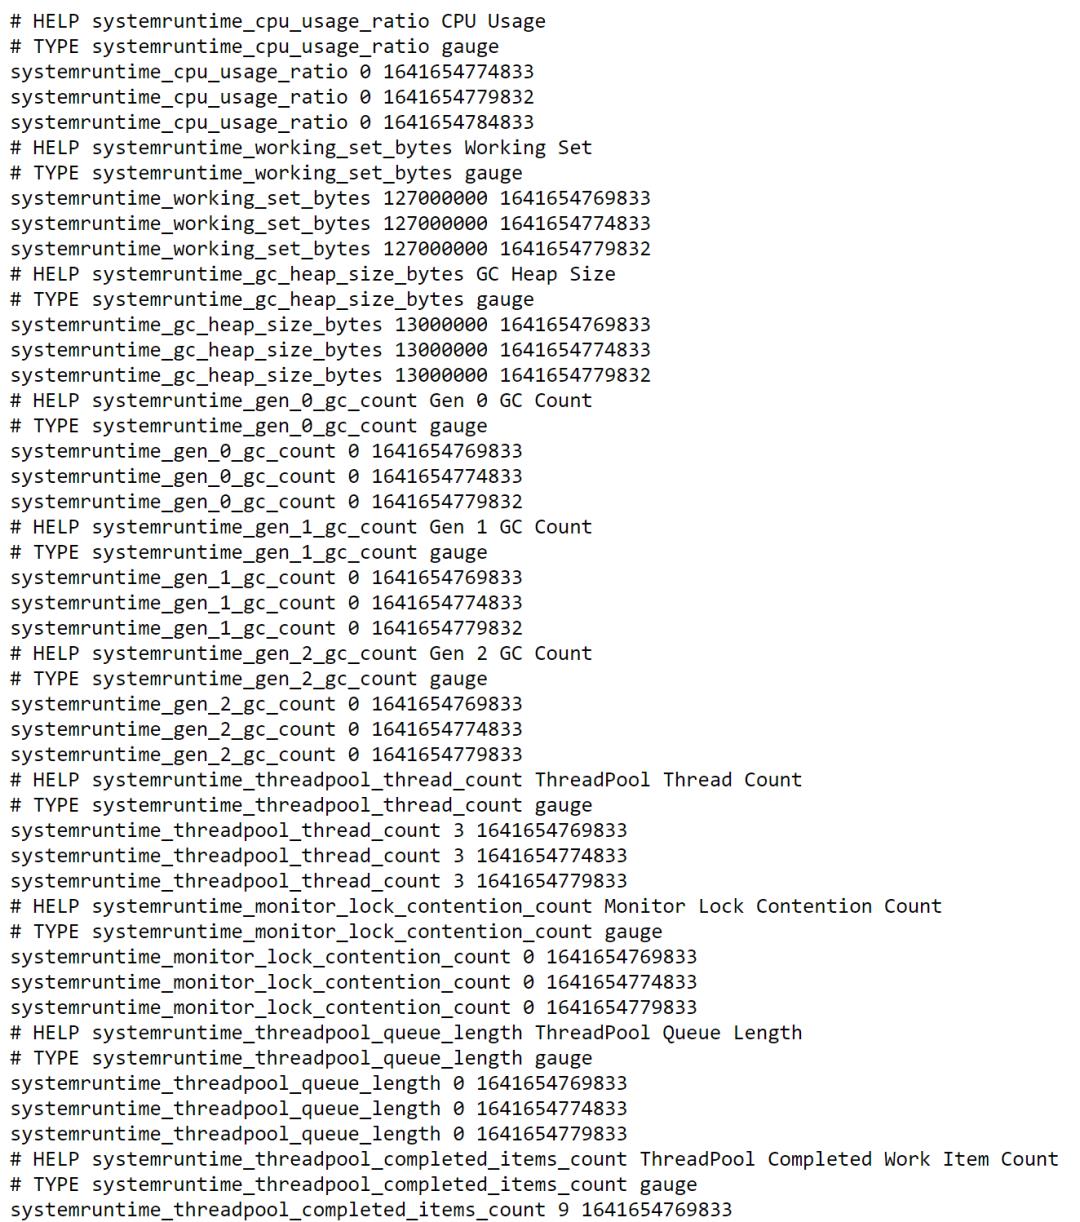
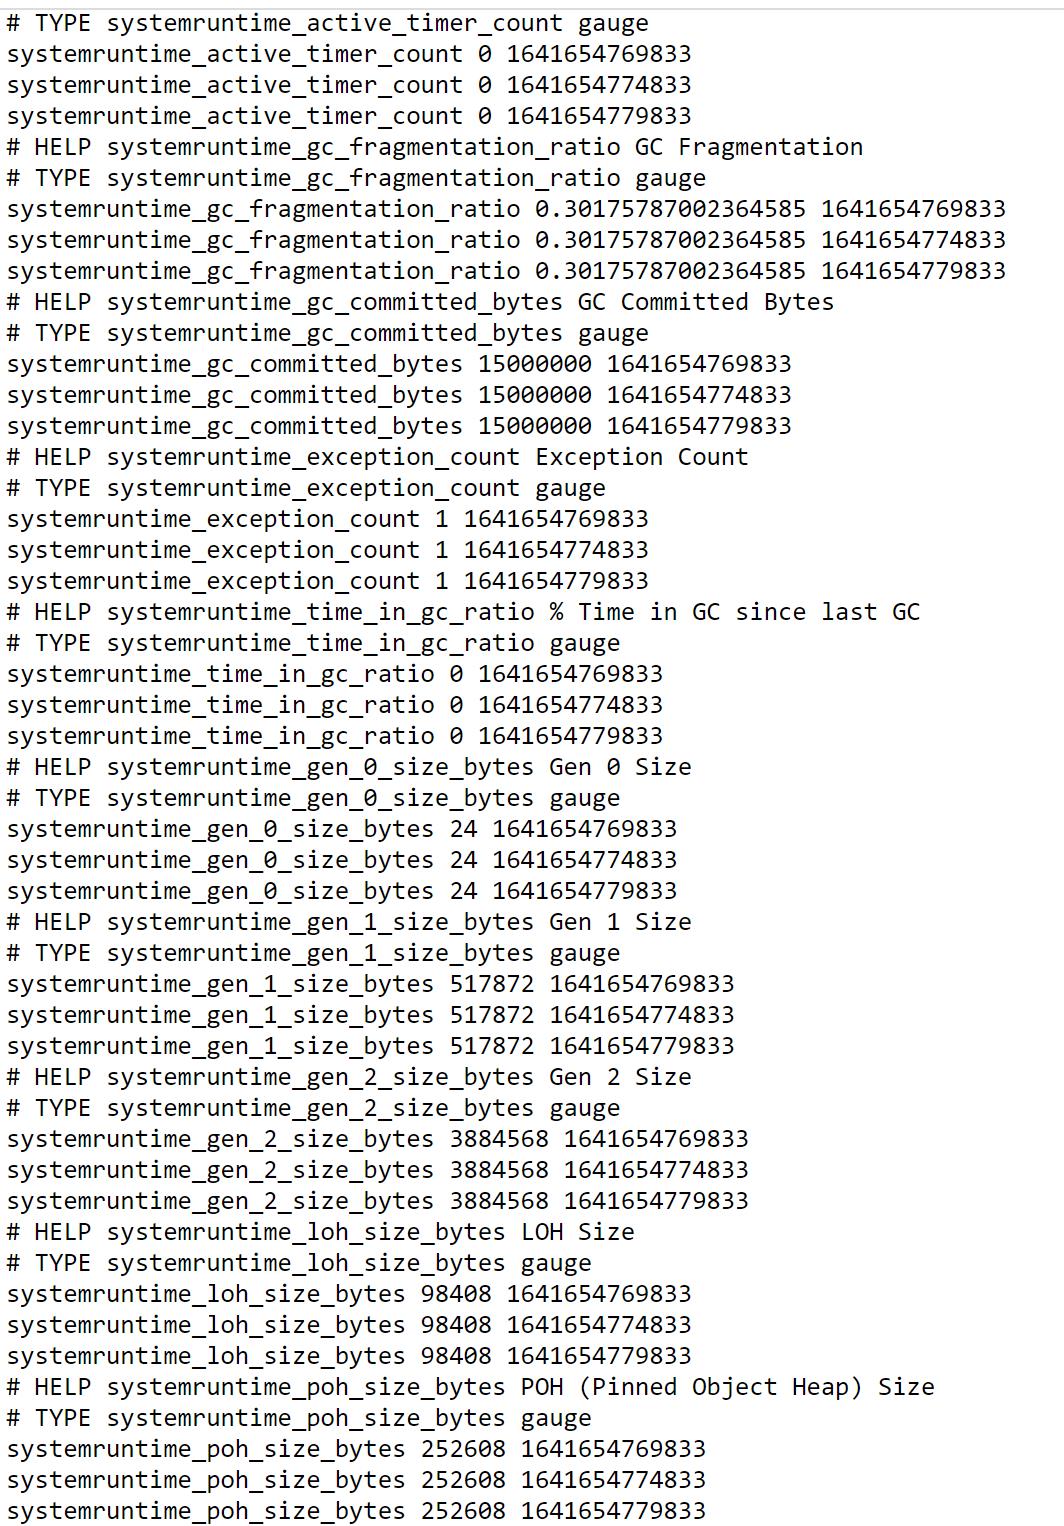
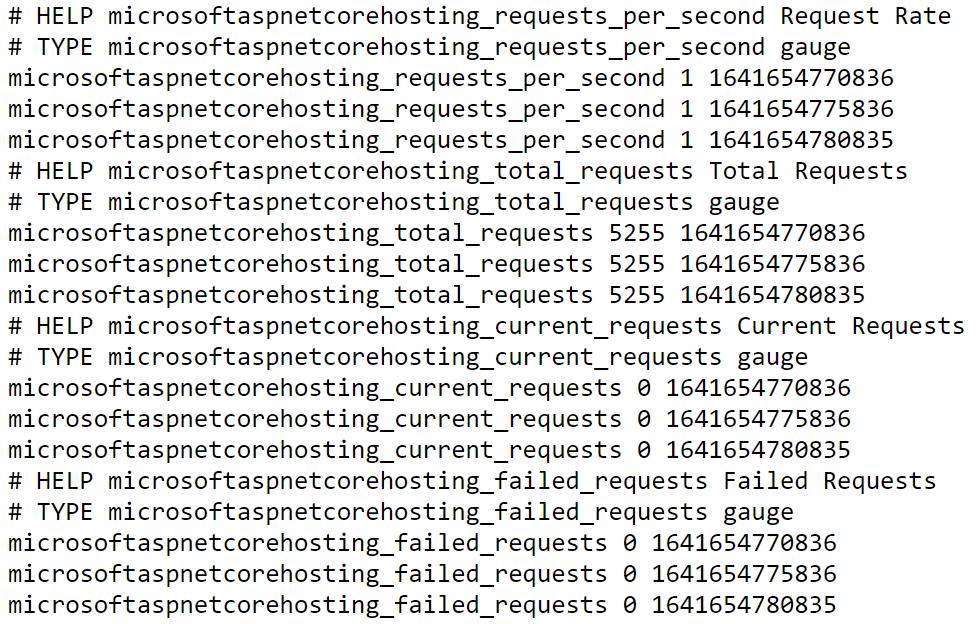
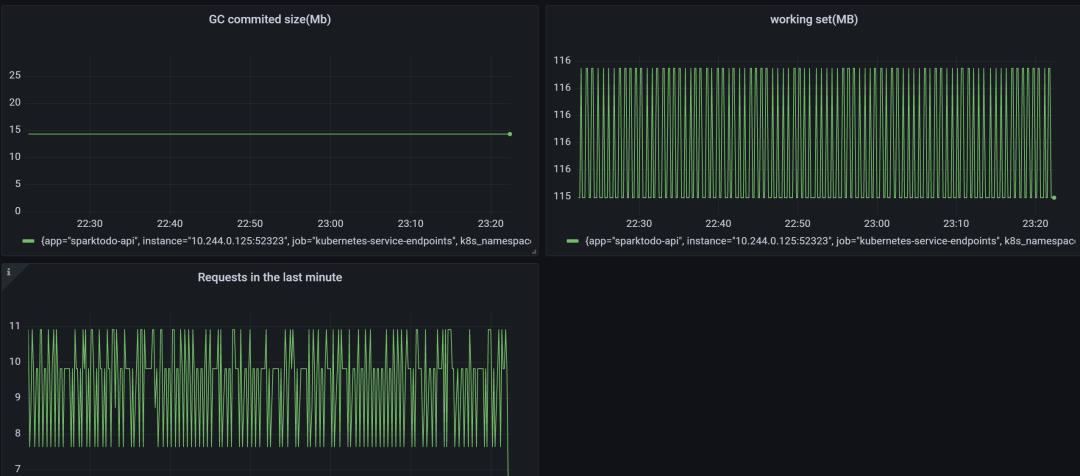
dotnet-monitor 默认会收集很多信息,包括了 CPU、内存、GC、线程池等等信息,可以帮助我们更好的了解 .NET 应用的运行状况,通过 Prometheus 收集到数据之后,我们可以进一步通过 Grafana 来做更好的 UI 展示以及可以根据指定的指标来做监控报警(做了几个小示例,数据仅供参考)

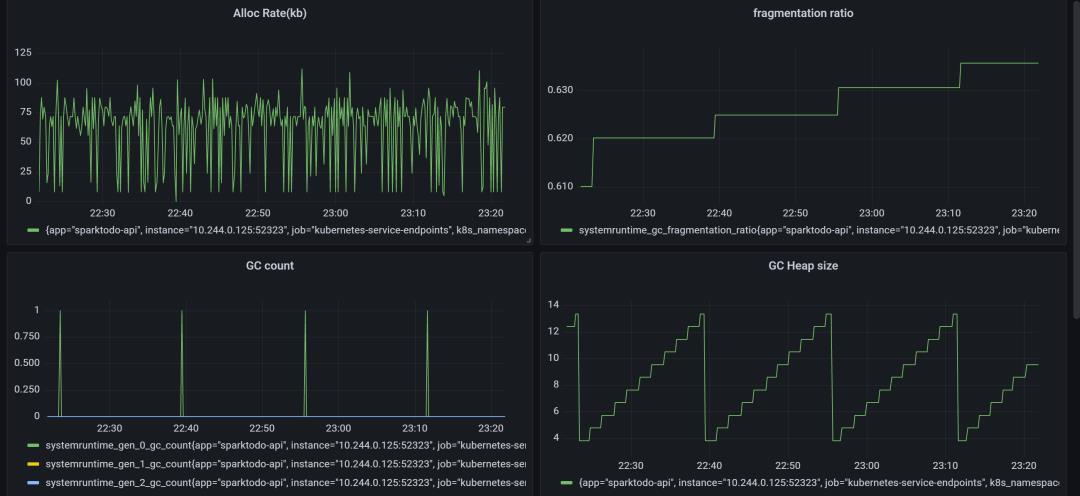
Sample 2
默认地,dotnet-monitor 会监控三个来源的数据,可以认为就是 dotnet-counters 中的三个 Provider,
分别是 System.Runtime/Microsoft.AspNetCore.Hosting/Grpc.AspNetCore.Server
我们也可以自定义 dotnet-monitor 的配置来禁用默认的 provider 或者添加更多新的 provider,我们可以提供两种类型的配置,一种是环境变量形式的配置,配置分隔符使用 __ 来表示,比如
Metrics__IncludeDefaultProviders: true也可以使用 Json 文件配置(推荐):
    "Metrics":
        "IncludeDefaultProviders": true
更加推荐使用 JSON 方式,因为更加直观,而且更便于维护
这两种方式配置方式配置文件的路径是不一样的,对于第一种配置配置文件放在 /etc/dotnet-monitor 中,而对于 Json 方式的配置则可以更加灵活的自定义,可以使用 XDG_CONFIG_HOME 来定义配置根目录,如果配置为 /etc 则配置文件对应的路径则是 /etc/dotnet-monitor/settings.json,下面是一个使用自定义配置的示例,无论哪种方式配置都可以通过 ConfigMap 来定义,挂载到容器的指定路径
apiVersion: apps/v1
kind: Deployment
metadata:
  name: reservation-server
  namespace: default
  labels:
    app: reservation-server
spec:
  replicas: 1
  revisionHistoryLimit: 2
  selector:
    matchLabels:
      app: reservation-server
  minReadySeconds: 0
  strategy:
    type: RollingUpdate
    rollingUpdate:
      maxUnavailable: 1
      maxSurge: 1
  template:
    metadata:
      labels:
        app: reservation-server
    spec:
      containers:
        - name: reservation-server
          image: openreservation/reservation-server:latest
          imagePullPolicy: Always
          resources:
            requests:
              cpu: 30m
              memory: 32Mi
            limits:
              cpu: 80m
              memory: 256Mi
          readinessProbe:
            httpGet:
              path: /health
              port: 80
            initialDelaySeconds: 60
            periodSeconds: 30
          livenessProbe:
            httpGet:
              path: /health
              port: 80
            initialDelaySeconds: 60
            periodSeconds: 30
          ports:
            - containerPort: 80
          env:
          - name: DOTNET_DiagnosticPorts
            value: /diag/port
          volumeMounts:
          - name: settings
            mountPath: /app/appsettings.Production.json
            subPath: appsettings
          - mountPath: /diag
            name: diagvol
          - mountPath: /dumps
            name: dumpsvol
          - mountPath: /tmp
            name: tmpvol
        - name: dotnet-monitor
          image: mcr.microsoft.com/dotnet/monitor
          args: [ "--no-auth" ]
          imagePullPolicy: Always
          ports:
            - containerPort: 52323
          env:
          - name: DOTNETMONITOR_DiagnosticPort__ConnectionMode
            value: Listen
          - name: DOTNETMONITOR_DiagnosticPort__EndpointName
            value: /diag/port
          - name: DOTNETMONITOR_Storage__DumpTempFolder
            value: /dumps
          - name: DOTNETMONITOR_Urls
            value: "http://+:52323"
          - name: XDG_CONFIG_HOME
            value: "/etc"
          volumeMounts:
          - mountPath: /diag
            name: diagvol
          - mountPath: /dumps
            name: dumpsvol
          - mountPath: /tmp
            name: tmpvol
          - name: monitor-configs
            mountPath: /etc/dotnet-monitor/settings.json
            subPath: default
          resources:
            requests:
              cpu: 30m
              memory: 32Mi
            limits:
              cpu: 50m
              memory: 256Mi
      volumes:
        - name: settings
          configMap:
            name: reservation-configs
        - name: monitor-configs
          configMap:
            name: dotnet-monitor-configs
        - name: diagvol
          emptyDir:
        - name: dumpsvol
          emptyDir:
        - name: tmpvol
          emptyDir:
对于 dotnet-monitor 的配置可以放在一个 ConfigMap 中,通过挂载的方式挂载到 dotnet-monitor 容器中,dotnet-monitor 配置 ConfigMap 示例如下:
apiVersion: v1
kind: ConfigMap
metadata:
  name: dotnet-monitor-configs
  namespace: default
data:
  default: |

      "urls": "http://*:52323",
      "Metrics":
        "IncludeDefaultProviders": true,
        "Providers": [

            "ProviderName": "System.Net.Http"
          ,

            "ProviderName": "Microsoft.EntityFrameworkCore"
          ,

            "ProviderName": "Microsoft.Data.SqlClient.EventSource"

        ]
这里另外配置了 Metrics 来源
System.Net.Http提供HttpClient相关的 EventCounters 数据Microsoft.EntityFrameworkCore提供EF Core相关的 EventCounters 数据
如果我们自己应用程序中有自己封装的一些 Event counters 数据也是可以收集的
Connection Mode
细心的小伙伴们可能会发现我们前面示例中在 dotnet-monitor 容器中都配置了一个环境变量 DOTNETMONITOR_DiagnosticPort__ConnectionMode 为 Listen,
上面两个示例中都是使用 Listen 模式,但是 Listen 模式是 .NET 5 之后才支持的,对于 .NET Core 3.x 的应用应该使用 Connect 模式(踩了坑的==
下面是一个 Connect 模式的 deployment 示例,也是第一个示例改成的 Connect 模式
apiVersion: apps/v1
kind: Deployment
metadata:
  name: sparktodo-api
  labels:
    app: sparktodo-api
spec:
  replicas: 1
  revisionHistoryLimit: 0
  selector:
    matchLabels:
      app: sparktodo-api
  minReadySeconds: 0
  strategy:
    type: RollingUpdate
    rollingUpdate:
      maxUnavailable: 1
      maxSurge: 1

  template:
    metadata:
      annotations:
        prometheus.io/scrape: "true"
        prometheus.io/port: "52323"
      labels:
        app: sparktodo-api

    spec:
      containers:
        - name: sparktodo-api
          image: weihanli/sparktodo-api:latest
          imagePullPolicy: Always
          resources:
            requests:
              memory: "64Mi"
              cpu: "20m"
            limits:
              memory: "128Mi"
              cpu: "50m"
          ports:
            - name: http
              containerPort: 80
              protocol: TCP
          livenessProbe:
            httpGet:
              path: /health
              port: 80
            initialDelaySeconds: 60
            periodSeconds: 30
          readinessProbe:
            httpGet:
              path: /health
              port: 80
            initialDelaySeconds: 60
            periodSeconds: 30
          volumeMounts:
          - mountPath: /tmp
            name: tmpvol
        - name: monitor
          image: mcr.microsoft.com/dotnet/monitor
          args: [ "--no-auth" ]
          imagePullPolicy: Always
          ports:
            - containerPort: 52323
          env:
          - name: DOTNETMONITOR_DiagnosticPort__ConnectionMode
            value: Connect
          - name: DOTNETMONITOR_Urls
            value: "http://+:52323"
          volumeMounts:
          - mountPath: /tmp
            name: tmpvol
          resources:
            requests:
              cpu: 20m
              memory: 32Mi
            limits:
              cpu: 50m
              memory: 256Mi
      volumes:
      - name: tmpvol
        emptyDir:
和 Listen 模式相比,Connect 模式更为简单一些,应用程序只需要和 dotnet-monitor 容器挂载同一个 tmp 目录即可,但是 Listen 模式功能更为强大,Listen 模式可以支持同时监听多个 .NET 容器,Connect 模式不支持,而且有一些高级的用法 CollectionRule 的配置仅仅支持 Listen 模式,可以参考:https://github.com/dotnet/dotnet-monitor/issues/1274,所以如果可能应当使用 Listen 模式,.NET Core 3.x 只支持 Connect 模式
Open API
dotnet-monitor 除了 metrics 之外还提供了很多的别的 API 可以参考文档 https://github.com/dotnet/dotnet-monitor/blob/main/documentation/api/README.md
| Route | Description |
|---|---|
/processes | 获取捕获的进程的信息 |
/dump | 生成一个进程的托管 dump |
/gcdump | 生成进程的 GC dump |
/trace | 生成进程的 Trace 信息 |
/metrics | 生成进程的 metrics 信息,并以 Prometheus 的格式返回 |
/livemetrics | 捕获进程的实时 metrics 信息 |
/logs | 捕获进程日志信息(EventLog) |
/info | 获取当前 dotnet-monitor 的信息(版本信息,基本配置) |
/operations | 获取 egress 操作状态获取取消操作 |
More
使用 dotnet-monitor 之后,我们就可以更好的监控我们的应用程序,之前我们使用 prometheus-net.DotNetRuntime 这个项目来监控我们的应用程序,有了 dotnet-monitor 基本完全可以取代它了,而且不需要写一行代码,而且扩展性也比较强,只需要修改配置文件就能收集更多自己关心的数据了,功能也很强大,metrics 数据能够帮助我们了解应用程序的整体状态,但是有些问题可能还需要生成进程 dump 来分析具体原因,dotnet-monitor 也可以很方便地生成进程 dump 以及 trace 数据等等,还可以配置一些动态创建 dump,trace 的配置,比如内存持续一分钟超过 2G 创建 dump 等。
另外在部署的时候,上面为了简单没有启用授权,实际使用如果需要公网访问,授权一定要做好,现在已经默认支持授权了,可以参考文档配置,另外一种则是不要给公网访问,只在 k8s 集权内部可以访问,需要的话本地做一个 port-forward 进行操作,也是我更为推荐的使用方式。
功能很强大,一篇文章很难介绍完,大家可以了解一下,有需要的时候就可以用起来了
目前使用下来,总体感觉还是很棒的,但是发现一个问题,有时候信息收集有问题,部署了几个应用,有一个应用的 System.Runtime 相关的 metrics 数据没有收集到,其他的数据都有的,感觉很奇怪,搞了几天了不知道哪里的姿势不对,提了一个 issue,感兴趣的可以关注一下 https://github.com/dotnet/dotnet-monitor/issues/1241,有踩过坑的大佬可以帮忙看一下万分感谢
另外还有一点,上面 Prometheus 只会收集 dotnet-monitor 的数据,如果要同时收集 dotnet-monitor 的 metrics 和 应用的 metrics ,你可能需要使用 Prometheus 的 Service Monitor 的 Operator,这里不多做介绍了,可以自己了解一下
References
https://github.com/WeihanLi/SparkTodo/blob/master/manifests/deployment.yml
https://github.com/OpenReservation/ReservationServer/blob/dev/k8s/dotnet-monitor-configmap.yaml
https://github.com/OpenReservation/ReservationServer/blob/dev/k8s/reservation-deployment.yaml
https://github.com/prometheus-community/helm-charts/tree/main/charts/kube-prometheus-stack#kube-prometheus-stack
https://github.com/prometheus-community/helm-charts/tree/main/charts/kube-prometheus-stack/crds
https://github.com/prometheus-operator/prometheus-operator/blob/main/Documentation/troubleshooting.md
https://github.com/dotnet/dotnet-monitor/issues/1274
https://github.com/dotnet/dotnet-monitor/issues/1241
https://github.com/dotnet/dotnet-monitor/
https://github.com/dotnet/dotnet-monitor/tree/main/documentation
https://github.com/dotnet/dotnet-monitor/blob/main/documentation/kubernetes.md
以上是关于使用 dotnet-monitor 在 Kubernetes 中收集 .NET metrics的主要内容,如果未能解决你的问题,请参考以下文章