Android安卓开发中的布局与事件
Posted woodwhale
tags:
篇首语:本文由小常识网(cha138.com)小编为大家整理,主要介绍了Android安卓开发中的布局与事件相关的知识,希望对你有一定的参考价值。
【android】安卓开发中的布局与事件
1、Android Studio下载配置
非常简单的百度然后点击下载安装就好了。注意的是,本来我是打算使用评价还不错的Genymotion这个软件来充当虚拟机的,捆版下载VirtualBox先不说,安装了之后还报错无法启动,找了一下午也未解决,最后导致VirtualBox还卸载不了,搞得人头大,所以最终使用了AS自带的虚拟机。
如何配置虚拟机呢,为了不让他下载到C盘,需要改一个环境变量
ANDROID_SDK_HOME
D:\\Environment\\Android\\avd
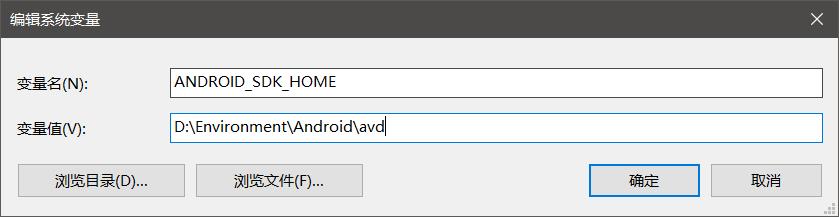
之后重启AS发现下载的虚拟机文件都在这里面了就说明成功了。
值得注意的是,AS刚开始创建项目的时候gradle构建的非常慢,需要等噢。
配置好了就可以运行Hello world了。

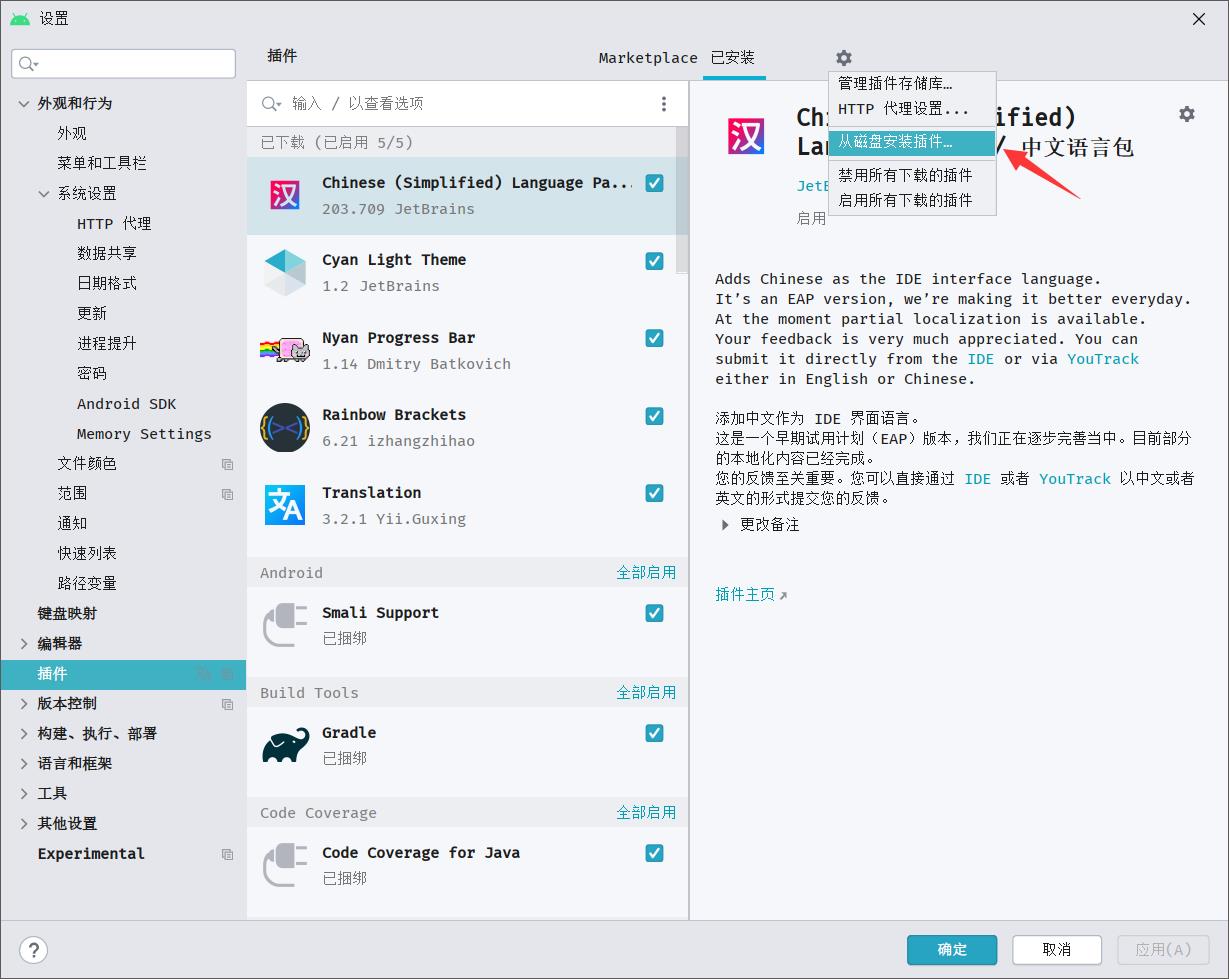
至于如何设置成中文,需要到idea的插件市场下载中文插件,在AS中使用本地安装,虽然部分无法翻译,但是绝大部分都翻译成中文了,还是非常爽滴!
2、布局
1.xml页面
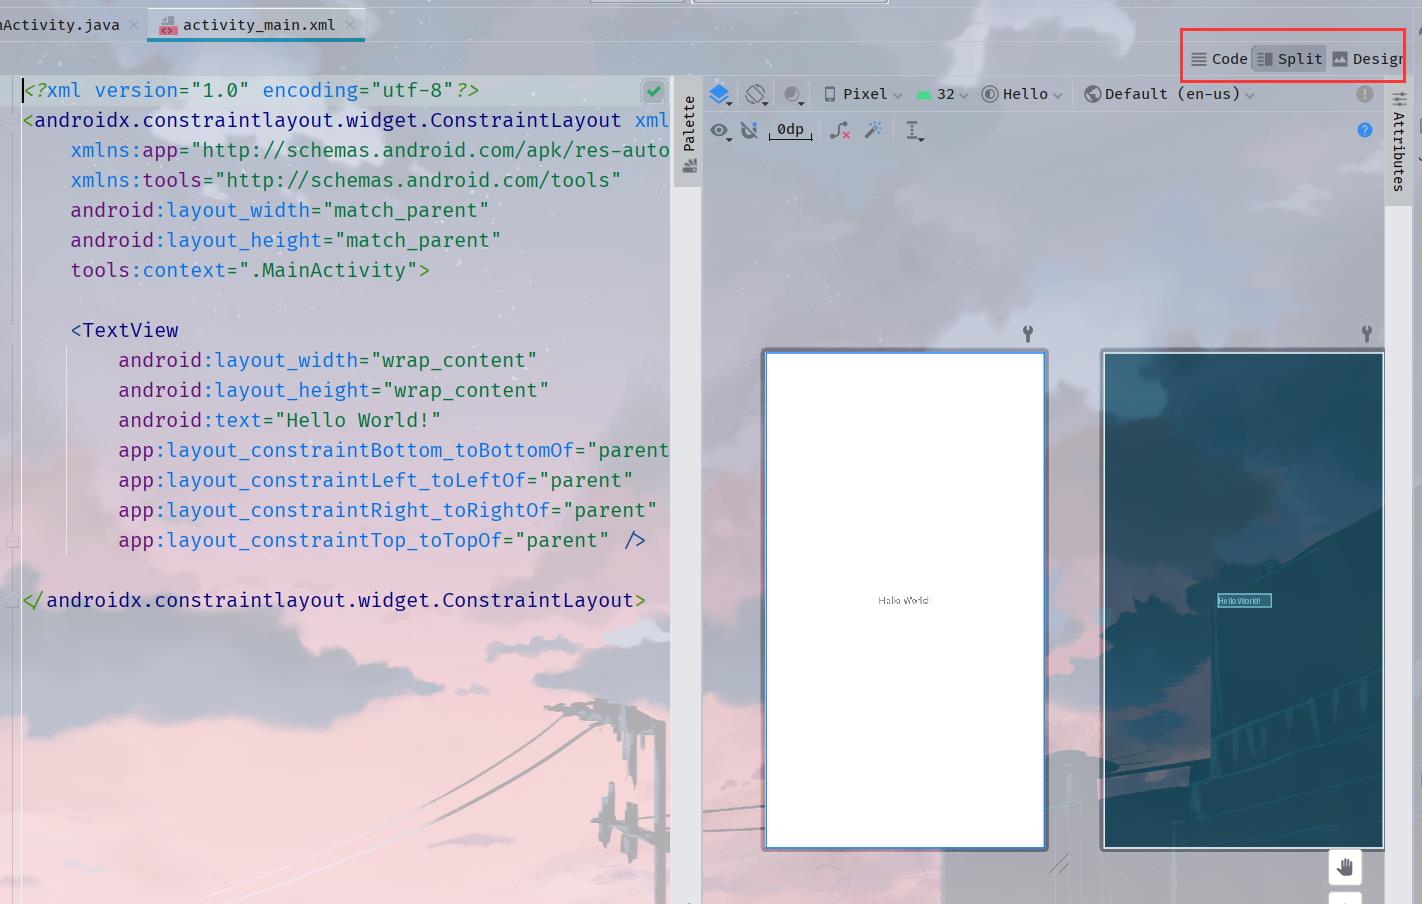
在AS中可以通过GUI来设置APP,在layout中每一个xml对应一个页面

可以在Design中手动拖拽组件,也可以通过code的方式来写代码构建界面
布局中常用的单位有
- px(绝对像素,不建议使用)
- dp(适配单位,建议使用)
- sp(字体单位)
2.线性布局
2.1 线性布局的使用
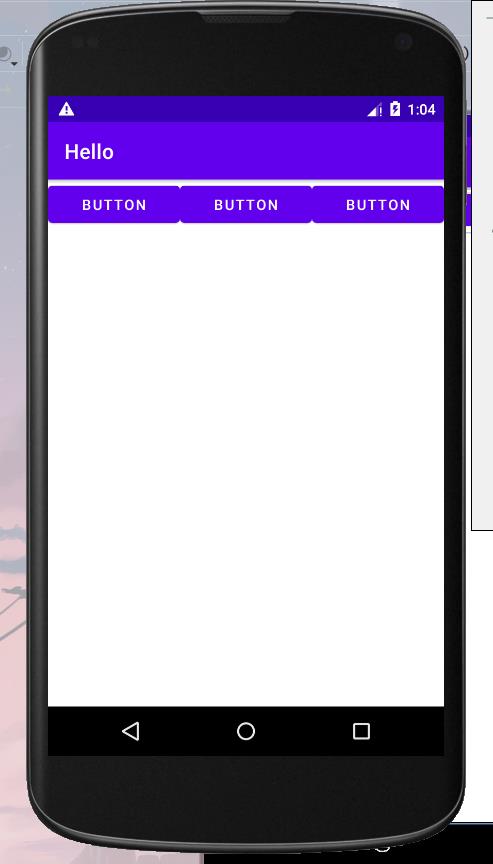
其实在Java Swing中也学过,就是一行流下来的那种,在xml中使用LinearLayout标签就可以使用流式布局
下面代码中的match_parent字面意思就是匹配父类的大小
看看加了3个button后的效果
<?xml version="1.0" encoding="utf-8"?>
<LinearLayout xmlns:android="http://schemas.android.com/apk/res/android"
    xmlns:app="http://schemas.android.com/apk/res-auto"
    xmlns:tools="http://schemas.android.com/tools"
    android:layout_width="match_parent"
    android:layout_height="match_parent">


    <Button
        android:id="@+id/button"
        android:layout_width="wrap_content"
        android:layout_height="wrap_content"
        android:layout_weight="1"
        android:text="Button" />

    <Button
        android:id="@+id/button2"
        android:layout_width="wrap_content"
        android:layout_height="wrap_content"
        android:layout_weight="1"
        android:text="Button" />

    <Button
        android:id="@+id/button3"
        android:layout_width="wrap_content"
        android:layout_height="wrap_content"
        android:layout_weight="1"
        android:text="Button" />

</LinearLayout>
2.2 线性布局摆放的方向
在LinearLayout标签中,使用android:orientation=""可以改变布局的摆放方向,有两种——水平和垂直,分别是horizontal和horizontal
可以在design页面的这个按钮中设置
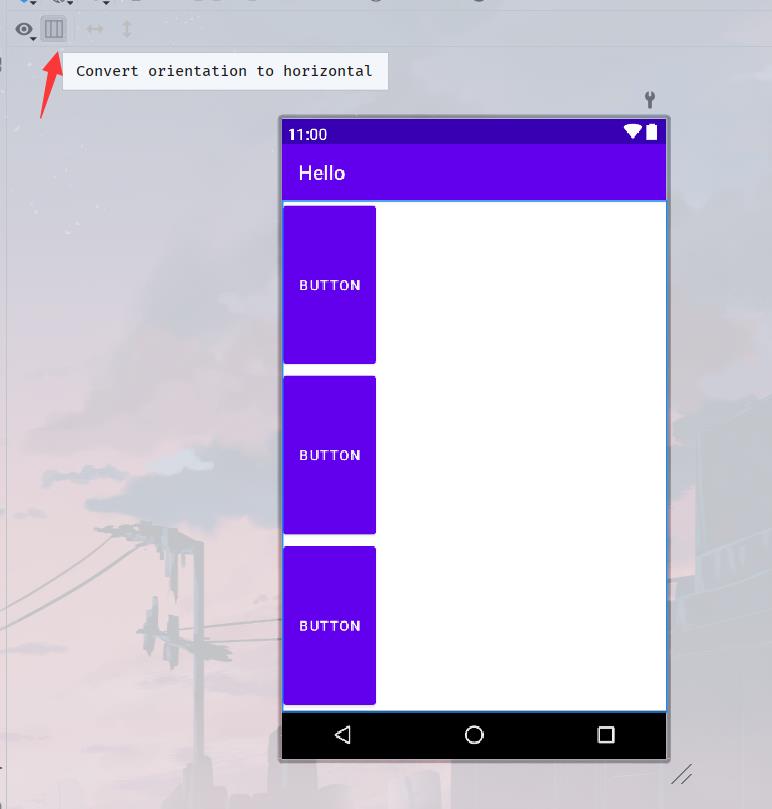
其实改变的就是代码的这一行

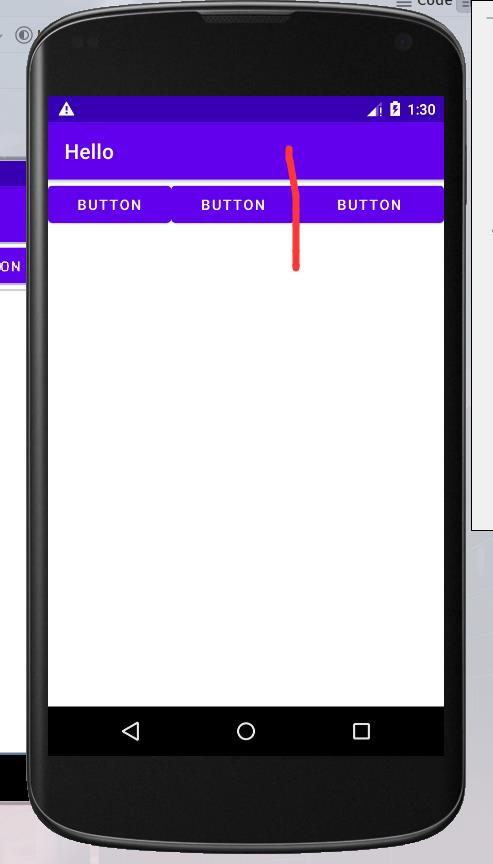
2.3 线性布局的权重
权重就是这个元素在一行内容占比,使用layout_weight来表示,每一个元素都可以设置一个权重,我如上的代码就是权重都为1

权重使用的是屏幕的宽度和高度,是成比例的!
假设,现在有3个button,每个权重分别是1,1,2,那么第一个和第二个button占了1/4,第三个占用了2/4也就是1/2。
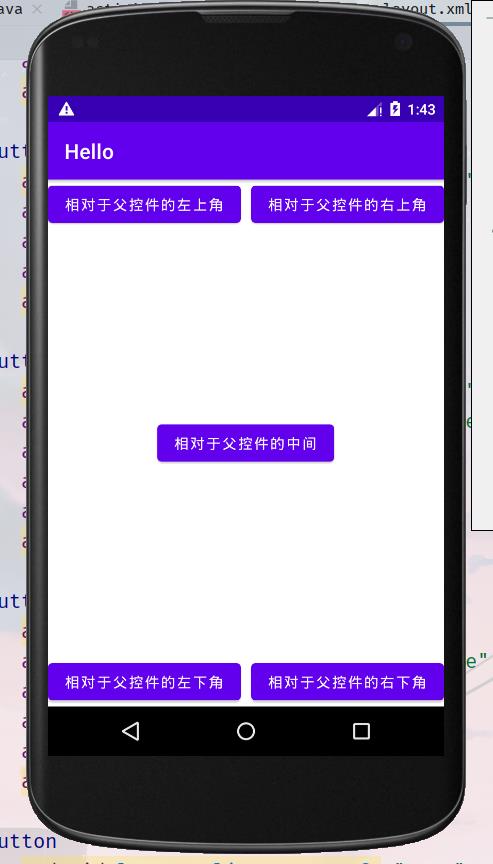
3.相对布局
3.1 相对于父级控件
使用标签RelativeLayout就可以使用相对布局了。
默认是相对于控件的左边
我们这里使用的是相对于父控件,使用属性layout_centerInParent,这个是在父控件的中间,true和false两个值可以选择
同理,有layout_alignParentRight,相对于父控件的右边,layout_alignParentLeft,相对于父控件的左边,还有一个相对于父控件的下面layout_alignParentBottom
一个简单的例子
<?xml version="1.0" encoding="utf-8"?>
<RelativeLayout
    xmlns:android="http://schemas.android.com/apk/res/android"
    android:layout_width="match_parent"
    android:layout_height="match_parent">


    <Button
        android:layout_centerInParent="true"
        android:id="@+id/button4"
        android:layout_width="wrap_content"
        android:layout_height="wrap_content"
        android:text="相对于父控件的中间" />

    <Button
        android:layout_alignParentRight="true"
        android:id="@+id/button5"
        android:layout_width="wrap_content"
        android:layout_height="wrap_content"
        android:text="相对于父控件的右上角" />

    <Button
        android:layout_alignParentRight="true"
        android:layout_alignParentBottom="true"
        android:id="@+id/button6"
        android:layout_width="wrap_content"
        android:layout_height="wrap_content"
        android:text="相对于父控件的右下角" />

    <Button
        android:layout_alignParentLeft="true"
        android:layout_alignParentBottom="true"
        android:id="@+id/button7"
        android:layout_width="wrap_content"
        android:layout_height="wrap_content"
        android:text="相对于父控件的左下角" />

    <Button
        android:layout_alignParentLeft="true"
        android:id="@+id/button8"
        android:layout_width="wrap_content"
        android:layout_height="wrap_content"
        android:text="相对于父控件的左上角" />

</RelativeLayout>
效果如下:
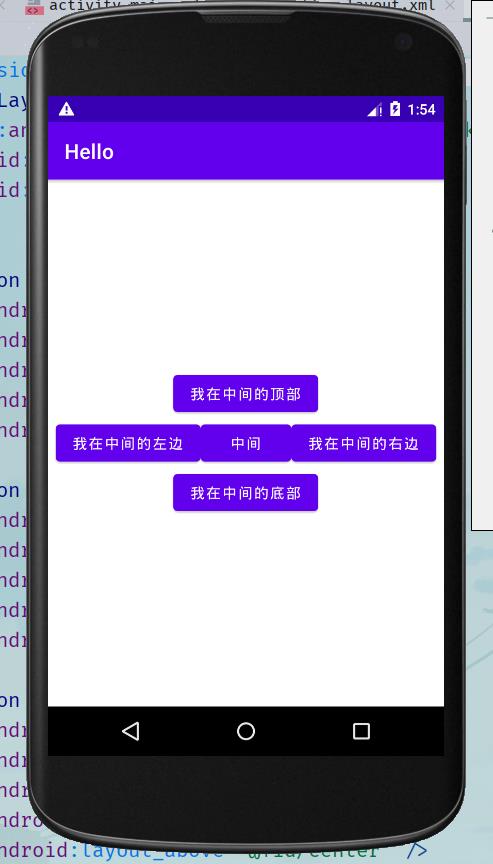
3.2 相对于同级控件
看代码!
使用layout_toLeftOf和layout_toRightOf和layout_above和layout_below来相对于某个控件来布局
<?xml version="1.0" encoding="utf-8"?>
<RelativeLayout
    xmlns:android="http://schemas.android.com/apk/res/android"
    android:layout_width="match_parent"
    android:layout_height="match_parent">


    <Button
        android:layout_width="wrap_content"
        android:layout_height="wrap_content"
        android:layout_centerInParent="true"
        android:text="中间"
        android:id="@+id/center" />

    <Button
        android:layout_width="wrap_content"
        android:layout_height="wrap_content"
        android:text="我在中间的左边"
        android:layout_toLeftOf="@+id/center"
        android:layout_centerInParent="true" />

    <Button
        android:layout_width="wrap_content"
        android:layout_height="wrap_content"
        android:text="我在中间的顶部"
        android:layout_centerInParent="true"
        android:layout_above="@+id/center" />

    <Button
        android:layout_width="wrap_content"
        android:layout_height="wrap_content"
        android:text="我在中间的右边"
        android:layout_centerInParent="true"
        android:layout_toRightOf="@+id/center"/>

    <Button
        android:layout_width="wrap_content"
        android:layout_height="wrap_content"
        android:text="我在中间的底部"
        android:layout_below="@+id/center"
        android:layout_centerInParent="true"/>

</RelativeLayout>
效果如下:
4.绝对布局
已经过时的布局方法,使用AbsoluteLayout标签
layout_x和layout_y设置位置
<?xml version="1.0" encoding="utf-8"?>
<AbsoluteLayout
    xmlns:android="http://schemas.android.com/apk/res/android"
    android:layout_width="match_parent"
    android:layout_height="match_parent">

    <Button
        android:layout_width="wrap_content"
        android:layout_height="wrap_content"
        android:layout_x="100dp"
        android:layout_y="100dp"
        android:text="绝对位置" />

</AbsoluteLayout>
5.表格布局
就是表格的样式,使用TableLayout标签
使用TableRow标签来显示一行
例如
<?xml version="1.0" encoding="utf-8"?>
<TableLayout
    xmlns:android="http://schemas.android.com/apk/res/android"
    android:layout_width="match_parent"
    android:layout_height="match_parent">

    <TableRow>
        <Button
            android:layout_width="wrap_content"
            android:layout_height="wrap_content"
            android:text="1"/>
        <Button
            android:layout_width="wrap_content"
            android:layout_height="wrap_content"
            android:text="2"/>
        <Button
            android:layout_width="wrap_content"
            android:layout_height="wrap_content"
            android:text="3"/>

    </TableRow>

    <TableRow>
        <Button
            android:layout_width="wrap_content"
            android:layout_height="wrap_content"
            android:text="4"/>
        <Button
            android:layout_width="wrap_content"
            android:layout_height="wrap_content"
            android:text="5"/>
        <Button
            android:layout_width="wrap_content"
            android:layout_height="wrap_content"
            android:text="6"/>

    </TableRow>

    <TableRow>
        <Button
            android:layout_width="wrap_content"
            android:layout_height="wrap_content"
            android:text="7"/>
        <Button
            android:layout_width="wrap_content"
            android:layout_height="wrap_content"
            android:text="8"/>
        <Button
            android:layout_width="wrap_content"
            android:layout_height="wrap_content"
            android:text="9"/>

    </TableRow>


</TableLayout>
效果如下:

6.帧布局
使用FrameLayout标签
例如
<?xml version="1.0" encoding="utf-8"?>
<FrameLayout xmlns:android="http://schemas.android.com/apk/res/android"
    android:layout_width="match_parent"
    android:layout_height="match_parent">

    <Button
        android:layout_width="wrap_content"
        android:layout_height="wrap_content"
        android:layout_gravity="center"
        android:text="按钮"/>

</FrameLayout>
3、设计一个计算器布局
1.由线性布局开始
使用线性布局
<?xml version="1.0" encoding="utf-8"?>
<LinearLayout xmlns:android="http://schemas.android.com/apk/res/android"
    android:layout_width="match_parent"
    android:layout_height="match_parent"
    android:orientation="vertical">

    <LinearLayout
        android:layout_width="match_parent"
        android:layout_height="80dp"
        android:orientation="horizontal">

        <TextView
            android:layout_width="0dp"
            android:layout_height="match_parent"
            android:layout_weight="1"
            android:gravity="center"
            android:text="C"
            android:textSize="20sp" />

        <TextView
            android:layout_width="0dp"
            android:layout_height="match_parent"
            android:layout_weight="1"
            android:gravity="center"
            android:text="+/-"
            android:textSize="20sp" />

        <TextView
            android:layout_width="0dp"
            android:layout_height="match_parent"
            android:layout_weight="1"
            android:gravity="center"
            android:text="%"
            android:textSize="20sp" />

        <TextView
            android:layout_width="0dp"
            android:layout_height="match_parent"
            android:layout_weight="1"
            android:gravity="center"
            android:background="@color/cardview_shadow_start_color"
            android:text="/"
            android:textSize="20sp" />
    </LinearLayout>

    <LinearLayout
        android:layout_width="match_parent"
        android:layout_height="80dp"
        android:orientation="horizontal">

        <TextView
            android:layout_width="0dp"
            android:layout_height="match_parent"
            android:layout_weight="1"
            android:gravity="center"
            android:text="1"
            android:textSize="20sp" />

        <TextView
            android:layout_width="0dp"
            android:layout_height="match_parent"
            android:layout_weight="1"
            and以上是关于Android安卓开发中的布局与事件的主要内容,如果未能解决你的问题,请参考以下文章