AI平民化之路 - 华为云ModelArts和AI Gallery体验指南
Posted BigDataToAI
tags:
篇首语:本文由小常识网(cha138.com)小编为大家整理,主要介绍了AI平民化之路 - 华为云ModelArts和AI Gallery体验指南相关的知识,希望对你有一定的参考价值。
在校期间主学机器学习和算法,在一次偶然的机会接触了大数据,而后便入门大数据,至今也从事大数据平台开发工作。可是,仍然对AI技术念念不忘呀,平常也会做点机器学习相关的小东西,尝试一些demo,想着某一天还能回到曾经熟悉的领域,正如我博客名称,从大数据到人工智能。由于我的工作也是平台相关的,所以本次ModelArts的体验对我来说不仅仅是产品的使用者,更是一个产品的学习者。话不多说,接下来和大家分享一下作为产品使用者的体验。
作为一站式AI开发平台,华为云ModelArts提供了全周期AI工作流管理,让用户能够快速创建和部署模型。对于初学者,新手入门教程指引用户快速了解ModelArts产品。
新手入门指引
该新手入门指引为自动学习中的物体检测项目,将“云宝图片”数据集下载下来之后,在自动学习中创建物体检测项目,实现“云宝检测”的模型训练与模型部署。接下来分享一下该入门项目指南。
创建OBS对象存储桶
OBS是华为云的对象存储服务,由于ModelArts只上线了部分区域,所以需要确保购买的OBS资源的区域和ModelArts在同一个区域,例如我这边全部选择“北京四”。

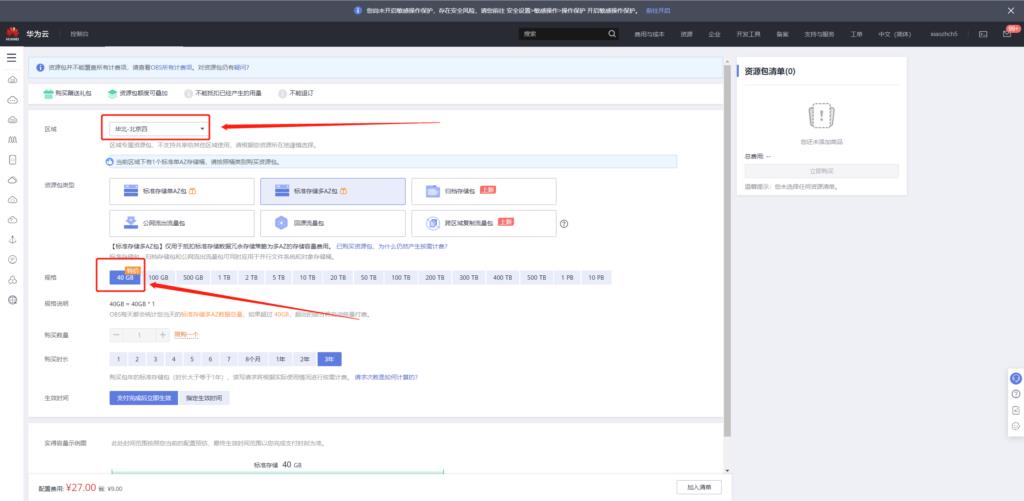
OBS有按需计费和按量计费两种方式,新用户可以以9元体验1年40G的存储服务,详细的计费方式和购买方式可参考:
计费方式: https://support.huaweicloud.com/drawer-obs/obs_99_0016.html
购买方式:https://console.huaweicloud.com/console/?region=cn-north-4&locale=zh-cn#/obs/buy
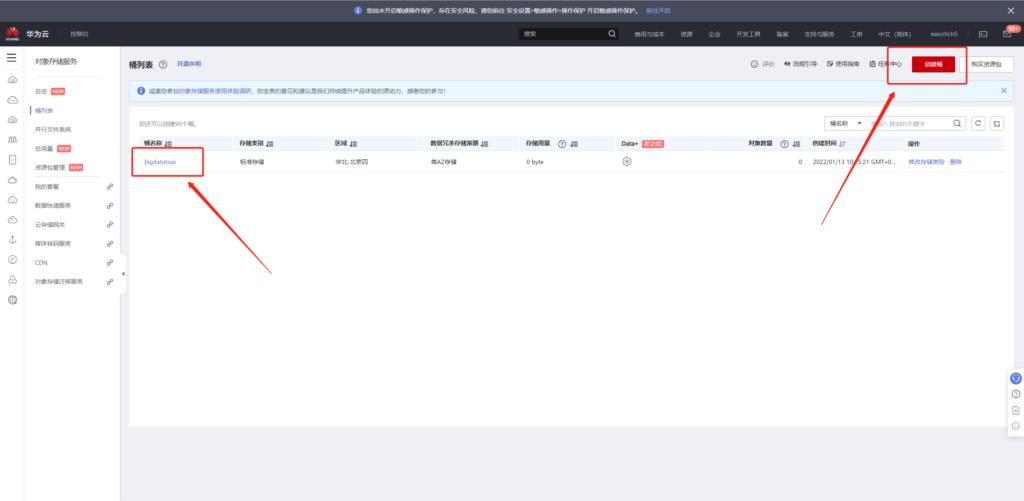
然后在上述区域创建OBS桶,例如我这里创建了bigdatatoai桶
下载数据并上传至OBS
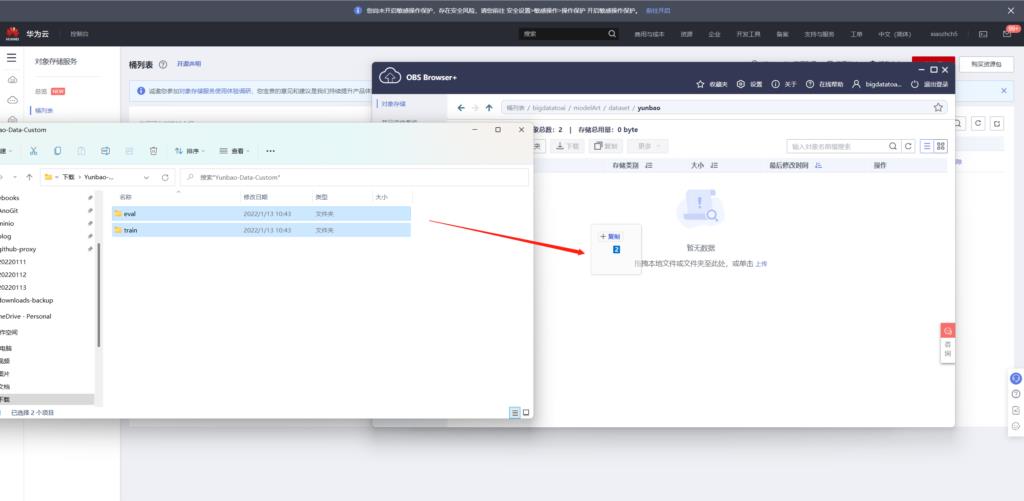
数据,按照提示将数据上传到OBS。这边有两种方式上传,一种是直接通过网页上传,另一种是通过OBS桌面工具OBS Browser+上传,下面介绍一下通过OBS Browser+上传的方式。
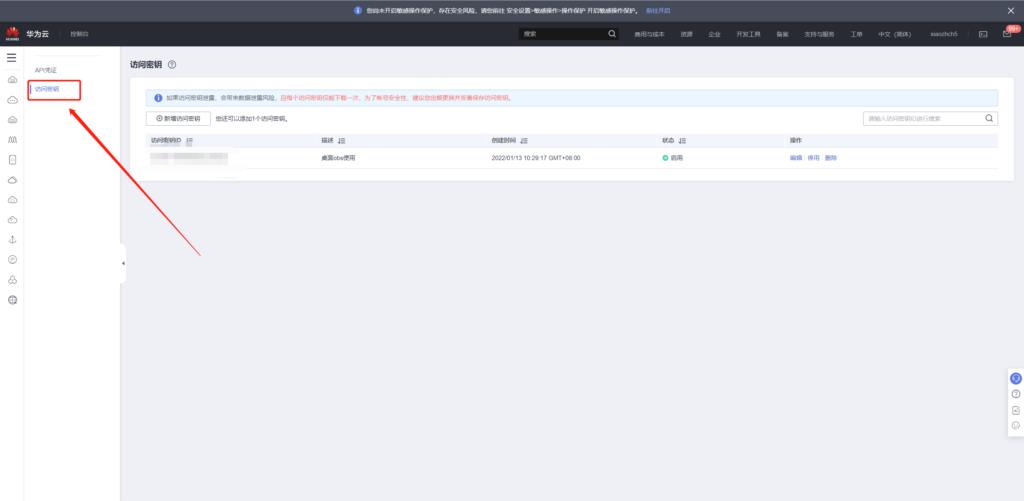
首先您要在此处下载并安装该工具:https://support.huaweicloud.com/browsertg-obs/obs_03_1003.html 。本处以windows为例:
首先申请访问密钥,得到密钥之后,填入OBS Browser+即可。


登录之后便可以看到我们刚刚创建的桶
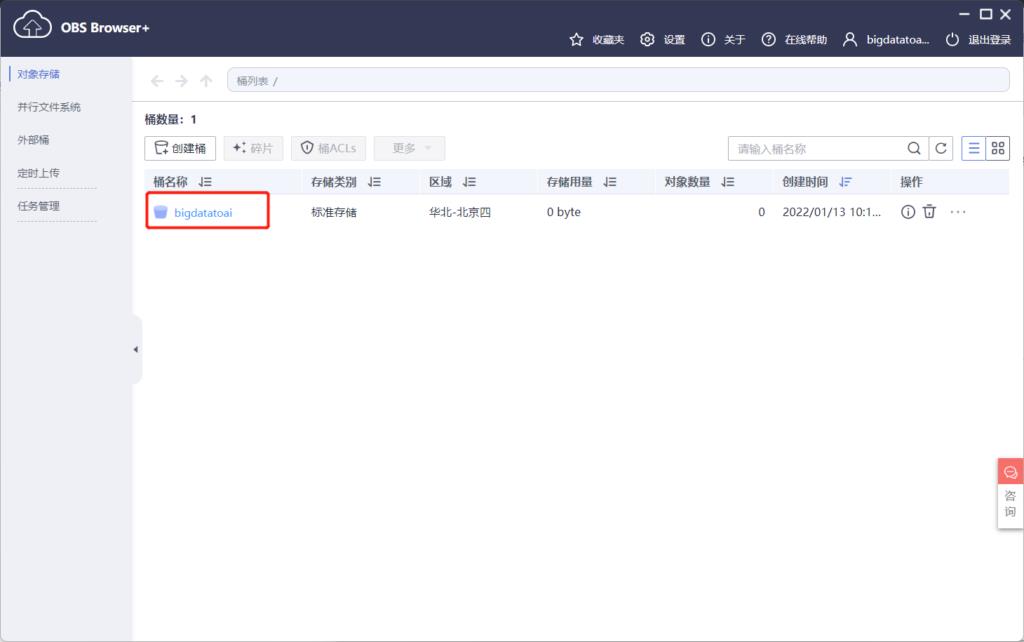
在桶内创建文件夹modelArt/dataset/yunbao,将原始数据上传到此目录(可直接拖拉上传)

自动学习入门
接着便可以使用自动学习功能,对刚刚上传的云宝图像进行模型训练。

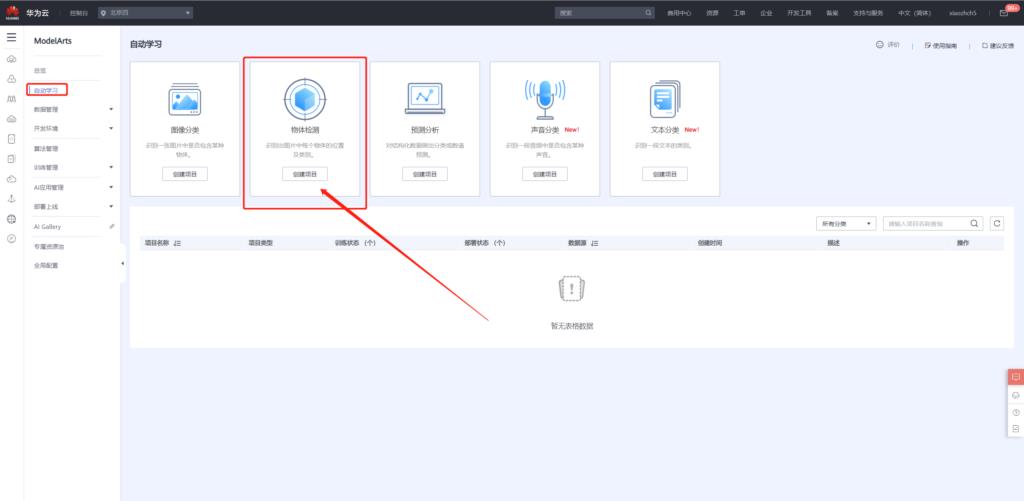
不过在实际进行使用之前还需要授权委托,本文以自动创建委托为例。
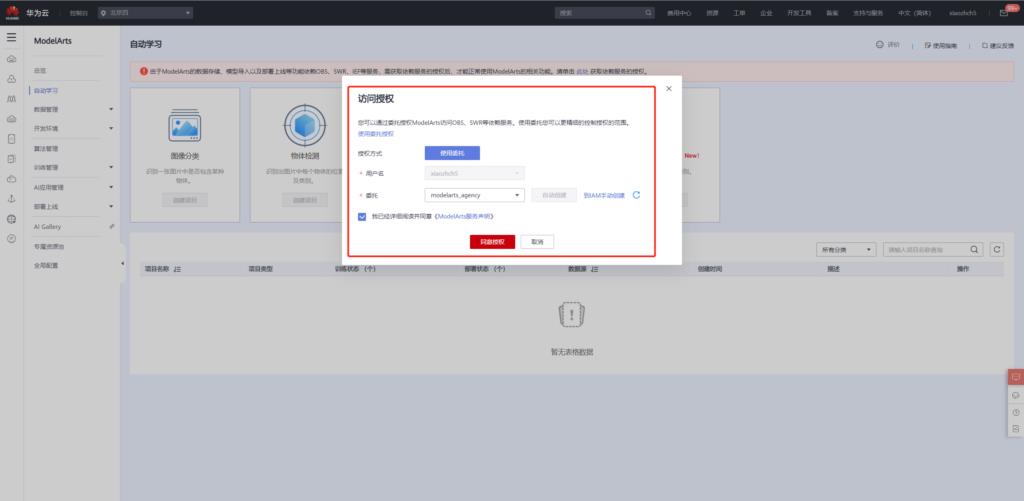
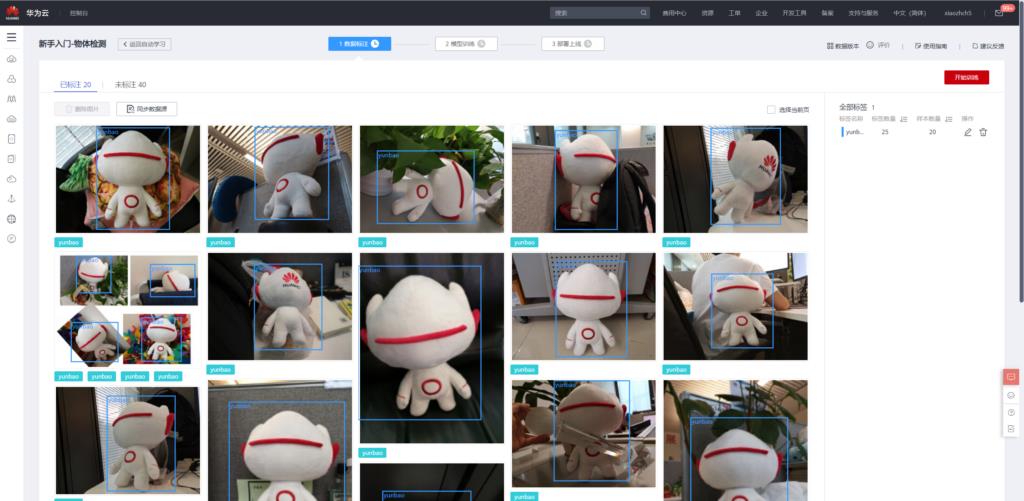
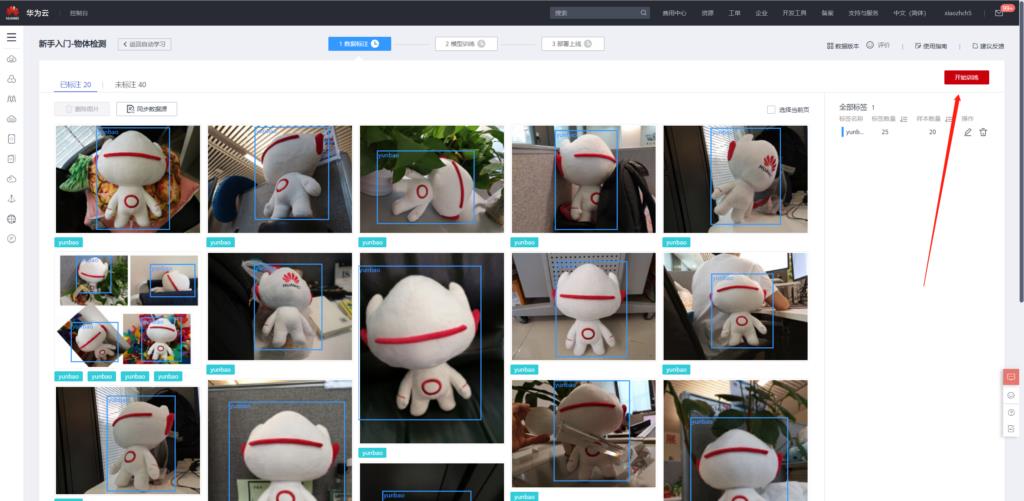
点击自动学习中的目标检测,使用我们刚刚上传的数据创建项目
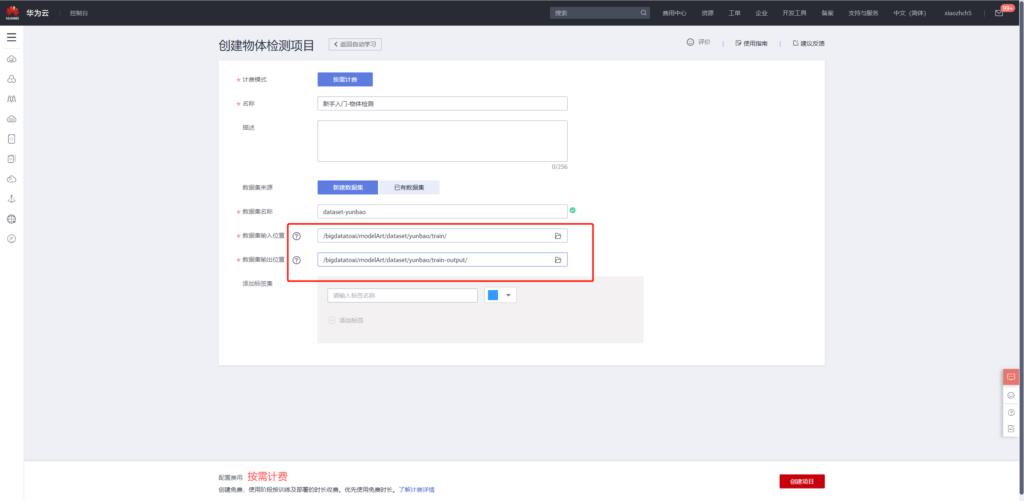
项目创建完成之后,便可使用已标注的数据进行训练,原始数据中已标注的数据为20个,其余40个数据未标注,后续步骤中使用手动标注之后再进行模型训练。
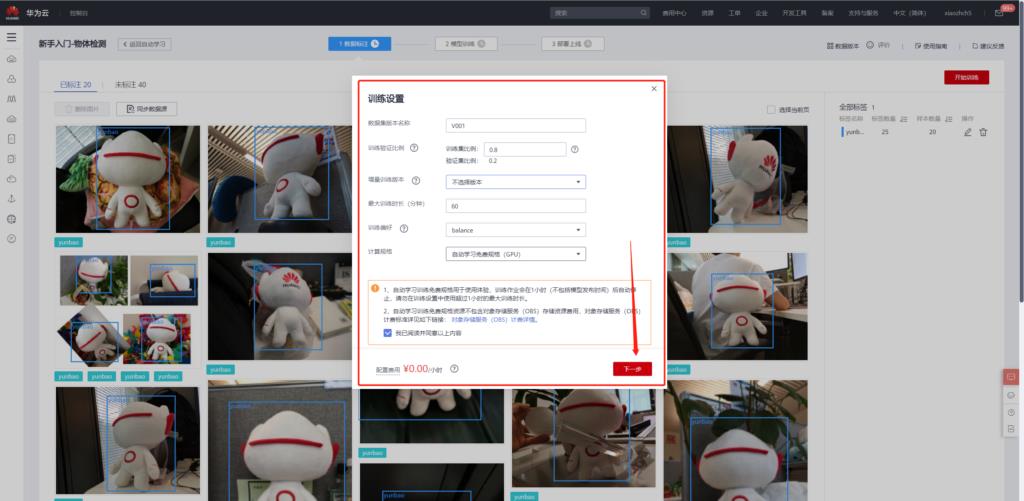
模型训练
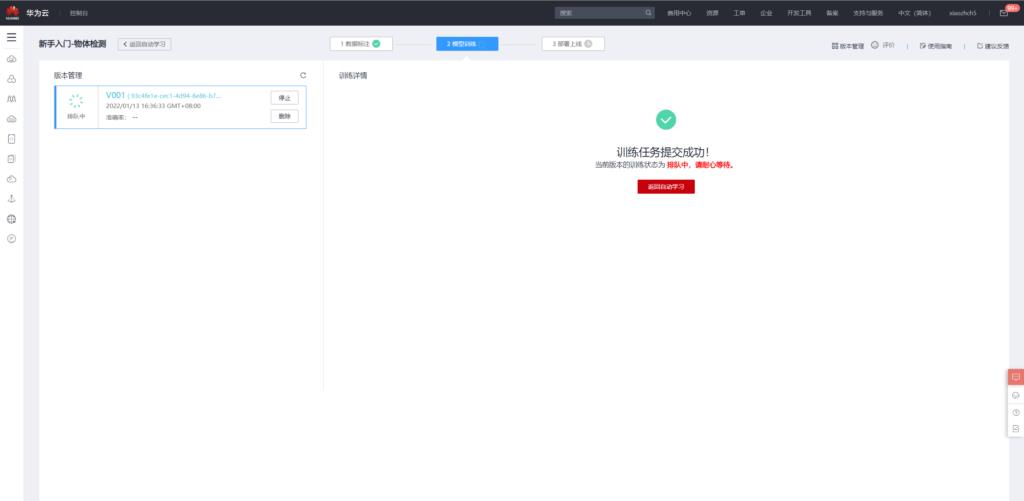
训练完成之后得到如下评估结果,

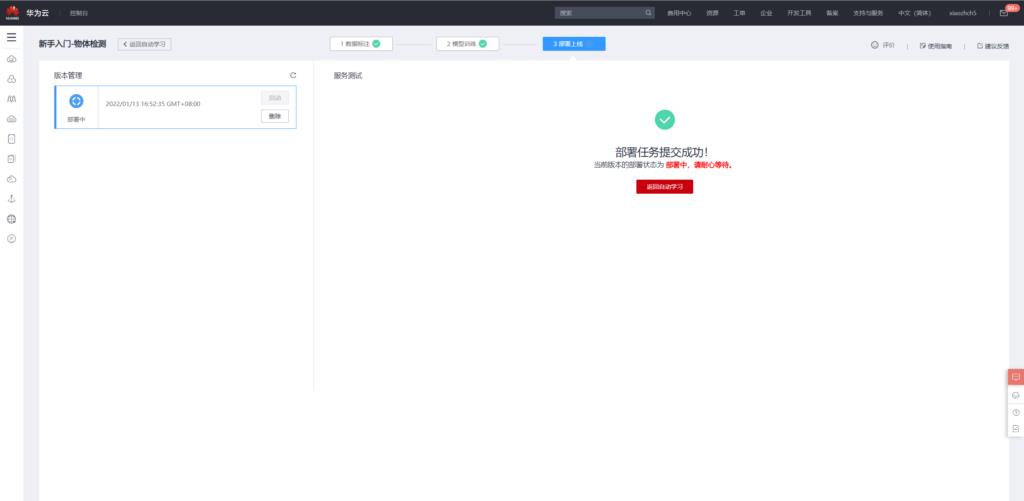
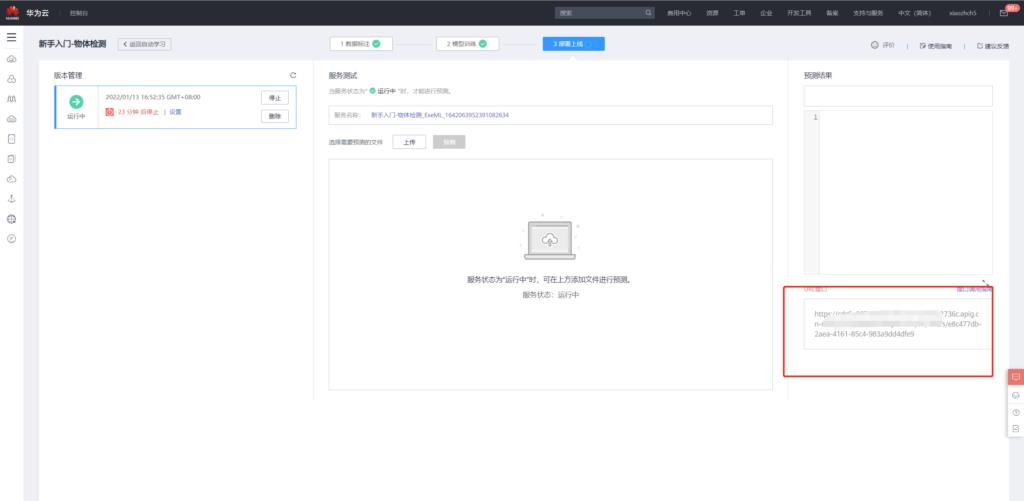
接着便可以将模型部署上线
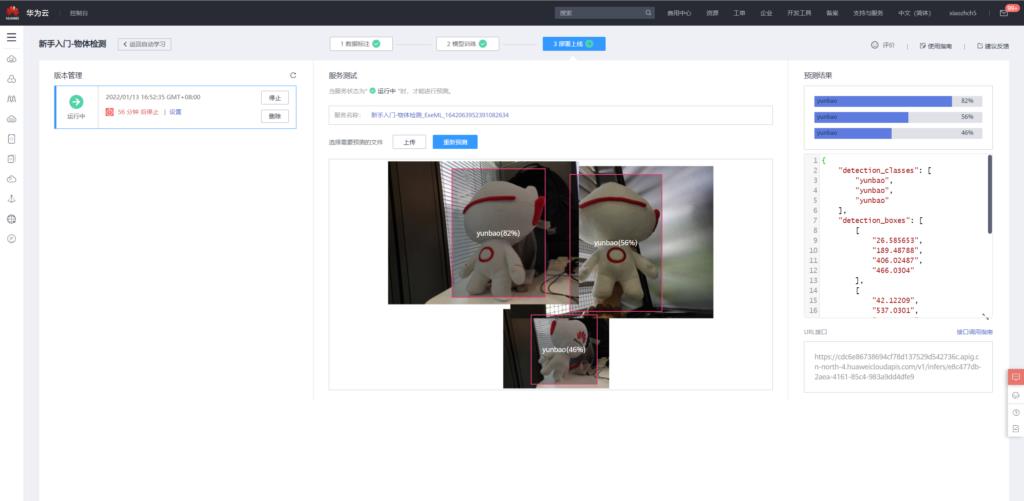
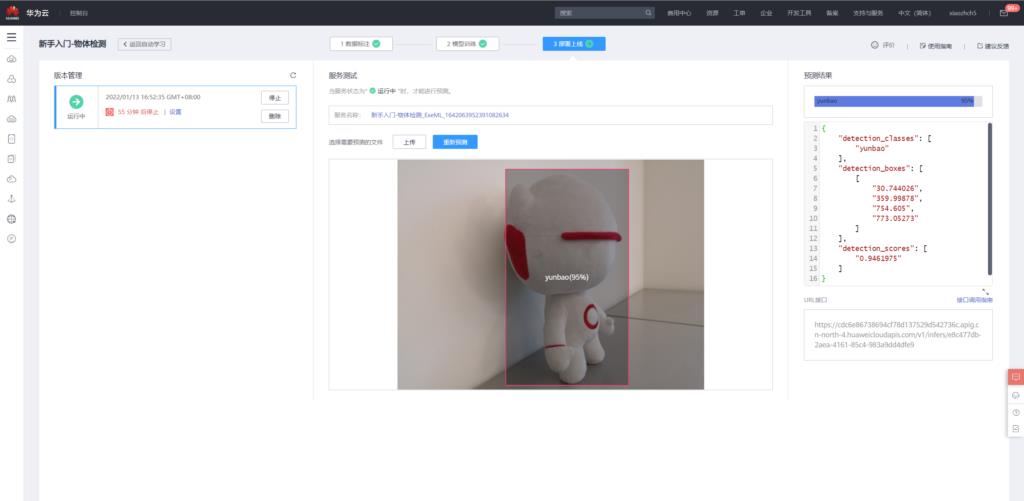
模型使用
使用已知刚刚训练好的模型进行预测,通过页面上传eval中的图像
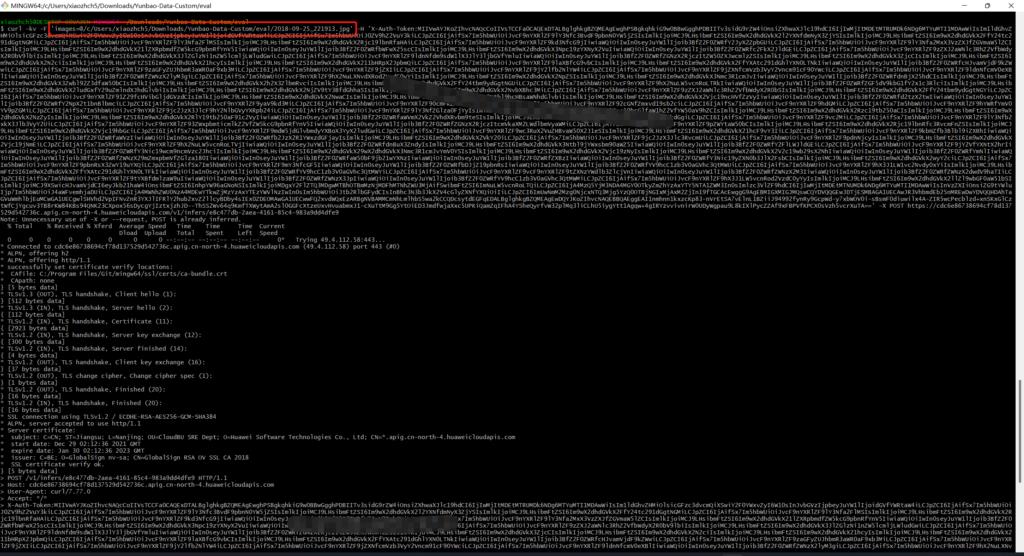
当然,也可以通过api调用的方式对图像进行检测。
根据https://support.huaweicloud.com/engineers-modelarts/modelarts_23_0063.html所述,使用postman获取X-Auth-Token
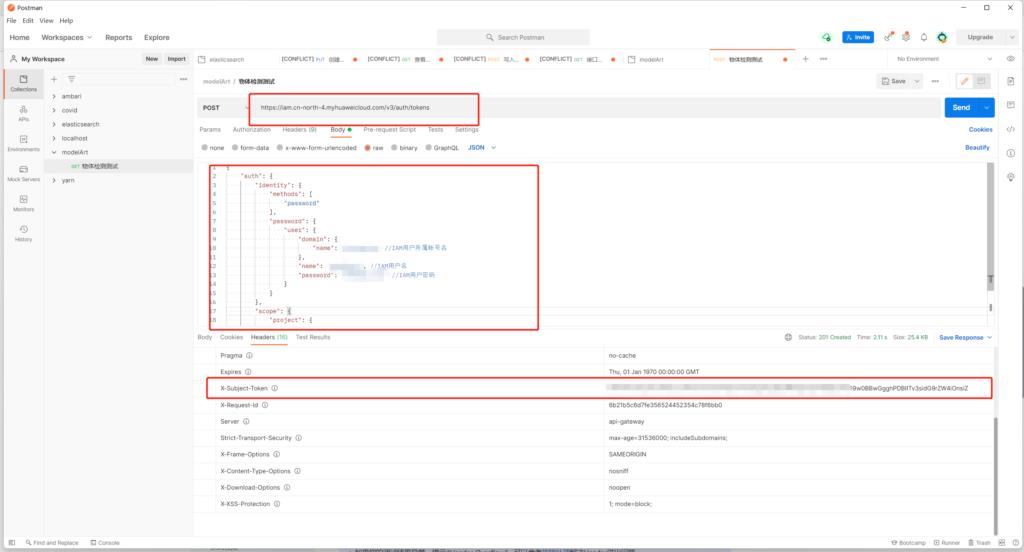
然后使用模型页面的api对图像进行检测
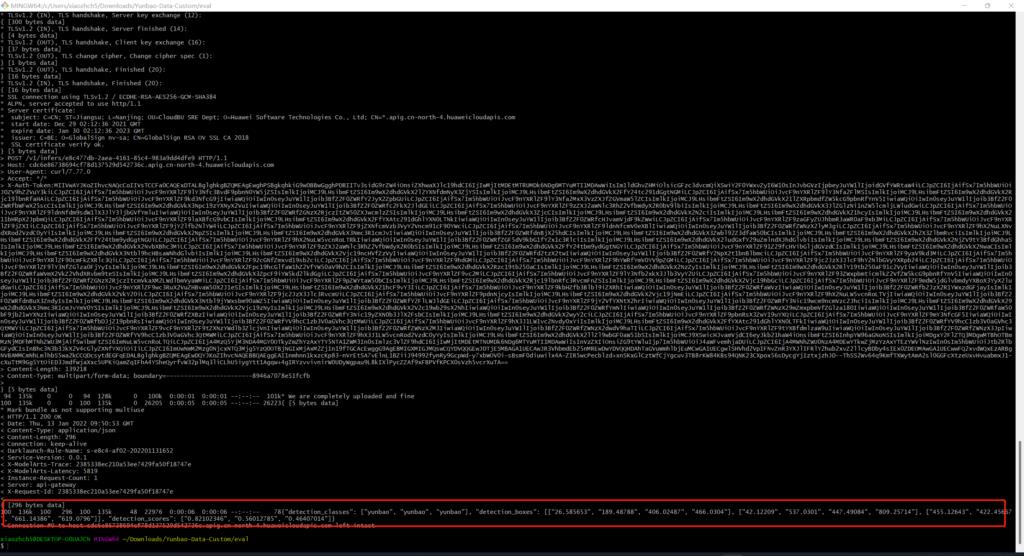
本文使用curl方式发送图片,(使用postman一直返回400)得到如下结果
手动标记数据重新训练
刚刚我们使用20张已经标记好的数据对模型进行训练,现在手动对剩余的40张图片进行标记。
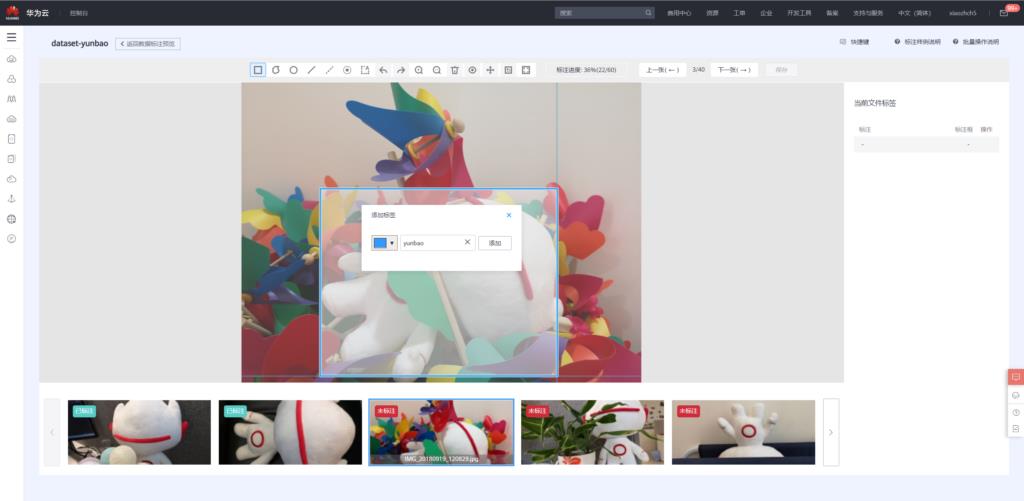
使用标记后的60张图片重新训练:
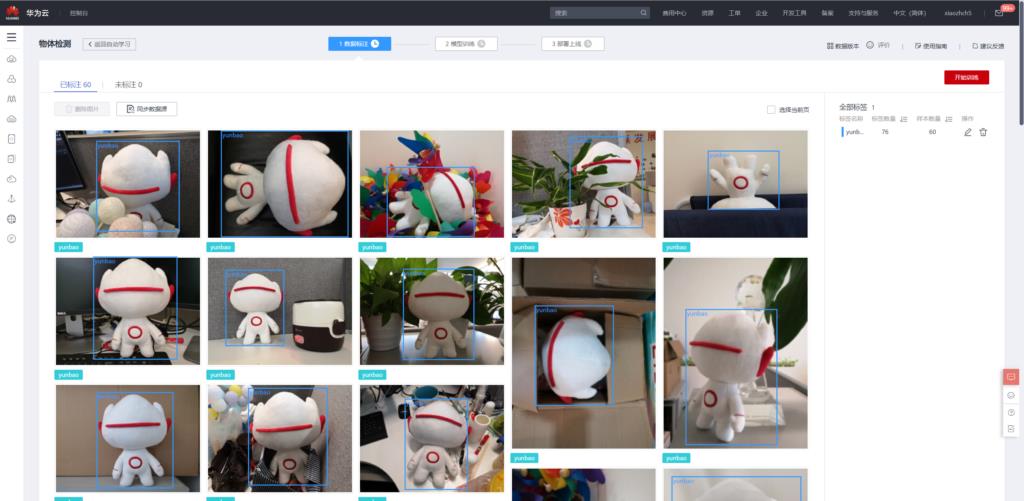
重新训练的结果如下
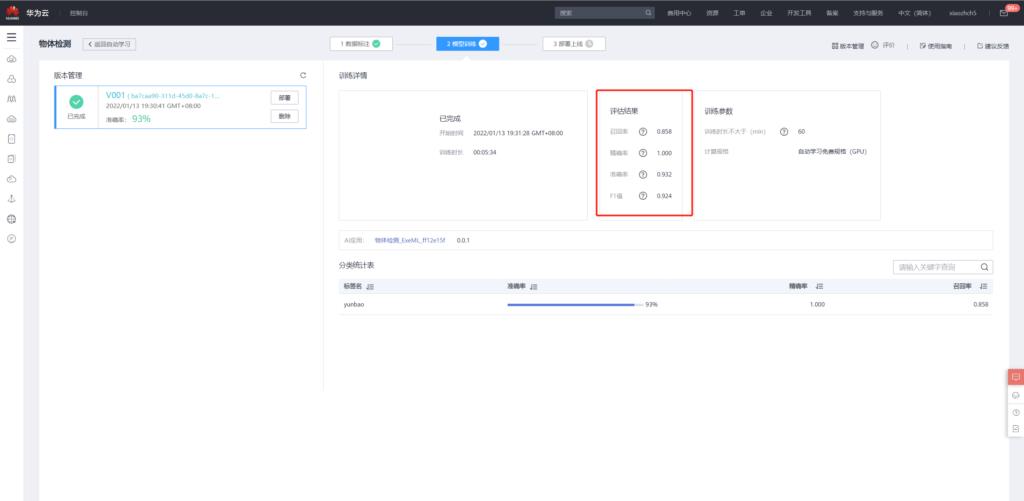
可见其性能相较于20张图片的训练有所提高。
CodeLab - 开箱即用的在线NoteBook开发环境
总览
平台化的一个极大优势就是开箱即用。我很喜欢CodeLab这个能力。接下来我们来体验一下如何使用CodeLab开发。
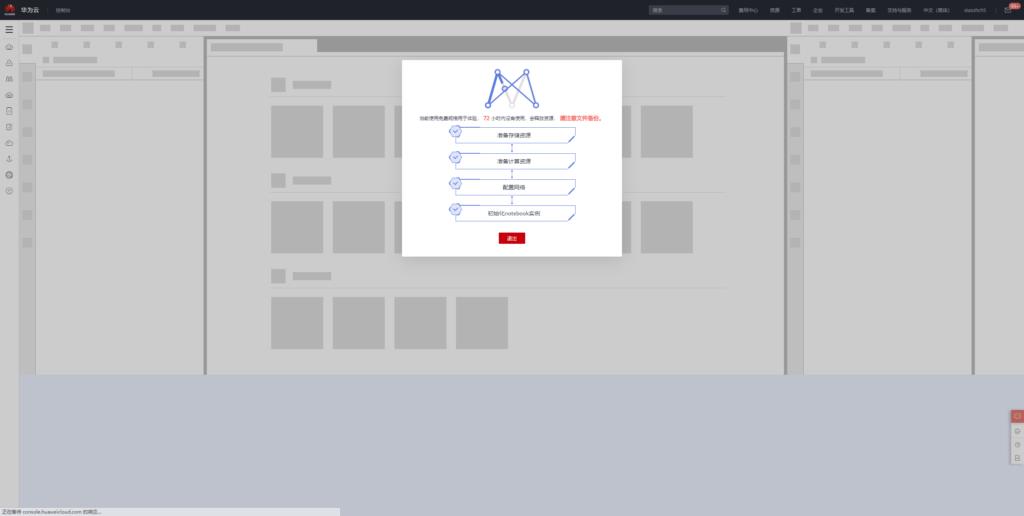
首先点击立即使用,进入NoteBook开发环境。

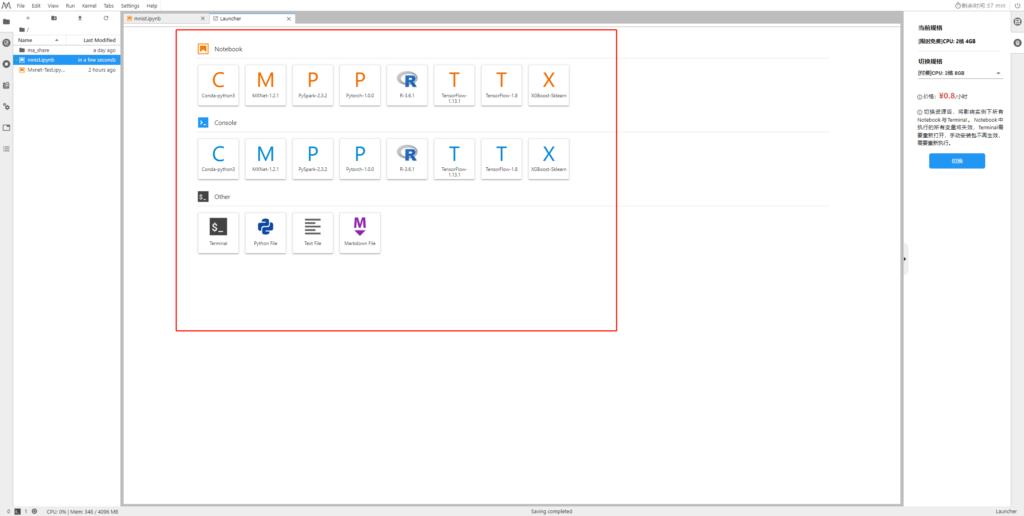
CodeLab目前直接支持如下类型的机器学习框架,如果您觉得不满意,还可以使用conda在终端中自由安装。
使用mnist数据训练全连接网络
参考地址:https://mxnet.apache.org/versions/1.5.0/tutorials/gluon/mnist.html
下面我以mxnet框架为例,尝试运行经典的手写数字识别的例子。
首先下载训练和测试数据
import mxnet as mx

# Select a fixed random seed for reproducibility
mx.random.seed(42)

def data_xform(data):
    """Move channel axis to the beginning, cast to float32, and normalize to [0, 1]."""
    return nd.moveaxis(data, 2, 0).astype('float32') / 255

train_data = mx.gluon.data.vision.MNIST(train=True).transform_first(data_xform)
val_data = mx.gluon.data.vision.MNIST(train=False).transform_first(data_xform)
加载数据
batch_size = 100
train_loader = mx.gluon.data.DataLoader(train_data, shuffle=True, batch_size=batch_size)
val_loader = mx.gluon.data.DataLoader(val_data, shuffle=False, batch_size=batch_size)
导入必要的包
from __future__ import print_function  # only relevant for Python 2
import mxnet as mx
from mxnet import nd, gluon, autograd
from mxnet.gluon import nn
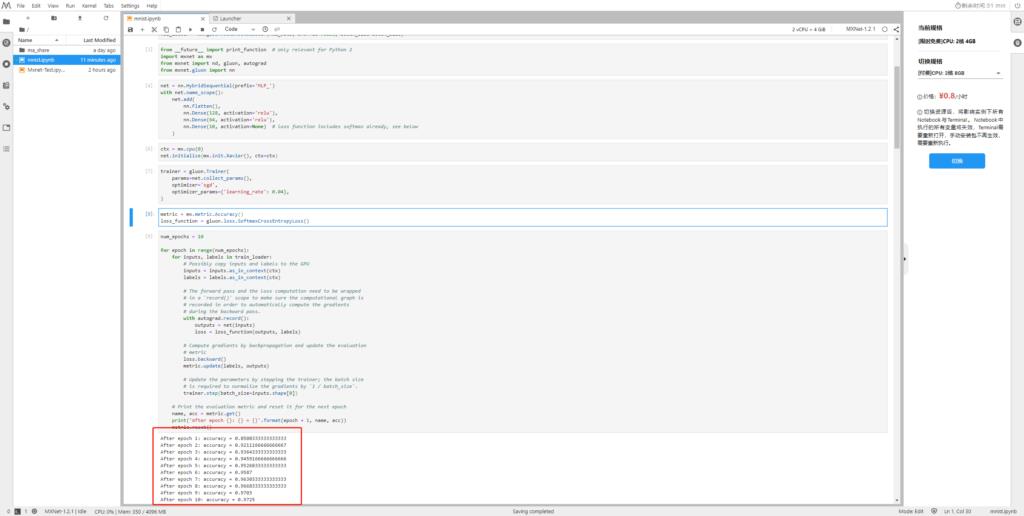
构建全连接网络
net = nn.HybridSequential(prefix='MLP_')
with net.name_scope():
    net.add(
        nn.Flatten(),
        nn.Dense(128, activation='relu'),
        nn.Dense(64, activation='relu'),
        nn.Dense(10, activation=None)  # loss function includes softmax already, see below
    )
网络初始化,使用cpu进行训练
ctx = mx.cpu(0)
net.initialize(mx.init.Xavier(), ctx=ctx)
定义如何训练上述构建的全连接网络
trainer = gluon.Trainer(
    params=net.collect_params(),
    optimizer='sgd',
    optimizer_params='learning_rate': 0.04,
)
定义损失函数
metric = mx.metric.Accuracy()
loss_function = gluon.loss.SoftmaxCrossEntropyLoss()
重复10次训练
num_epochs = 10

for epoch in range(num_epochs):
    for inputs, labels in train_loader:
        # Possibly copy inputs and labels to the GPU
        inputs = inputs.as_in_context(ctx)
        labels = labels.as_in_context(ctx)

        # The forward pass and the loss computation need to be wrapped
        # in a `record()` scope to make sure the computational graph is
        # recorded in order to automatically compute the gradients
        # during the backward pass.
        with autograd.record():
            outputs = net(inputs)
            loss = loss_function(outputs, labels)

        # Compute gradients by backpropagation and update the evaluation
        # metric
        loss.backward()
        metric.update(labels, outputs)

        # Update the parameters by stepping the trainer; the batch size
        # is required to normalize the gradients by `1 / batch_size`.
        trainer.step(batch_size=inputs.shape[0])

    # Print the evaluation metric and reset it for the next epoch
    name, acc = metric.get()
    print('After epoch :  = '.format(epoch + 1, name, acc))
    metric.reset()
在执行10次之后的训练精度为0.9725
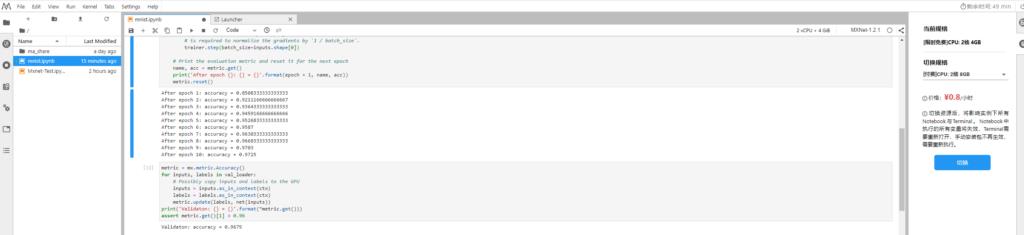
接下来我们用测试集验证一下效果如何
metric = mx.metric.Accuracy()
for inputs, labels in val_loader:
    # Possibly copy inputs and labels to the GPU
    inputs = inputs.as_in_context(ctx)
    labels = labels.as_in_context(ctx)
    metric.update(labels, net(inputs))
print('Validaton:  = '.format(*metric.get()))
assert metric.get()[1] > 0.96
得到测试精度为:0.9679
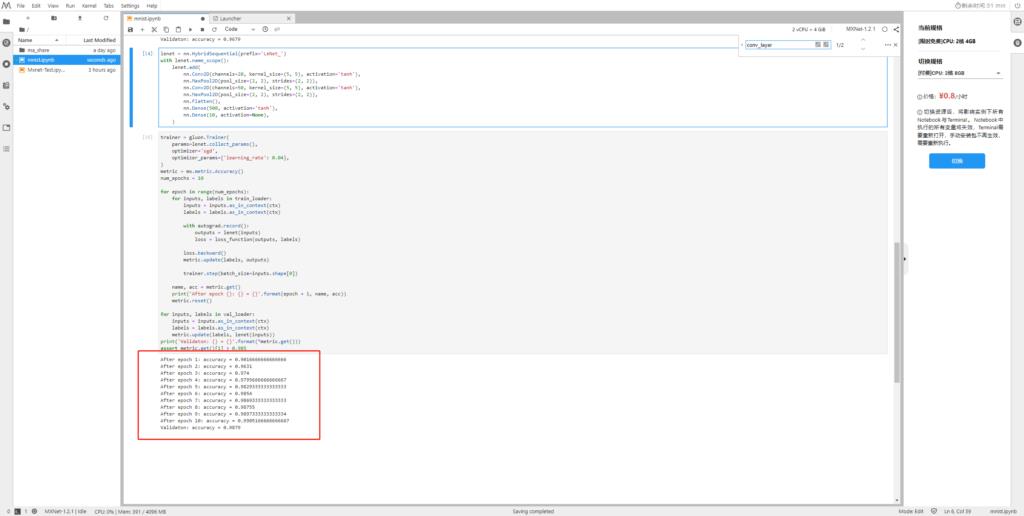
使用mnist数据训练lenet网络
接下来我们再使用上述数据来训练lenet和测试模型精度
定义lenet
lenet = nn.HybridSequential(prefix='LeNet_')
with lenet.name_scope():
    lenet.add(
        nn.Conv2D(channels=20, kernel_size=(5, 5), activation='tanh'),
        nn.MaxPool2D(pool_size=(2, 2), strides=(2, 2)),
        nn.Conv2D(channels=50, kernel_size=(5, 5), activation='tanh'),
        nn.MaxPool2D(pool_size=(2, 2), strides=(2, 2)),
        nn.Flatten(),
        nn.Dense(500, activation='tanh'),
        nn.Dense(10, activation=None),
    )
训练lenet网络
trainer = gluon.Trainer(
    params=lenet.collect_params(),
    optimizer='sgd',
    optimizer_params='learning_rate': 0.04,
)
metric = mx.metric.Accuracy()
num_epochs = 10

for epoch in range(num_epochs):
    for inputs, labels in train_loader:
        inputs = inputs.as_in_context(ctx)
        labels = labels.as_in_context(ctx)

        with autograd.record():
            outputs = lenet(inputs)
            loss = loss_function(outputs, labels)

        loss.backward()
        metric.update(labels, outputs)

        trainer.step(batch_size=inputs.shape[0])

    name, acc = metric.get()
    print('After epoch :  = '.format(epoch + 1, name, acc))
    metric.reset()

for inputs, labels in val_loader:
    inputs = inputs.as_in_context(ctx)
    labels = labels.as_in_context(ctx)
    metric.update(labels, lenet(inputs))
print('Validaton:  = '.format(*metric.get()))
assert metric.get()[1] > 0.985
由下图可见,lenet的训练和测试精度达到了0.9905和0.9879
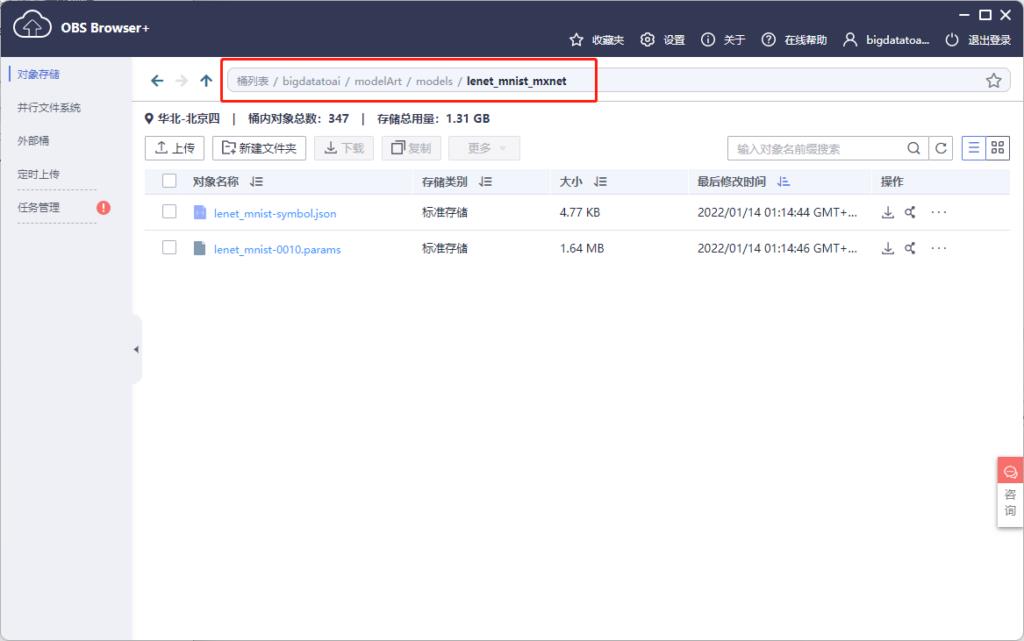
lenet模型导出
接下来我们把刚刚训练好的lenet网络导出到本地。
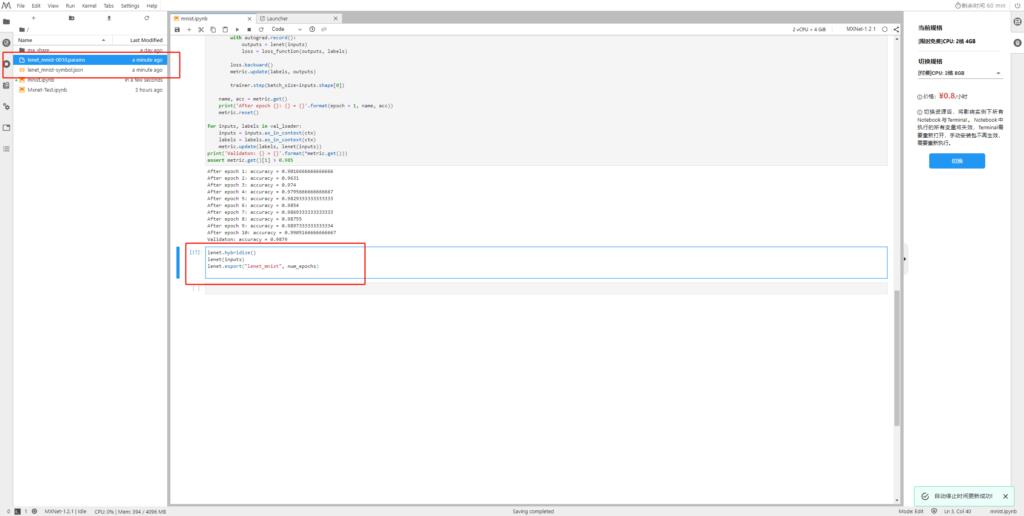
将上述两个文件下载到本地,然后再上传到OBS中。
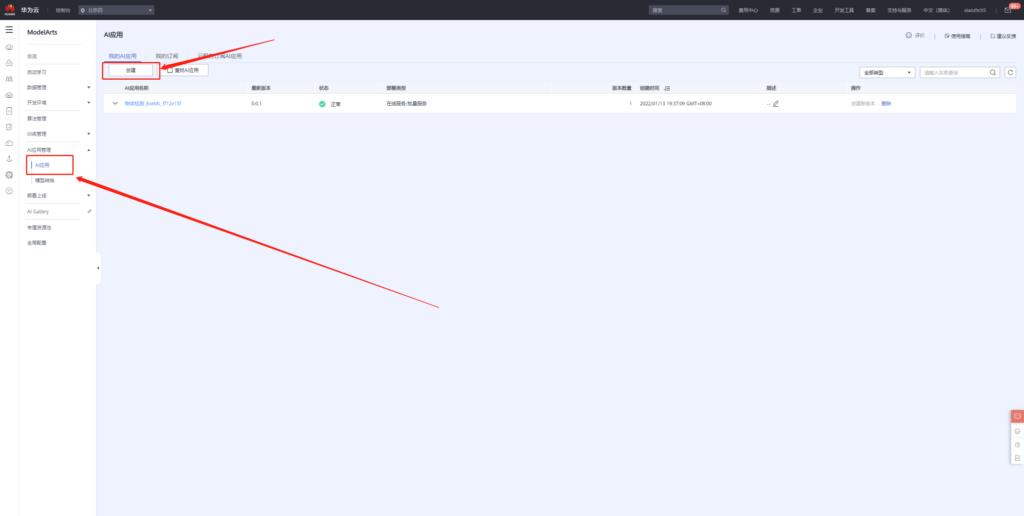
使用lenet模型创建AI应用
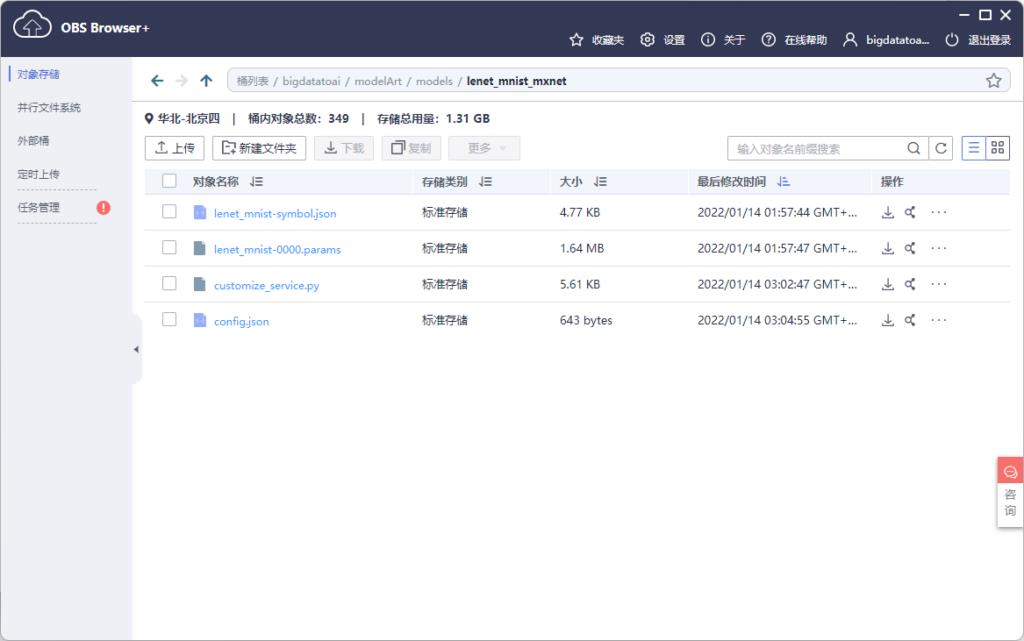
经过上述步骤,我们将lenet模型导入到OBS的下述目录。
除此之外,我们还需要两个文件才能实现模型部署,一个是推理代码,一个是配置文件。官方已经提供了手写数字识别的推理代码,我们直接用即可,代码内容:
customize_service.py
import mxnet as mx
import requests
import zipfile
import json
import shutil
import os
import numpy as np

from mxnet.io import DataBatch
from mms.log import get_logger
from mms.model_service.mxnet_model_service import MXNetBaseService
from mms.utils.mxnet import image, ndarray


logger = get_logger()


def check_input_shape(inputs, signature):
    '''Check input data shape consistency with signature.

    Parameters
    ----------
    inputs : List of NDArray
        Input data in NDArray format.
    signature : dict
        Dictionary containing model signature.
    '''
    assert isinstance(inputs, list), 'Input data must be a list.'
    assert len(inputs) == len(signature['inputs']), 'Input number mismatches with ' \\
         'signature. %d expected but got %d.' \\
                                           % (len(signature['inputs']), len(inputs))
    for input, sig_input in zip(inputs, signature['inputs']):
        assert isinstance(input, mx.nd.NDArray), 'Each input must be NDArray.'
        assert len(input.shape) == \\
               len(sig_input['data_shape']), 'Shape dimension of input %s mismatches with ' \\
                                'signature. %d expected but got %d.' \\
                                % (sig_input['data_name'], len(sig_input['data_shape']),
                                   len(input.shape))
        for idx in range(len(input.shape)):
            if idx != 0 and sig_input['data_shape'][idx] != 0:
                assert sig_input['data_shape'][idx] == \\
                       input.shape[idx], 'Input %s has different shape with ' \\
                                         'signature. %s expected but got %s.' \\
                                         % (sig_input['data_name'], sig_input['data_shape'],
                                            input.shape)

class DLSMXNetBaseService(MXNetBaseService):
    '''MXNetBaseService defines the fundamental loading model and inference
       operations when serving MXNet model. This is a base class and needs to be
       inherited.
    '''
    def __init__(self, model_name, model_dir, manifest, gpu=None):
        print ("-------------------- init classification servive -------------")
        self.model_name = model_name
        self.ctx = mx.gpu(int(gpu)) if gpu is not None else mx.cpu()
        self._signature = manifest['Model']['Signature']
        data_names = []
        data_shapes = []
        for input in self._signature['inputs']:
            data_names.append(input['data_name'])
            # Replace 0 entry in data shape with 1 for binding executor.
            # Set batch size as 1
            data_shape = input['data_shape']
            data_shape[0] = 1
            for idx in range(len(data_shape)):
                if data_shape[idx] == 0:
                    data_shape[idx] = 1
            data_shapes.append(('data', tuple(data_shape)))

        # Load MXNet module
        epoch = 0
        try:
            param_filename = manifest['Model']['Parameters']
            epoch = int(param_filename[len(model_name) + 1: -len('.params')])
        except Exception as e:
            logger.warning('Failed to parse epoch from param file, setting epoch to 0')

        sym, arg_params, aux_params = mx.model.load_checkpoint('%s/%s' % (model_dir, manifest['Model']['Symbol'][:-12]), epoch)
        self.mx_model = mx.mod.Module(symbol=sym, context=self.ctx,
                                      data_names=['data'], label_names=None)
        self.mx_model.bind(for_training=False, data_shapes=data_shapes)
        self.mx_model.set_params(arg_params, aux_params, allow_missing=True)

    def _preprocess(self, data):
        img_list = []
        for idx, img in enumerate(data):
            input_shape = self.signature['inputs'][idx]['data_shape']
            # We are assuming input shape is NCHW
            [h, w] = input_shape[2:]
            if input_shape[1] == 1:
                img_arr = image.read(img, 0)
            else:
                img_arr = image.read(img)
            img_arr = image.resize(img_arr, w, h)
            img_arr = image.transform_shape(img_arr)
            img_list.append(img_arr)
        return img_list

    def _postprocess(self, data):
        dim = len(data[0].shape)
        if dim > 2:
            data = mx.nd.array(np.squeeze(data.asnumpy(), axis=tuple(range(dim)[2:])))
        sorted_prob = mx.nd.argsort(data[0], is_ascend=False)
        top_prob = map(lambda x: int(x.asscalar()), sorted_prob[0:5])
        return ['probability': float(data[0, i].asscalar()), 'class': i
                for i in top_prob]

    def _inference(self, data):
        '''Internal inference methods for MXNet. Run forward computation and
        return output.

        Parameters
        ----------
        data : list of NDArray
            Preprocessed inputs in NDArray format.

        Returns
        -------
        list of NDArray
            Inference output.
        '''
        # Check input shape
        check_input_shape(data, self.signature)
        data = [item.as_in_context(self.ctx) for item in data]
        self.mx_model.forward(DataBatch(data))
        return self.mx_model.get_outputs()[0]

    def ping(self):
        '''Ping to get system's health.

        Returns
        -------
        String
            MXNet version to show system is healthy.
        '''
        return mx.__version__

    @property
    def signature(self):
        '''Signiture for model service.

        Returns
        -------
        Dict
            Model service signiture.
        '''
        return self._signature
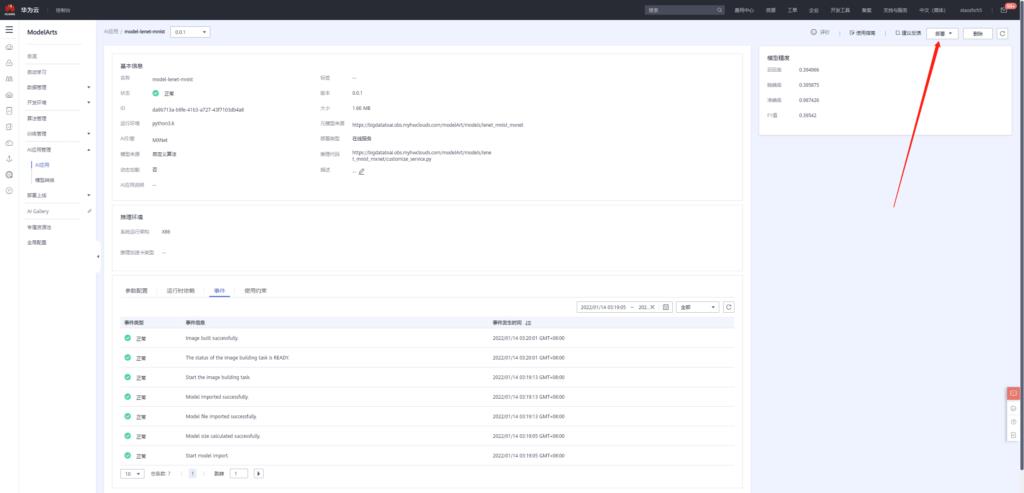
接下来就是配置文件,其内容如下所示,我们可根据自己模型的精度修改metrics中的内容
config.json
"model_type": "MXNet", "metrics": "f1": 0.39542, "accuracy": 0.987426, "precision": 0.395875, "recall": 0.394966, "dependencies": [], "model_algorithm": "image_classification", "apis": ["procotol": "http", "url": "/", "request": "Content-type": "multipart/form-data", "data": "type": "object", "properties": "images": "type": "file", "method": "post", "response": "Content-type": "multipart/form-data", "data": "required": ["predicted_label", "scores"], "type": "object", "properties": "scores": "items": "minItems": 2, "items": ["type": "string", "type": "number"], "type": "array", "maxItems": 2, "type": "array"]
将上述两个文件也拷贝到OBS中
接下来我们便可以基于上述模型构建AI应用。
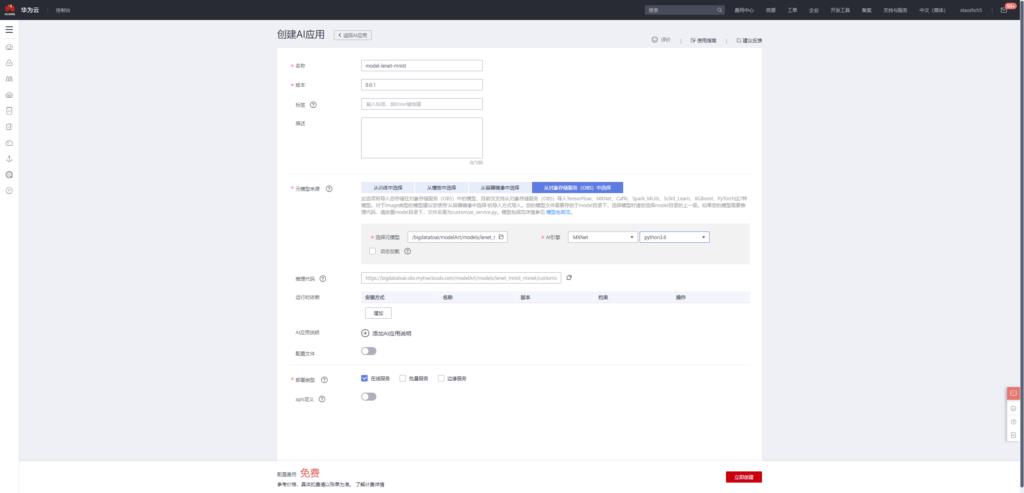
应用创建完成之后,接着便可以将该应用部署上线。
添加环境变量
input_data_name:images
input_data_shape:0,1,28,28
output_data_shape:0,10
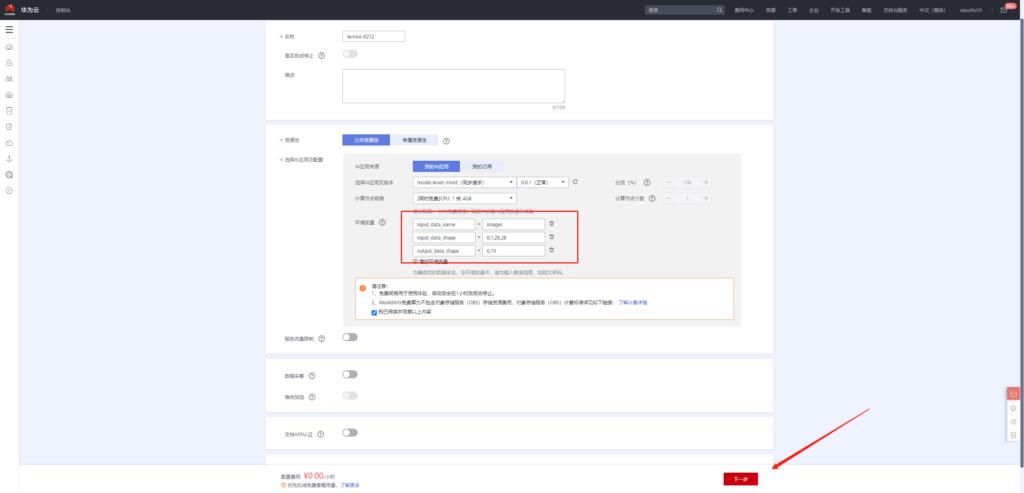
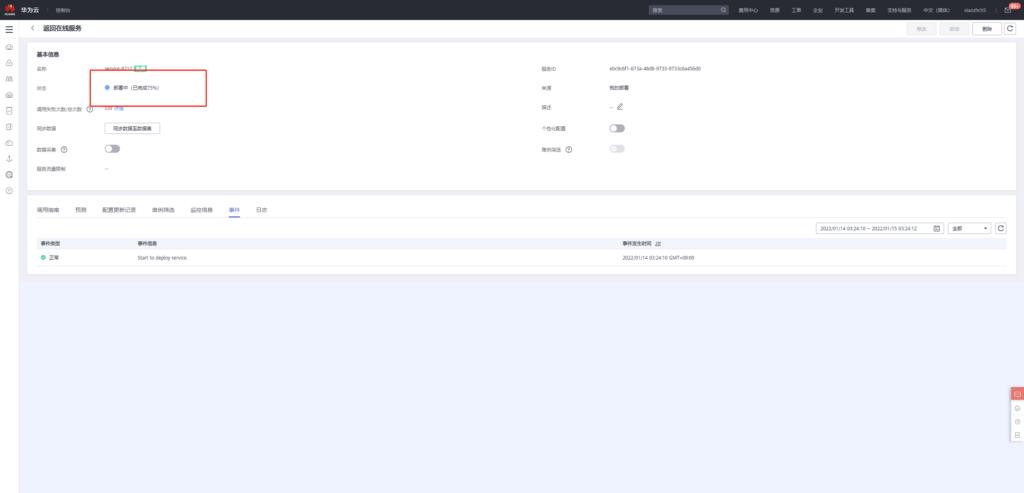
等待部署完成之后便可执行预测操作。由于我们在模型中定义图片大小为28x28,所以我们输入的图像为28x28的黑白数字图像。
该图像可以通过下述方法获得:
通过搜索引擎搜索得到mnist图片,然后进行截图:
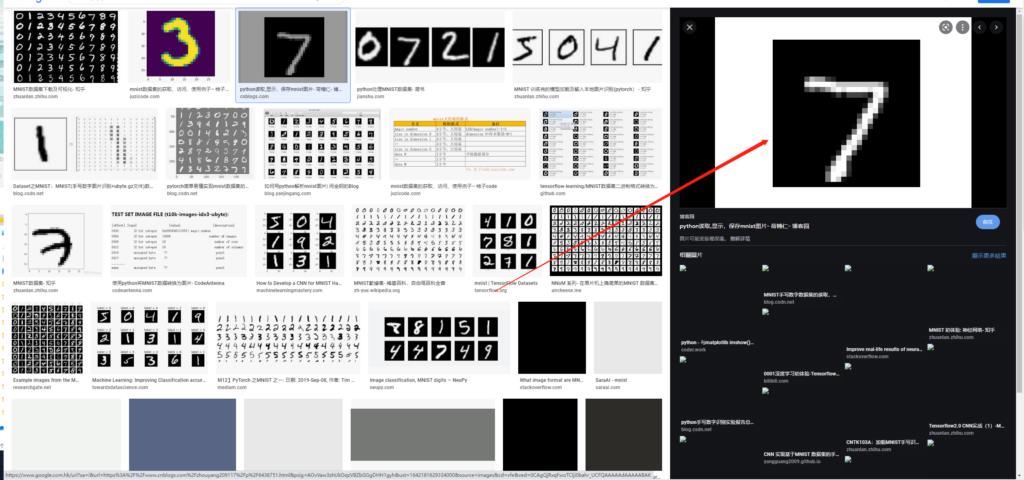
接着使用在线图片尺寸调整工具,将图片调整为28x28,
在线图片调整工具网址:https://www.iloveimg.com/zh-cn/resize-image#resize-options,pixels
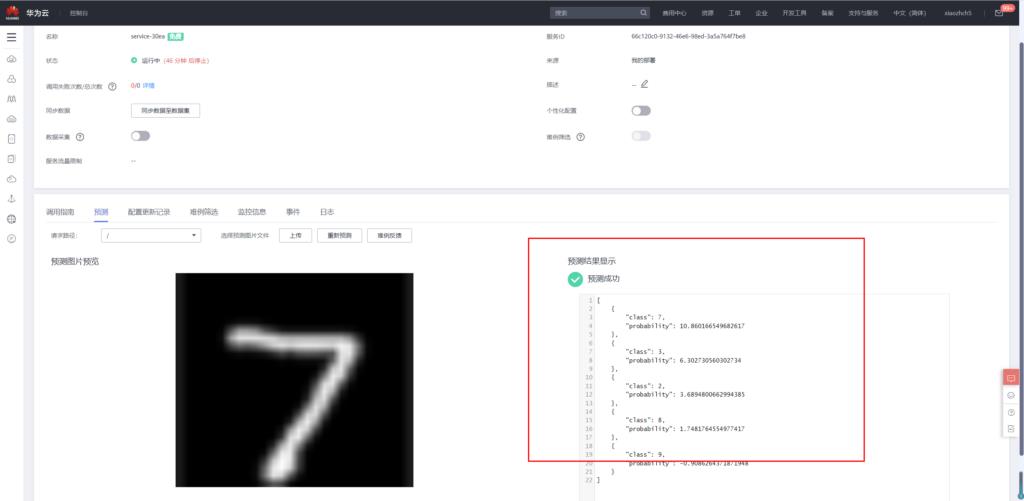
那么经过上述操作,我们得到了一张28x28黑白手写7图像
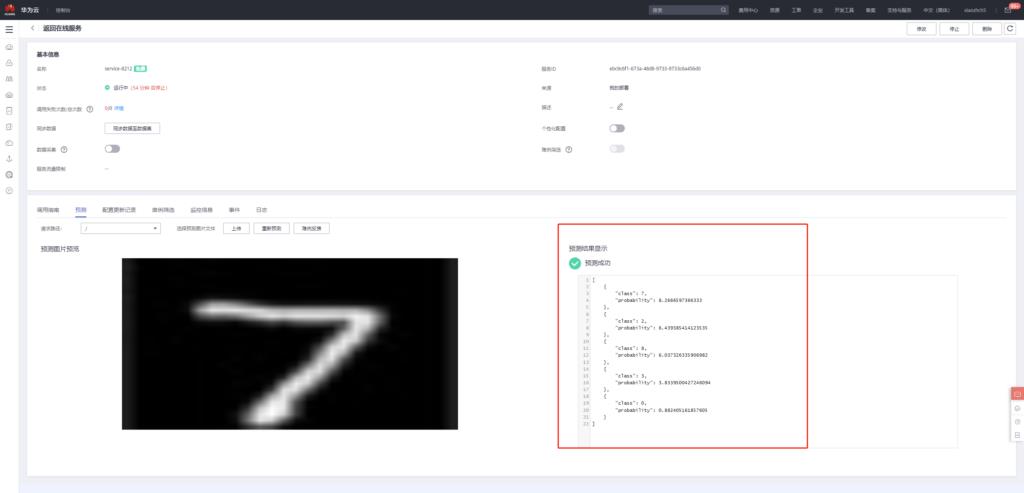
在预测中上传此图像

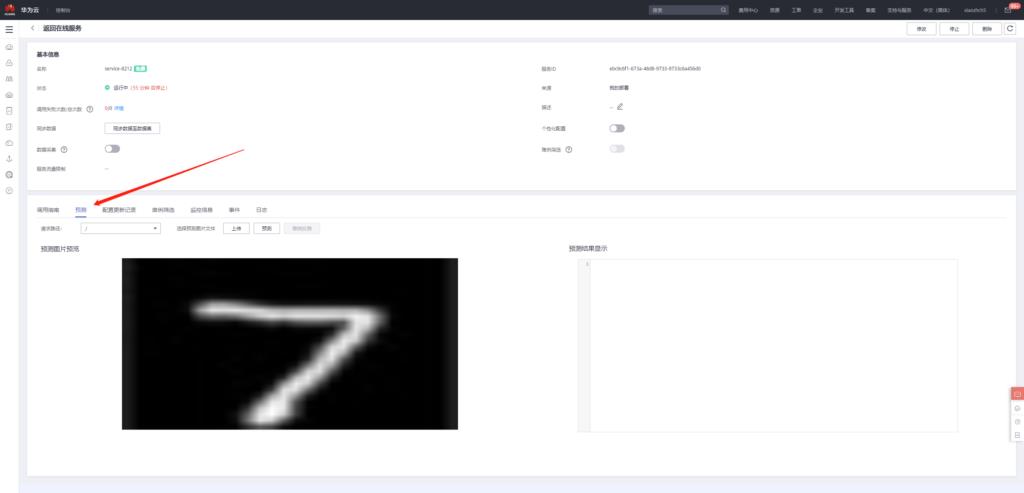
接着点击预测,得到如下预测结果
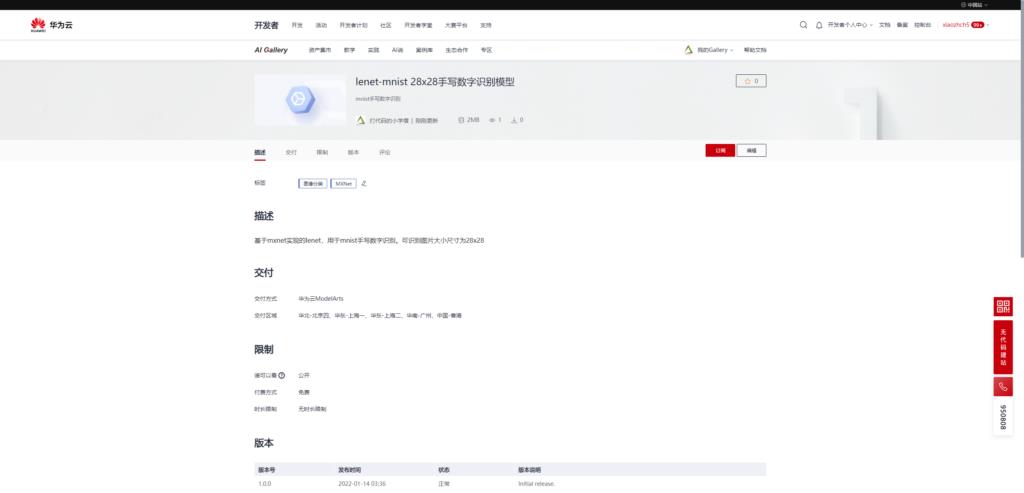
lenet-mnist 28x28手写数字识别模型发布
点击下述链接进入模型发布页面
https://developer.huaweicloud.com/develop/aigallery/model/list
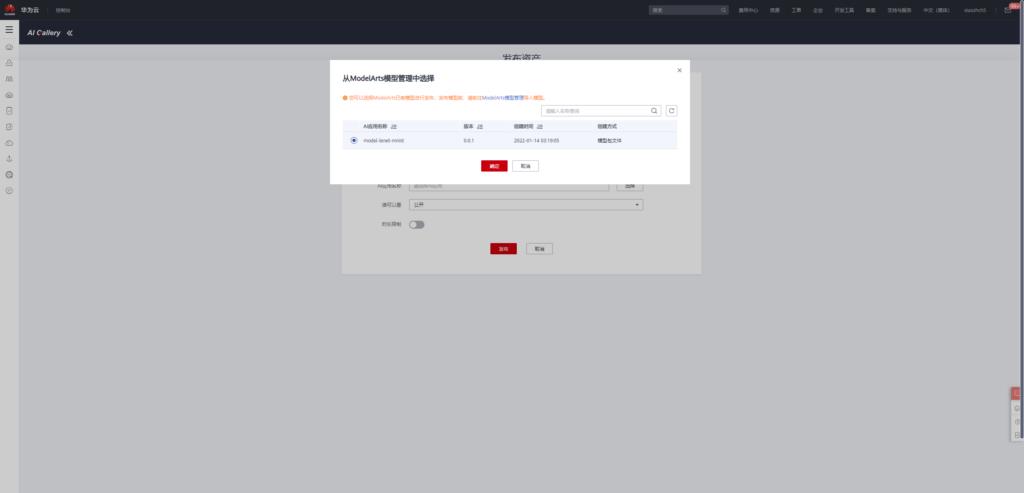
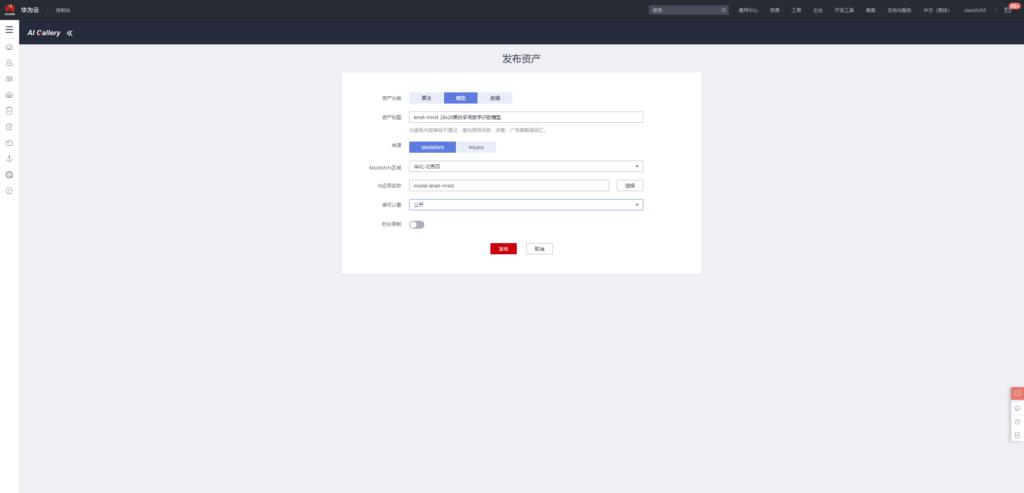
最终发布页面
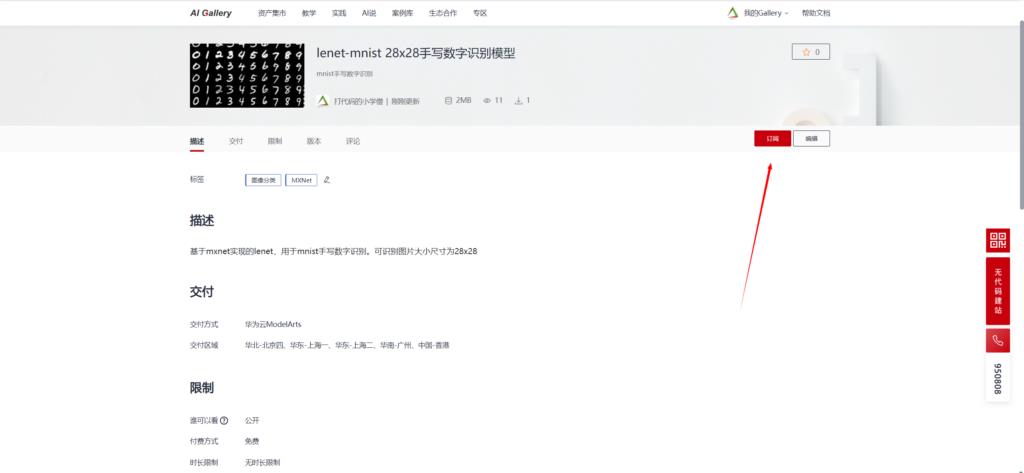
从AI Gallery订阅模型
AI Gallery是基于ModelArts发布的AI应用市场,该功能极大降低了AI模型的开发门槛,基于AI Gallery的AI模型市场,即使用户不了解AI知识,通过订阅模型服务,也可以直接使用该模型。我觉得随着技术的进步和社会的发展,AI肯定是要趋于平民化的,而AI Gallery此项功能正是该方向的极大开拓者。
接下来,和大家分享一下如何订阅我刚刚发布的模型,然后快速部署。
首先进入模型订阅页面,点击订阅:https://developer.huaweicloud.com/develop/aigallery/model/detail?id=d6fcb13b-adc8-448e-a523-5d7f5d44b7a2
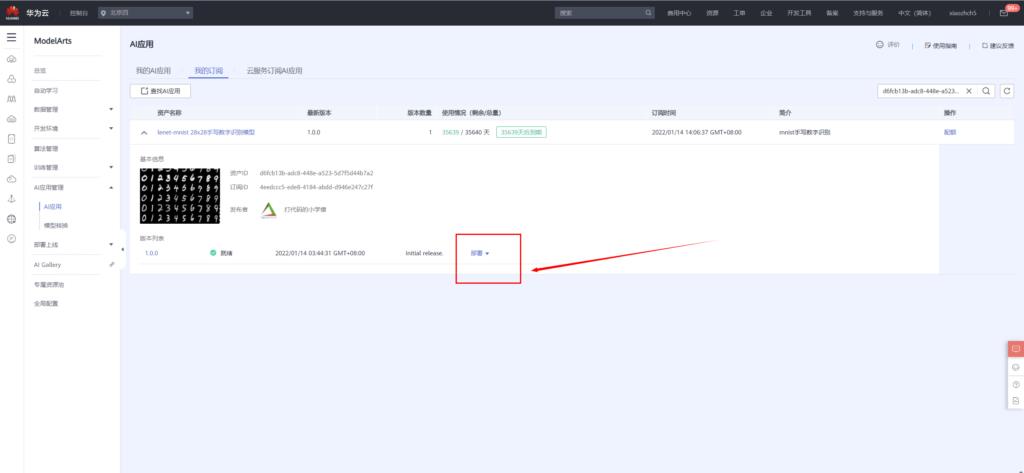
订阅完成之后,前往控制台,选择ModelArts所在的云服务区域,我这边还是选择北京四。进入控制台后,便可以直接在线部署该模型
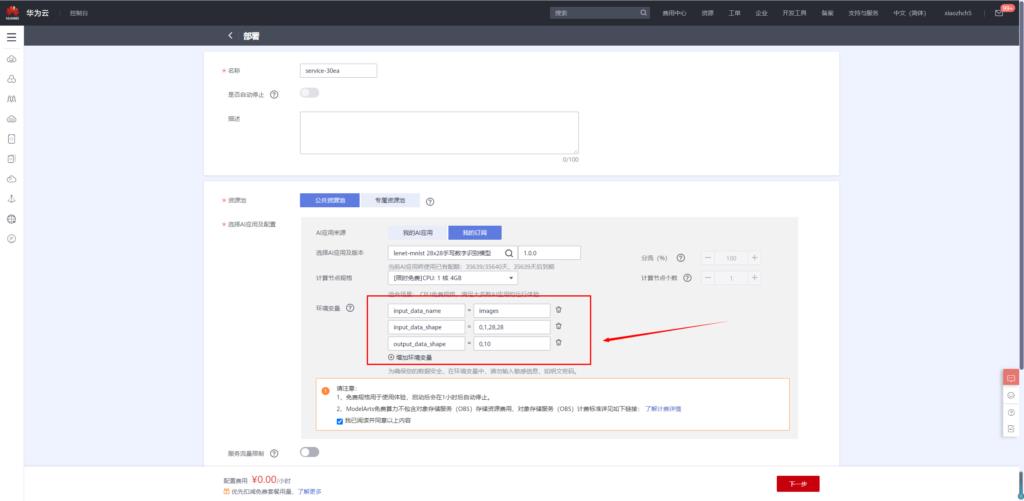
同样,模型部署时候,添加如下环境变量
input_data_name:images
input_data_shape:0,1,28,28
output_data_shape:0,10
模型部署成功之后便可进行手写数字识别
总结
华为云modelArts和AI Gallery给AI平民化铺了一条非常宽广的道路,各个层次的人都可以在上面走。有能力的AI开发者可以更专注于模型和算法开发,而不需要关注底层硬件侧面细节;普通使用者可以使用自动学习模块进行模型开发与部署;而对于没有任何ai先验知识的同学来说,有了AI Gallery,只需要几步便可以轻松部署AI应用。
从平台的角度来说,我对于这个产品是非常喜欢的,高级功能,轻松入手,高大上的能力直接通过平台化的方式平民化,或许也是我们工作中平台开发的方向。
本文参与 AI创想秀,邂逅“华为云ModelArts”征文大赛
参赛链接:https://blog.csdn.net/csdnstudent/article/details/122456112
以上是关于AI平民化之路 - 华为云ModelArts和AI Gallery体验指南的主要内容,如果未能解决你的问题,请参考以下文章
解锁普惠AI开发,华为云ModelArts一站式AI开发平台