用Python做图像处理
Posted 赖勇浩
tags:
篇首语:本文由小常识网(cha138.com)小编为大家整理,主要介绍了用Python做图像处理相关的知识,希望对你有一定的参考价值。
用Python做图像处理
最近在做一件比较 evil 的事情——验证码识别,以此来学习一些新的技能。因为我是初学,对图像处理方面就不太了解了,欲要利吾事,必先利吾器,既然只是做一下实验,那用 Python 来作原型开发再好不过了。在 Python 中,比较常用的图像处理库是 PIL(Python Image Library),当前版本是 1.1.6 ,用起来非常方便。大家可以在
http://www.pythonware.com/products/pil/index.htm 下载和学习。
在这里,我主要是介绍一下做图像识别时可能会用到的一些 PIL 提供的功能,比如图像增强、还有滤波之类的。最后给出使用 Python 做图像处理与识别的优势与劣势。
基本图像处理
使用 PIL 之前需要 import Image 模块:
import Image
然后你就可以使用Image.open(‘xx.bmp’) 来打开一个位图文件进行处理了。打开文件你不用担心格式,也不用了解格式,无论什么格式,都只要把文件名丢给 Image.open 就可以了。真所谓 bmp、jpg、png、gif……,一个都不能少。
img = Image.open(‘origin.png’) # 得到一个图像的实例对象 img

图 1原图
图像处理中,最基本的就是色彩空间的转换。一般而言,我们的图像都是 RGB 色彩空间的,但在图像识别当中,我们可能需要转换图像到灰度图、二值图等不同的色彩空间。 PIL 在这方面也提供了极完备的支持,我们可以:
new_img = img.convert(‘L’)
把 img 转换为 256 级灰度图像, convert() 是图像实例对象的一个方法,接受一个 mode 参数,用以指定一种色彩模式,mode 的取值可以是如下几种:
· 1 (1-bit pixels, black and white, stored with one pixel per byte)
· L (8-bit pixels, black and white)
· P (8-bit pixels, mapped to any other mode using a colour palette)
· RGB (3x8-bit pixels, true colour)
· RGBA (4x8-bit pixels, true colour with transparency mask)
· CMYK (4x8-bit pixels, colour separation)
· YCbCr (3x8-bit pixels, colour video format)
· I (32-bit signed integer pixels)
· F (32-bit floating point pixels)
怎么样,够丰富吧?其实如此之处,PIL 还有限制地支持以下几种比较少见的色彩模式:LA (L with alpha), RGBX (true colour with padding) and RGBa (true colour with premultiplied alpha)。
下面看一下 mode 为 ‘1’、’L’、’P’时转换出来的图像:
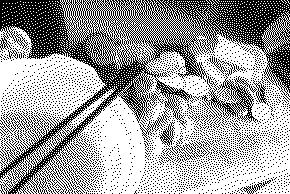
图 2 mode = '1'
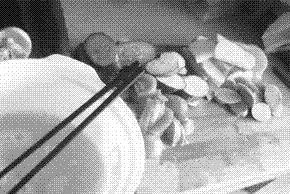
图 3 mode = 'L'

图 4 mode = 'P'
convert() 函数也接受另一个隐含参数 matrix,转换矩阵 matrix 是一个长度为4 或者16 tuple。下例是一个转换 RGB 空间到 CIE XYZ 空间的例子:
rgb2xyz = (
0.412453, 0.357580, 0.180423, 0,
0.212671, 0.715160, 0.072169, 0,
0.019334, 0.119193, 0.950227, 0 )
out = im.convert("RGB", rgb2xyz)
除了完备的色彩空间转换能力外, PIL 还提供了resize()、rotate()等函数以获得改变大小,旋转图片等几何变换能力,在图像识别方面,图像实例提供了一个 histogram() 方法来计算直方图,非常方便实用。
图像增强
图像增强通常用以图像识别之前的预处理,适当的图像增强能够使得识别过程达到事半功倍的效果。 PIL 在这方面提供了一个名为 ImageEnhance 的模块,提供了几种常见的图像增强方案:
import ImageEnhance
enhancer = ImageEnhance.Sharpness(image)
for i in range(8):
factor = i / 4.0
enhancer.enhance(factor).show("Sharpness %f" % factor)
上面的代码即是一个典型的使用 ImageEnhance 模块的例子。 Sharpness 是 ImageEnhance 模块的一个类,用以锐化图片。这一模块主要包含如下几个类:Color、Brightness、Contrast和Sharpness。它们都有一个共同的接口 .enhance(factor) ,接受一个浮点参数 factor,标示增强的比例。下面看看这四个类在不同的 factor 下的效果


图 5 使用Color 进行色彩增强,factor 取值 [0, 4],步进 0.5


图 6 用 Birghtness 增强亮度,factor取值[0,4],步进0.5


图 7用 Contrast 增强对比度, factor 取值 [0,4],步进0.5


图 8用 Sharpness 锐化图像,factor取值 [0,4],步进0.5
图像 Filter
PIL 在 Filter 方面的支持是非常完备的,除常见的模糊、浮雕、轮廓、边缘增强和平滑,还有中值滤波、ModeFilter等,简直方便到可以做自己做一个Photoshop。这些 Filter 都放置在 ImageFilter 模块中,ImageFilter主要包括两部分内容,一是内置的 Filter,如 BLUR、DETAIL等,另一部分是 Filter 函数,可以指定不同的参数获得不同的效果。示例如下:
import ImageFilter
im1 = im.filter(ImageFilter.BLUR)
im2 = im.filter(ImageFilter.MinFilter(3))
im3 = im.filter(ImageFilter.MinFilter()) # same as MinFilter(3)
可以看到 ImageFilter 模块的使用非常简单,每一个 Filter 都只需要一行代码就可调用,开发效率非常高。

图 9使用 BLUR
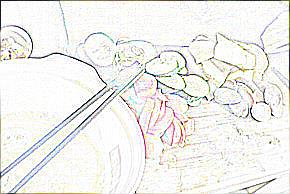
图 10使用 CONTOUR

图 11使用 DETAIL
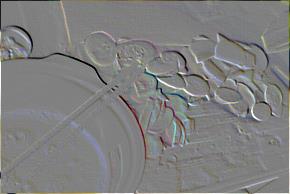
图 12使用 EMBOSS

图 13使用 EDGE_ENHANCE

图 14使用 EDGE_ENHANCE_MORE
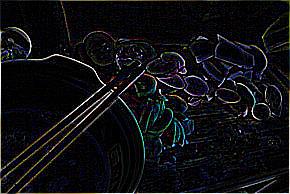
图 15使用 FIND_EDGES
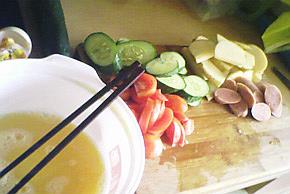
图 16使用 SHARPEN

图 17使用 SMOOTH

图 18使用 SMOOTH_MORE
以上是几种内置的 Filter 的效果图,除此之外, ImageFilter 还提供了一些 Filter 函数,下面我们来看看这些可以通过参数改变行为的 Filter 的效果:

图 19使用 Kernel(),参数:size = (3, 3), kernel = (0.5, 0.5, 0.5, 0.5, 0.5, 0.5, 0.5, 0.5, 0.5)

图 20使用 MaxFilter,默认参数

图 21使用 MinFilter,默认参数

图 22使用 MedianFilter,默认参数

图 23使用 ModeFilter,参数 size = 3

图 24使用 RankFilter,参数 size = 3, rank = 3
小结
到此,对 PIL 的介绍就告一段落了。总的来说,对于图像处理和识别,PIL 内建了强大的支持,从各种增强算法到 Filter ,都让人无法怀疑使用 Python 的可行性。 Python唯一的劣势在于执行时间过慢,特别是当实现一些计算量大的算法时候,需要极强的耐心。我曾用 Hough Transform(霍夫变换)来查找图像中的直线,纯 Python 的实现处理一个 340 * 100 的图片也要花去数秒时间(P4 3.0G + 1G memory)。但使用 PIL 无需关注图像格式、内建的图像增强算法和 Filter 算法,这些优点使 Python 适合用于构造原型和进行实验,在这两方面Python 比 matlab 更加方便。商业的图像识别产品开发,可以考虑已经被 boost accepted的来自 adobe 的开源 C++ 库 gil,可以兼顾执行性能和开发效率。
以上是关于用Python做图像处理的主要内容,如果未能解决你的问题,请参考以下文章