[opencv]调用鼠标事件执行grabcut算法实现阈值分割
Posted lx17746071609
tags:
篇首语:本文由小常识网(cha138.com)小编为大家整理,主要介绍了[opencv]调用鼠标事件执行grabcut算法实现阈值分割相关的知识,希望对你有一定的参考价值。
#include<iostream>
#include <opencv2/opencv.hpp>
#include <math.h>
using namespace cv;
using namespace std;

//grabcut算法
bool setMouse = false; //判断鼠标左键的状态(up / down)
bool init;
Point pt;
Rect rect;
Mat srcImg, mask, bgModel, fgModel;
int numRun = 0;
void onMouse(int, int, int, int, void*);
void runGrabCut();
void showImage();
int main()
{
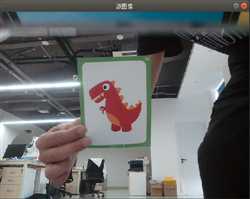
    srcImg = imread("/home/leoxae/KeekoRobot/TestPic/手持卡片/2.png");
    if (srcImg.empty())
    {
        printf("could not load image...
");
        return -1;
    }

    imshow("源图像", srcImg);

    mask.create(srcImg.size(), CV_8U);
    setMouseCallback("源图像", onMouse, 0);

    while (1)
    {
        char c = (char)waitKey(0);
        if (c == ‘ ‘) {//选中矩形框后,按空格键执行grabcut分割
            runGrabCut();
            numRun++;
            showImage();
            printf("current iteative times : %d
", numRun);
        }
        if ((int)c == 27) {
            break;
        }

    }
    return 0;
}

void showImage()
{
    Mat result, binmask;
    binmask = mask & 1;                //进一步掩膜
    if (init)                        //进一步抠出无效区域。鼠标按下,init变为false
    {
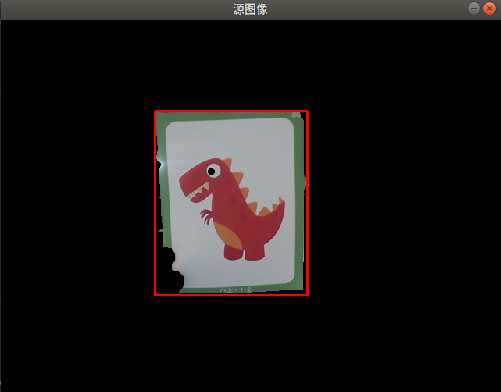
        srcImg.copyTo(result, binmask);
    }
    else
    {
        result = srcImg.clone();
    }
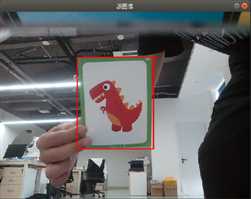
    rectangle(result, rect, Scalar(0, 0, 255), 2, 8);
    imshow("源图像", result);
}

void onMouse(int events, int x, int y, int flag, void *)
{
    if (x < 0 || y < 0 || x > srcImg.cols || y > srcImg.rows)    //无效区域
        return;


    if (events == EVENT_LBUTTONDOWN)
    {
        setMouse = true;
        pt.x = x;
        pt.y = y;
        init = false;
    }
    else if (events == EVENT_MOUSEMOVE)//鼠标只要动,就执行一次
    {
        if (setMouse == true)            //鼠标左键按住,滑动
        {
            Point pt1;
            pt1.x = x;
            pt1.y = y;
            rect = Rect(pt, pt1);//定义矩形区域
            showImage();
            mask.setTo(Scalar::all(GC_BGD));//背景
            mask(rect).setTo(Scalar(GC_PR_FGD));//前景                //对rect内部设置为可能的前景,外部设置为背景
        }
    }
    else if (events == EVENT_LBUTTONUP)
        setMouse = false;                //鼠标左键抬起
}

void runGrabCut()
{
    if (init)//鼠标按下,init变为false
        grabCut(srcImg, mask, rect, bgModel, fgModel, 1);//第二次迭代,用mask初始化grabcut
    else
    {
        grabCut(srcImg, mask, rect, bgModel, fgModel, 1, GC_INIT_WITH_RECT);//用矩形窗初始化GrabCut
        init = true;
    }
}
运行结果:


以上是关于[opencv]调用鼠标事件执行grabcut算法实现阈值分割的主要内容,如果未能解决你的问题,请参考以下文章