JMS-ActiveMq-点对点模式
Posted cbpm-wuhq
tags:
篇首语:本文由小常识网(cha138.com)小编为大家整理,主要介绍了JMS-ActiveMq-点对点模式相关的知识,希望对你有一定的参考价值。
点对点(Point-to-Point)。在点对点的消息系统中,消息分发给一个单独的使用者。点对点消息往往与队列(javax.jms.Queue)相关联。
有两种消费形式,我们此次只介绍listener模式(代码冗长,后期的util需自己封装)
destination=session.createQueue("FirstQueue1"); // 创建消息队列 两种模式:1 点对点
destination=session.createTopic("FirstTopic1"); // 创建消息队列 两种模式:2 发布订阅
- 实时监听,消费者监听生产者的生产状态
- 定时刷新 recive模式(不实用,不推荐
版本:apache-activemq-5.11.1 官网下载
主页:http://activemq.apache.org/
目前最新版本:5.11.1
开发包及源码下载地址:http://activemq.apache.org/activemq-5111-release.html
ActiveMQ 服务启动地址:http://127.0.0.1:8161/admin/ 用户名/密码admin/admin
1.生产者JMSProducer
/**
 * 消息生产者
 * @author Administrator
 *
 */
public class JMSProducer {

    private static final String USERNAME=ActiveMQConnection.DEFAULT_USER; // 默认的连接用户名
    private static final String PASSWORD=ActiveMQConnection.DEFAULT_PASSWORD; // 默认的连接密码
    private static final String BROKEURL=ActiveMQConnection.DEFAULT_BROKER_URL; // 默认的连接地址
    private static final int SENDNUM=10; // 发送的消息数量

    public static void main(String[] args) {

        ConnectionFactory connectionFactory; // 连接工厂
        Connection connection = null; // 连接
        Session session; // 会话 接受或者发送消息的线程
        Destination destination; // 消息的目的地
        MessageProducer messageProducer; // 消息生产者

        // 实例化连接工厂
        connectionFactory=new ActiveMQConnectionFactory(JMSProducer.USERNAME, JMSProducer.PASSWORD, JMSProducer.BROKEURL);

        try {
            connection=connectionFactory.createConnection(); // 通过连接工厂获取连接
            connection.start(); // 启动连接
            session=connection.createSession(Boolean.TRUE, Session.AUTO_ACKNOWLEDGE); // 创建Session
            destination=session.createQueue("FirstQueue1"); // 创建消息队列 两种模式:1 点对点 2 发布订阅
            messageProducer=session.createProducer(destination); // 创建消息生产者
            sendMessage(session, messageProducer); // 发送消息
            session.commit();
        } catch (Exception e) {
            // TODO Auto-generated catch block
            e.printStackTrace();
        } finally{
            if(connection!=null){
                try {
                    connection.close();
                } catch (JMSException e) {
                    // TODO Auto-generated catch block
                    e.printStackTrace();
                }
            }
        }
    }

    /**
     * 发送消息
     * @param session
     * @param messageProducer
     * @throws Exception
     */
    public static void sendMessage(Session session,MessageProducer messageProducer)throws Exception{
        for(int i=0;i<JMSProducer.SENDNUM;i++){
            TextMessage message=session.createTextMessage("ActiveMQ 发送的消息"+i);
            System.out.println("发送消息:"+"ActiveMQ 发送的消息"+i);
            messageProducer.send(message);
        }
    }
}
2.listener编写
/**
 * 消息监听
 * @author Administrator
 *
 */
public class Listener implements MessageListener{

    @Override
    public void onMessage(Message message) {
        // TODO Auto-generated method stub
        try {
            System.out.println("收到的消息:"+((TextMessage)message).getText());
        } catch (JMSException e) {
            // TODO Auto-generated catch block
            e.printStackTrace();
        }
    }

}
3.消费者
/**
 * 消息消费者
 * @author Administrator
 *
 */
public class JMSConsumer2 {

    private static final String USERNAME=ActiveMQConnection.DEFAULT_USER; // 默认的连接用户名
    private static final String PASSWORD=ActiveMQConnection.DEFAULT_PASSWORD; // 默认的连接密码
    private static final String BROKEURL=ActiveMQConnection.DEFAULT_BROKER_URL; // 默认的连接地址

    public static void main(String[] args) {
        ConnectionFactory connectionFactory; // 连接工厂
        Connection connection = null; // 连接
        Session session; // 会话 接受或者发送消息的线程
        Destination destination; // 消息的目的地
        MessageConsumer messageConsumer; // 消息的消费者

        // 实例化连接工厂
        connectionFactory=new ActiveMQConnectionFactory(JMSConsumer2.USERNAME, JMSConsumer2.PASSWORD, JMSConsumer2.BROKEURL);

        try {
            connection=connectionFactory.createConnection();  // 通过连接工厂获取连接
            connection.start(); // 启动连接
        //消费者不需要开启事务 参数一:是否开启事务 参数二:消费类型
            session=connection.createSession(Boolean.FALSE, Session.AUTO_ACKNOWLEDGE); // 创建Session
            destination=session.createQueue("FirstQueue1");  // 创建连接的消息队列
            messageConsumer=session.createConsumer(destination); // 创建消息消费者
            messageConsumer.setMessageListener(new Listener()); // 注册消息监听
        } catch (JMSException e) {
            // TODO Auto-generated catch block
            e.printStackTrace();
        }
    }
}
4.session方式说明
Session.AUTO_ACKNOWLEDGE。当客户成功的从receive 方法返回的时候,或者从MessageListener.onMessage
方法成功返回的时候,会话自动确认客户收到的消息。
Session.CLIENT_ACKNOWLEDGE。客户通过消息的acknowledge 方法确认消息。需要注意的是,在这种模
式中,确认是在会话层上进行:确认一个被消费的消息将自动确认所有已被会话消费的消息。例如,如果一
个消息消费者消费了10 个消息,然后确认第5 个消息,那么所有10 个消息都被确认。
Session.DUPS_ACKNOWLEDGE。该选择只是会话迟钝第确认消息的提交。如果JMS provider 失败,那么可
能会导致一些重复的消息。如果是重复的消息,那么JMS provider 必须把消息头的JMSRedelivered 字段设置
为true。
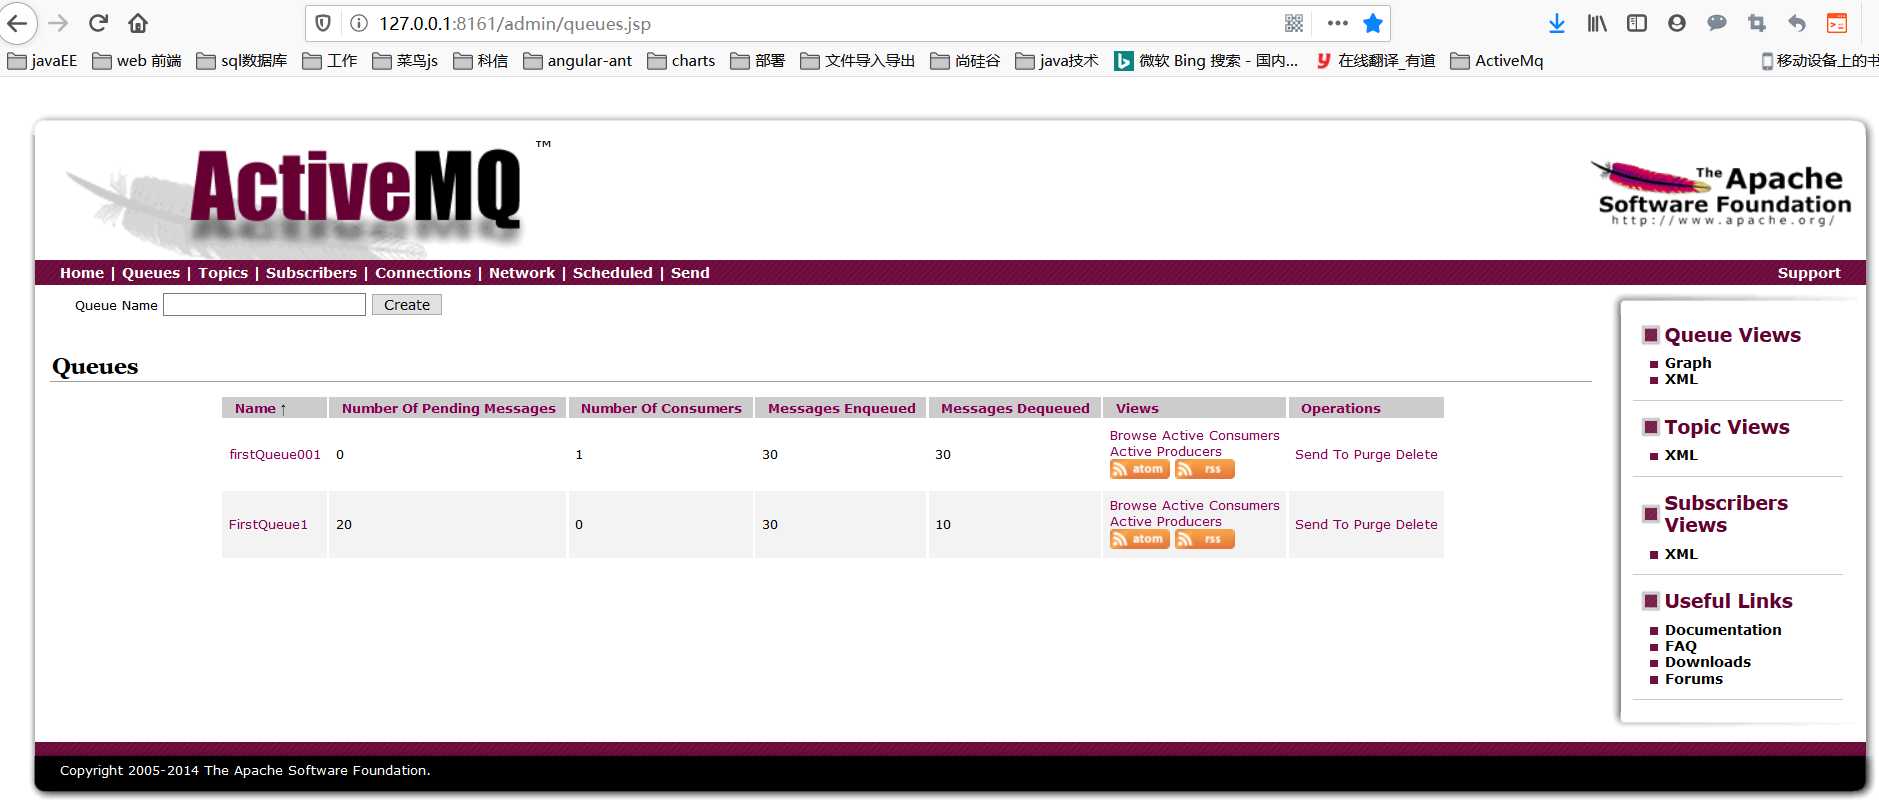
5.测试主页面
以上是关于JMS-ActiveMq-点对点模式的主要内容,如果未能解决你的问题,请参考以下文章